Vegetarian

Autumn Harvest Buddha Bowls by Amy Cantu

Print Friendly and PDF


September is the month of birthdays in my family–there are at least four. As evidenced here, here, here, and here, I have a very soft and tender spot for cake. And so, more than anything this month, I've been craving foods that I could feel good about eating. I'm talking nutritionally dense foods that are also filling and easy to source, as the bountiful summer produce disappears from the market. A beautiful, colorful Autumn Harvest Buddha Bowl filled with hearty quinoa, bright orange butternut squash, earthy roasted mushrooms, deep green wilted spinach, and protein-rich tofu make me feel good about the meal, while the richly satisfying peanut sauce keeps me eating to the very last bite. I told my 5-year-old that it was "peanut butter sauce", which made him grin from ear to ear and eagerly eat the entire buddha bowl. (Because who doesn't love peanut butter?)

Notes: Buddha Bowls are highly customizable. The quinoa can be replaced with quick-cooking farro, barley, or brown rice. The roasted vegetables could be pumpkin, carrots, sweet potatoes, and/or kale. The tofu could be chickpeas, beans, or lentils. If you're feeling more like having a Dalai Lama bowl, shredded or chopped rotisserie chicken would be a great substitute for the tofu. The optional fish sauce will also deepen the flavor or the peanut sauce.

The chiles in the peanut sauce are there for flavor and can easily be modified for your heat preferences. Smaller red or green Thai chiles provide the most heat, especially if you leave the ribs and seeds intact. Jalapeños with the seeds and ribs removed will be super mild–I used one and no one noticed any spiciness at all.

Peanut sauce adapted from Bon Appetit.


Time: 40 minutes
Servings: 4

For the vegetables and tofu:
1 14-ounce block Firm or Extra-Firm Tofu
2 pounds butternut squash, peeled, seeded, and cut into 1" pieces (about 1 large butternut squash)
8 ounces crimini (brown) mushrooms, quartered
5 ounces baby spinach
3 tablespoons grape seed or olive oil, divided use
Kosher salt
Freshly ground pepper

For the quinoa:
2 cups quinoa
4 cups water
Kosher salt
1 lime, juiced

For the peanut sauce:
1 or 2 Jalapeño or Thai chiles, chopped (see notes above)
2 garlic cloves, grated or minced
1 cup creamy peanut butter
3/4 cup unsweetened coconut milk
2 tablespoons maple syrup
2 tablespoons soy sauce
2 teaspoons fish sauce (optional)
1/2 cup water
Kosher salt

For the garnishes:
Finely sliced green onions
Chopped cilantro
Chopped peanuts

For the vegetables and tofu: Preheat oven to 450 degrees F., with one rack in the top third of the oven and the second rack in the bottom third.

Cut tofu block in half horizontally (width-wise), and cube into roughly 1" pieces. Lay tofu in a single layer on top of a double-layer of paper towels to drain while preparing the vegetables.

Arrange butternut squash in a single layer on a rimmed baking sheet. Drizzle with 1 tablespoon oil and season with kosher salt and pepper; toss to coat squash evenly. Push the butternut squash to one side of the pan, keeping them in a single layer. 

Blot the tofu cubes dry with another paper towel, pressing down on them gently to release any excess liquid. Arrange tofu next to the butternut squash. Drizzle with 2 teaspoons oil and season with kosher salt and pepper; toss gently to coat evenly. Space tofu so that they are in a single layer.

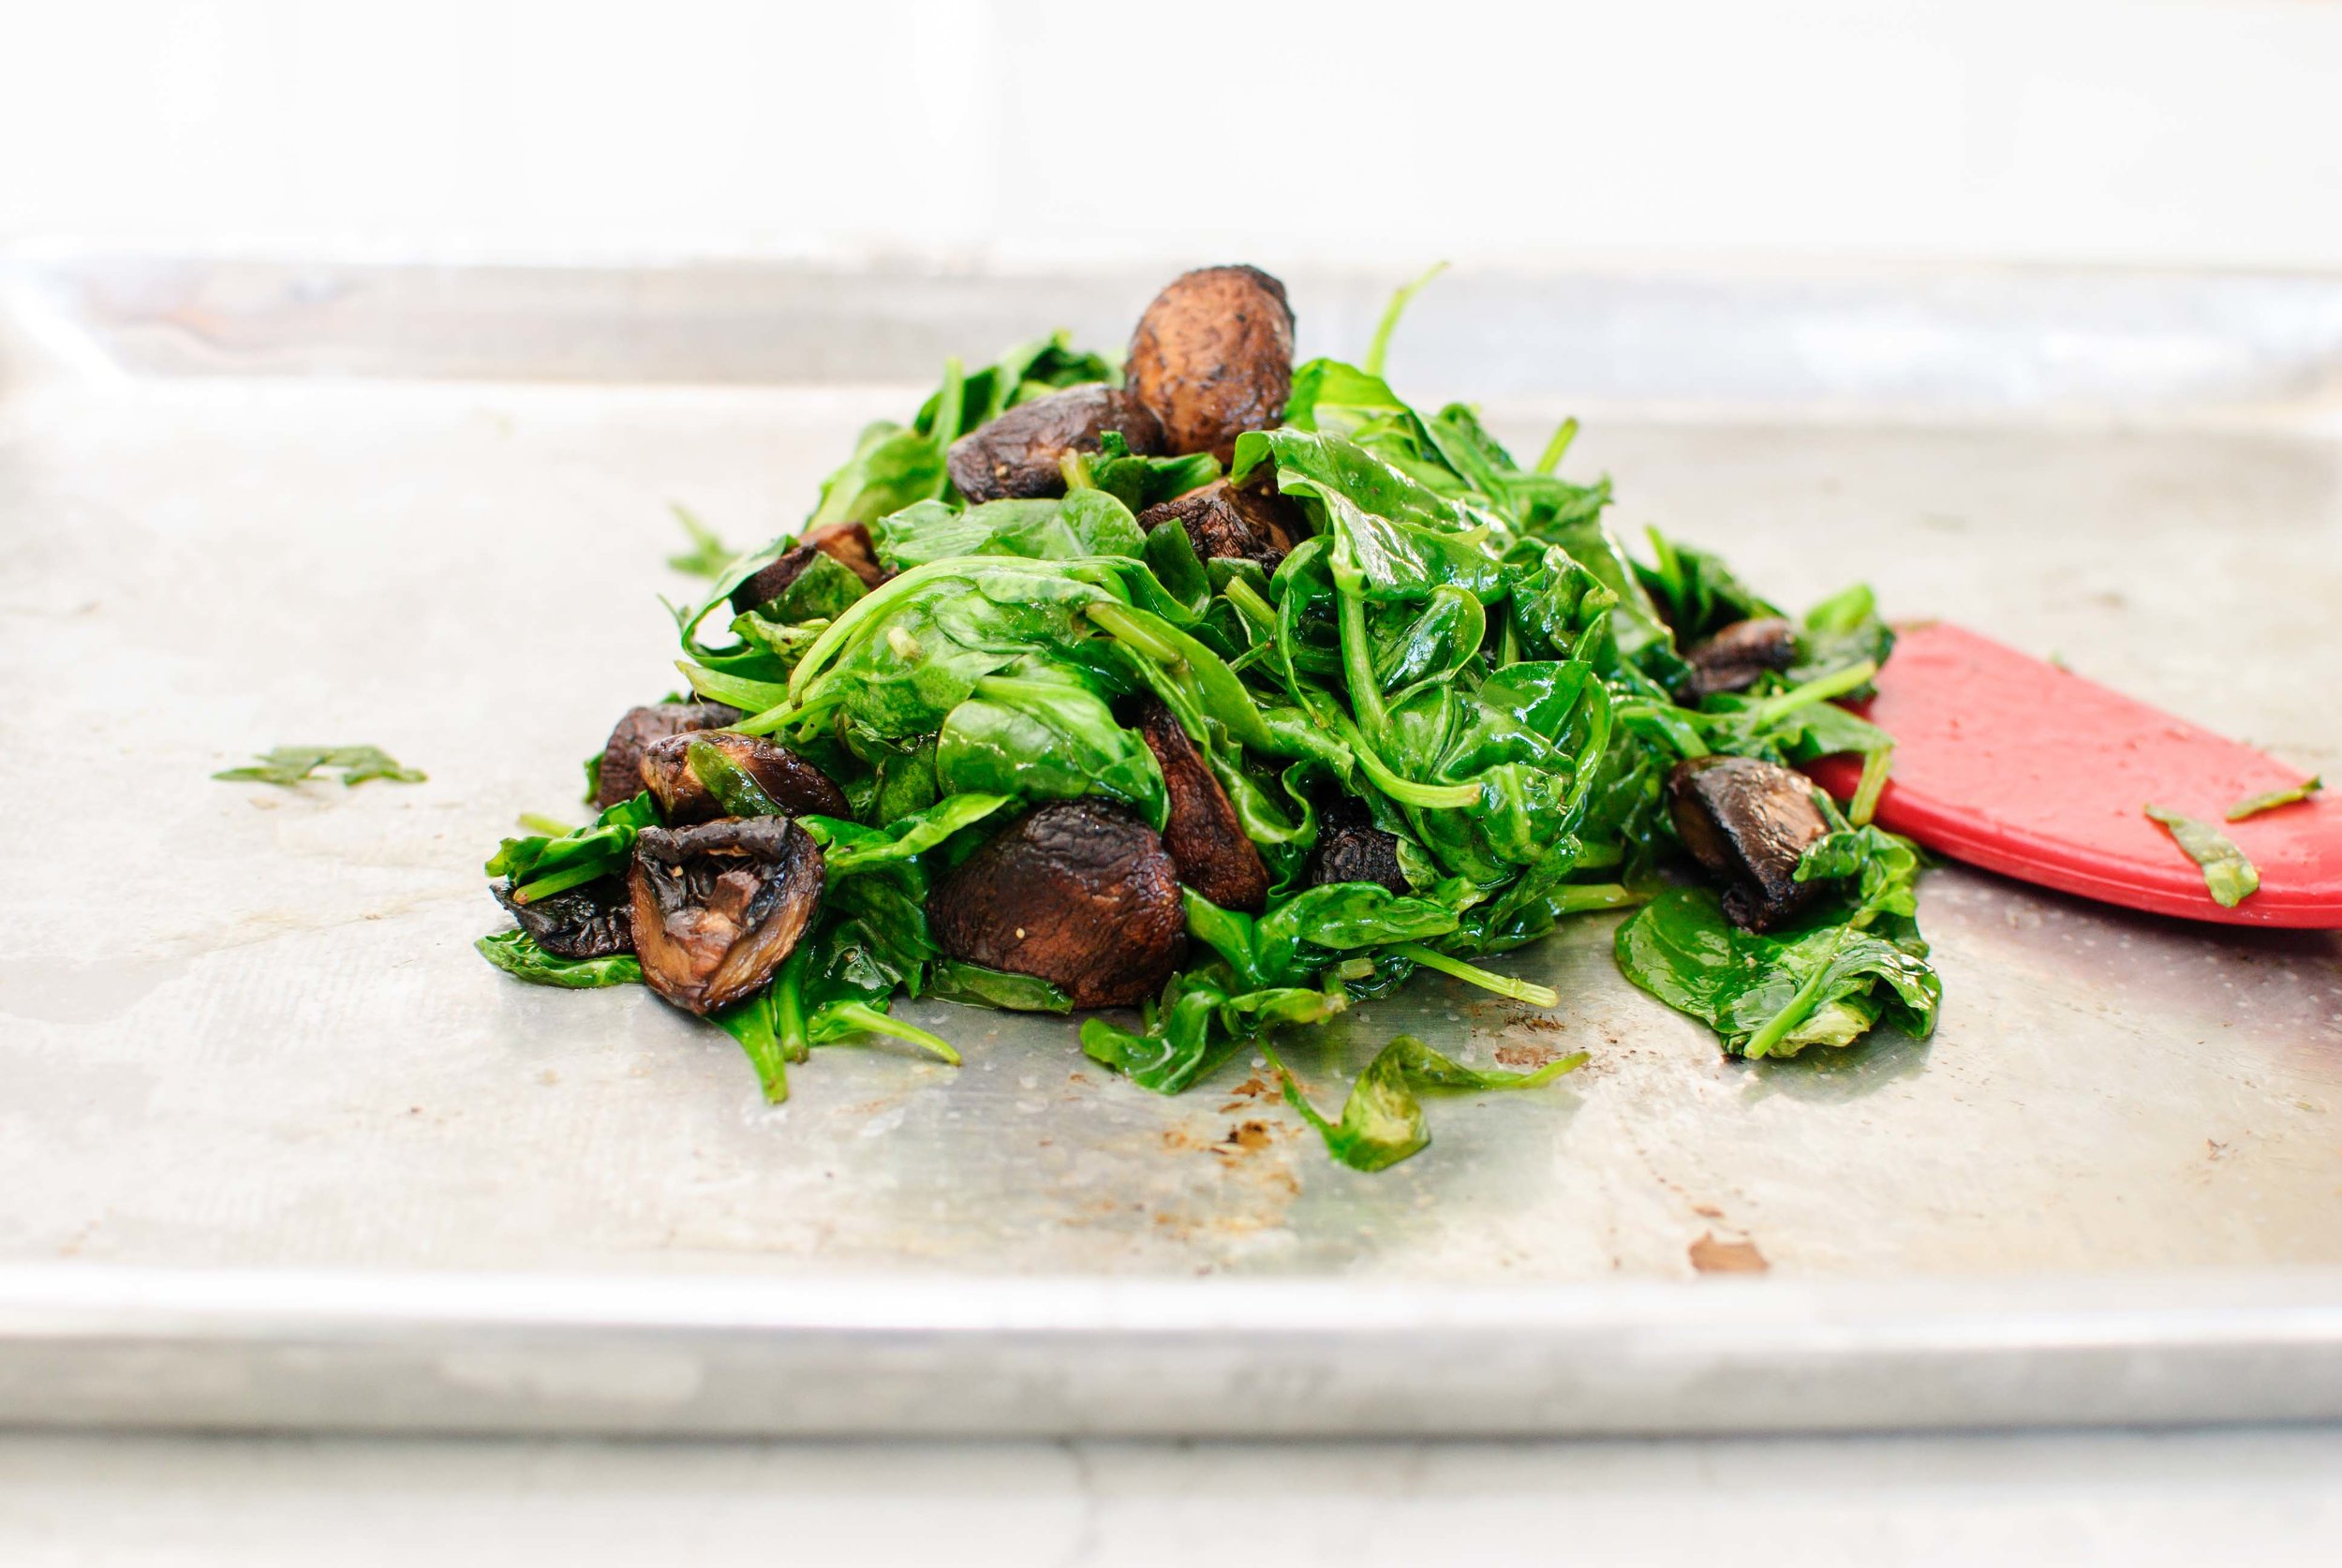
On a second rimmed baking sheet, toss quartered mushrooms with 2 teaspoons of oil, kosher salt and pepper; arrange in a single layer.

Place the butternut squash and tofu on the top oven rack and the mushrooms on the bottom rack. Roast for 25 minutes. 

Add spinach to baking sheet with mushrooms, drizzle with 1 tablespoon of oil, kosher salt, and pepper; toss to combine. Continue to roast for 2 more minutes or until spinach is wilted. Remove both baking sheets from oven. Check the butternut squash with a fork–there should be little resistance. If squash is not done, return baking sheet to the oven for another 5 minutes.

For the quinoa: Bring 2 cups of quinoa, 4 cups of water, and a generous pinch of salt to a boil, then reduce to low, cover, and simmer for 15 minutes. Remove from heat and let sit for 5 minutes, before fluffing with a fork. Drizzle with lime juice and stir with a fork to combine.

For the sauce: Pulse all the ingredients, except water and salt, together in a blender until smooth. Pour into saucepan with water and whisk together over medium-low heat until hot. Remove from heat.

To assemble: Place quinoa at the bottom of a bowl. Heap roasted vegetables over the quinoa and drizzle generously with peanut sauce. Garnish with green onions, cilantro, and chopped peanuts.

Chocolate Birthday Cake with Chocolate Frosting by Amy Cantu

Print Friendly and PDF

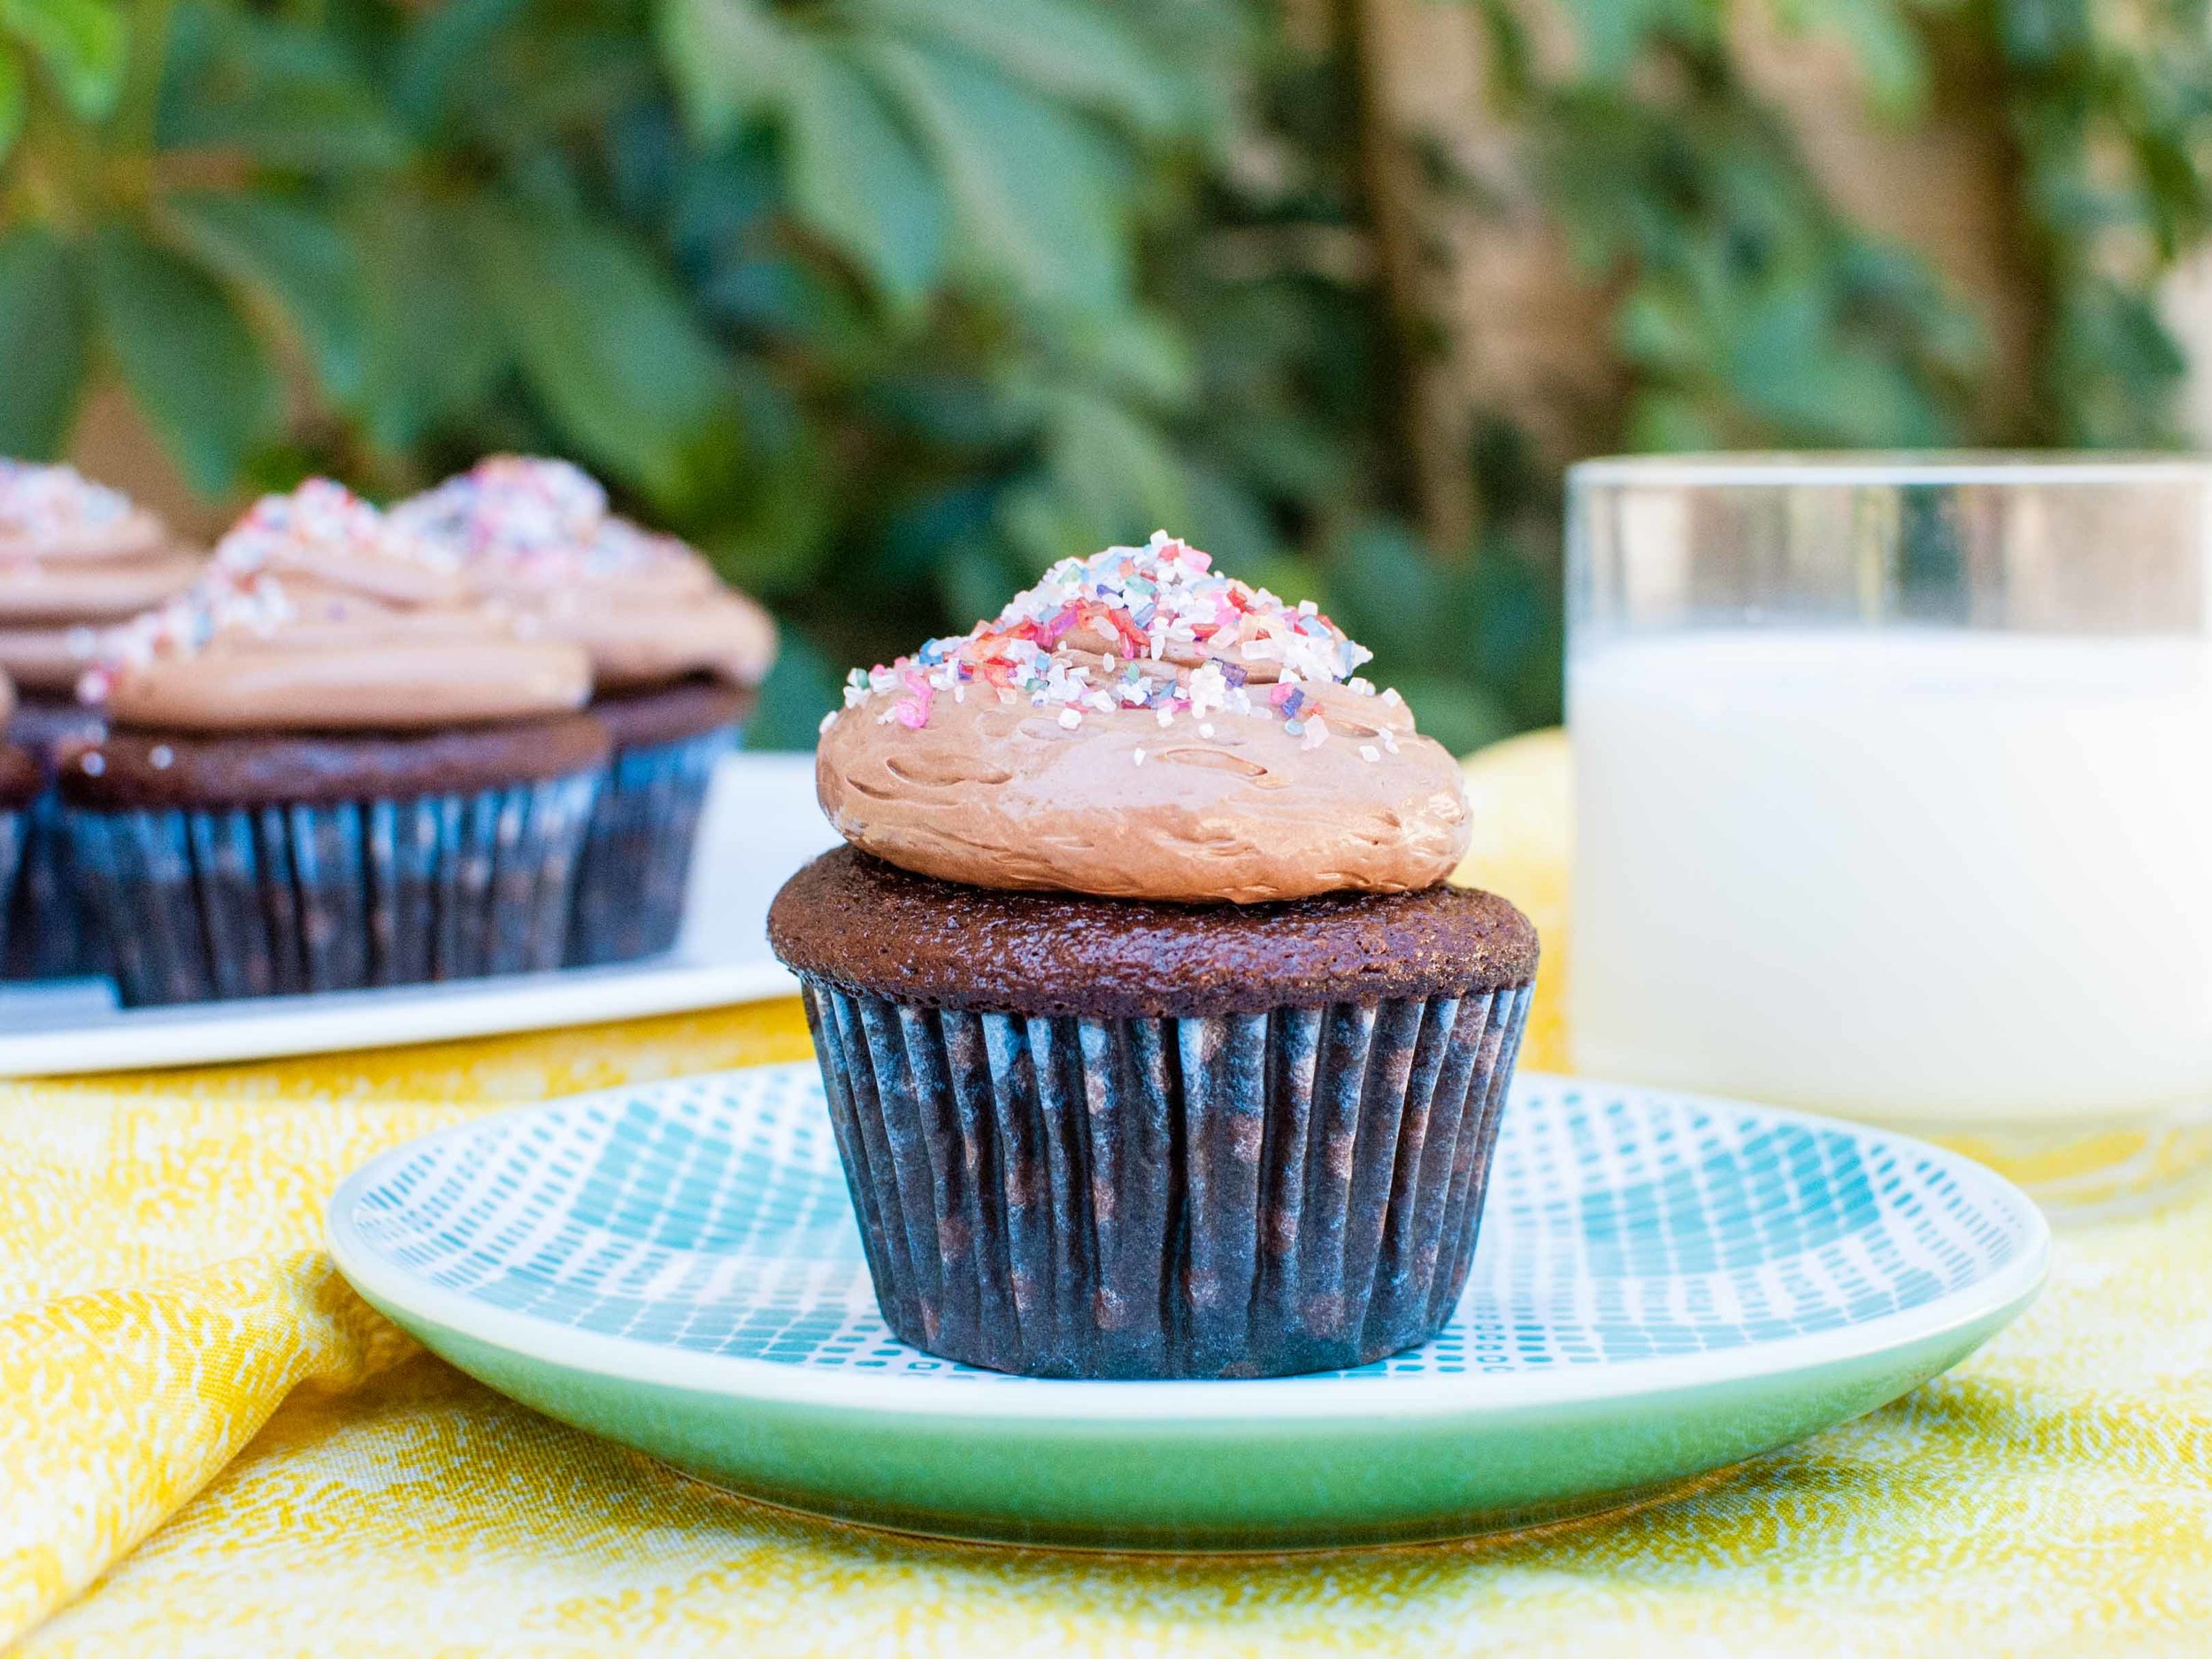
If you didn't know already, I have an absolute obsession with cake. Coconut Cake, Ice Cream Cake, Polenta Cake . . . it doesn't matter—I love it all! But sometimes nothing will do except rich, moist chocolate cake slathered with creamy, chocolate buttercream frosting, and this cake is exactly that. It's at once homey, impressive, and deeply satisfying to eat. Adults and kids both love it because . . . chocolate. It's the cake that strikes that nostalgic pang in my heart when I think of childhood birthday celebrations with balloons and streamers in primary colors. So go ahead: Make the time investment, bake this Chocolate Birthday Cake with Chocolate Frosting and eat your heart out, even if it's only your un-birthday.

Notes: I used the cake batter to make 12 cupcakes, (for a birthday play-date with a few besties,) and a small 6-inch double layer cake to enjoy with the family. I've also included instructions for using the batter to make all cupcakes, a 9x13 cake, or an 8-inch 3-Layer cake: Don't be scared off by all the text! I love the included recipe for Chocolate Buttercream Frosting because it stays beautifully shiny and creamy even as it sits out, and it's not cloyingly sweet. If the frosting begins to curdle as you are beating it, switch to high speed and keep whipping it until it looks smooth again. Don't worry, just keep whipping, and I promise it will come together. The cake is best at room temperature and will keep for 3 days without refrigeration . . . if it lasts that long!


Time: 2 hours
Yield: 12 cupcakes + 6-inch double-layer cake (I used a 6x3" round pan), 30 cupcakes, 13x9x2-inch baking pan, or 3-layer cake (8" rounds)

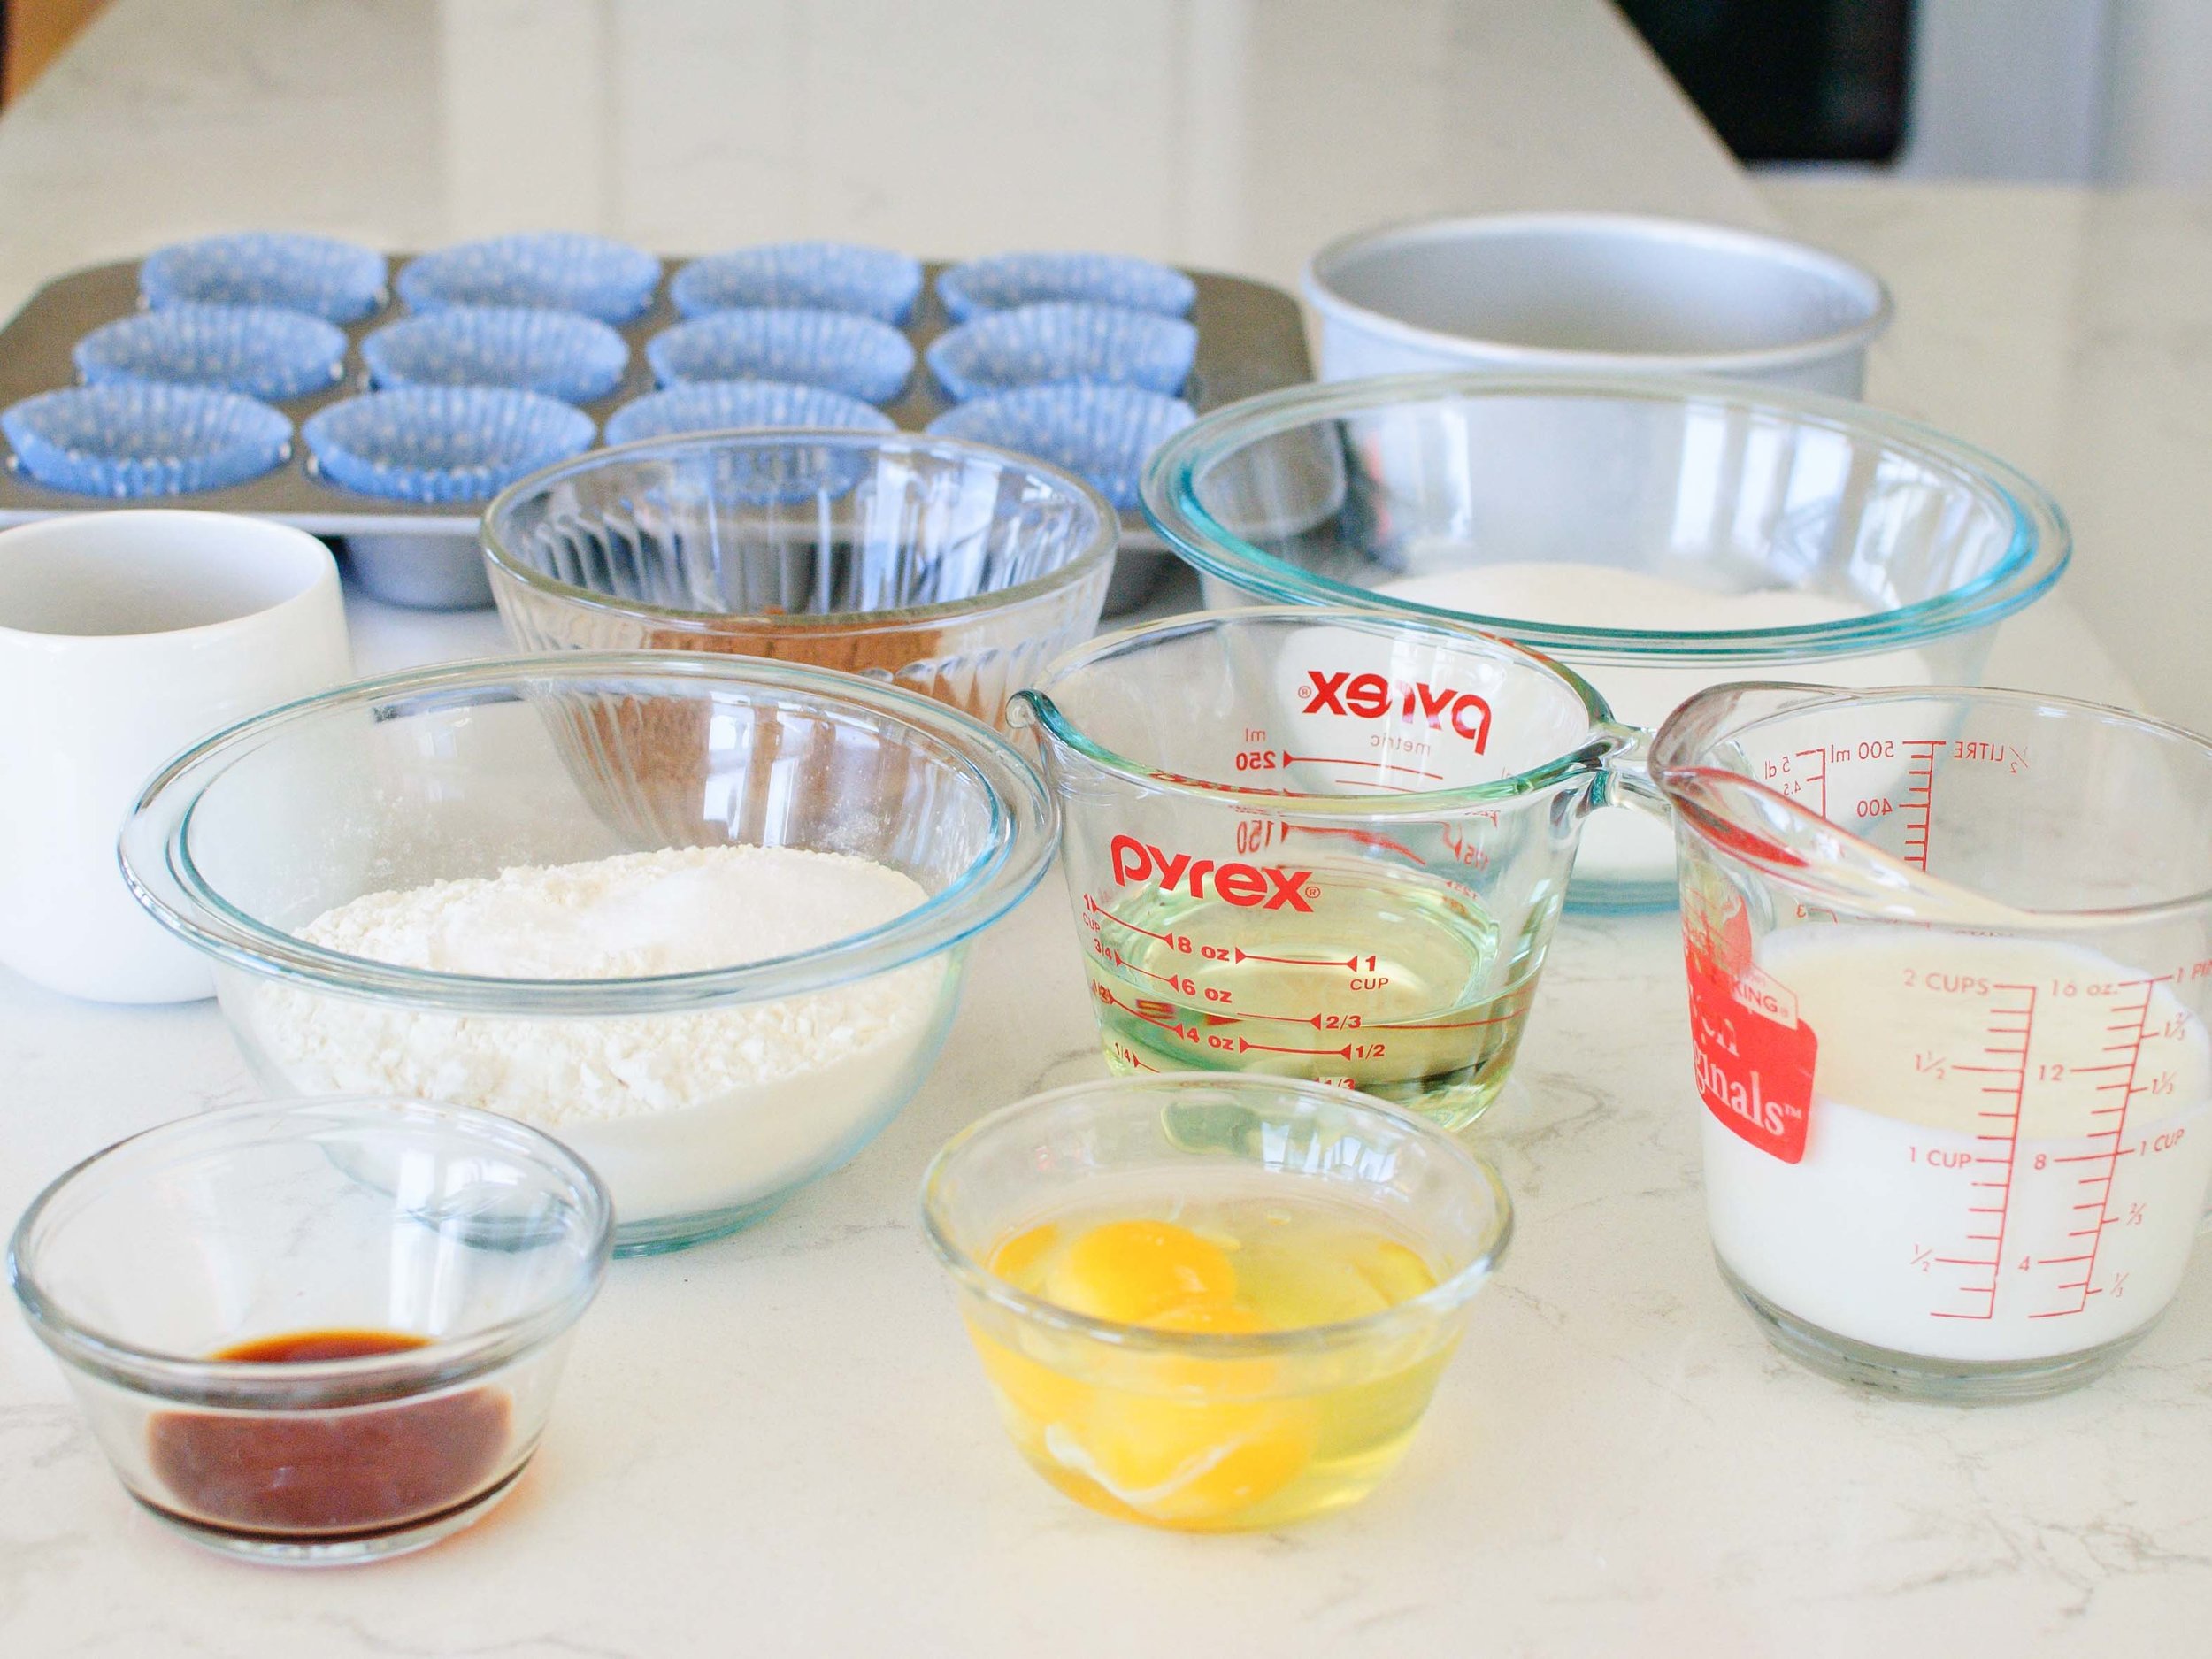
2 cups sugar
1 3/4 cups all-purpose flour
3/4 cup cocoa (natural, not dutch process)
1 teaspoon baking powder
1 1/2 teaspoons baking soda
1 1/2 teaspoons kosher salt (3/4 teaspoon table salt)
2 eggs
1 cup shaken buttermilk
1/2 cup vegetable oil
2 teaspoons vanilla extract
1 cup very hot brewed coffee
1 recipe Chocolate Buttercream Frosting (See recipe below.)
Loads of sprinkles

Preheat oven to 350 degrees F. Cupcakes: Line with cupcake liners. Cake pans: Cut parchment paper to fit the bottom of the pans. (I trace the bottom of the pan onto the parchment paper, then cut it out for a perfect fit.) Grease the bottoms and sides of the pan(s), line with the parchment paper, then grease the top of the parchment paper. (The extra parchment paper step ensures no wasted effort from the cake sticking to the pan!)

In a large bowl (or stand-mixer bowl fitted with a flat beater), stir together sugar, flour, cocoa, baking soda, baking powder, and salt. Beat in eggs, buttermilk, oil, and vanilla at medium speed for 2 minutes, until well-combined. Stir in very hot coffee - batter will be runny. Pour batter into prepared pans, filling them 2/3 full.

Bake until a wooden toothpick poked into the middle of the cake comes out clean. (Cupcakes: 22 to 25 minutes, 6x3-inch round: 30-35 minutes, 9x13-inch cake: 35-40 minutes, three 8-inch round cake pans: 30-35 minutes.) Cool 10 minutes, then remove from pans to wire racks. Cool completely. 

Cupcakes: Frost with Chocolate Buttercream Frosting and decorate judiciously with sprinkles!

6-inch Double Layer Cake: If necessary, lightly trim the top of the cake to create a flat top. Using a serrated bread knife, slice the cake horizontally to create two round layers of equal thickness. Place one layer on a flat plate or cake stand. Using a knife or offset spatula, spread the top with frosting. Top with the second layer, and spread frosting all over the top and sides, creating pretty swirls as you go, if you like. Decorate with plenty of sprinkles!

13x9 Single-Layer Cake: Spread Chocolate Buttercream Frosting over the top and sides. (There will be extra frosting.) Then sprinkle, sprinkle, sprinkle with sprinkles!

3-Layer Cake: Lightly trim the top of each 8" round cake to create a flat top. Place one layer on a plate or cake stand. Using a knife or offset spatula, spread the top with frosting leaving a 1/4" border. Top with the second layer, and spread the top with frosting leaving a 1/4" border. Place the final layer on top, and spread frosting evenly over the top and sides, creating pretty swirls as you go, if you like. Then, go crazy with those sprinkles!

Chocolate Buttercream Frosting

Recipe adapted from The Cake Bible by Rose Levy Bernanbaum

10 ounces bittersweet or semisweet chocolate, roughly chopped or chips
2 cups unsalted butter, room temperature (softened)
4 large egg whites, room temperature*
1 cup granulated sugar

Using a double-boiler to melt chocolate: Improvise a double-boiler, (if you don't have one,) by filling a saucepan 1/4 full with water and placing a heat-safe bowl over the pot. (The bowl should not touch the water.) Bring the water to a boil, then reduce the heat to low to keep a steady simmer. Place the chocolate into the bowl and stir frequently, until the chocolate begins to melt. Remove from heat when half the chocolate is melted, and continue to stir, using residual heat to complete the melting. The chocolate should be completely smooth. (If the chocolate is not completely melted, return the chocolate to the double-boiler for 30 seconds and continue stirring.)

Using a microwave to melt chocolate: Microwave chocolate in a microwave-safe bowl on high for 15 seconds. Stir well. Repeat until chocolate is half-melted and stir, using residual heat to complete the melting. If chocolate cools before chocolate is completely smooth, return to the microwave for another 15 seconds and continue to stir until chocolate is fully melted.

In a mixing bowl beat the butter on medium speed until smooth and creamy.

In the bowl of an electric mixer, beat the egg whites using the whisk attachment, (if you have one,) using a high speed setting, until soft peaks form when the beater is raised. Gradually beat in the sugar until stiff peaks form when the beater is raised slowly. Beat in the butter by the tablespoon. If the mixture looks slightly curdled, increase the speed a little and beat until smooth before continuing to add more butter. Add the melted and cooled chocolate all at once and beat until smooth and uniform in color. Use immediately or place in an airtight bowl. Re-beat frosting at room temperature to restore texture.

*Contains raw egg: Please be aware that consuming raw and lightly cooked eggs exposes a slight risk of salmonella or other food-borne illness. To reduce this risk, use fresh, properly refrigerated, clean grade A or AA eggs with intact shells, and avoid contact between the yolks or whites and the shell.

Orecchiette with Roasted Broccoli by Cynthia Raub

Print Friendly and PDF

Olivia has a spectacular appetite, and she really enjoys eating, much like her mommy and daddy. This year, in Junior Kindergarten, she is required to bring her own lunch every day. This excited both of us, and we made quick work to brainstorm ideas of things she loves. She started a journal and began drawing pictures of meals that she enjoyed, so we could remember what to include for lunch. Her very first idea was pasta and broccoli, and this recipe is a version with seasoned breadcrumbs that she really loves. This pasta dish is light and tasty and simple to make. The reserved pasta water and a pungent cheese make a light sauce and the tender-crisp broccoli is the perfect texture for kids. I find that kids cannot be fooled and really just want to eat delicious food like cheesy pasta! This is a healthier alternative to macaroni and cheese, so it's imperative to season these simple and few ingredients very well. 

I find that involving my kids in any part of the planning or cooking of meals makes them more enthusiastic to eat. The foods I send with Olivia to school are an extension of our food priorities at home: I focus on homemade and simple. Because Olivia has such an impressive appetite, satisfying meals are another priority since a variety of snacks will most likely not fill her up when she's hungry. This makes a filling lunch or an easy weeknight dinner!

Notes: This recipe can be simplified even further by skipping the blanching step for the broccoli before roasting it; you can even oven roast the broccoli for a nuttier flavor and a less hands on step. Substitute the cheese for any other finely grated hard cheese like Parmesan, but personally, I like the more pungent flavor of Pecorino-Romano with broccoli. These breadcrumbs are delicious on EVERYTHING and you can also enhance them in so many ways. A while back, I cooked them in rendered pancetta fat and herbs, which would be spectacular in this dish too.


Time: 35 minutes
Servings: 6

1 lb pasta
5 cups broccoli florets
6 tablespoons olive oil (divided)
2/3 cup bread crumbs
Kosher salt
Freshly cracked black pepper
1/2 teaspoon garlic powder
2 cloves of garlic, smashed
1 cup finely grated Pecorino-Romano
1 teaspoon lemon zest (about 1 small lemon)

Cook pasta according to package directions and your preference. Don't forget to season the boiling water liberally with salt! Strain pasta, reserving 2/3 cup of pasta water. Fill your pot back up with water and bring to a boil (for the broccoli).

While your pasta is cooking, make the breadcrumbs. In a large skillet, heat 3 tablespoons of olive oil on medium heat. Add breadcrumbs to the hot oil and stir to combine. Season breadcrumbs with 1/2 teaspoon of salt, garlic powder, and a pinch of black pepper. Cook breadcrumbs until golden and crunchy. Set aside.

Cut broccoli into large bite sized pieces. Blanch broccoli florets: bring water to a boil in a large pot and season with salt. Drop in broccoli and cook for 60-90 seconds or until desired doneness has been reached. Plunge broccoli into an ice bath, (large bowl filled with ice and water,) to stop broccoli from overcooking. Once cooled, drain, dry on a clean kitchen towel and set aside.

In a large skillet, add 3 tablespoons of olive oil and garlic and cook garlic until fragrant and barely browned. Remove garlic from oil and dispose. Add strained broccoli to the oil and season with salt and pepper. Over high heat, roast broccoli on the first side until crisp and browned. Toss the broccoli to roast on another side. Once browned, remove broccoli from the pan and set aside.

In the same large skillet, heat reserved pasta water and pasta together. Add finely grated cheese and stir to combine until pasta becomes creamy. Add roasted broccoli and lemon zest and heat through together. Transfer to a serving plate and garnish with breadcrumbs.

Two Bean Summer Salad by Amy Cantu

Print Friendly and PDF

Once a quarter, I eagerly await my next shipment of beans from the Rancho Gordo Bean Club. When I hear the loud thud of the box hitting my doorstep, I run out and rip the box open to take stock of what beautiful bean goodies have arrived - I'm never disappointed. Rancho Gordo grows heirloom bean varietals that might otherwise go extinct, since grocery store beans have become so limited and homogenous. I never knew how glorious beans could be before I cooked up my first batch of Rancho Gordo beans. There are so many different kinds with varying colors, textures, sizes, and flavor. Some varieties cook up big, sturdy and meaty, while others are petite, melty, and creamy. Also, these beans don't take forever to cook because they haven't been sitting on warehouse shelves for years and years. I held a bag of scarlet runner beans in my hands and admired their deep eggplant purple sheen with violet speckles and streaks - so beautiful. I knew these scarlet runner beans were destined for a bean salad that would celebrate summer. An overnight soak and hour-long cook rendered the beans plump and substantial with creamy centers, ready to soak up a bright, vibrant dressing. Tossed with summery green beans, ripe tomatoes, and sweet corn, this Two Bean Summer Salad has lots of fun textures and is hearty enough to be a main course. Tote this bean salad along for a picnic alongside a few cups of easy chocolate pudding, and you'll remember why sometimes the ordinary can really be spectacular. Happy summer!

Notes: I can't encourage you enough to seek out quality dried beans and cook them up yourself, but I know that sometimes we're in a pinch, and we just need to pull a meal together. Feel free to substitute two cans of beans, drained, and rinsed for the beans in this recipe, if you are short on time (red kidney beans or cannelini beans will work).

Just like with Broccoli Cooked Forever or in a good Caesar Salad dressing, even if you're not an anchovy fan, I promise that you won't taste them or anything fishy in the final salad. The anchovies lend a deep, savory flavor that is really delicious in the dressing.


Time: 1 hour, 20 minutes (or 30 minutes, if using canned beans)
Serves: 6-8

1 1/2 cups dried scarlet runner beans (or other dried runner bean), soaked overnight and drained (about 4 - 4 1/2 cups cooked)
1/2 pound green beans, ends trimmed, and cut into thirds
3 ears corn, shucked
2 large tomatoes, watery seeds removed, 1/3" dice
1/4 cup red wine vinegar
1 teaspoon kosher salt
Freshly round pepper
1 teaspoon dijon mustard
2 garlic cloves, minced
2 anchovies, minced
1/2 cup olive oil
1/4 cup basil, slivered or torn into small pieces
 4 stalks green onion, thinly sliced

In a stockpot or french oven, combine beans with enough water to cover beans by 2 inches (about 6 cups). Bring to boil for 5 minutes, then reduce heat to low, and simmer partially covered, until tender - about 1 hour. Drain and rinse under cold water until beans are cool. Transfer to a large bowl.

Meanwhile bring a large pot of water to boil. Prepare an ice water bath by combining water and a few handfuls of ice in a large bowl. Blanch green beans in the boiling water for 2 minutes or until crisp tender, then scoop out the beans with a slotted spoon or strainer and plunge into the ice water. Add cooled green beans to the scarlet runner beans.

Next put the corn into the boiling water, reduce heat to medium low, and cook for 5 minutes. Add another handful of ice to the water bath, and plunge the cooked corn into the icy water to cool. Stand an ear of corn flat side down on a large cutting board. Using a sharp knife, cut the kernels from the corn cob. Transfer corn kernels into the bowl with the beans and repeat with remaining corn.

Add diced tomatoes, red wine vinegar, salt, pepper, mustard, garlic, anchovies, and olive oil to the salad and mix well. Taste and add additional salt and pepper to adjust seasoning. Sprinkle slivered basil and green onions over the salad and lightly toss to combine. Serve immediately.

Eggplant Dip with Caramelized Onions and Tahini by Amy Cantu

Print Friendly and PDF

It was another one of those harried days - I felt vaguely grumpy from getting too little sleep because I've become so used to waking up at every little sound my kids make that I'm now an insomniac. Also, I'm a worrier. I can't help it. I lay awake at night thinking about nothing and everything - that weird bump I found on the back of one kid's knee, the persistent grumble in my stomach, why American politics is so polarized, and exactly what time do I need to roll out of bed so that I still have enough time to throw together a lunchbox and get to the preschool on time (or maybe just 5 minutes late)? It's possible, I also drink too much caffeine too late in the day. I digress. The previous night, I laid awake distraught over eggplant dip, and now I stood in the kitchen with Cynthia and Christine passing around pieces of flatbread with various versions of eggplant dip, "OK, which do you like better? Bite A or B? Really? Are you sure you like B? What?! And you like A better? Well you're both no help!" In that moment, it felt like world peace depended upon which eggplant dip tasted better, and I was at an impasse. (I know this sounds ridiculous, and that's because it was. This is also a PSA on the importance of sleep. Don't be like me!) My dad would be the tie-breaker. "OK dad, it's down to you. Which one tastes better??? No pressure. Actually, yes, pressure. You're deciding!" My dad looked at me dubiously, as I shoved a bite into his mouth. "Mmmm, yeah this one tastes good. Kind of creamy." And then I pushed the second bite his way. "Mmmm, yeah this one tastes good too." Exasperated, I cried, "Oh, come on! You said almost the same thing twice!" My dad looked at me like he did when I was a teenager, and I was being particularly hormonal and witchy. He grunted, "Mmm. The second one. I can taste that it has eggplant." The tie breaker - because an eggplant dip should also taste like it contains eggplant. Brilliant! So, here is my recipe for Eggplant Dip with Caramelized Onions and Tahini: The roasted eggplant is silky, the caramelized onions adds deep savory sweetness, the tahini coats the tongue in nutty richness, and most importantly, you can still taste the eggplant! Sometimes it takes a village to raise children, and sometimes it takes a village just to make a bowl of eggplant dip. It's darn good eggplant dip.

Notes: This eggplant dip is a delicious and different accompaniment to a crudité platter, especially if you throw in some wedges of pita bread. The texture is already a bit creamy from the roasted eggplant and tahini, but you could extend the dip and make it even creamier by stirring in some plain yogurt. It will be a different kind of delicious. My dilemma as to whether to include the yogurt in the recipe was great (see babble above), because both versions of this dip are delicious with or without the yogurt. However, aside from using this dish as a dip, it also makes an amazing spread for Chicken Shawarma Flatbread or a fancy pizza, if you will. I repeat, AMAZING. And for this use, I say, no yogurt.

I call for aleppo chile flakes in the recipe, which is worth seeking out. I got a bag on Amazon, and it's now my go-to for chile flakes. Aleppo chile is commonly used in Middle Eastern cuisines, and adds a little heat (without being over-powering), bright acidity, and an interesting je ne sais quoi to whatever you sprinkle it on!


Time: 1 hour, 30 minutes
Serves: 6-8

2 large eggplants
2 medium onions
1 tablespoon, plus 2 tablespoons extra virgin olive oil (divided use)
1/3 cup tahini, well-stirred
Juice of 1 lemon
1 teaspoon cumin
Kosher salt
1/4 - 1/2 teaspoon aleppo pepper flakes or freshly ground black pepper, to taste

Preheat oven to 400 degrees F. Line a rimmed baking sheet with aluminum foil and grease lightly with oil or cooking spray. Prick eggplants all over with a small sharp knife, to allow steam to escape while the eggplants roast. (Don't skip this step or beware of exploding eggplants!) Place pricked eggplants on baking sheet and roast in oven for an hour or more, until eggplants are wrinkled, deflated, and scorched in spots. Remove from oven and let rest until cool enough to handle. Using a spoon, split the roasted eggplants open, and scoop up the soft inner-flesh from the charred skin and into a colander. Stir in a sprinkle of salt, and let drain for 5-10 minutes. Press the eggplant with the back of a spoon to squeeze out any excess liquid, then scrape into a large bowl.
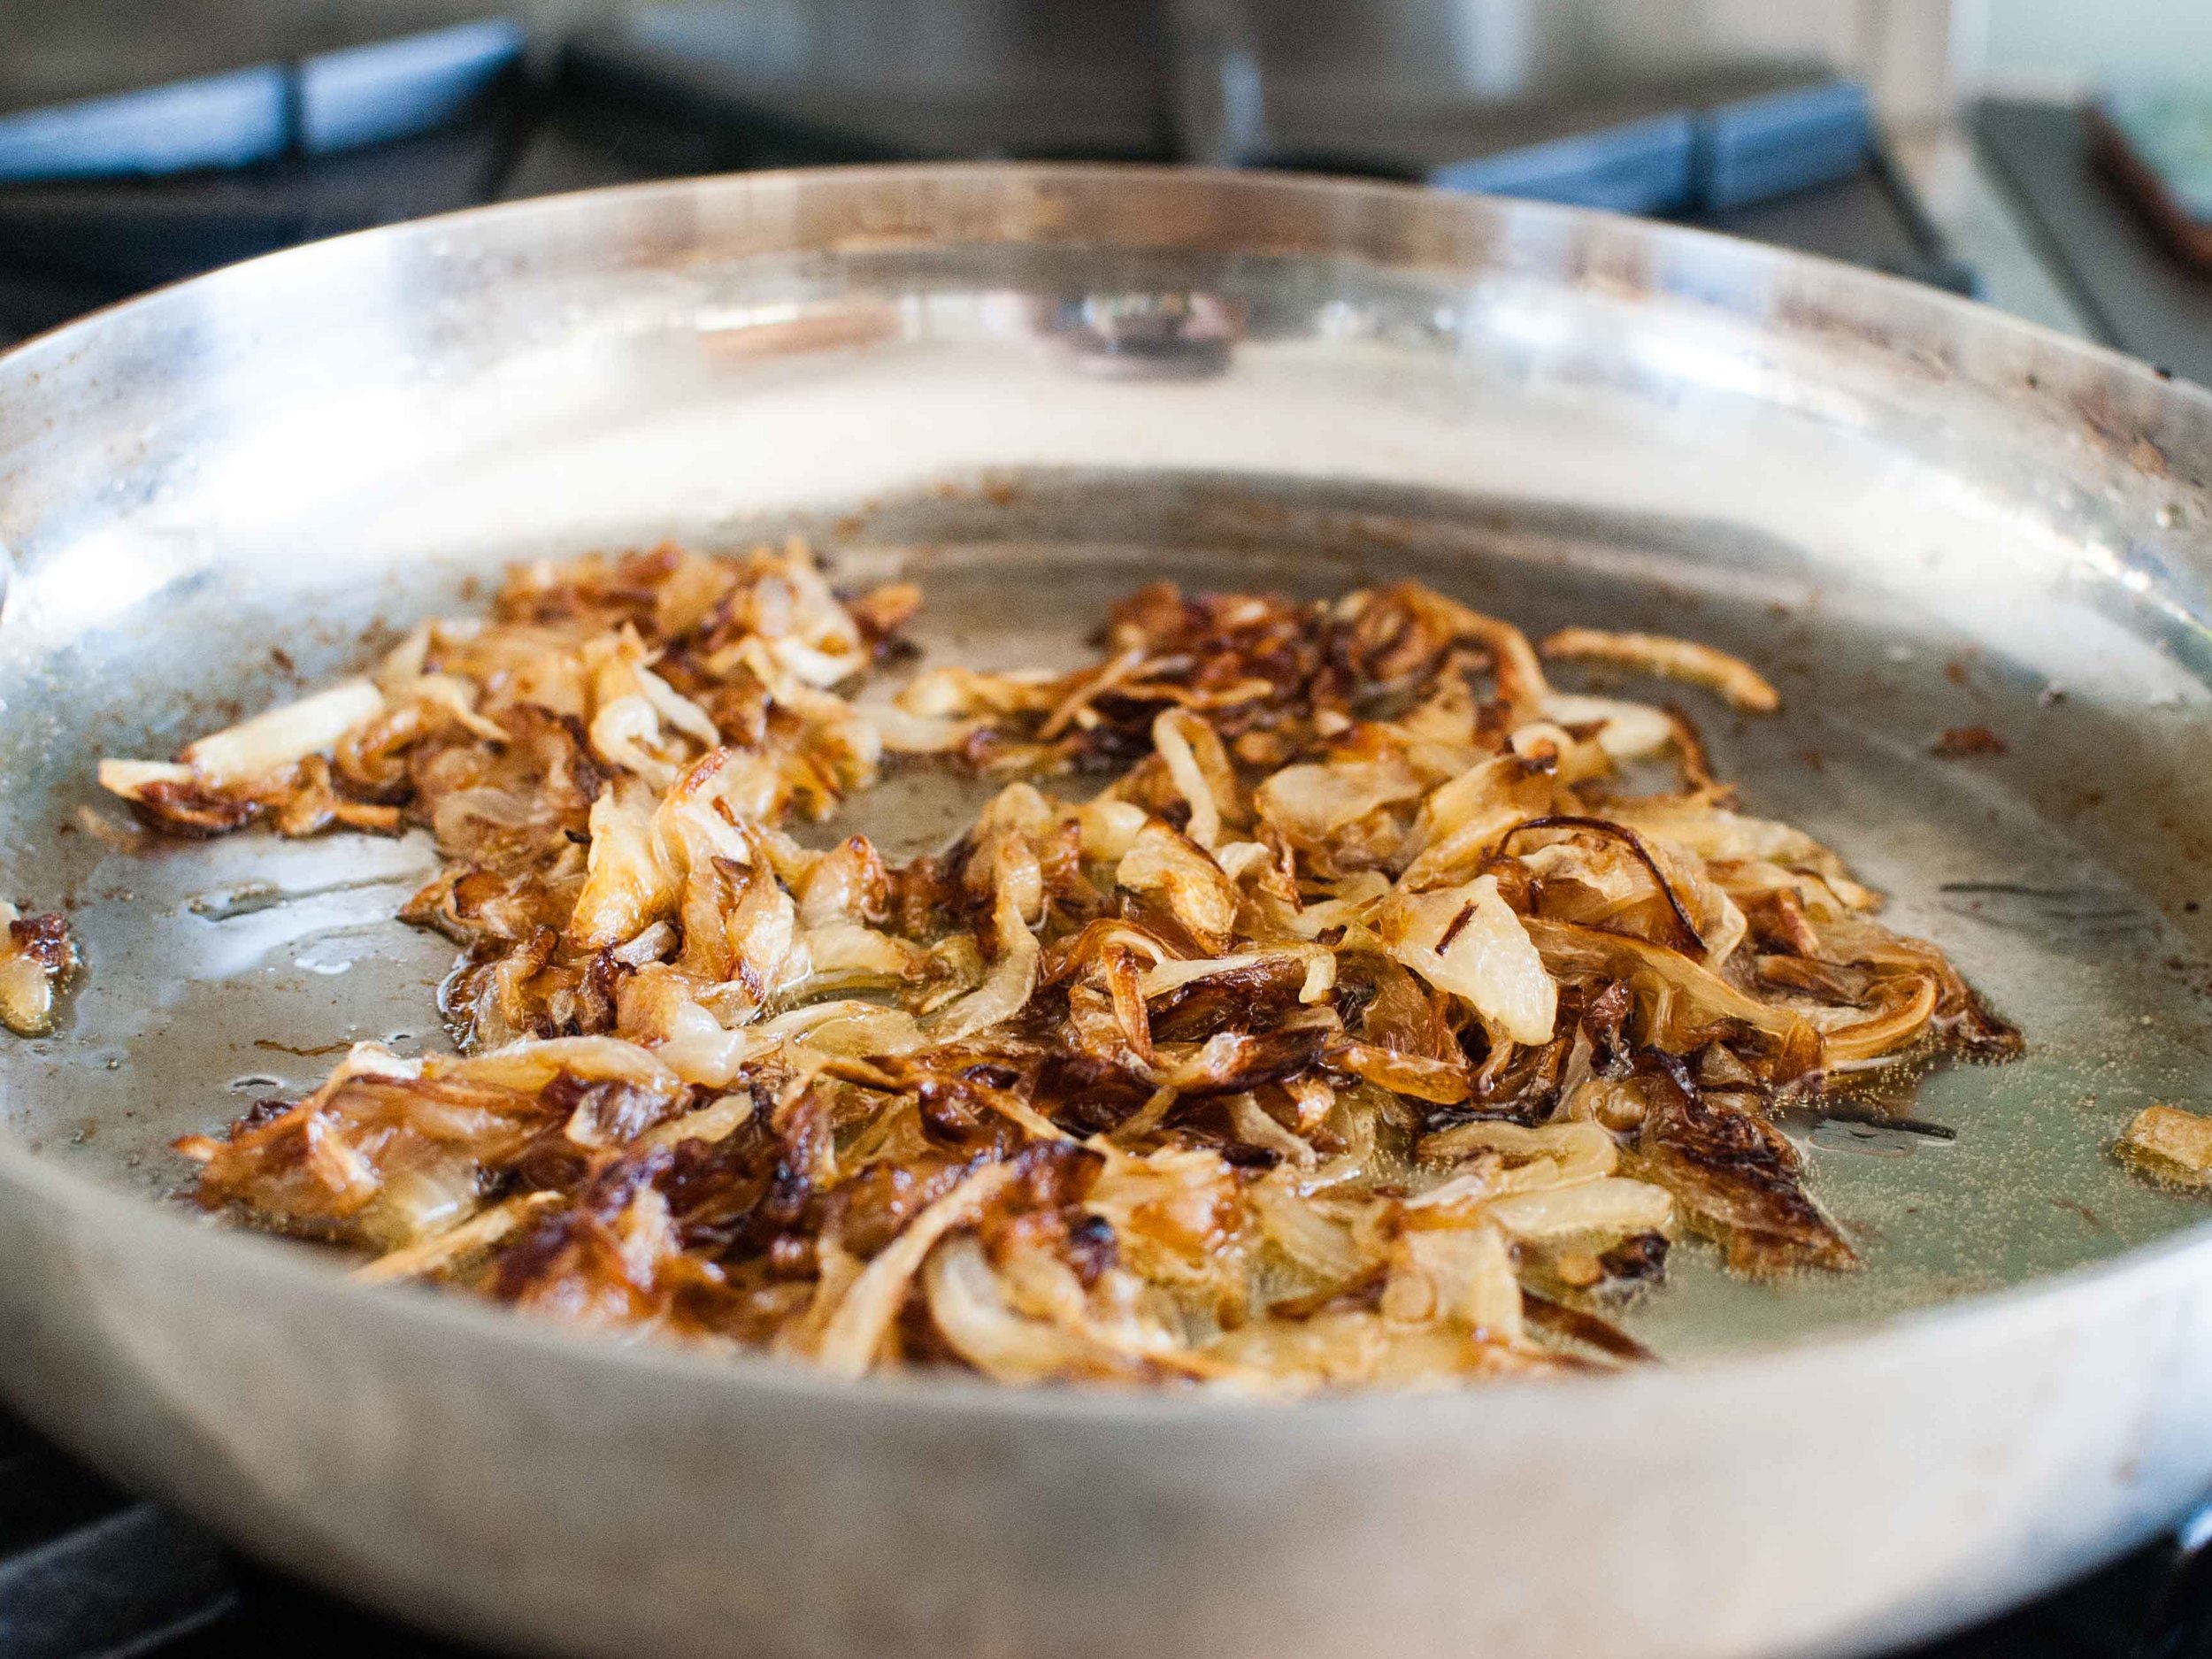
Meanwhile, trim the ends of the onions. Cut the onions in half from root to tip and remove the papery skins. Place the onions flat-side down, and slice them thinly (1/8" thick) from root to tip. Heat 1 tablespoon of olive oil in a large wide pan (12") over medium-low heat. Add the sliced onions and stir to coat the onions in oil and distribute the onions evenly across the pan. Let the onions cook, stirring occasionally (every 5-10 minutes), keeping the heat at medium-low. Continue to cook until the onions are a deep golden brown, about 45 minutes. If onions look like they are beginning to burn, lower the heat a bit. Once the onions are caramelized, drizzle 2 tablespoons of water into the pan, scrape up the brown bits (fond) from the bottom of the pan, and stir it into the onions. Remove onions from heat, and let cool.

Stir the eggplant around a bit to loosen it up and make a chunky paste. Add caramelized onions, 1 tablespoon olive oil, tahini, lemon juice, cumin, kosher salt, and aleppo pepper flakes or black pepper, to taste. Stir well and taste again to adjust seasoning.

Transfer dip into a serving bowl. Drizzle the final tablespoon of olive oil over the dip, and sprinkle with another pinch of aleppo pepper just before serving with pita bread wedges and sliced vegetables.

Raspberry Peach Jam by Amy Cantu

Print Friendly and PDF

Making jam is a labor of love, but it also extends the flavors of summer into the winter. I have a soft spot in my heart for fruit jams, and love the soft, spoonable texture of this pectin-free Raspberry Peach Jam. Since there is no added commercial pectin to this jam, the texture is looser than most jams you would find in a grocery store, and the raspberry and peach flavors are bold and vivid. I think it also makes this Raspberry Peach Jam more versatile, since you could also use at as a topping for ice cream or yogurt. My favorite way to eat it is spooned generously onto a buttermilk biscuit - mornings don't get much better than that!

Notes: If you are going to bottle the jam to make it shelf stable (and more giftable), make sure to read and follow the recipe well. (Nothing worse than a spoiled jar of jam.)

I added vanilla beans to this jam to give it a more sophisticated, floral flavor, but feel free to leave it out if you don't have any.


Time: 1 1/2 hours
Yield: 6 half-pint jar

5 pounds (80 oz) Fresh peaches
24 ounces Fresh aspberries
7 cups (50 oz) granulated sugar
1/4 cup lemon juice (1-2 lemons)
1/2 teaspoon kosher salt (1/4 teaspoon table salt)
2 large vanilla beans

Bring a large pot of water to boil. Put a few metal spoons into the freezer to use for checking the set of the jam later. 

If bottling your jam, preheat oven to 250 degrees F. Wash 6 half pint mason jars with rims and new lids in hot, soapy water. Let rims and lids dry on a clean towel. Place clean jars (without lids/rims) on a rimmed cookie sheet and carefully place in oven. Heat for 30 minutes or until ready to fill with jam. 

Meanwhile, use a sharp paring knife to score the bottom of each peach with an "X". Blanch the peaches in the boiling water for 30 seconds, then remove to a bowl of cold water to cool. Skins should now easily peel off the peaches using your fingers. Remove pits and dice the peaches into 1/2-inch pieces. 

In a very large bowl, stir together diced peaches, raspberries, sugar, lemon juice, and salt until well combined. Slice vanilla beans in half length-wise, and use the tip of a small knife to scrape the black seeds into the bowl. Add the vanilla bean pods into the bowl as well, and stir until combined.

Divide fruit mixture into two large, wide saute pans (or complete this step in two batches). Bring fruit to a boil over medium heat, stirring frequently so the fruit doesn't scorch. Continue to cook jam until the large bubbles subside to smaller, finer bubbles and the jam thickens a bit. Begin checking the jam by drizzling a bit of jam onto a frozen spoon. Let the jam cool for a few seconds on the spoon, then draw a line through the jam with your fingertip. If the jam stays mostly separated, the jam is ready. If the jam quickly fills in the line, continue cooking the jam for a few more minutes and then check again.

Freezer jam: Pour jam into freezer safe containers, leaving 1/2-inch headspace. Place lids on containers and let stand at room temperature for 24 hours. Then place jam in the freezer (for up to 6 months) or refrigerator (up to 3 weeks).

Bottled jam: Place canning rack in a large canning pot, and fill halfway with water. Bring to a boil. Fill hot mason jars with jam leaving 1/4" headspace between the jam and the rim of the jar. Wipe the rims of the jar clean. Seal jars and carefully load into the canning pot, using jar lifters. Check that the water covers the jars by 1 or 2 inches, adding additional boiling water if needed. Boil the jars for 10 minutes to process. Use jar lifters to remove from the canning pot and let cool on a towel or cake rack at room temperature for 12-24 hours. Any jars that do not seal, should be stored in the refrigerator and eaten first. Sealed jars should be stored in a cool, dry place away from direct sunlight.

Mustardy Potato Salad by Cynthia Raub

Print Friendly and PDF

Potato salad isn't the most alluring side dish at the barbecue - often times overcooked potatoes are drenched in mayonnaise, which makes it difficult to tell what other ingredients lurk under the dressing. But, this mustard-heavy, tangy version is bright and flavorful, a perfect counterpoint to rich barbecued meats. The baby potatoes are supple and firm, while the crisp green beans lend a fresh crunch to every bite. All the while, the light and tart mustard dressing showcases the beautiful vegetables in appearance and flavor. 

Notes: This side dish can be made in advance and only gets better after the first 24 hours. Also, adding the seasoned dressing to hot potatoes will yield more flavorful potatoes. The potatoes will absorb the dressing while they are still hot and it makes such a big difference in their flavor! You can also substitute the green beans for practically any other hearty summer vegetable, but I love the crisp snap from the green beans opposed to the dense chew of the potatoes.


Time: 25 minutes
Servings: 8-10

3 pounds baby potatoes
1 pounds green beans, trimmed and cut into 1-inch pieces
1/3 cup finely minced red onion
2 cloves of finely minced garlic
3 tablespoons whole grain mustard
1 tablespoon dijon mustard
2 tablespoons mayonnaise
2 tablespoons apple cider vinegar
1 tablespoon kosher salt (+ more for boiling the potatoes)
1 teaspoon freshly cracked pepper

In a large pot, cover potatoes with 1 inch of water and season water with 1/4 cup of salt. Bring the potatoes to a boil over high heat and cook for 15-20 minutes, until tender and easily pierced with a knife.

As the potatoes are boiling, in small bowl combine the red onion, garlic, whole grain mustard, dijon mustard, mayonnaise, apple cider vinegar, salt and pepper. Whisk to combine and set aside. 

When the potatoes are cooked, strain them carefully into a large colander. Drape a clean kitchen towel on top of the potatoes to absorb any excess moisture. 

In the same pot, bring water to a boil and season with salt. Add the green beans and cook until tender-crisp, about 1 minute. Strain carefully into a colander and toss to release steam, excess water, and to cool slightly. 

Once the potatoes are cooled enough to touch (but still very warm or hot), slice in half and add to a large bowl. Add the mustard dressing to the potatoes while the potatoes are still hot so they can absorb the flavors in the dressing. Add green beans and toss to coat with the dressing.

Pesto Pasta Salad with Roasted Tomatoes by Amy Cantu

Print Friendly and PDF


The first time I ever made a Pesto Pasta Salad with store bought pesto, I thought, really? This is it? I was underwhelmed and disappointed because I was looking forward to luscious pesto coating hot, long strands of pasta. The pasta was too firm, (even though I cooked the pasta to al dente,) with only a hint of basil, and it just tasted flat. This recipe for Pesto Pasta Salad with Roasted Tomatoes is not altogether different from that first attempt, but it tastes worlds apart. THIS pesto salad is a glorious celebration of summer, and the difference is all in the details. I made my own pesto sauce (instead of store-bought) using fresh basil. I toasted the pine nuts to bring out their nutty flavor. Beautiful summer cherry tomatoes were roasted to make them taste like candied tomatoes, without adding any sugar. I made sure to check the seasoning and add more salt before serving, to keep the flavors tasting bright and savory. Milky fresh mozzarella provided nuggets of soft, creamy flavor and texture. Each pesto-infused bite of pasta was a revelation in my mouth, with big, bold basil flavor. I was very, very happy.

Notes: I beg you to try making your own pesto at least once, (as in this recipe,) before deciding to use the store-bought kind. I have definitely used store-bought before for convenience, but when I developed this recipe, I did a side-by-side comparison of freshly made pesto vs. the store-bought pesto, and the fresh pesto blew my mind. Really. The difference was huge, and if you have a food processor or blender, fresh pesto only takes a few minutes to make. 

I have been overcooking my pasta for pasta salad by a minute or two ever since I read this post on Serious Eats about how pasta gets stiffer when it cools, so over-cooking the pasta a bit for pasta salad is great because it keeps the texture from getting too firm.

Pine nuts are at least half of what makes pesto so darn good, but I realize they are pricey. You can substitute half or all of the pine nuts for walnuts, and it will be a suitable substitution.

This Pesto Pasta Salad alongside Cynthia's Mediterranean Turkey Burgers and Mustardy Potato Salad makes an amazing barbecue. Adding shredded or diced chicken would also make this the perfect light summer meal, rather than a side.


Time: 45 minutes
Servings: 8-10

1 pound cherry tomatoes
1 tablespoon plus 1 cup extra virgin olive oil, divided use
Kosher salt
Freshly ground black pepper
1 cup pine nuts, divided use
1 pound farfalle (bow tie) pasta
1 cup parmesan cheese, grated
4 cups basil leaves, packed (about 5 ounces)
4 cloves garlic, roughly chopped
1/2 cup parsley, finely chopped
1 cup green onions, thinly sliced
pound fresh mozzarella, cut (or torn) into 1-inch piece

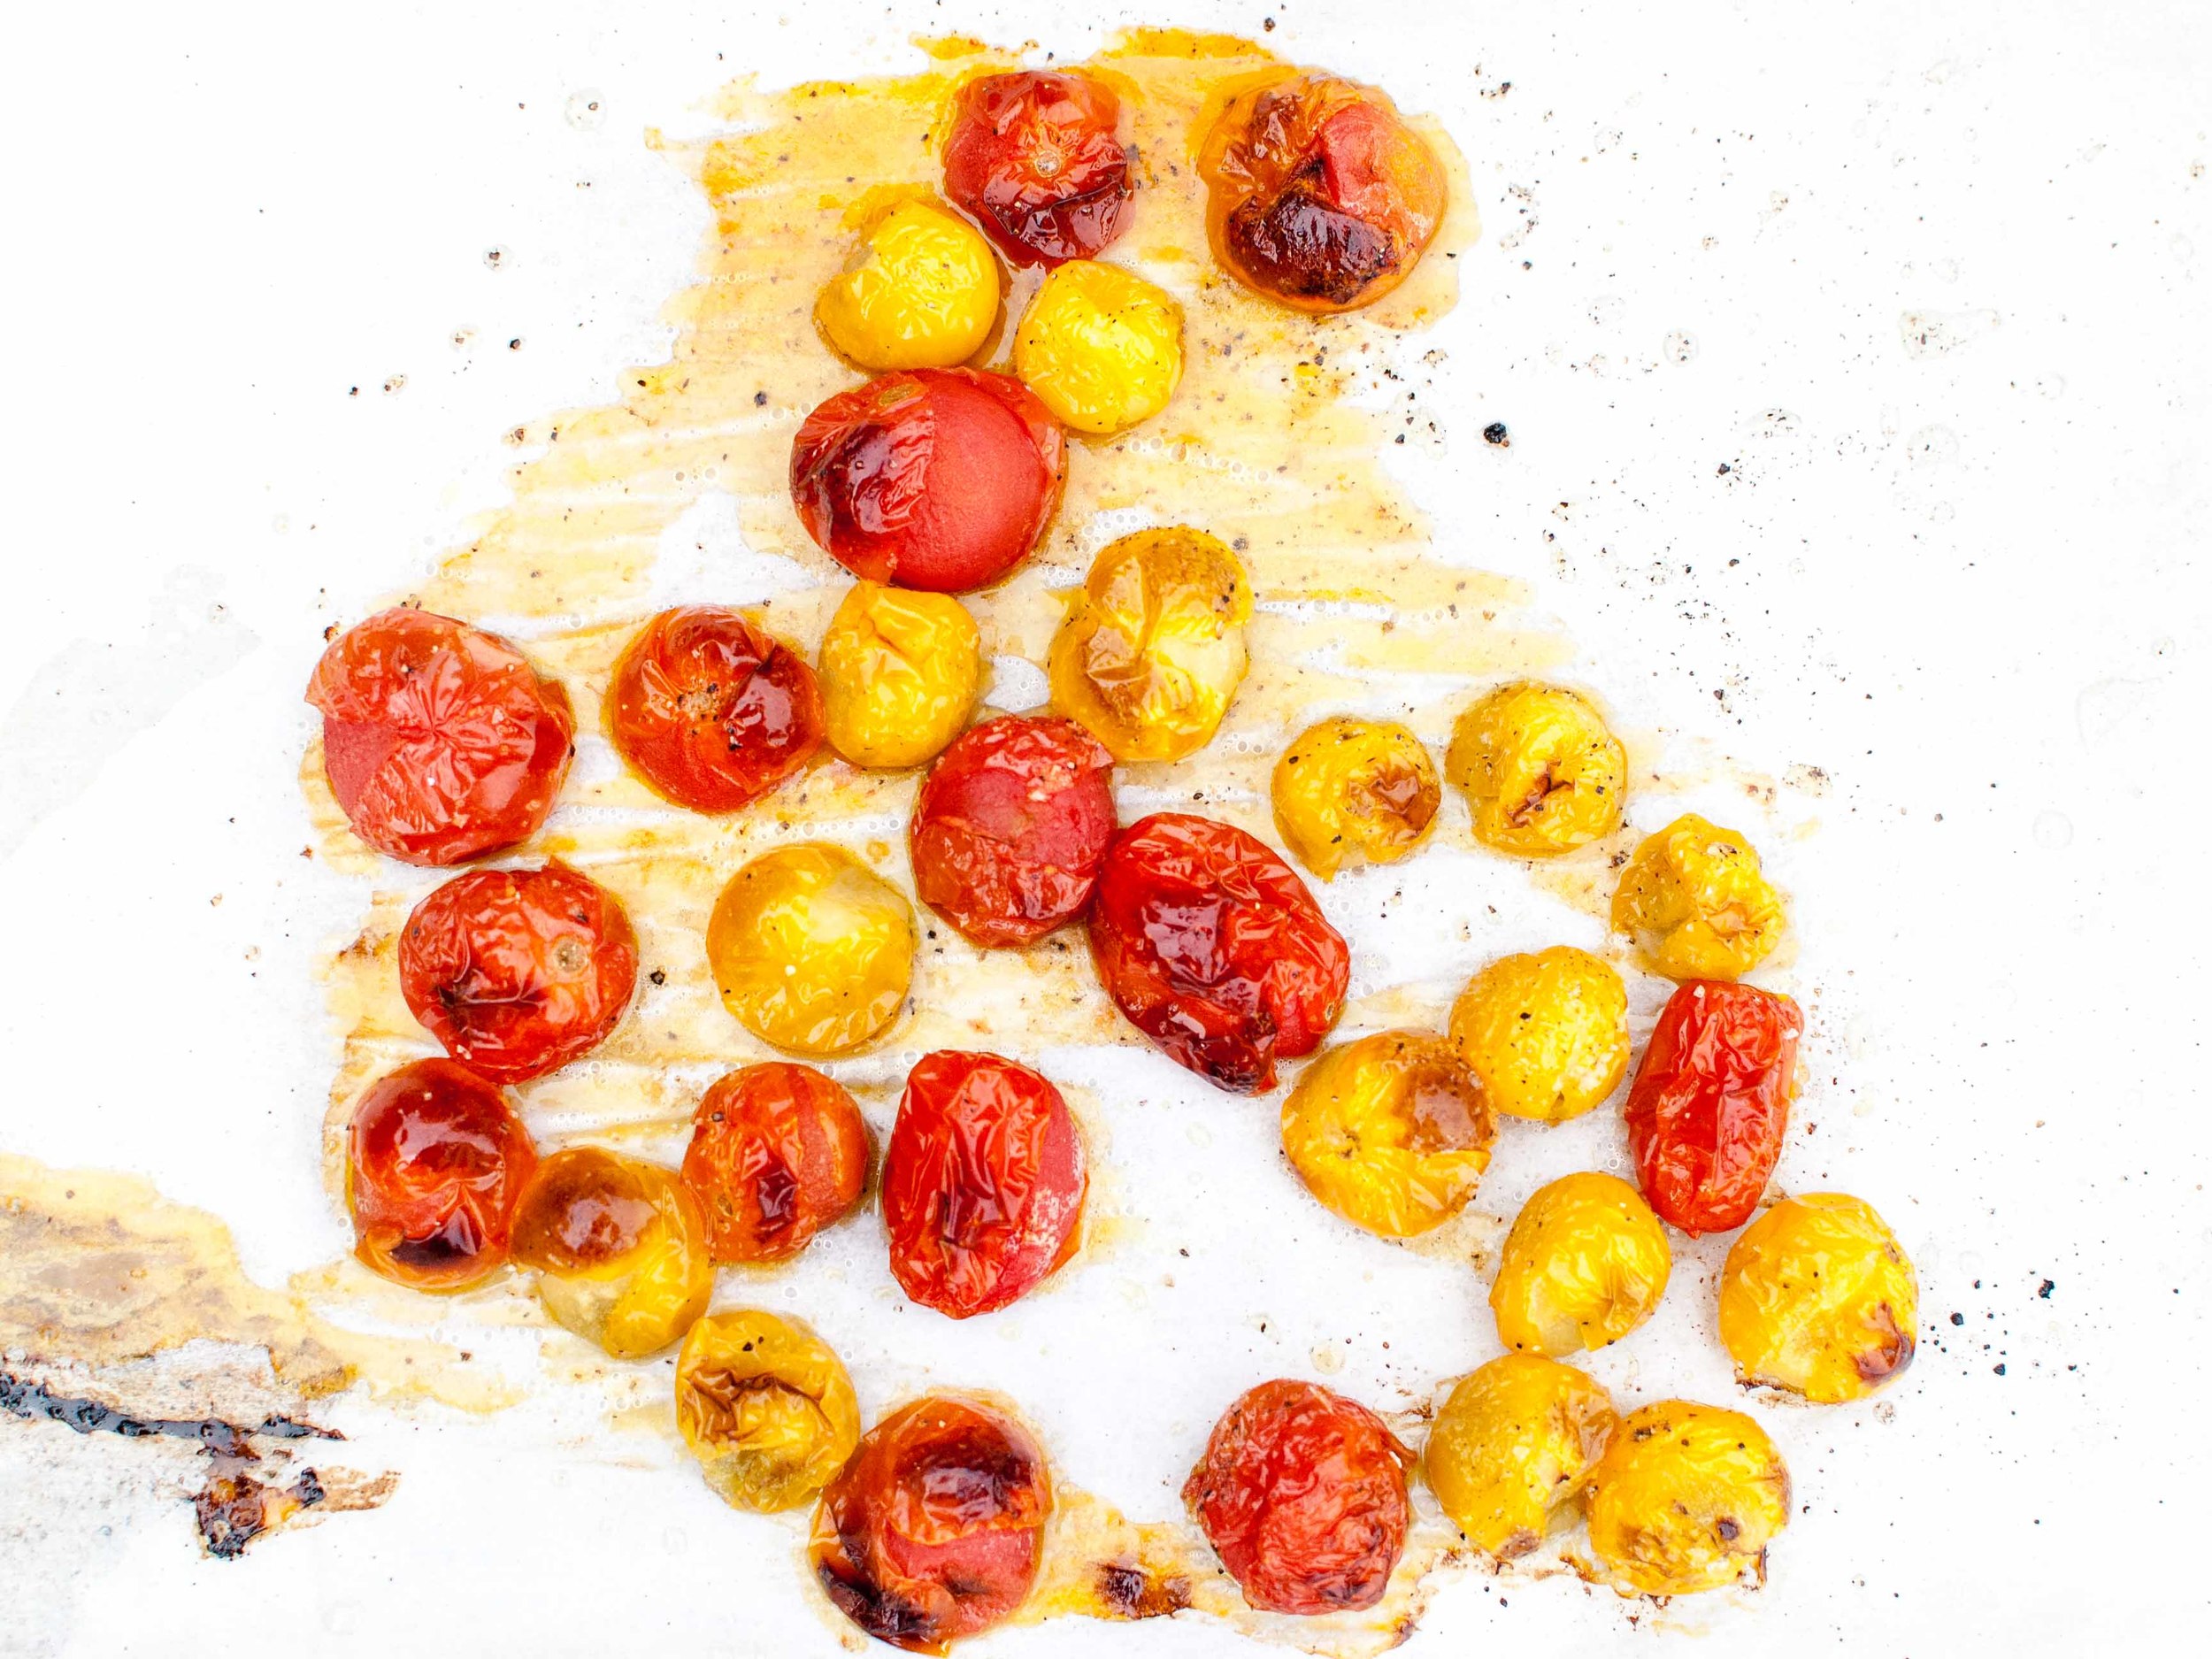
Preheat oven to 400 degrees F. Combine cherry tomatoes and 1 tablespoon olive oil on a rimmed sheet pan. Sprinkle lightly with salt and pepper. Roast tomatoes for 20-25 minutes, until tomatoes are soft and releasing some of its juice. Let cool.

Reduce oven temperature to 375 degrees F. Place pine nuts on a rimmed sheet pan, and toast in oven until golden brown, about 5 minutes. Let cool.

Meanwhile, bring a large pot of salted water to boil. Stir in pasta, and adjust heat to maintain a low boil. Cook for two minutes longer than the package instructions. Drain and rinse pasta in cold water until the pasta is no longer warm.

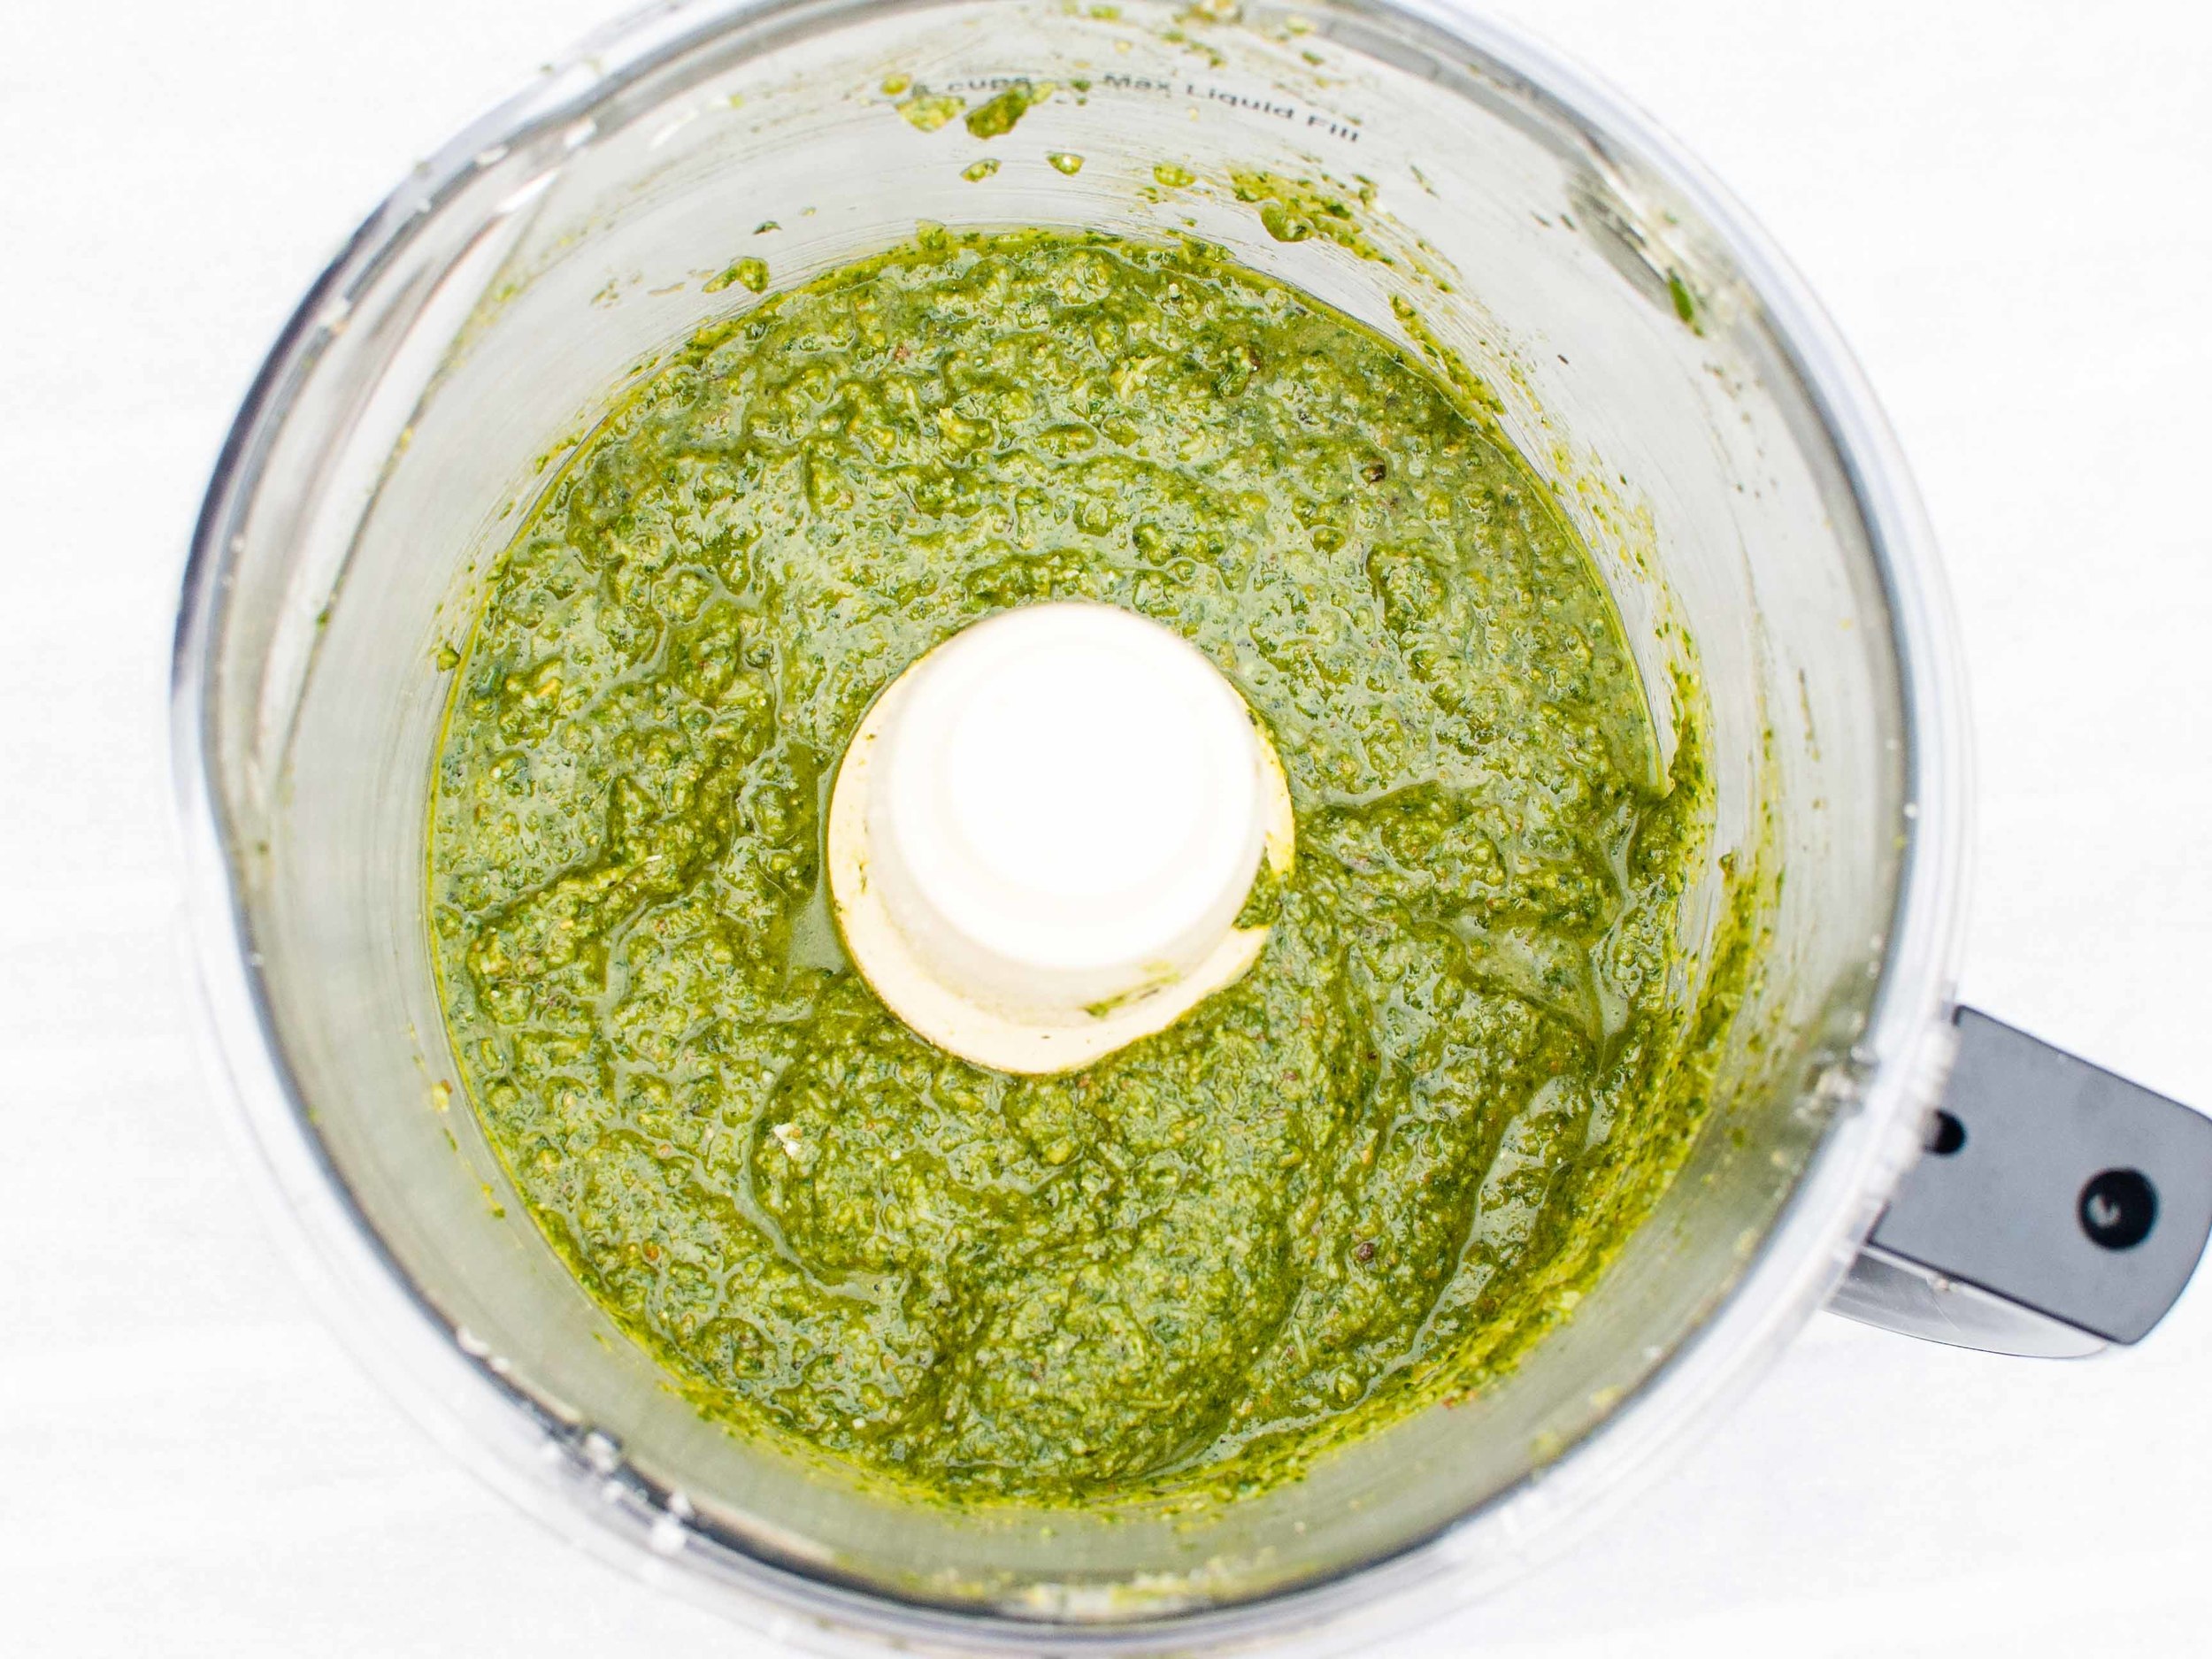
Make pesto: Combine 1/2 cup toasted pine nuts, parmesan, basil leaves, and garlic in a food processor or blender. Process until a paste is formed, stopping to scrape the container down as needed. With the motor running, drizzle in 1 cup olive oil, and process until the oil is fully incorporated and pesto is smooth.

In a large mixing bowl, combine pasta, pesto, chopped parsley, sliced green onions, and remaining toasted pine nuts until pasta is evenly coated. Add half of the roasted tomatoes and half the mozzarella and toss to combine. Taste and adjust seasoning with additional salt and freshly ground pepper. Pour pasta salad into a large serving bowl, and arrange the remaining tomatoes and mozzarella on top. Serve at room temperature.

Polenta Cake with Olive Oil and Lemon by Amy Cantu

Print Friendly and PDF

I had this lemony, moist, squidgy, lightly gritty polenta cake stuck in my head. I knew just how I wanted it to look, taste, and feel in my mouth, but I was having trouble actually baking it. This one took three tries, but the results were totally worth it. I tried it as a loaf cake first, but the middle kept sinking, and the top was unattractively mottled dark brown. The Polenta Cake might seem plain Jane and suspiciously like cornbread, but I promise that its humble looks are deceiving. The olive oil and yogurt keep this Polenta Cake moist and just a bit dense, the lemon lends a bright citrusy flavor, and the polenta adds texture and earthiness. I love it on its own as a snack cake, (I'm determined to make "snack cake" a cake genre,) drizzled with a lemon glaze, in a trifle, or as it is here - topped with billows of lightly sweetened whipped cream and ripe summer fruit. The genius of Polenta Cake with Olive Oil and Lemon is in its simplicity.

Notes: Polenta Cake with Olive Oil and Lemon is perfect for making a Berry Trifle because it's sturdy and textured enough to hold together under the many layers, but also moist and delicious all on its own. If you're not feeding a crowd, the cake can just as easily be sliced into squares and topped with whipped cream (or ice cream!) and any in-season fruit. In the winter, it would be lovely with poached pears or an apple-cinnamon compote - YUM!


Active time: 5 minutes, Inactive time: 35 minutes
Yield: One 9 x 9" cake

1 cup flour
1/2 cup polenta
2 teaspoons baking powder
1/2 teaspoon kosher salt
1 cup plain whole-milk yogurt
1 cup granulated sugar
3 eggs
2 teaspoons grated lemon zest
1/2 teaspoon vanilla extract
1/2 cup olive oil, plus extra to grease the cake pa

Preheat oven to 350 degrees F. Grease a 9 x 9" metal cake pan with cooking spray or olive oil. Line the bottom and two sides with parchment paper, and grease the parchment paper again. Set aside.

Whisk together flour, polenta, baking powder, and salt in a medium bowl.

In a separate large bowl, whisk together yogurt, sugar, eggs, lemon zest, vanilla, and olive oil. Slowly whisk the dry ingredients into the wet ingredients, until just mixed together with no dry spots.

Pour cake batter into the prepared pan and bake for 30-35 minutes, or until a toothpick poked into the center of the cake comes out clean. Let cool completely before slicing. Cut into squares and serve with whipped cream and berries or use to make Berry Trifle.

Recipe inspired by Ina Garten's Lemon Yogurt Cake.

Berry Trifle by Amy Cantu

Print Friendly and PDF

It's summer! Finally! I'm basking in the warmth of the sun. I'm in love with all the brightly colored produce at the farmer's market. The berries are local, sweet-as-candy, and a deep, ripe red. The blueberries pop in my mouth, surrendering their sweet juices. The raspberries are vibrantly tart and sweet. It's the perfect time to have a barbecue (or at least a supper out on the patio,) to celebrate the season! I need a simple dessert that tastes like the height of summer, and this red, white, and blue-hued Berry Trifle is just that. Fresh vibrant berries, clouds of whipped mascarpone cream, and squidgy pieces of cake come together in 15 minutes to create this dreamy Berry Trifle: An impressive, layered masterpiece that tastes as good as it looks. 

Notes: The only special equipment needed is a trifle dish (or a large glass bowl), so that the beautiful layers can be seen. Purchased pound cake or angel food cake make this a no-bake dessert, but Polenta Cake with Olive Oil and Lemon is perfect for this berry trifle and makes it extra-special. It's easy to make - just stir together the ingredients and bake. The Polenta Cake is extra moist from the olive oil and holds up well in the trifle layers thanks to it's sturdy texture from the polenta.


Time: 15 minutes
Servings: 8-10

3/4 pound raspberries
3/4 pound strawberries, tops removed and sliced
3/4 pound blueberries
1/4 cup granulated sugar, divided use
1/4 cup fresh orange juice, divided use
One recipe Polenta Cake with Olive Oil and Lemon or 9" loaf purchased pound cake, cut into 1-inch cubes
1/2 cup confectioners' sugar (powdered sugar)
1 teaspoon vanilla extract
1 pound (16 ounces) mascarpone cheese, at room temperature
Grated zest of 1 lemon
2 cups heavy cream
2 tablespoons seedless raspberry jam or currant jelly

Combine strawberries, 2 tablespoons sugar, and 2 tablespoons orange juice in a bowl. In a separate bowl, combine raspberries with remaining 2 tablespoons sugar and 2 tablespoons orange juice. Set bowls aside.

Using an electric mixer, whip together confectioners' sugar, vanilla extract, mascarpone cheese, and lemon zest at medium speed until well combined. Add heavy cream and continue to mix at high speed until the mixture is fluffy like whipped cream.

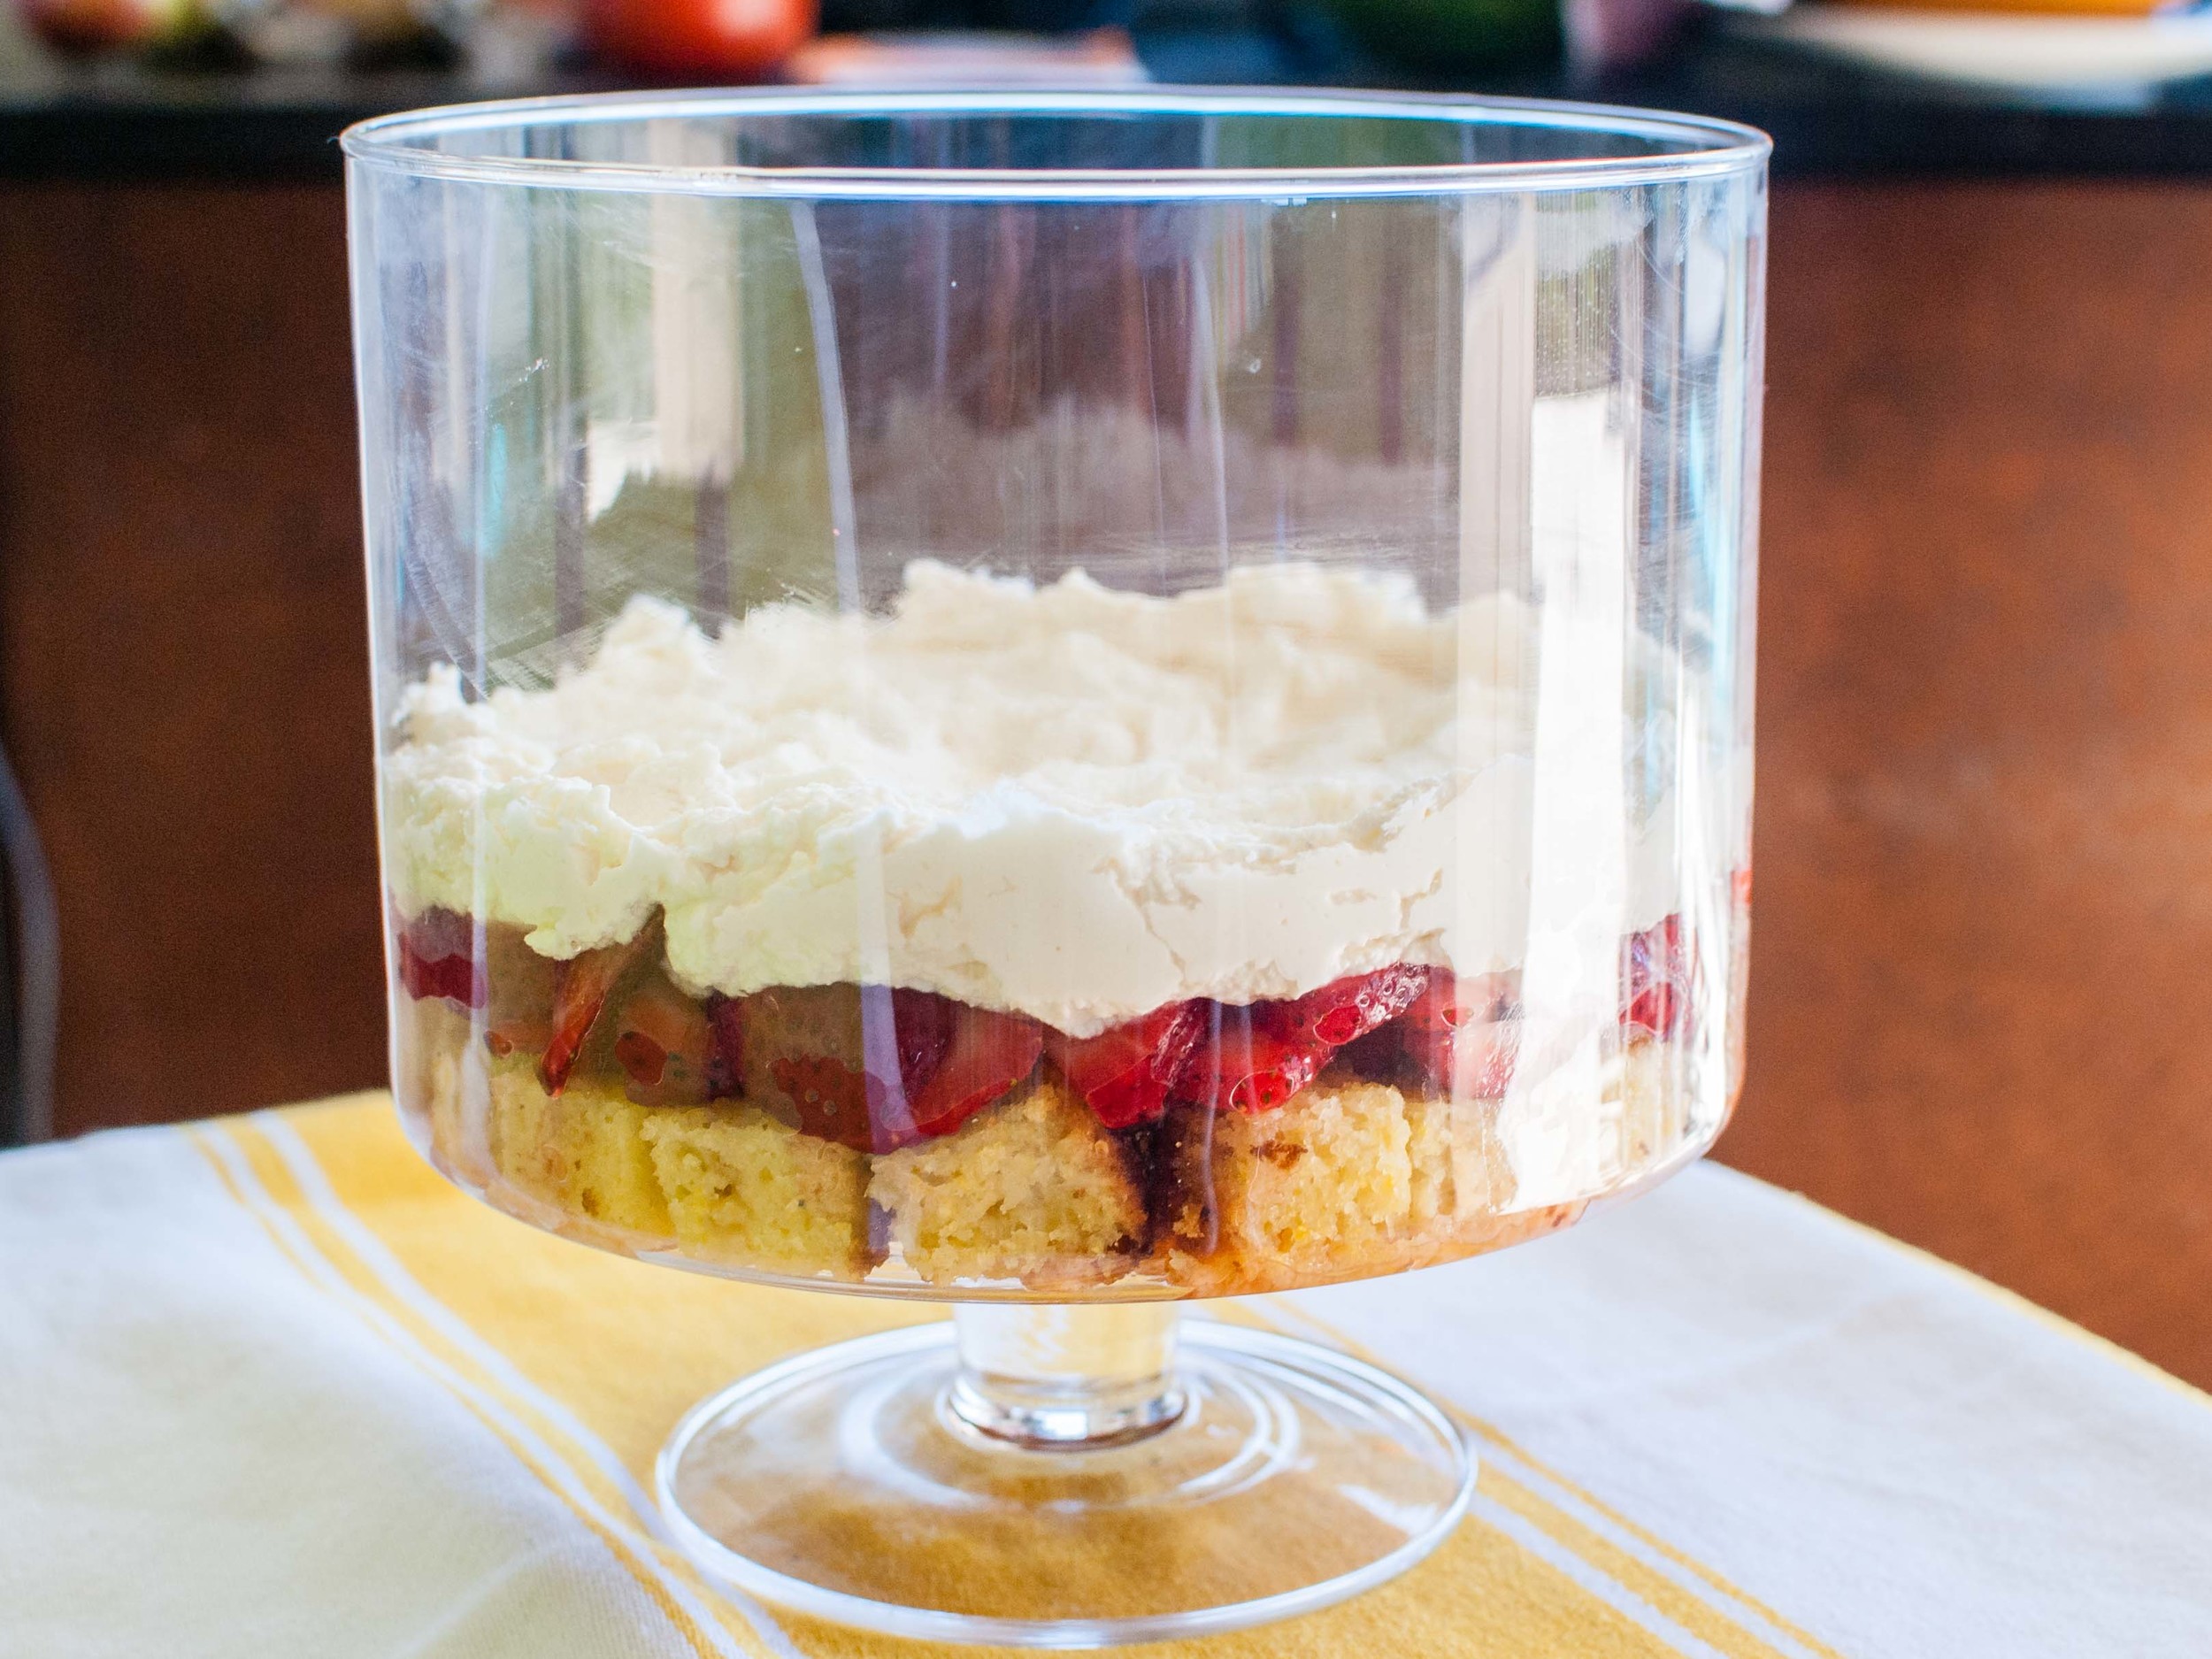
To assemble the trifle: Arrange 1/3 of the cake cubes into a 13-cup trifle dish (or a large glass bowl). Next, pour in the strawberries and spread to make an even layer. Spread 1/2 of the whipped mascarpone cream over the strawberries in an even layer. Arrange half of the remaining cake cubes evenly over the cream layer. Top the cake with all the raspberries to create another even layer. Spread the remaining whipped mascarpone cream over the raspberries. Add the remaining cake cubes evenly over the cream. For the final layer, distribute the blueberries evenly over the top.

Melt the jam in a small dish in the microwave or in a small saucepan over low heat. Using a pastry brush, anoint the blueberries with the melted jam to give them a sweet, glossy glaze. 

Cover and refrigerate for at least 1 hour before serving.

Salted Maple-Oat Scones by Amy Cantu

Print Friendly and PDF

The first time I ever made these scones was in the year 2000, and I was still in college. I had just purchased Ina Garten's The Barefoot Contessa Cookbook on a whim because the full-page color photos called to me at the bookstore (this was before everyone bought everything on Amazon). I saw her "Maple-Oatmeal Scones" and immediately needed to bake them. Like right that moment. I had a big midterm paper due the next day, but I needed a study snack, right?! Yes. I really, really needed these scones. I had never made scones before - it was a bit daunting. I imagined hard, brown stones coming out of the oven, but the photo of the scones was so enticing, that I just had to try. They were not dry - instead, these Maple-Oat Scones were a tender, small miracle. They are at once earthy and decadent - the oats and whole-wheat flour provide extra "health", texture, and flavor; but the butter and maple syrup ensure that these scones are still an indulgent treat. The addition of coarse salt sprinkled on top balances out the sweet maple glaze. In good faith, I've tried baking other maple-oat scone recipes or sampling them at bakeries, but these are still the best ones that I've found. And for the record, they were also the perfect study snack: it helped me score a big fat "A" on that English midterm.

Notes: This recipe is an old, tried and true friend from my early days of cooking. Ina Garten's The Barefoot Contessa Cookbook was one of my early cookbook muses, with her easy-to-follow recipes, bright enthusiasm, and beautiful, large photos that convinced me that I could and needed to cook each recipe. The original recipe called for a sprinkle of raw oats on top for garnish, but I like the update of a sprinkling of coarse salt instead. The salty-sweet craze is one of my favorite food fads that I'm willing to embrace whole-heartedly, and it works perfectly with these scones!

I rarely have buttermilk just hanging out in the fridge, so I substitute with a mix of milk and vinegar. Stir 2 teaspoons of white vinegar or lemon juice into 1/2 cup of milk (or 1 tablespoon vinegar and 1 cup milk) and let sit for a minute or two, until slightly thickened. Voila - "buttermilk" for use in baked goods and pancakes!

Lastly, this recipe makes a lot of scones. Ina's original recipe suggest 14 (very) large scones, but I find that it makes more like 20 medium scones. I have adjusted the baking time for the smaller size, but if you want to make mini scones, reduce the baking time by a few minutes, or if making the large size, add a few minutes. The fully baked scones (without the glaze) can be cooled to room temperature and frozen. Reheat frozen scones in a 350 degree Fahrenheit oven for 8-10 minutes (mini scones may only need 5-8 minutes). Unbaked scones can also be frozen - place on a baking sheet and freeze until solid (about 1 hour). Transfer to an airtight container to store in the freezer. To bake, pop as many frozen scones as needed onto a baking sheet and add an extra 5 minutes or so to the baking time. Don't forget to glaze them after they come out of the oven!


Read More: The Shared Scones


Time: 1 hour
Yield: About 20 scones

For the Scones:
3 1/2 cups all-purpose flour
1 cup whole-wheat flour
1 cup quick-cooking oats
2 tablespoons baking powder
2 tablespoons granulated sugar
2 teaspoons salt
1 pound cold unsalted butter, diced
1/2 cup cold buttermilk
1/2 cup pure maple syrup (preferably grade B)
4 eggs, lightly beaten
1 egg beaten with 1 tablespoon milk or water, for egg wash
Maple Glaze (see recipe below)
Coarse salt for sprinkling on top (such as Fleur de Sel, Sel Gris, or Coarse Sea Salt)

Preheat the oven to 400 degrees F.

In the bowl of an electric mixer fitted with a paddle attachment, combine the flours, oats, baking powder, sugar and salt.

Blend the cold butter in at the lowest speed and mix until the butter is in pea-size pieces.

Combine the buttermilk, maple syrup and eggs and add quickly to the flour-and-butter mixture. Mix until just blended. The dough will be sticky.

Dump the dough out onto a well-floured surface and be sure it is combined. Flour your hands and a rolling pin and roll the dough 3/4 to 1 inch thick. You should see lumps of butter in the dough.

Cut into 3-inch rounds with a plain or fluted cutter and place on a baking sheet lined with parchment paper.

Brush the tops with egg wash. Bake for 15 to 20 minutes, until the tops are crisp and the insides are done.

When the scones are done, cool for 5 minutes and drizzle each scone with 1 tablespoon of the Maple Glaze (recipe below). Sprinkle a bit of coarse salt on the top, for garnish. The warmer the scones are when you glaze them, the thinner the glaze will be.

Maple Glaze

1 1/4 cups confectioners' sugar
1/2 cup pure maple syrup (preferably grade B)
1 teaspoon pure vanilla extract

To make the glaze, combine the confectioners' sugar, maple syrup and vanilla. 

Rosemary-Cheddar Scones by Amy Cantu

Print Friendly and PDF

Scones seem like a special treat in a way that muffins seem ordinary. Don't get me wrong, I will never turn down a good muffin, but a scone is a bakery good that I eat slowly and savor with a big mug of coffee or tea. (I can't be bothered with those dainty tea cups at home.) These Rosemary-Cheddar Scones are stuffed with little cubes of cheddar cheese that ooze out when baked to form lacy, crunchy bits of crispy cheese around the scone. This might be my favorite part. It's like the bit of crunchy cheese that's left at the bottom of a fondue pot, or the cheese that escapes a grilled cheese sandwich onto the griddle. The Rosemary-Cheddar Scone itself is moist and tender, flecked with bits of fragrant rosemary, and happily cheesy. (Please don't compare these to the dry hockey puck scones that seem to be everywhere. Those scones are an abomination and should be banned from being sold.) Getting me up in the morning is like waking a sleeping monster, but this monster absolutely will get up early to bake these scones, because the results are so worth it!

Notes: This recipe is an old, tried and true friend from my early days of cooking. Ina Garten's The Barefoot Contessa Cookbook was one of my early cookbook muses, with her easy-to-follow recipes, bright enthusiasm, and beautiful, large photos that convinced me that I could and needed to cook each recipe. The original recipe called for dill, but I have substituted any fresh herb that I have hiding in the fridge - rosemary, chives, thyme, tarragon, etc. are all delicious. I happen to have an enormous rosemary bush in the backyard, so it's a convenient choice for me! Other delicious add-ins could be bacon bits, peeled and diced apple, jalapeño pepper, sun-dried tomatoes, or corn. You can also vary the type of cheese - brie, gruyere, mozzarella, jack . . . the possibilities are endless.

Lastly, this recipe makes a lot of scones. Ina's original recipe suggest 16 (very) large scones, but I find that it makes more like 24 medium scones. I have adjusted the baking time for the smaller size, but if you want to make mini scones, reduce the baking time by a few minutes, or if making the large size, add a few minutes. The fully baked scones can be fully cooled and frozen. Reheat frozen scones in a 350 degree Fahrenheit oven for 8-10 minutes (mini scones may only need 5-8 minutes). Unbaked scones can also be frozen - place on a baking sheet and freeze until solid (about 1 hour). Transfer to an airtight container to store in freezer. To bake, pop as many frozen scones as needed onto a baking sheet and add an extra 5 minutes or so to the baking time.


Read More: The Shared Scones


Time: 45 minutes
Yield: About 24 scones
 
4 cups plus 1 tablespoon all-purpose flour, divided
2 tablespoons baking powder
2 teaspoons salt
3/4 pound cold unsalted butter, diced
4 eggs, beaten lightly
1 cup cold heavy cream
1/2 pound extra-sharp yellow Cheddar, small-diced
1/3 cup minced fresh rosemary leaves
1 egg beaten with 1 tablespoon water or milk, for egg wash

Preheat the oven to 400 degrees F.

Combine 4 cups of flour, the baking powder, and salt in the bowl of an electric mixer fitted with a paddle attachment. 

Add the butter and mix on low speed until the butter is in pea-sized pieces. Mix the eggs and heavy cream and quickly add them to the flour-and-butter mixture. Combine until just blended.

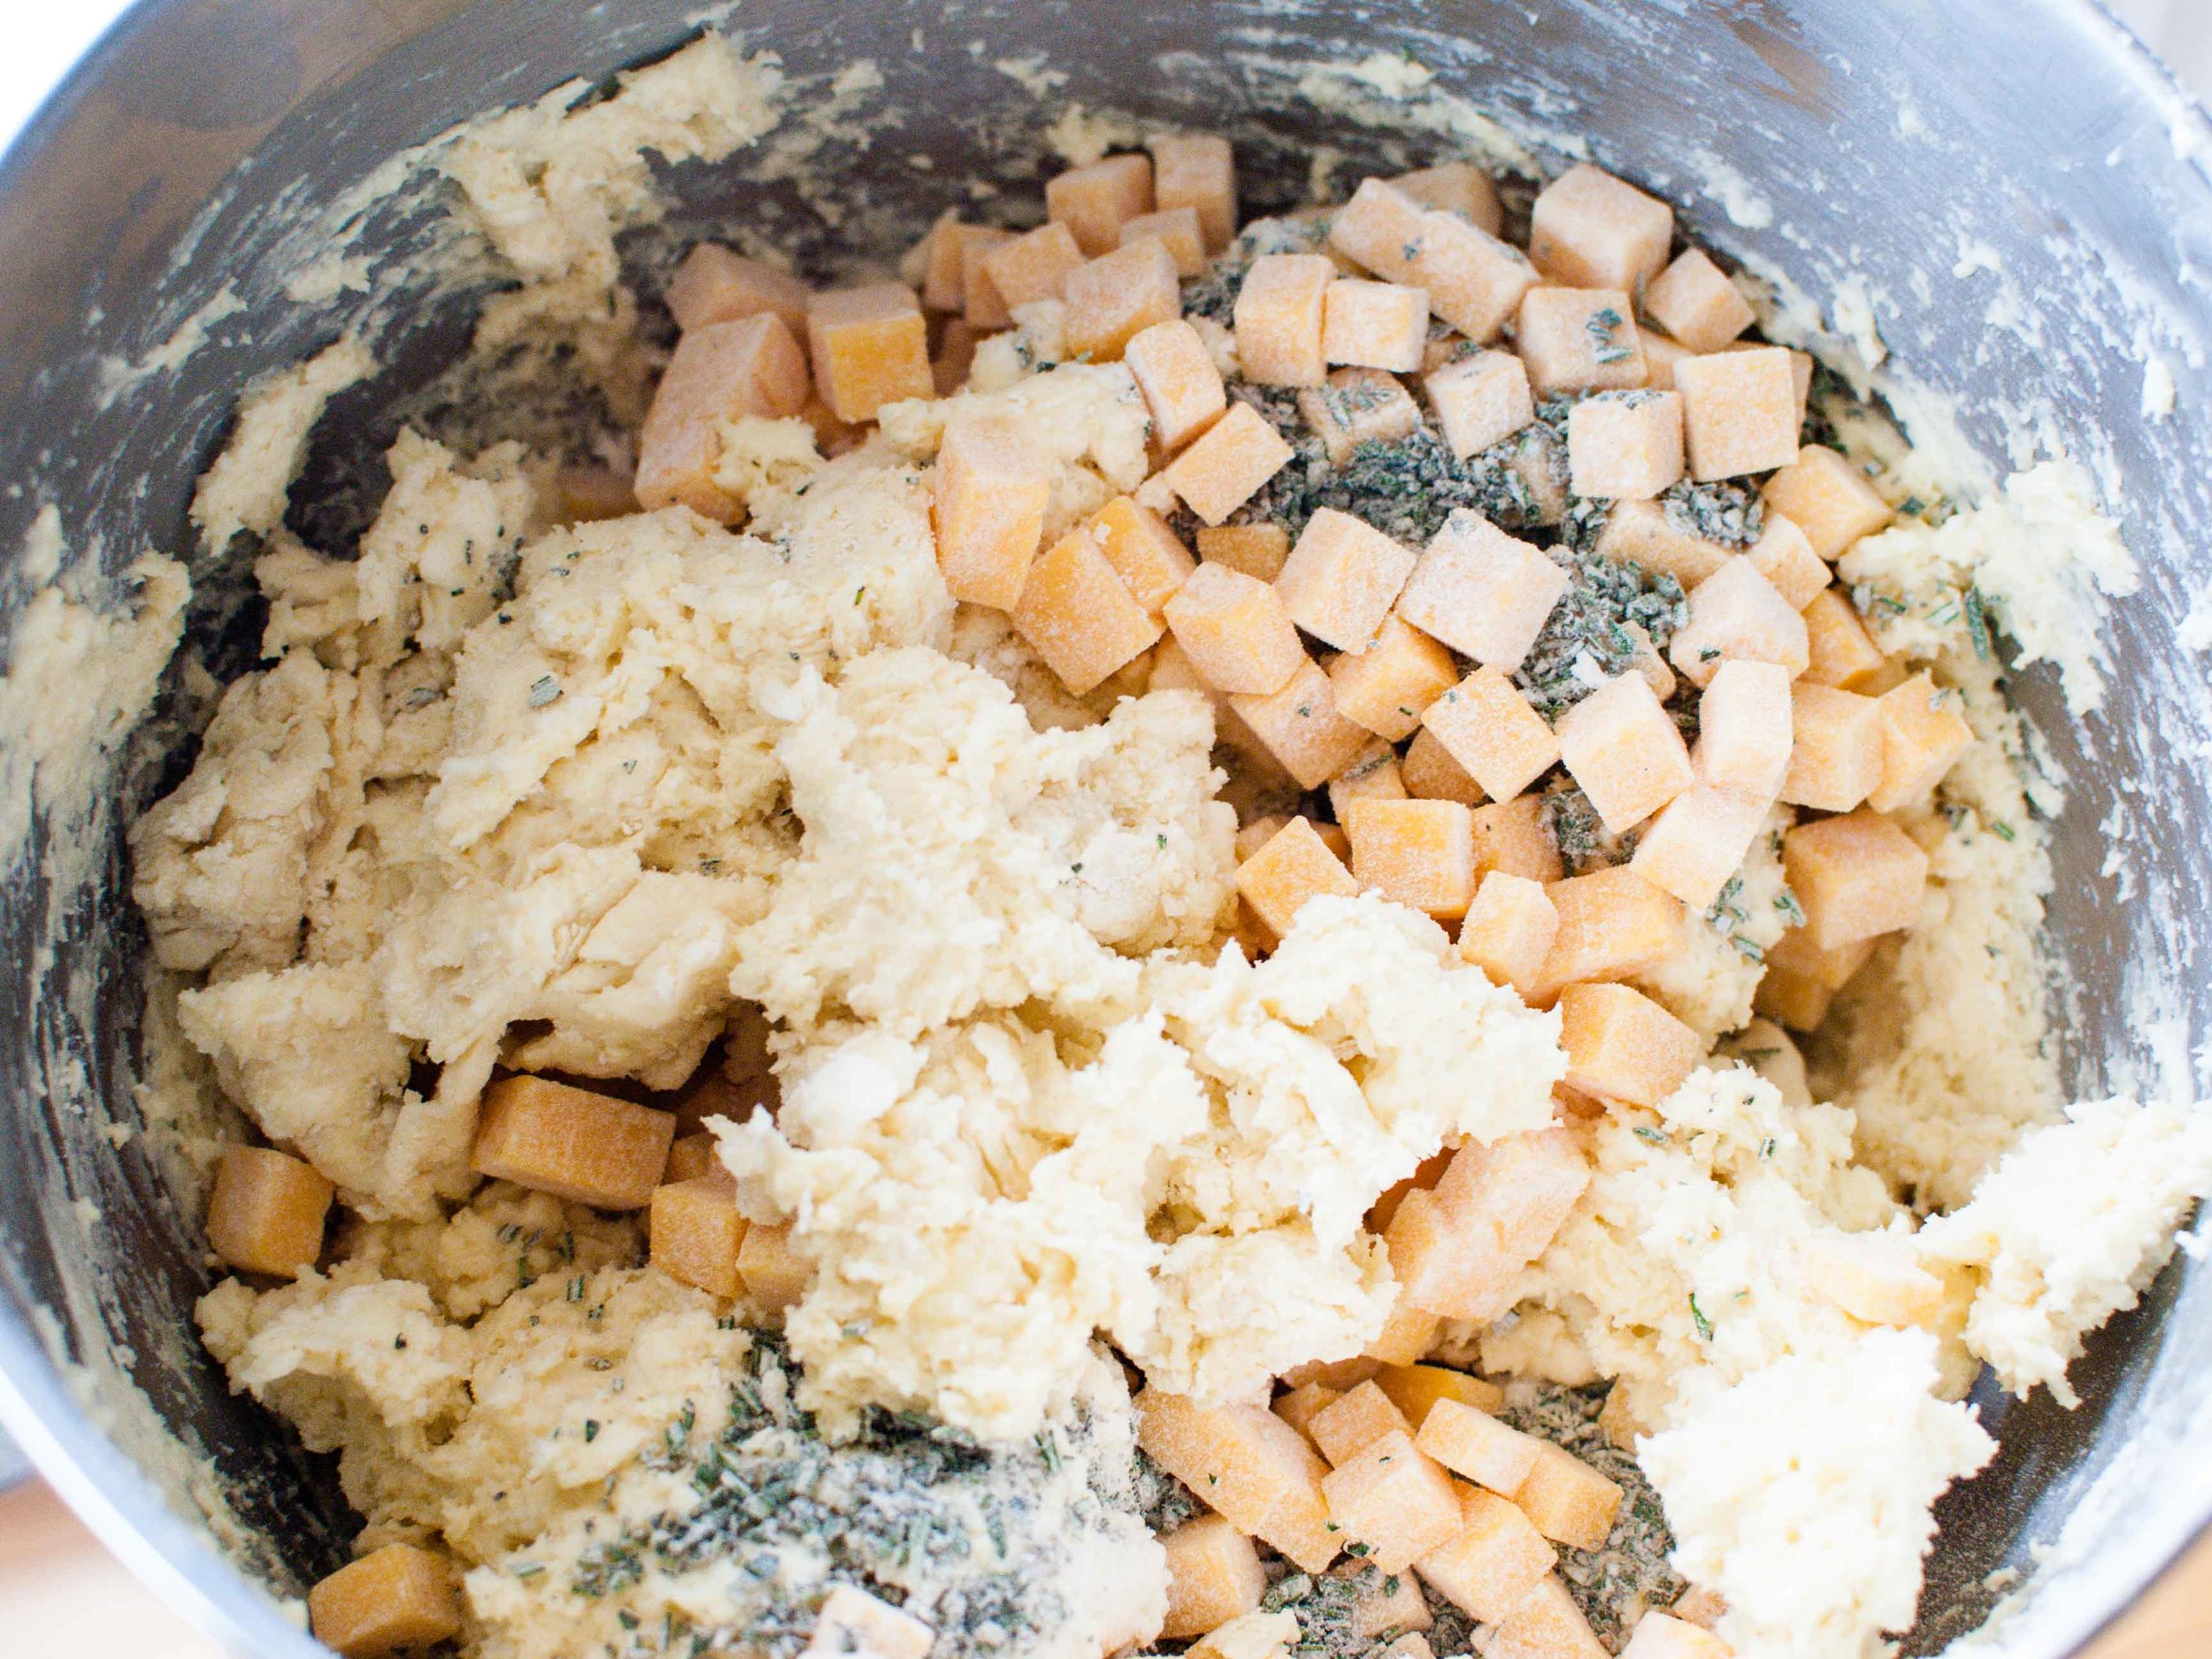
Toss together the Cheddar, rosemary, and 1 tablespoon of flour and add them to the dough. Mix until they are almost incorporated.

Dump the dough onto a well-floured surface and knead it for 1 minute, until the Cheddar and rosemary are well distributed.

Roll the dough 3/4-inch thick. Cut into 3-inch squares and then in half diagonally to make triangles. Brush the tops with egg wash.

Bake on a baking sheet lined with parchment paper for 15 to 20 minutes, until the outside is crusty and golden, and the inside is fully baked.

Rice Salad With Nuts and Sour Cherries by Cynthia Raub

Print Friendly and PDF
rice salad with nuts and sour cherries

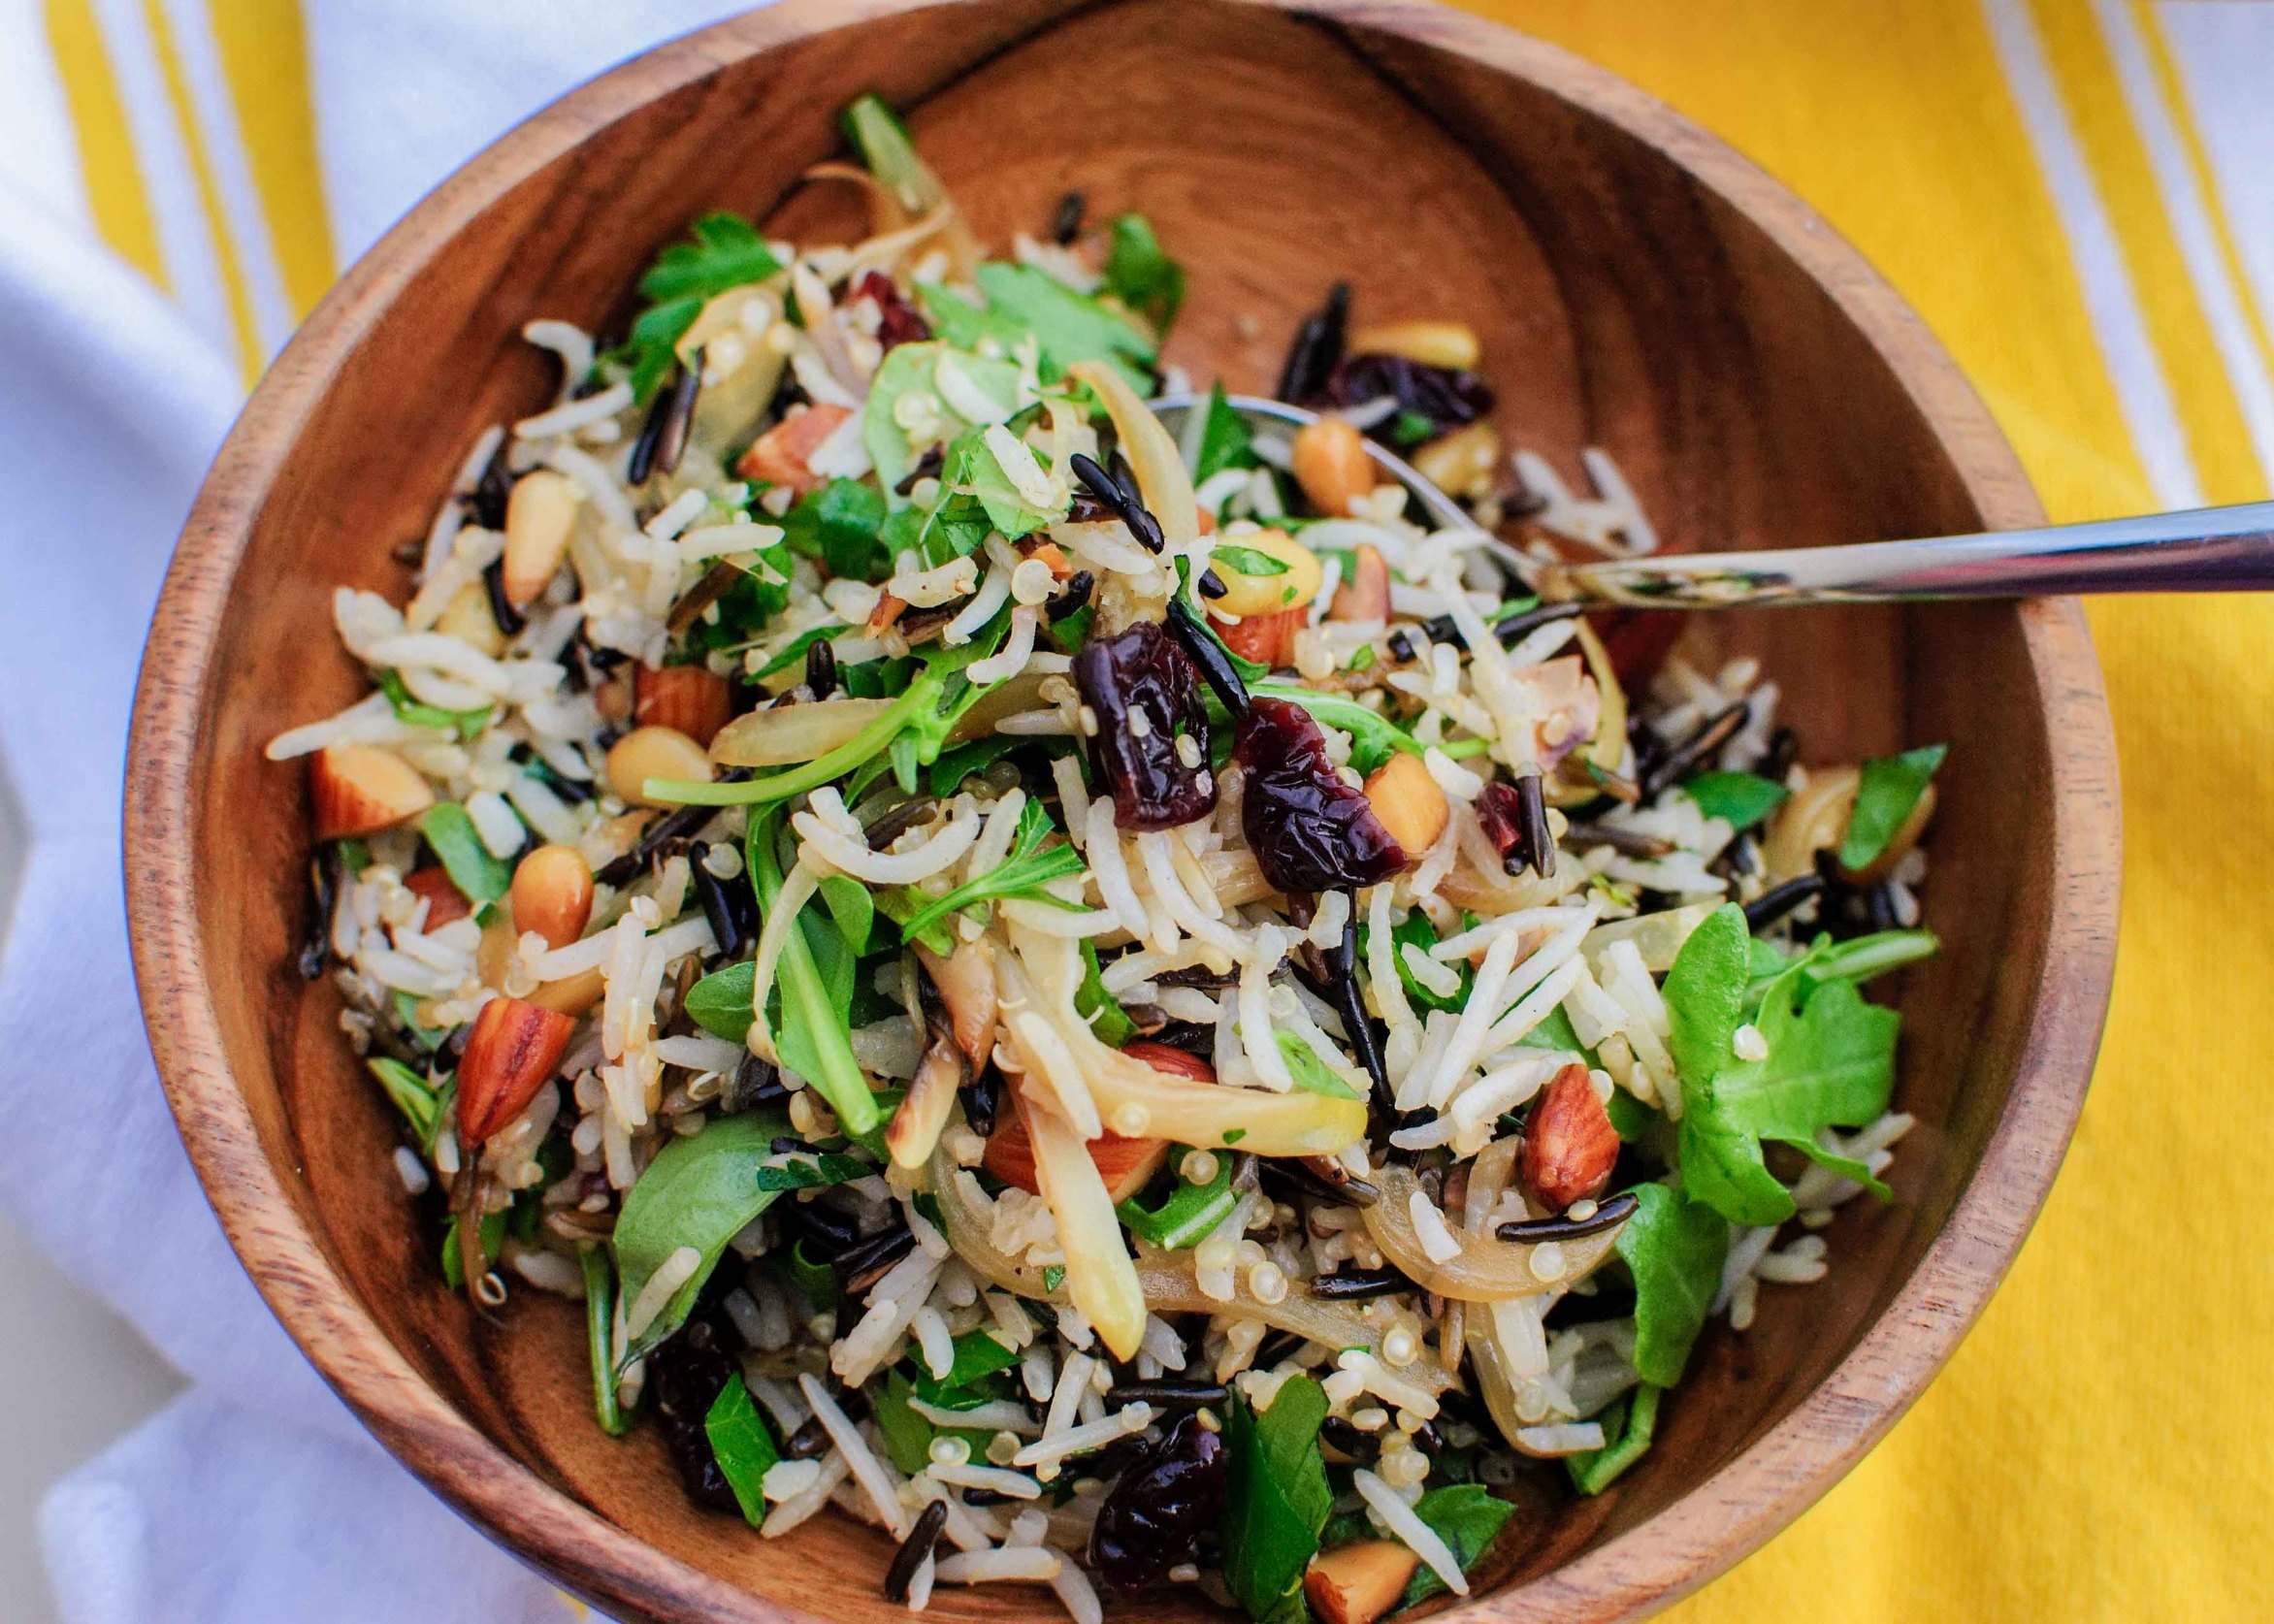
I love me a rice salad. A bit ago, I cooked a Korean meal for us complete with Seafood and Green Onion Pancake (Pa Jun) and a Soft Tofu Stew (Soondoobu Jjigae). Bi Bim Bap is also a traditional Korean dish with rice, various barely-cooked vegetables and topped with an egg. I like to describe Bi Bim Bap as a rice salad dressed with a browned and runny egg. This is what attracted me so much to this recipe: the various textures, temperatures and flavors make for an elegant statement dish. Ottolenghi' rice salad is nutty from the rice and quinoa, crunchy and rich from two kinds of nuts, and has a surprising subtle sweetness courtesy of the cherries and browned onions. Finished with herbs and spicy arugula for brightness, it's a wonderful side dish to practically anything.

Notes: This recipe yields a staggering amount of food. As written, it is at least 8 if not 12 generous servings. Tart dried cherries may be cumbersome to acquire, so I think that dried cranberries or even dried apricot would be complementary substitutes. This is a wonderful dish to bring to a potluck or a holiday gathering because of its versatility and because it makes such a large amount.


Scant 1 cup/150 g wild rice
Scant 1 1/4 cup/220 g basmati rice
5 1/2 tbsp/80 ml olive oil
2/3 cup/100 g quinoa
6 1/2 tbsp/60 g almonds, skins on, coarsely chopped
7 tbsp/60 g pine nuts
1/4 cup/60 ml sunflower oil
2 medium onions, thinly sliced (about 3 cups/320 g)
1 cup/30 g flat-leaf parsley leaves, coarsely chopped
2/3 cup/20 g basil leaves, coarsely chopped
1/3 cup/10 g tarragon leaves, coarsely chopped
2 cups/40 g arugula
2/3 cup/80 g dried sour cherries
1/4 cup/60 ml lemon juice, plus the grated zest of 1 lemon
2 cloves garlic, crushed
Salt and black pepper

Place the wild rice in a saucepan, cover with plenty of water, bring to a boil, and then turn down to a gentle simmer and cook for 35 minutes, until the rice is cooked but still firm. Drain, rinse under cold water, and set aside to dry.

Mix the basmati rice with 1 tablespoon of the olive oil and 1/2 teaspoon salt. Place in a saucepan with 1 1/3 cups/ 330 ml of boiling water, cover, and cook over the lowest possible heat for 15 minutes. Remove from the heat, place a tea towel over the pan, replace the lid, and set aside for 10 minutes. Uncover and allow to cool down completely.

Bring a small saucepan of water to a boil and add the quinoa. Cook for 9 minutes, then drain into a fine sieve, refresh under cold water, and set aside.

Place the almonds and pine nuts in a small pan with 1 tablespoon of the olive oil and a pinch of salt. Cook over medium-low heat for about 5 minutes, stirring frequently. Transfer to a small plate as soon as the pine nuts begin to color and set aside.

Heat the sunflower oil in a large sauté pan and add the onions, 1/4 teaspoon salt, and some black pepper. Cook over high heat for 5 to 8 minutes, stirring often, so that parts of the onion get crisp and others just soft. Transfer to paper towels to drain.

Place all the grains in a large bowl along with the chopped herbs, arugula, fried onion, nuts, and sour cherries. Add the lemon juice and zest, the remaining 3 1/2 tbsp olive oil, the garlic, 1/2 teaspoon salt, and some pepper. Mix well and set aside for at least 10 minutes before serving.

Lentils with Broiled Eggplant by Amy Cantu

Print Friendly and PDF

Luxurious. I would not have ever imagined that I might describe a lentil salad this way, but luxurious is exactly the perfect word. Smoky, silky, creamy, spicy, and a bit tangy: All of these sensations tangle together into one luxurious bite after another. Eggplant can be sensual. Yes, I said it. The broiled eggplant lifts ordinary lentils into a sensual tizzy of textures and flavors, and I don't think I've been the same ever since! Please eat this. It's a feast of colors for the eyes, sustaining nutrients for the body, and sensual luxury for the mouth and tongue. I understand completely now why Yotam Ottolenghi's approach to treating and eating vegetables can become an obsessive experience. I am forever changed, and now seeking to cook every single recipe in his cookbooks. (Speaking of which, Cynthia shared Ottolenghi's Rice Salad with Nuts and Sour Cherries with us, and I will be making this immediately. So good.)

Notes: The smoky broiled eggplant is what makes this dish so special. Roasting them directly over a gas stove is the fastest way to cook them and achieve that smoky flavor, but it definitely made a mess that took scrubbing to clean up. If you can lay down aluminum foil around the flame to catch some of the drippings, that would help a lot, but this was hard to do with my particular stovetop. Using the oven broiler to roast the eggplant is a less messy alternative, but it does take an hour instead of 15 minutes. If you choose the broiler method, please ensure that you poke the eggplant all over with a small sharp knife, to allow steam to escape. Otherwise, the eggplant may explode all over the oven - an even bigger mess to clean up!

The harissa is optional, but I was so happy to have a jar of homemade harissa gifted to me from Cynthia. It elevated this already excellent lentil salad into something truly special.


Time: 45 minutes to 1 hour, 30 minutes (depending on your method for roasting the eggplant)
Servings: 4

2 medium eggplants
2 tablespoons top-quality red wine vinegar
salt and black pepper
1 cup small dark lentils (such as Puy or Castelluccio), rinsed
3 small carrots, peeled
2 celery stalks
1 bay leaf
3 thyme sprigs
1/2 white onion
3 tablespoons olive oil, plus extra to finish
12 cherry tomatoes, halved
1/3 teaspoon brown sugar
1 tablespoon each roughly chopped parsley, cilantro and dill
2 tablespoon crème fraîche (or natural yogurt, if you prefer)
2 tablespoons harissa (purchased or homemade), optional

To cook the eggplants on a gas stovetop, which is the most effective way: Start by lining the area around the burners with foil to protect them. Put the eggplants directly on two moderate flames and roast for 12 to 15 minutes, turning frequently with metal tongs, until the flesh is soft and smoky and the skin is burnt all over. Keep an eye on them the whole time so they don’t catch fire.

To broil the eggplants in an oven instead: pierce the eggplants all over with a sharp knife. (This creates exit points for the steam to escape the eggplant; otherwise, the eggplant will explode and make a giant mess!) Put them on a foil-lined tray and place directly under a hot broiler for 1 hour, turning them a few times. The eggplants need to deflate completely and their skin should burn and break.

Remove the eggplants from the heat. If you used an oven broiler, change the oven to its normal setting. Heat the oven to 275°F. Cut a slit down the center of the eggplants and scoop out the flesh into a colander, avoiding the black skin. Leave to drain for at least 15 minutes and only then season with plenty of salt and pepper and 1/2 tablespoon of the vinegar.

While the eggplants are broiling, place the lentils in a medium saucepan. Cut one carrot and half a celery stalk into large chunks and throw them in. Add the bay leaf, thyme and onion, cover with plenty of water and bring to the boil. Simmer on a low heat for up to 25 minutes, or until the lentils are tender, skimming away the froth from the surface from time to time. Drain in a sieve. Remove and discard the carrot, celery, bay leaf, thyme and onion and transfer the lentils to a mixing bowl. Add the rest of the vinegar, 2 tablespoons of the olive oil and plenty of salt and pepper; stir and set aside somewhere warm.

Cut the remaining carrot and celery into 3/8-inch dice and mix with the tomatoes, the remaining oil, the sugar and some salt. Spread in an ovenproof dish and cook in the oven for about 20 minutes, or until the carrot is tender but still firm.

Add the cooked vegetables to the warm lentils, followed by the chopped herbs and stir gently. Taste and adjust the seasoning. Spoon the lentils onto serving plates. Pile some eggplant in the center of each portion and top it with a dollop each of crème fraîche or yogurt and harissa. Finish with a trickle of oil.

Lime Bars with Pistachio Crust by Amy Cantu

Print Friendly and PDF

One of my best friends often craves anything tart and citrusy, and has an especially deep love for key lime anything, as well as lemon bars. This recipe is undoubtedly for her. Not quite key lime pie and not quite lemon bars, these Lime Bars with Pistachio Crust are intensely creamy, cooling, tangy, and perfectly complemented by the nutty, sweet crust. This recipe is somewhat adapted from a Martha Stewart recipe for Key Lime Bars and also one I found for Lemon-Pistachio Bars on NYT Cooking. I found the Martha Stewart one, while delicious, always fell apart due to an overly delicate crust. So I loosely adapted a crust from the latter recipe to come up with this one. It holds together a bit better, but is still a creamy (even a bit gooey) bar.

Notes: Don't skip any of the cooling steps, or the bar will not hold together. The limey tanginess is fairly intense, so you can cut the bars into 16 small squares, rather than the 9 large squares I have pictured here - a little can go a long way! Make sure to store any leftovers (what??!) in the fridge.


Time: 20 minutes (active), 2 hours (inactive)
Yield: 9 large squares or 16 small squares

For the crust:
1 cup whole wheat pastry flour
1/4 cup wheat bran, toasted
1/4 cup confectioners' sugar
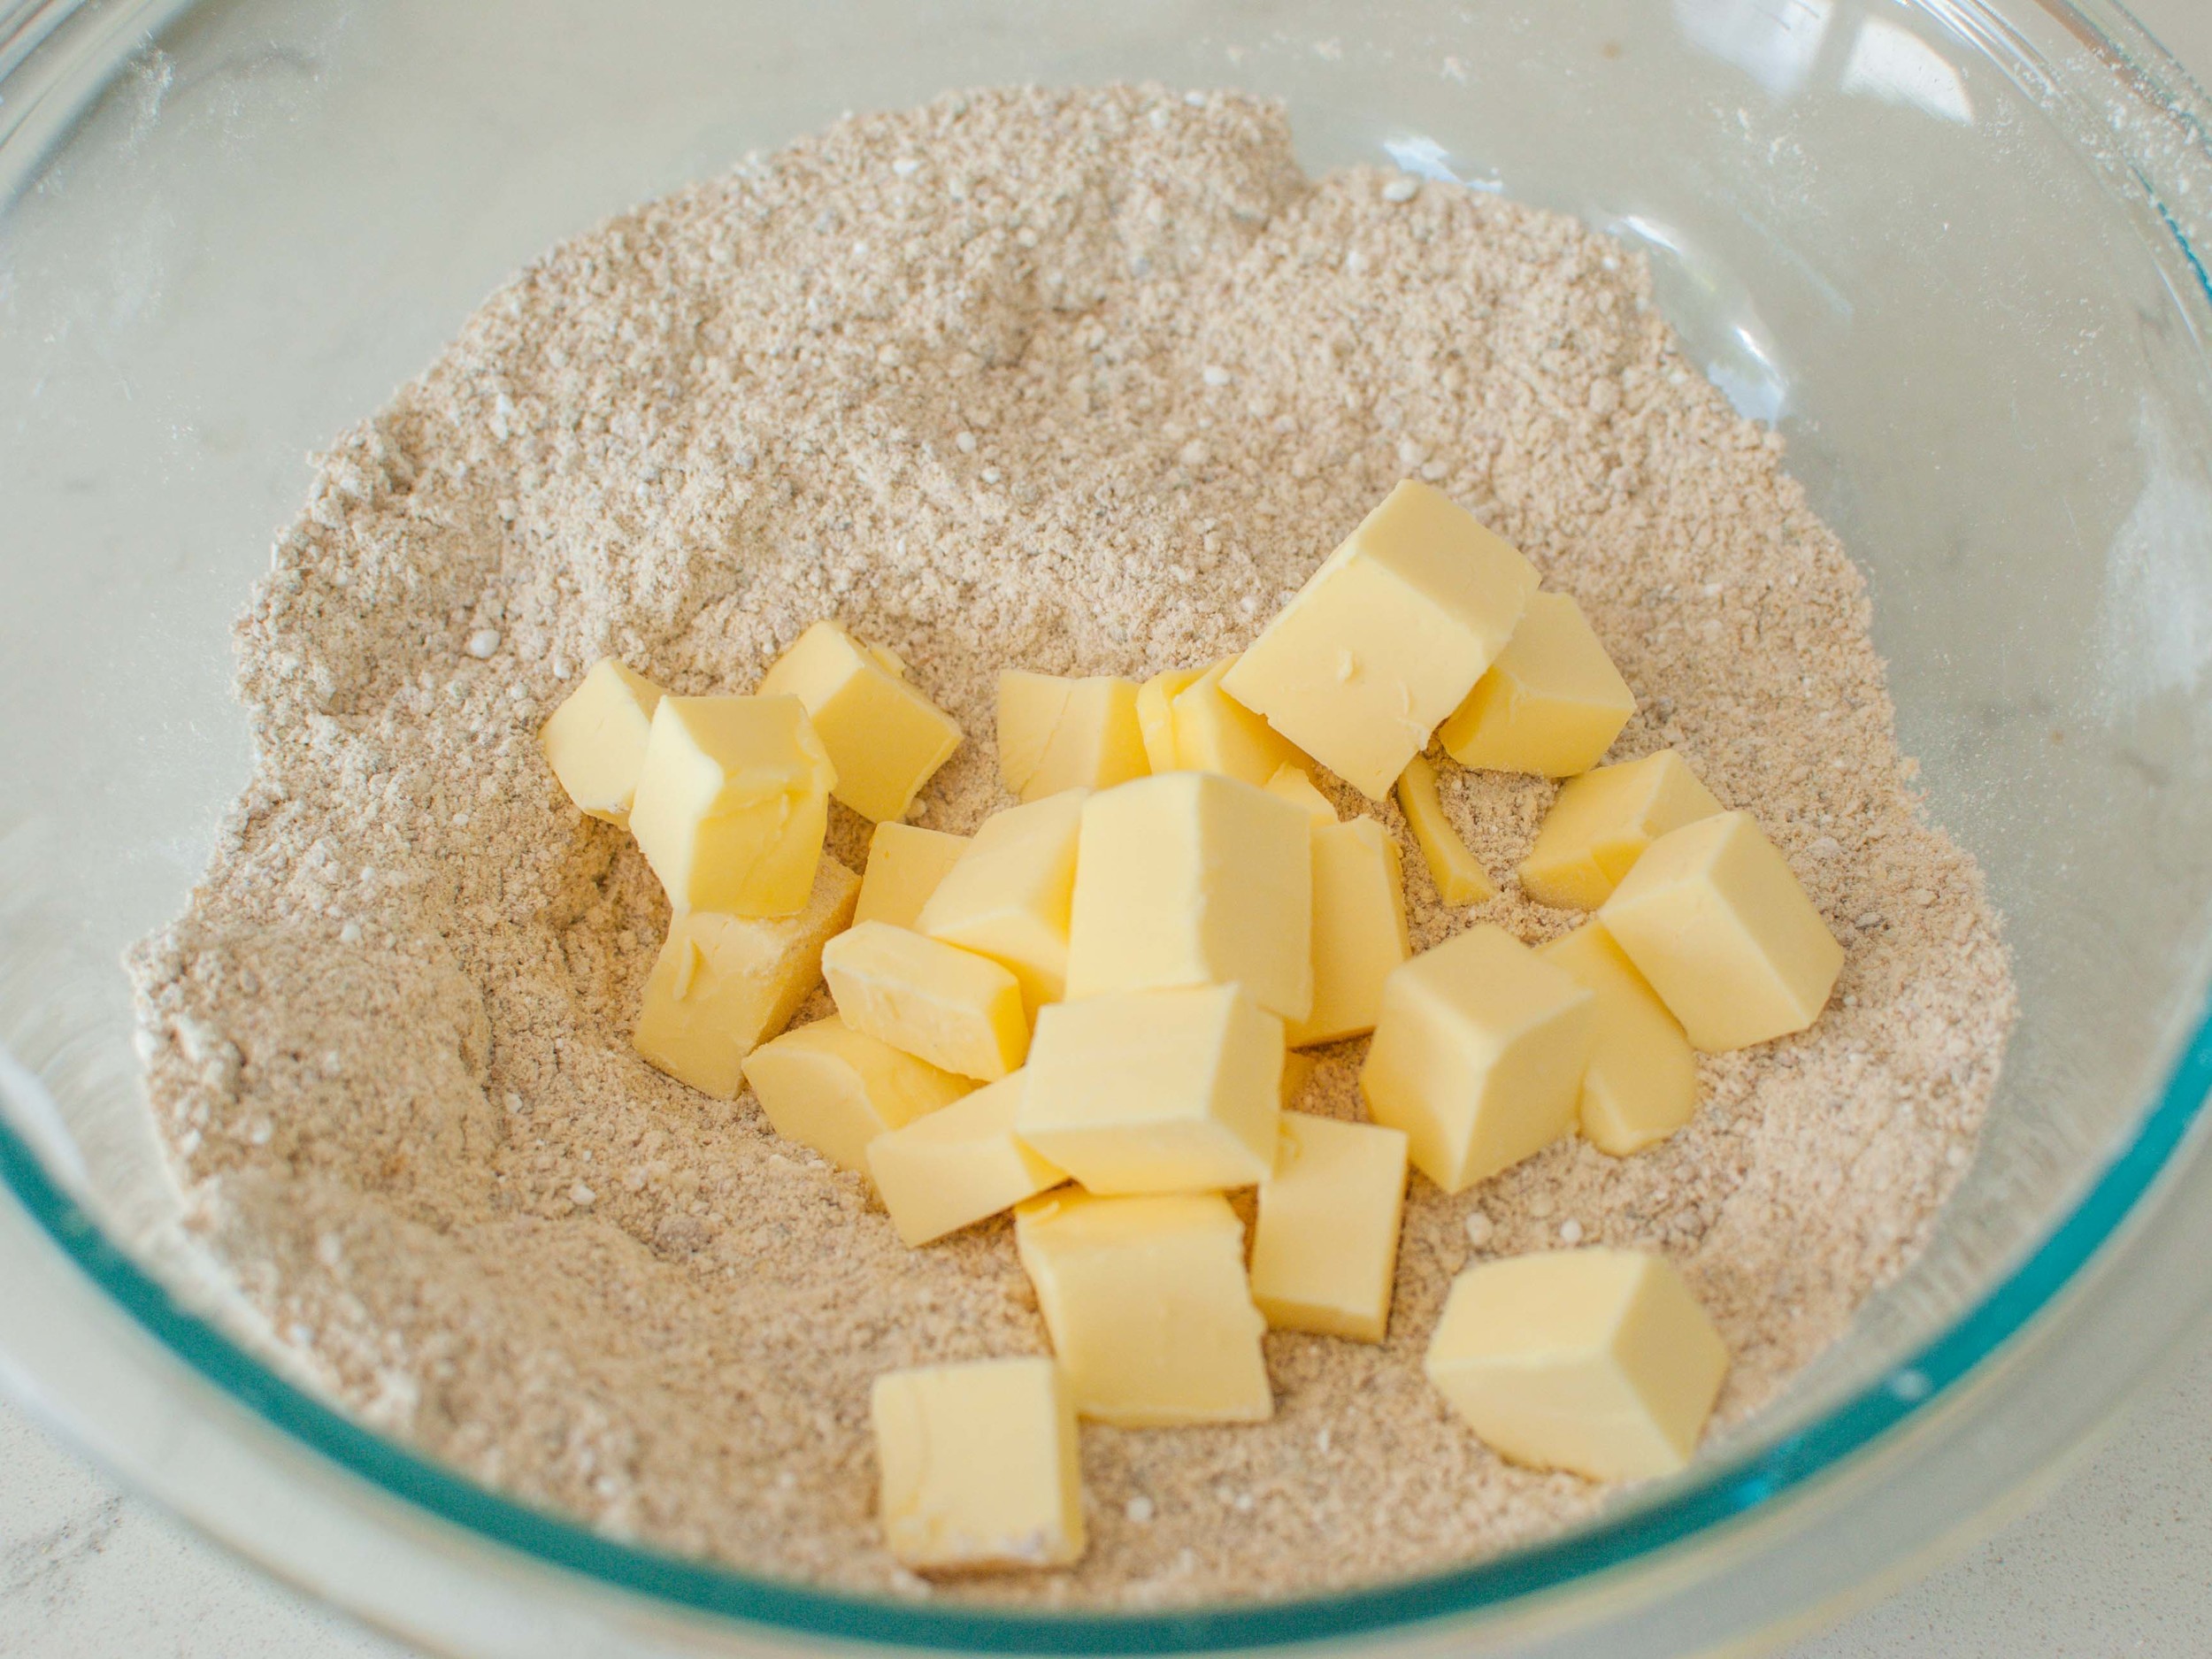
1/2 cup cold, unsalted butter, cut into small pieces
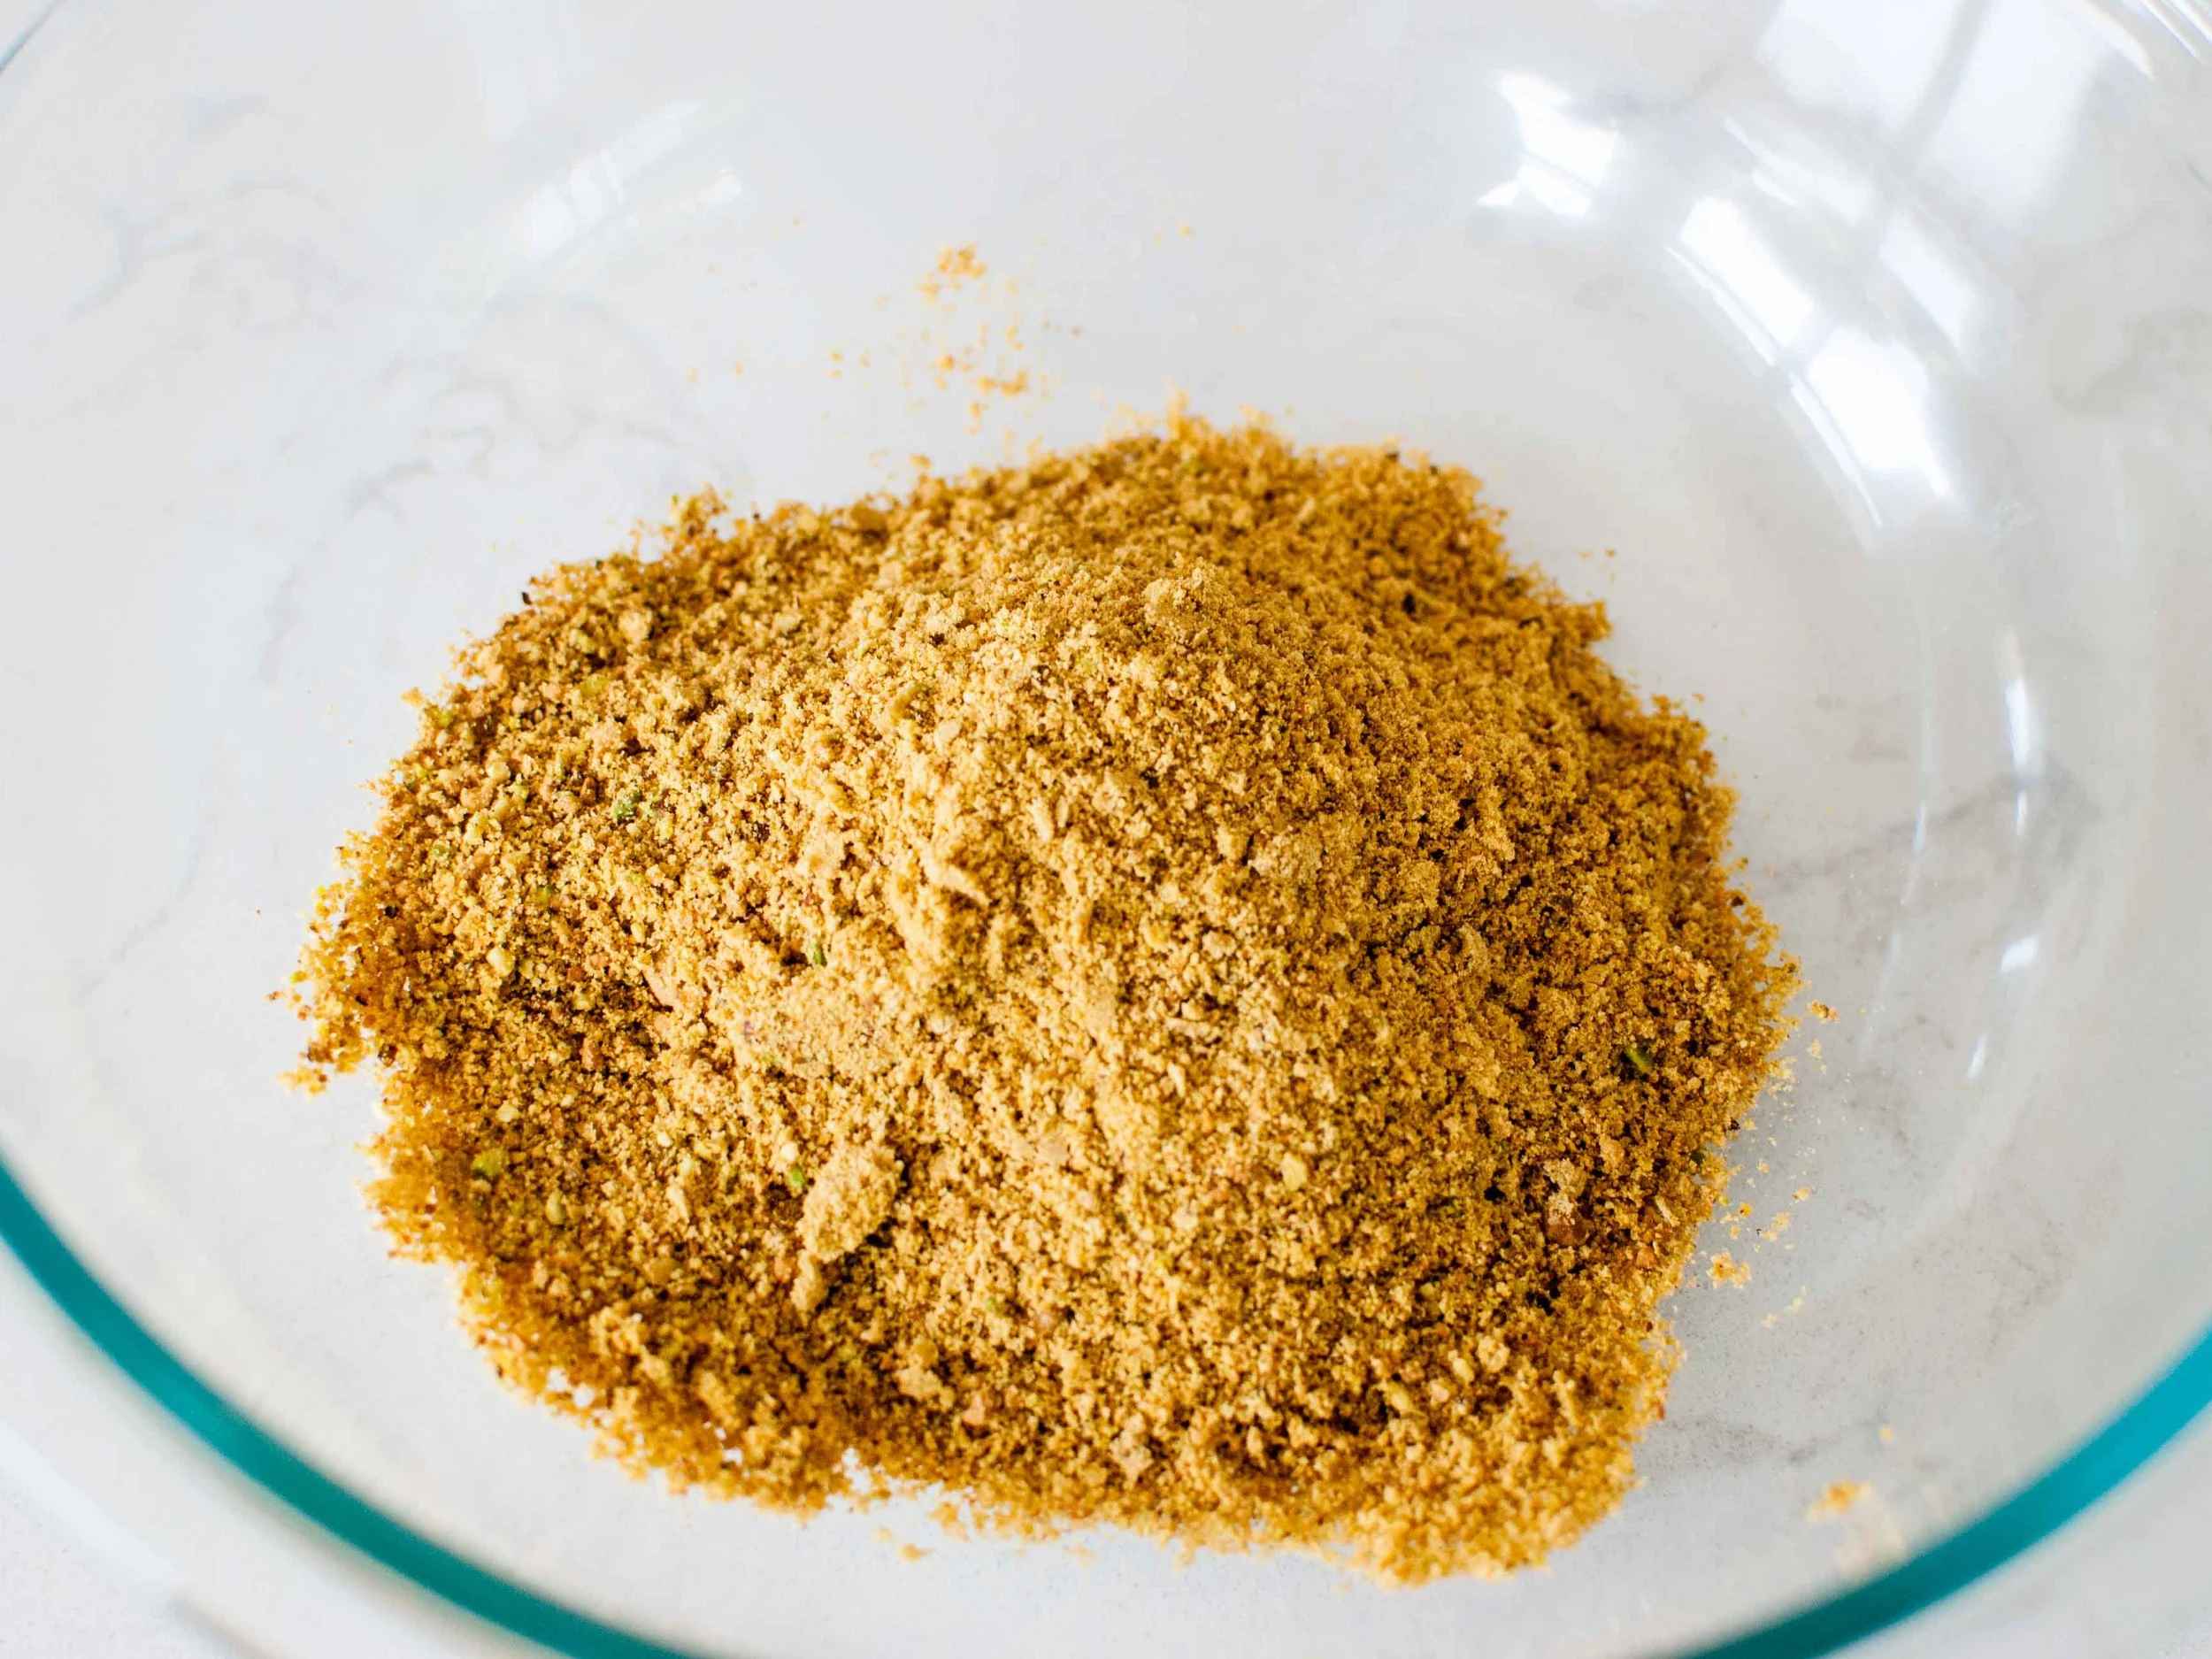
1/3 cup shelled salted pistachios, finely ground

For the filling:
2 large egg yolks
1 can (14 ounces) sweetened condensed milk
1/2 cup fresh lime juice
1 teaspoon finely grated lime zest

Preheat oven to 350 degrees.  Grease a n 8-inch square baking dish with non-stick cooking spray or  melted butter. Line bottom with parchment paper, leaving a 2-inch overhang on two sides.

In a small food processor or a clean coffee bean/spice grinder, finely grind pistachios.  In a large bowl, combine ground pistachios with flour, wheat bran, and sugar. Dump in the butter pieces and use your fingers to squish the butter pieces into the flour mixture, until everything looks like lumpy wet sand. You should still see streaks of butter.  (This can also be done completely in the food processor. Add all the dry ingredients and pulse until finely ground. Add butter and pulse a few times, until only pea-sized pieces of butter remain.) 

Press mixture into bottom and 1 inch up sides of prepared pan. Bake until lightly browned,  about 20 minutes. Cool crust, 30 minutes.

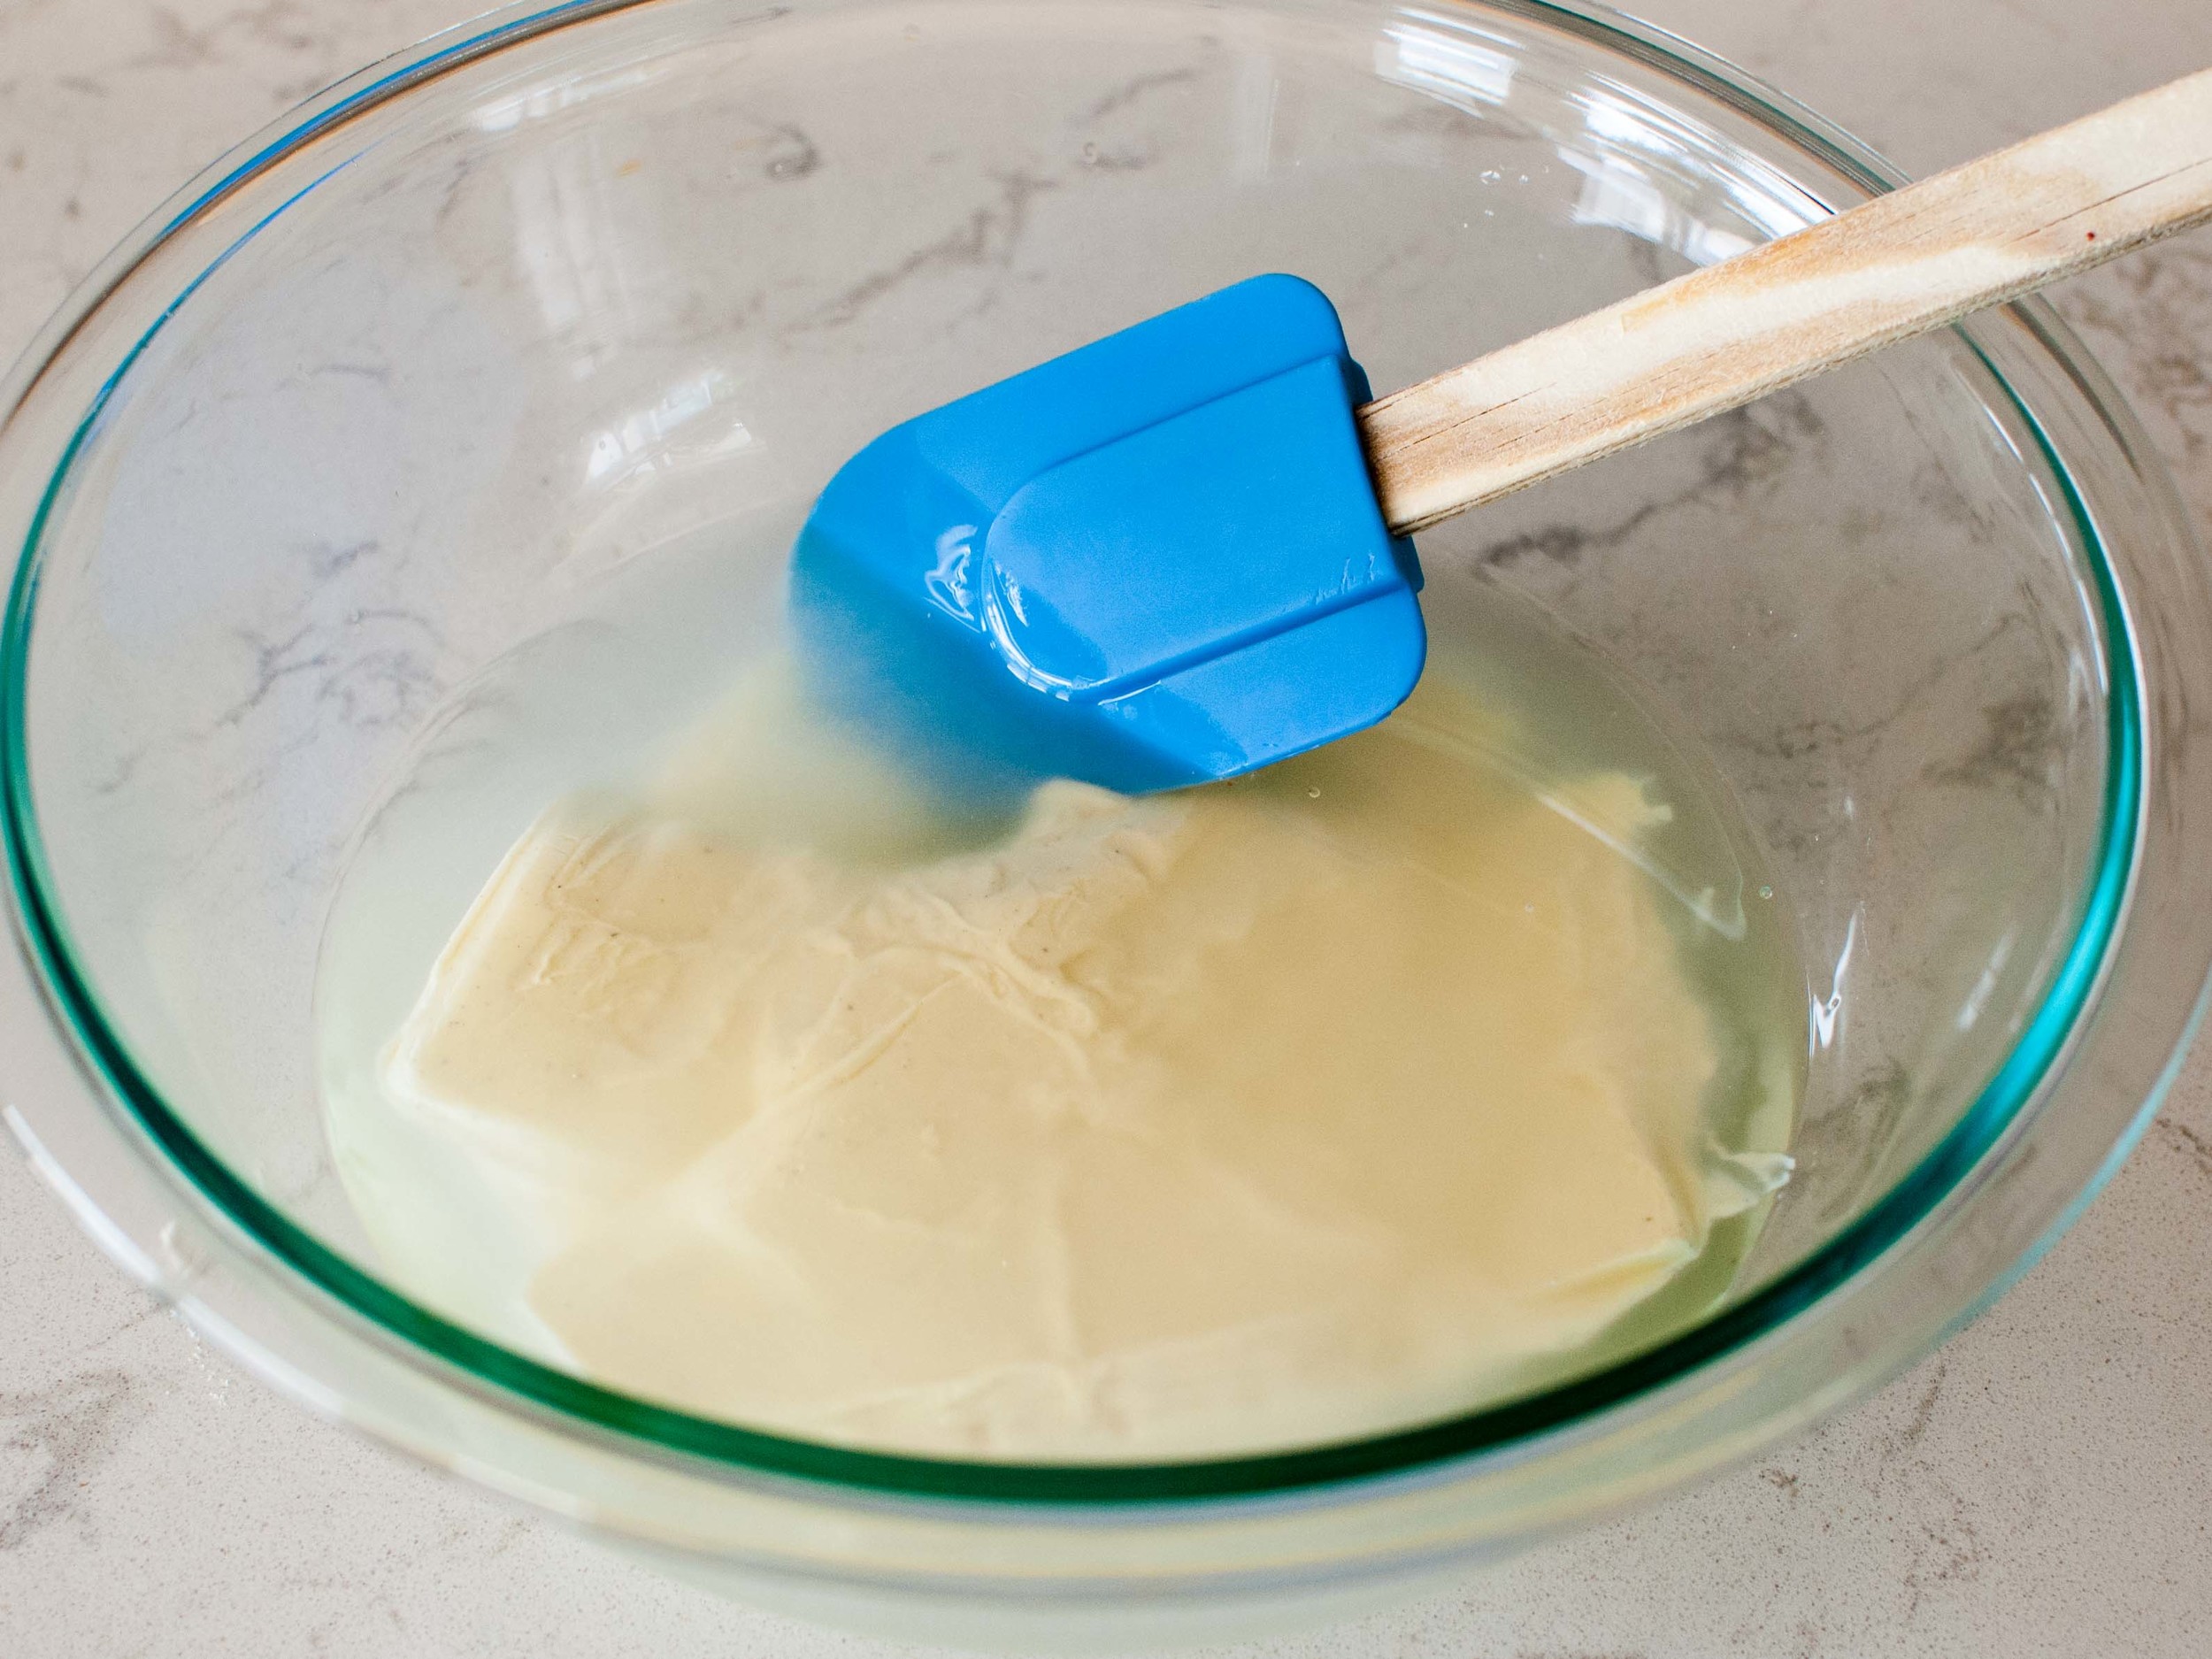
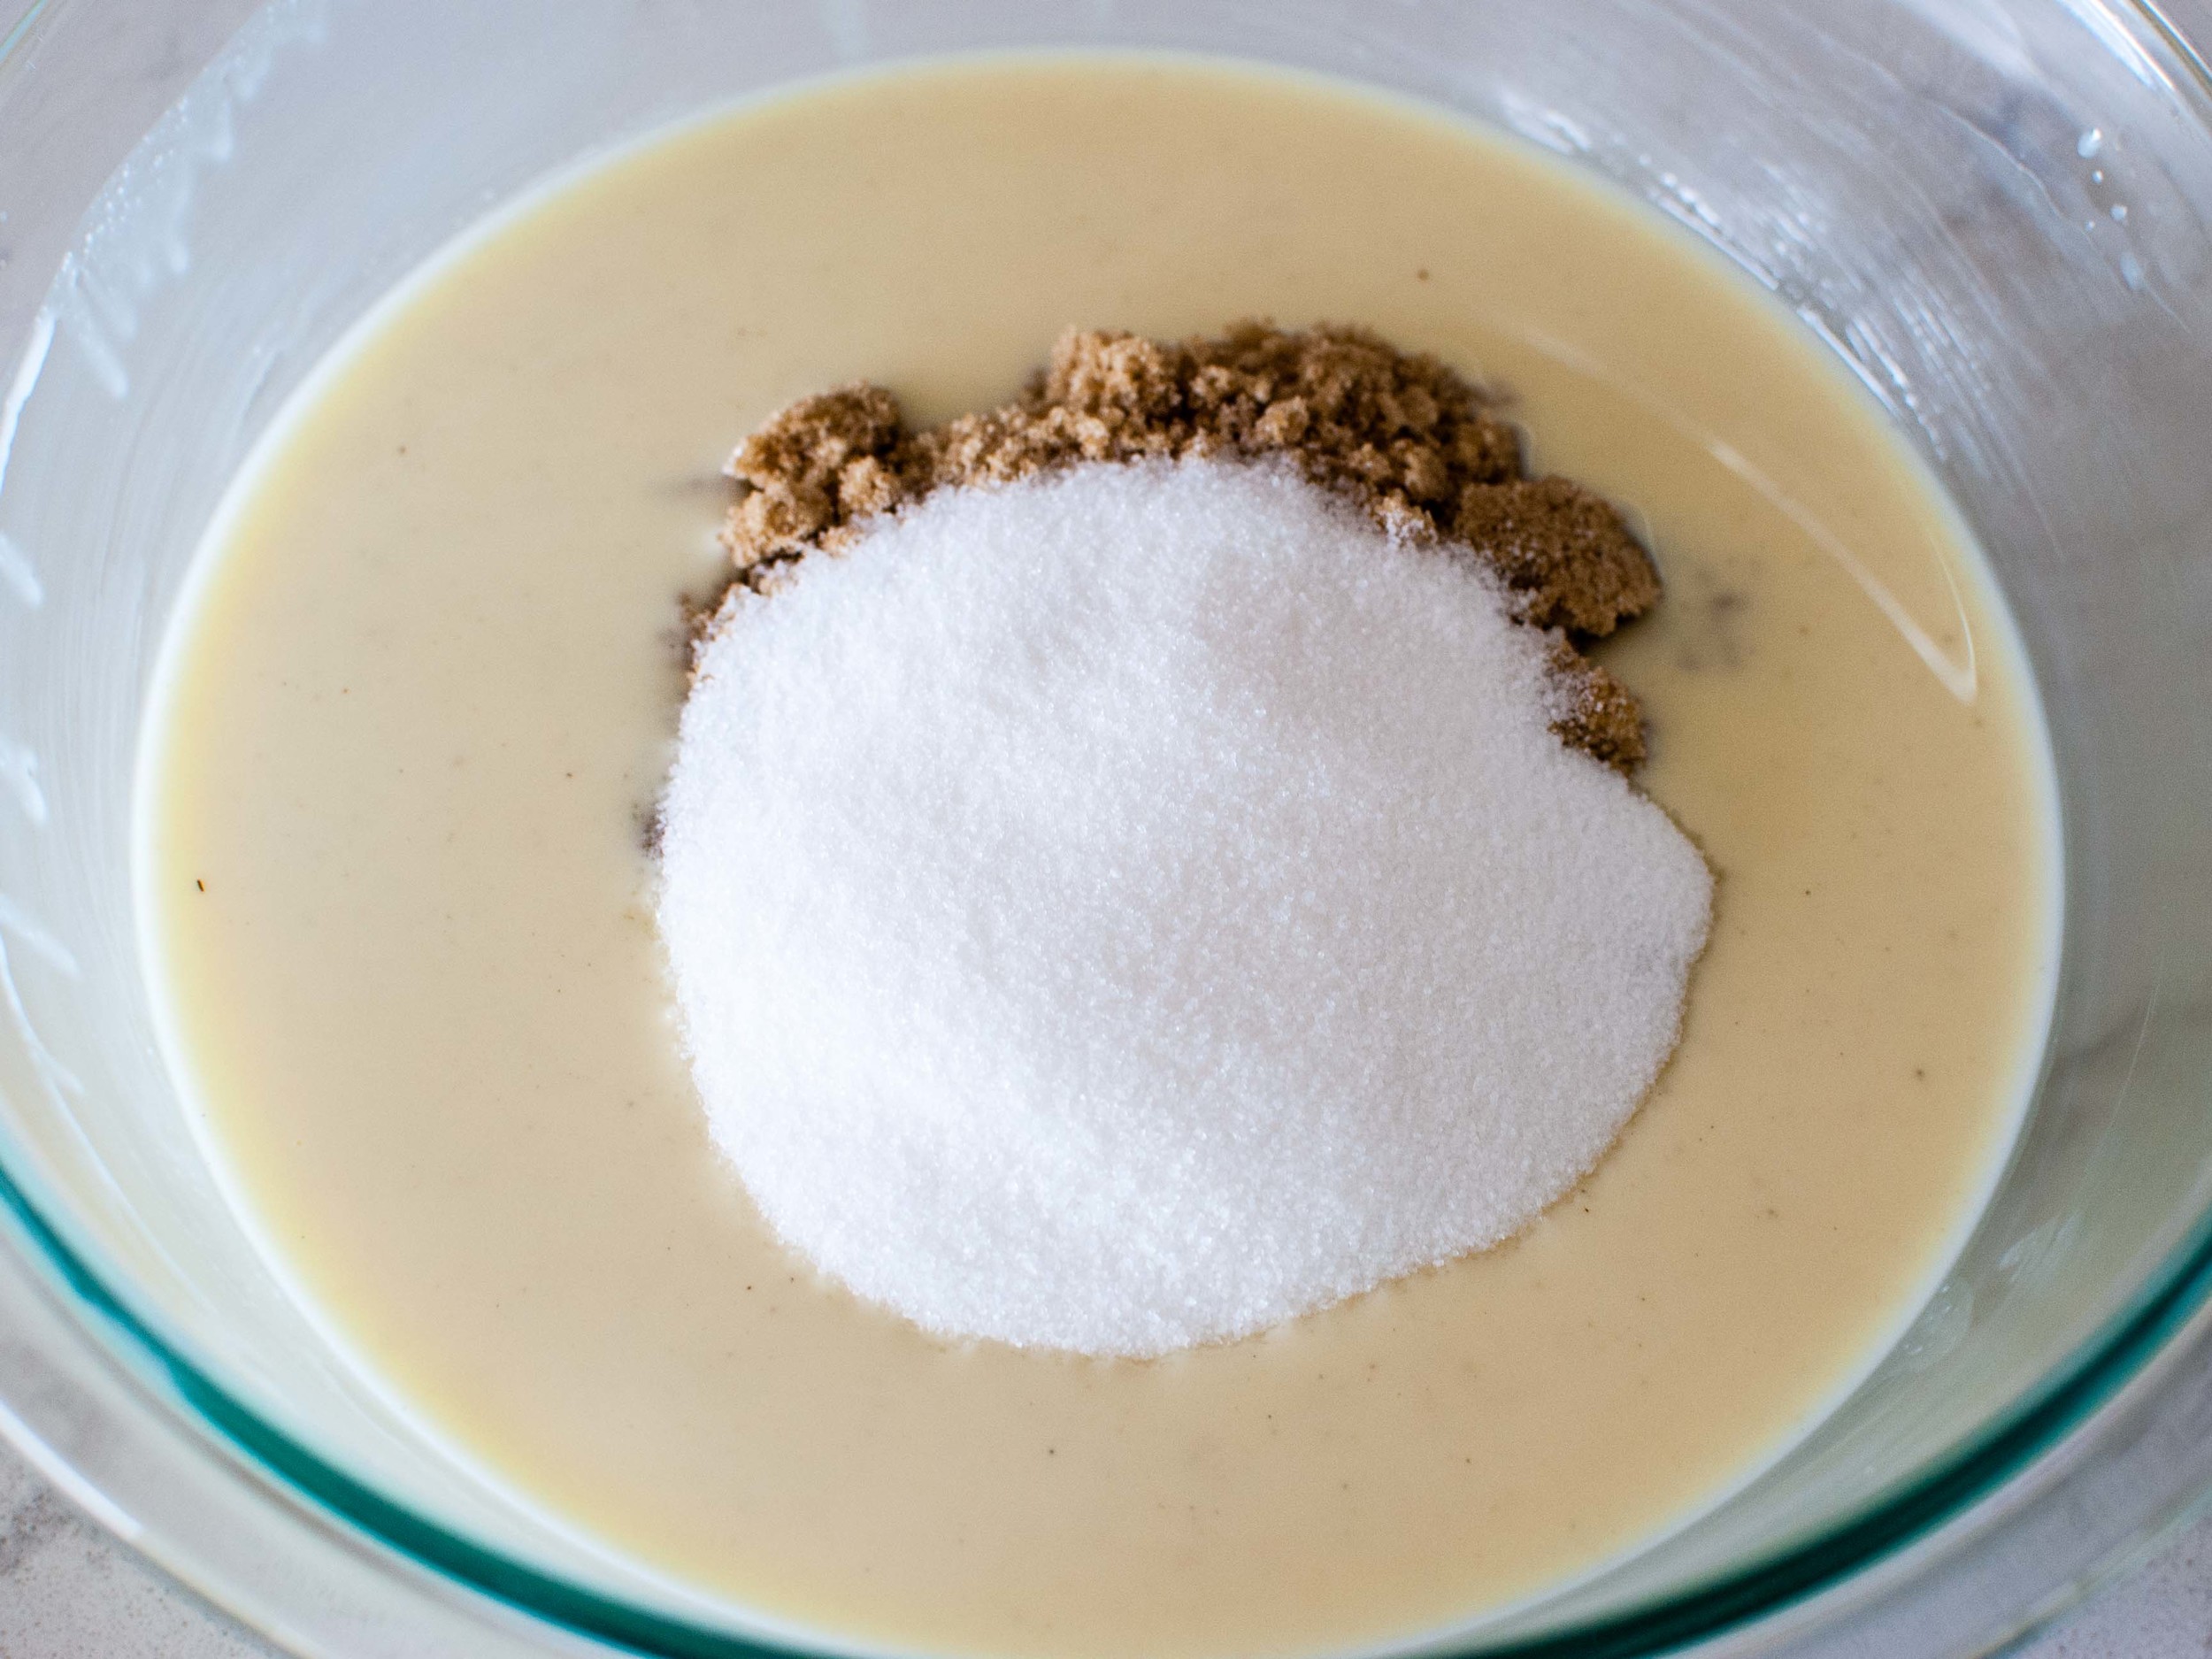
In a large bowl, whisk together egg yolks and condensed milk. Add lime juice; whisk until smooth. Pour filling into cooled crust; carefully spread to edges.

Bake until set, about 15 minutes. Cool in pan on rack; then chill at least 1 hour before serving. Using parchment paper overhang, lift out of pan, and transfer to a cutting board. With a serrated knife, cut into  9 large squares or 16  small squares, wiping knife with a damp kitchen towel between each cut. Eat with delight (or store in refrigerator until ready to serve).

Adapted from here and here.

Coconut Bars by Amy Cantu

Print Friendly and PDF

My obsession with all things coconut continues: I present to you these Coconut Bars, perfect for all of your afternoon tea and picnic treats! Even better - these coconut babies are nut-free, gluten-free, and vegan, so you can share these without displaying any warning signs. You can thank me later. These Coconut Bars are sweet, chewy, very coconut-y (obviously), and rich. The coconut flavor comes three-fold from coconut oil, coconut extract, and coconut flour - they are like eating macaroons in bar form, or like eating white chocolate covered coconut. Yes, please.

Notes: The original recipe uses all white sugar, but I swapped some out for brown sugar, which gives it a bit of caramel flavor. These Coconut Bars are good at room temperature, but I found that I loved them even more chilled. They became chewy and dense, rather than soft and crumbly. You can choose how you like to eat them, but alongside tea or coffee, they have found their match made in heaven.


Time: 1 hour
Yield: 12 large squares or 24 small triangles

8 oz. high quality white chocolate
1 cup coconut oil
1/2 cup granulated sugar
3/4 cup brown sugar, packed
1 teaspoon coconut extract
1/2 teaspoon vanilla extract
1/2 teaspoon kosher salt
6 egg whites, lightly beaten
1 /2 cups coconut flour

Heat oven to 350 degrees Fahrenheit. Grease a 9-inch by 13-inch baking pan and line the bottom and two sides with parchment paper. (Leaving a bit of overhang makes it easy to lift the cooled bars from the pan).

Break white chocolate into small pieces and dump into a large mixing bowl. Heat the coconut oil in a small saucepan over low heat or in the microwave for 1 minute, until oil is hot when touched. Pour oil over the white chocolate, and whisk until smooth. Add coconut and vanilla extracts, salt, and egg whites, stirring well to combine.

n a separate bowl, hisk together both sugars. (If brown sugar is very lumpy, microwave for a few seconds to soften the brow sugar and press lumps with the back of a spoon or sif.) Stir sugars into the white chocolate mixture - a few small lumps are just fine.  Stir in the coconut flour, until just combined.

Pour batter evenly into the prepared baking pan, and smooth out the top with a spatula. Bake for 30-35 minutes, until the top is set and golden. Cool completely in the baking dish set on top of a rack. Once cool, remove the Coconut Bars from the pan and cut into desired pieces. Devour at room temperature or chilled.

Adapted from Saveur Magazine.

Fresh Egg Pasta by Amy Cantu

Print Friendly and PDF

I never fully understood why anyone liked pasta with butter and parmesan. It always just sounded bland and boring to me. I filed it under "picky kid food". This luscious and ethereal fresh egg pasta changed my entire understanding of what pasta with butter and parmesan could actually mean. These wide ribbons were at once delightfully delicate and richly filling. A quick toss with a pat of butter and shower of grated parmesan infused the springy strands with a bit of luxury and saltiness without masking its simple glory. Cynthia and I went mad for it - dancing around the kitchen, swooning, moaning, eyes-rolling-into-the-back-of-our-heads, madness. This fresh pasta meets and exceeds any and all expectations you might have for homemade noodles.  If eating a bowl of nothing but plain pasta is too one note for you, (I promise that I struggled to consider eating anything else with it,) Cynthia's spring vegetables are a bright and punchy (if not guilt-appeasing) match to the simple indulgence of homemade pasta.

Notes: Homemade pasta is not terribly difficult to make, even for a novice. It can even be made with no special equipment, except perhaps a rolling pin. I had a pasta machine collecting dust in the closet (I almost forgot I even had it and only used it once 10 years ago), so I pulled it out to see if it still worked. It does, and it's been getting a lot of use ever since we tested this recipe. I pulled inspiration and direction from both Serious Eats, which has yet to fail me, and also a recipe from Melissa Clark in New York Times Cooking. I love the delicate richness of an extra egg yolk and detailed, fool-proof directions from Serious Eats; I also liked the addition of olive oil in Melissa Clark's version, which added flavor and made the dough easier to roll out. My first batch of pasta sported some ragged edges and uneven texture, but it still tasted better than any pasta I'd ever eaten. So, don't toss out any uglies - close your eyes and enjoy the perfect taste!

If the recipe makes more pasta than you need, the strands can be twisted together into a few loose nests and then frozen to cook later. The frozen pasta can be cooked without thawing, adding an extra minute or two to cook through.


Time: 1 hour
Serves: 4-6

2 1/4 cups all purpose flour
1 teaspoon kosher salt
1 tablespoon extra version olive oil
2 eggs
4 egg yolks

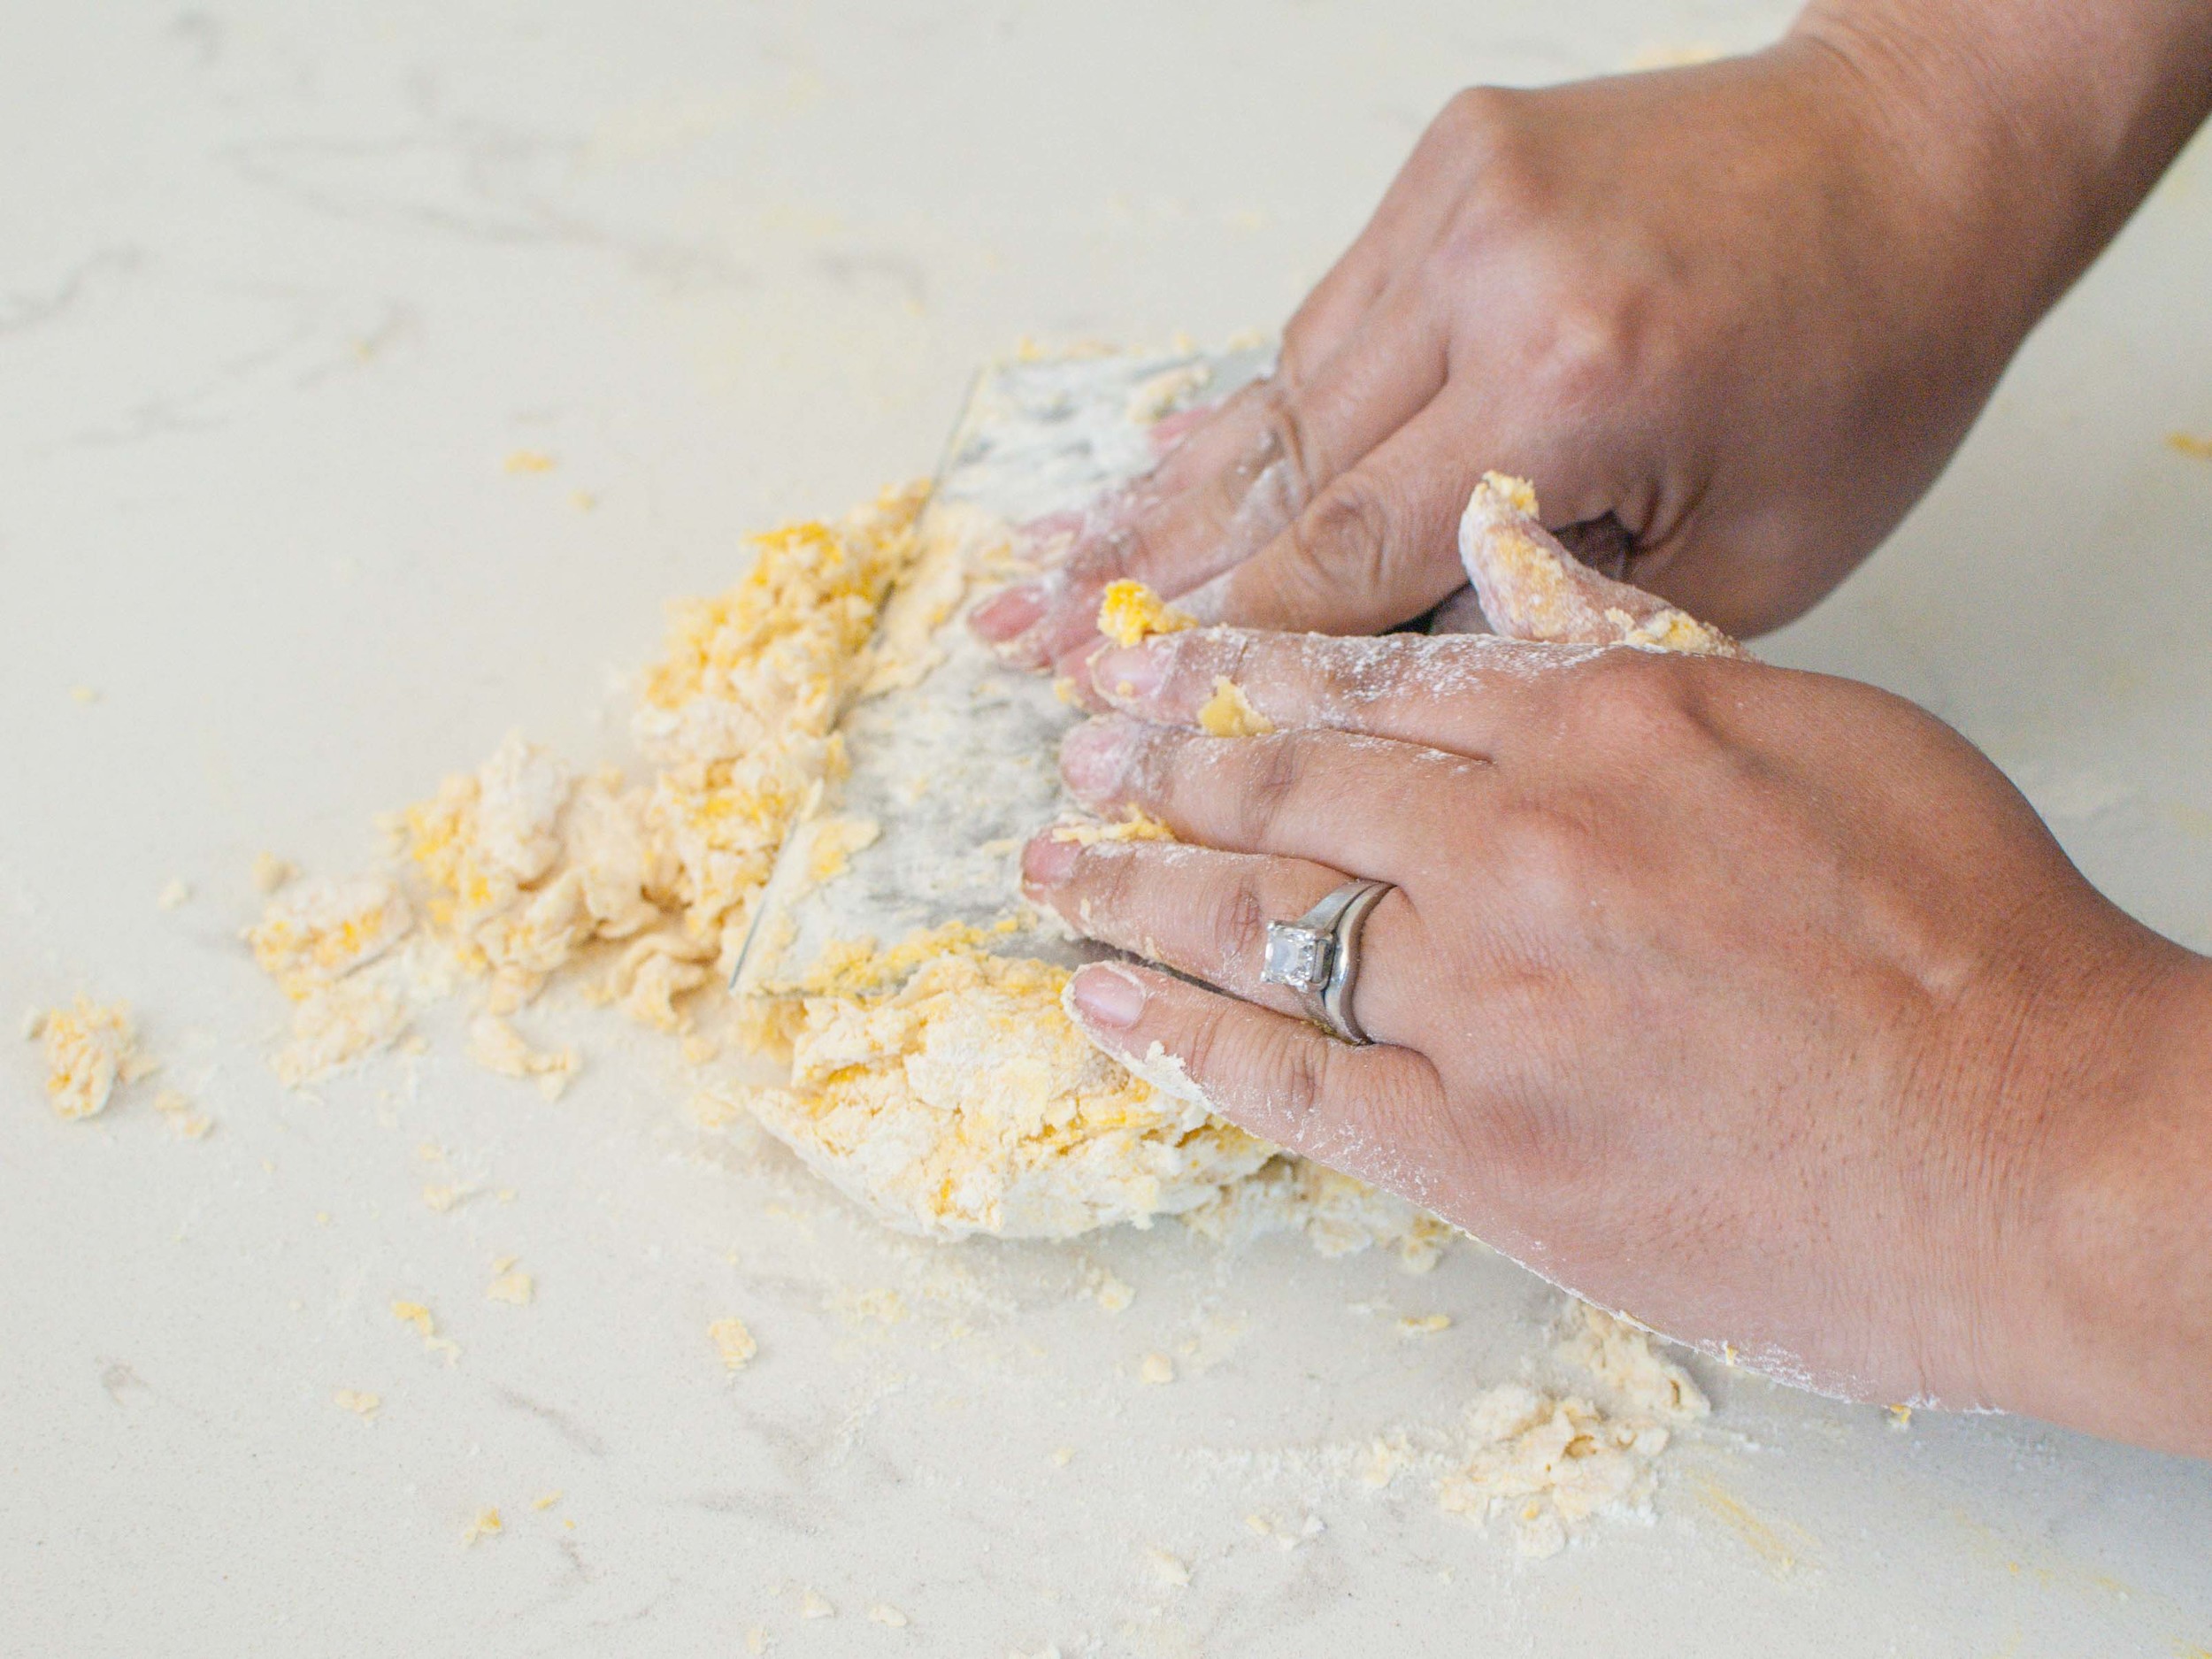
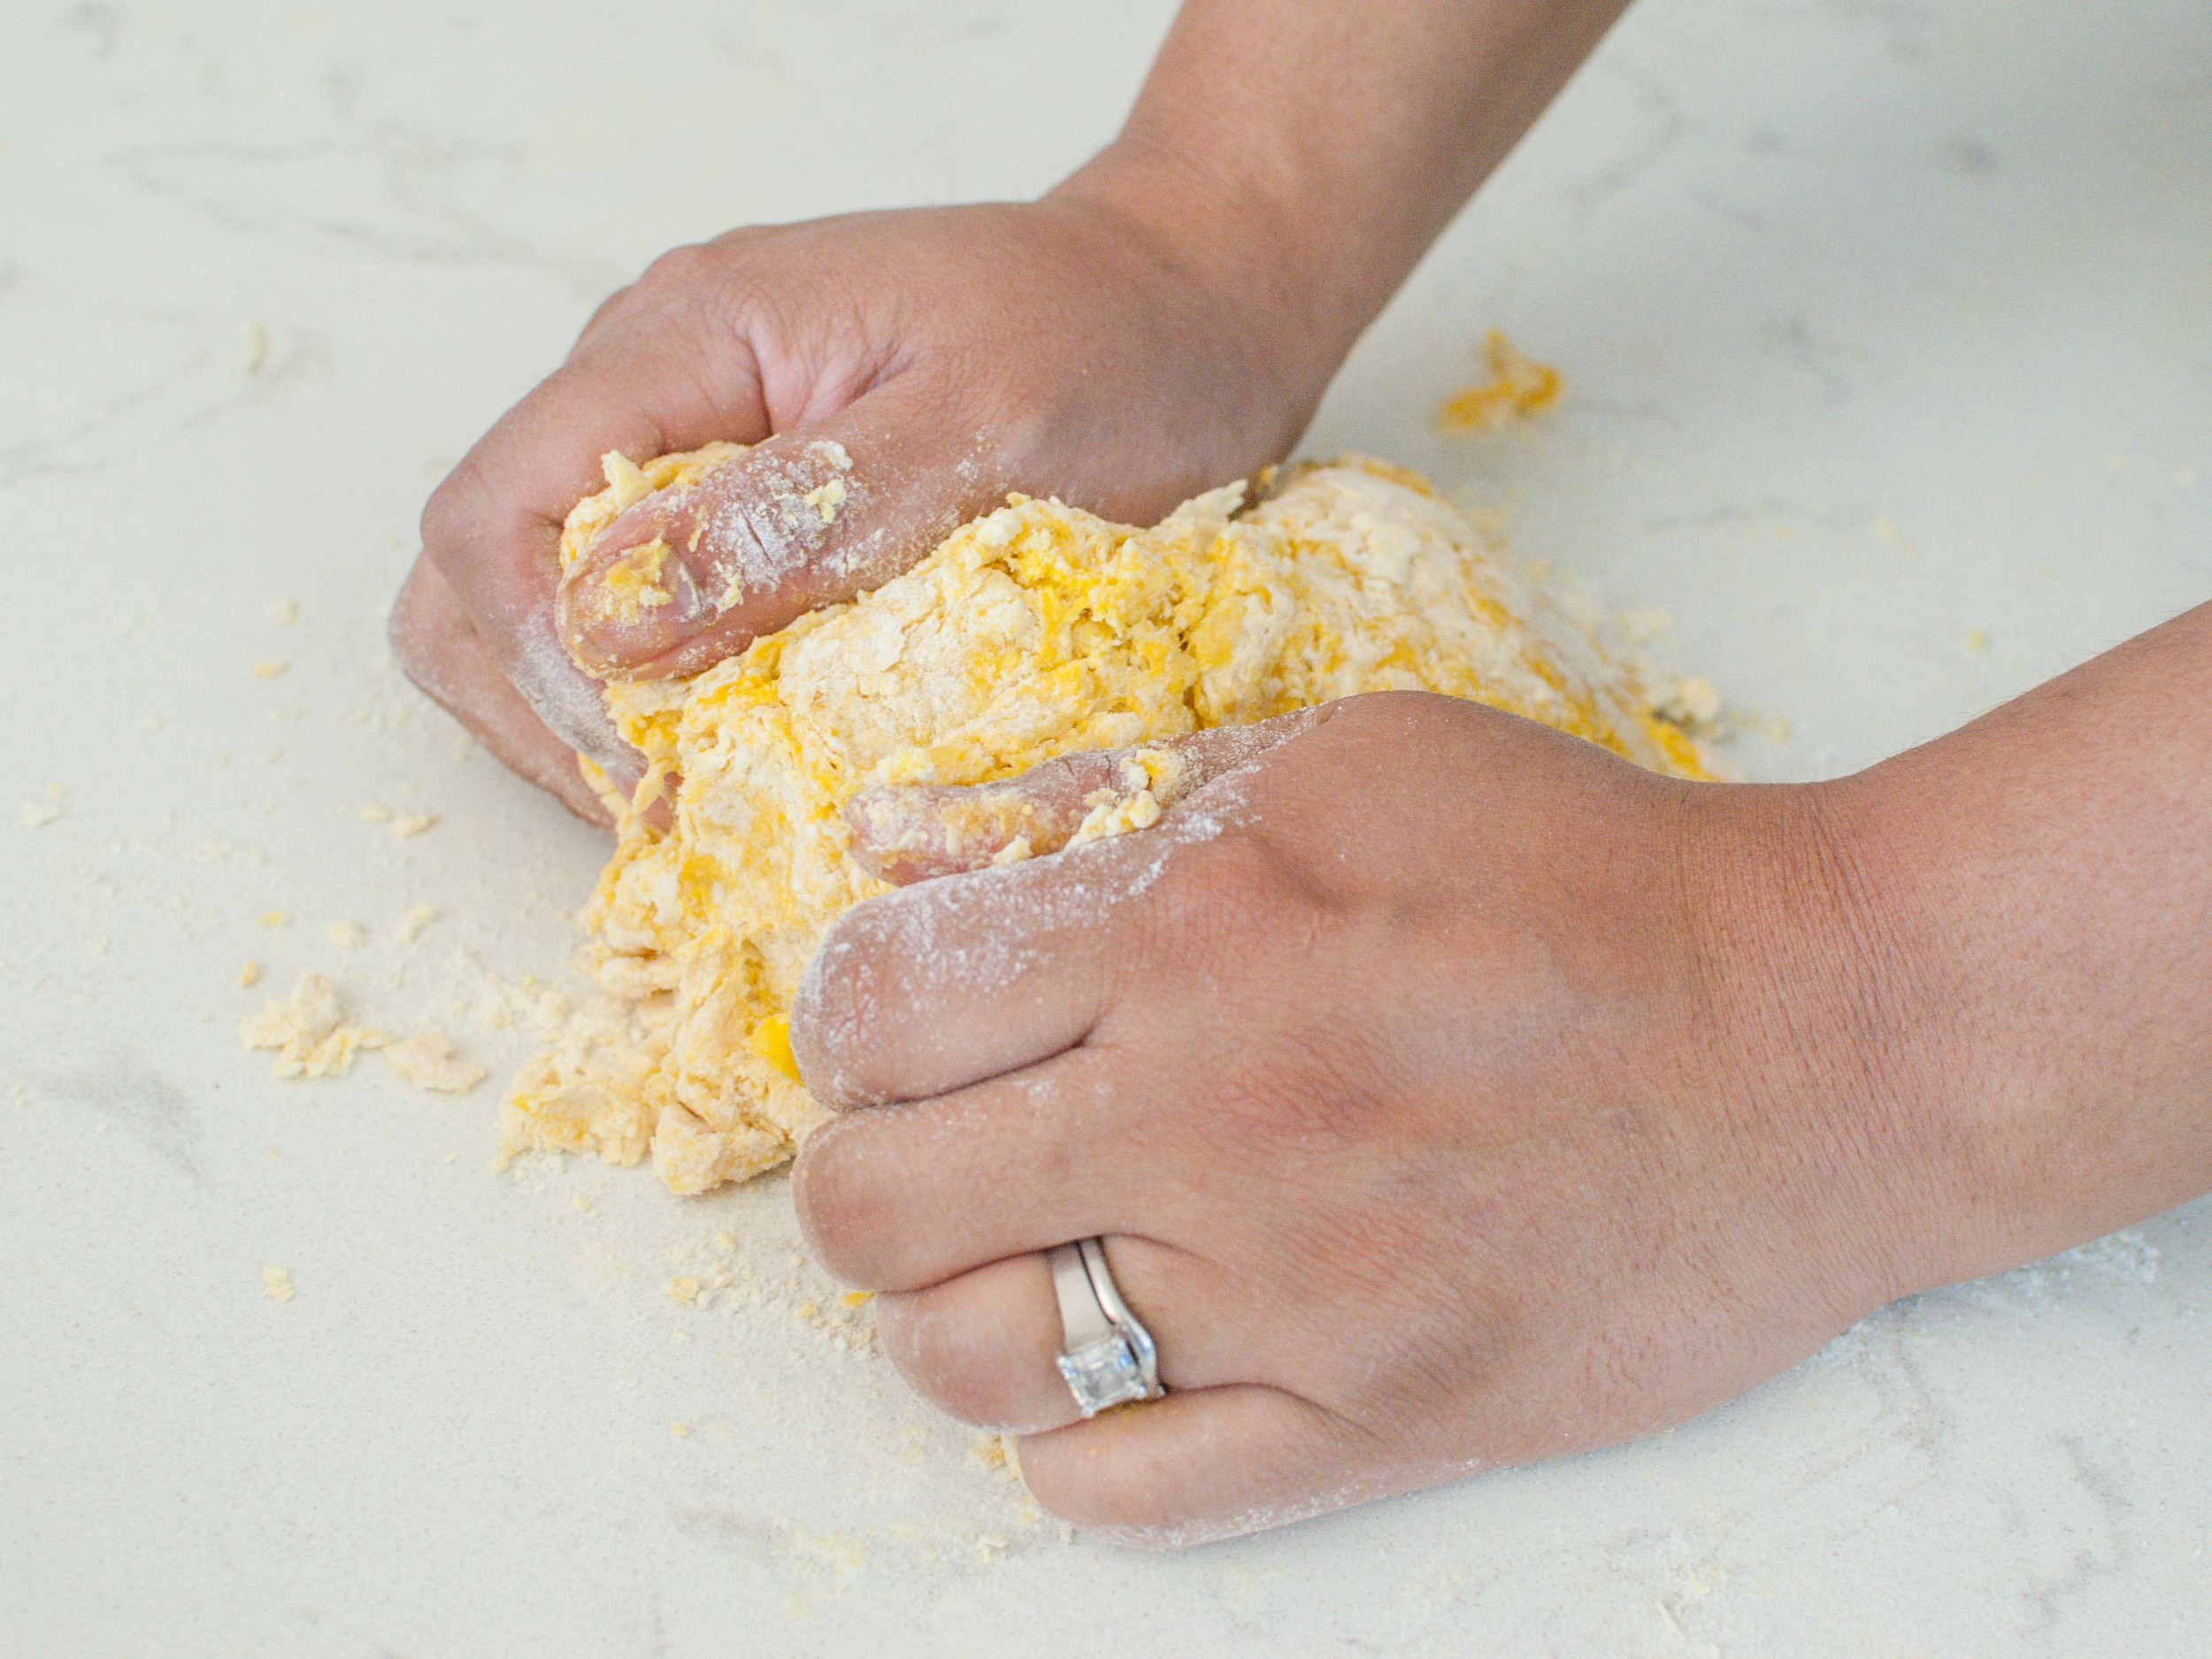
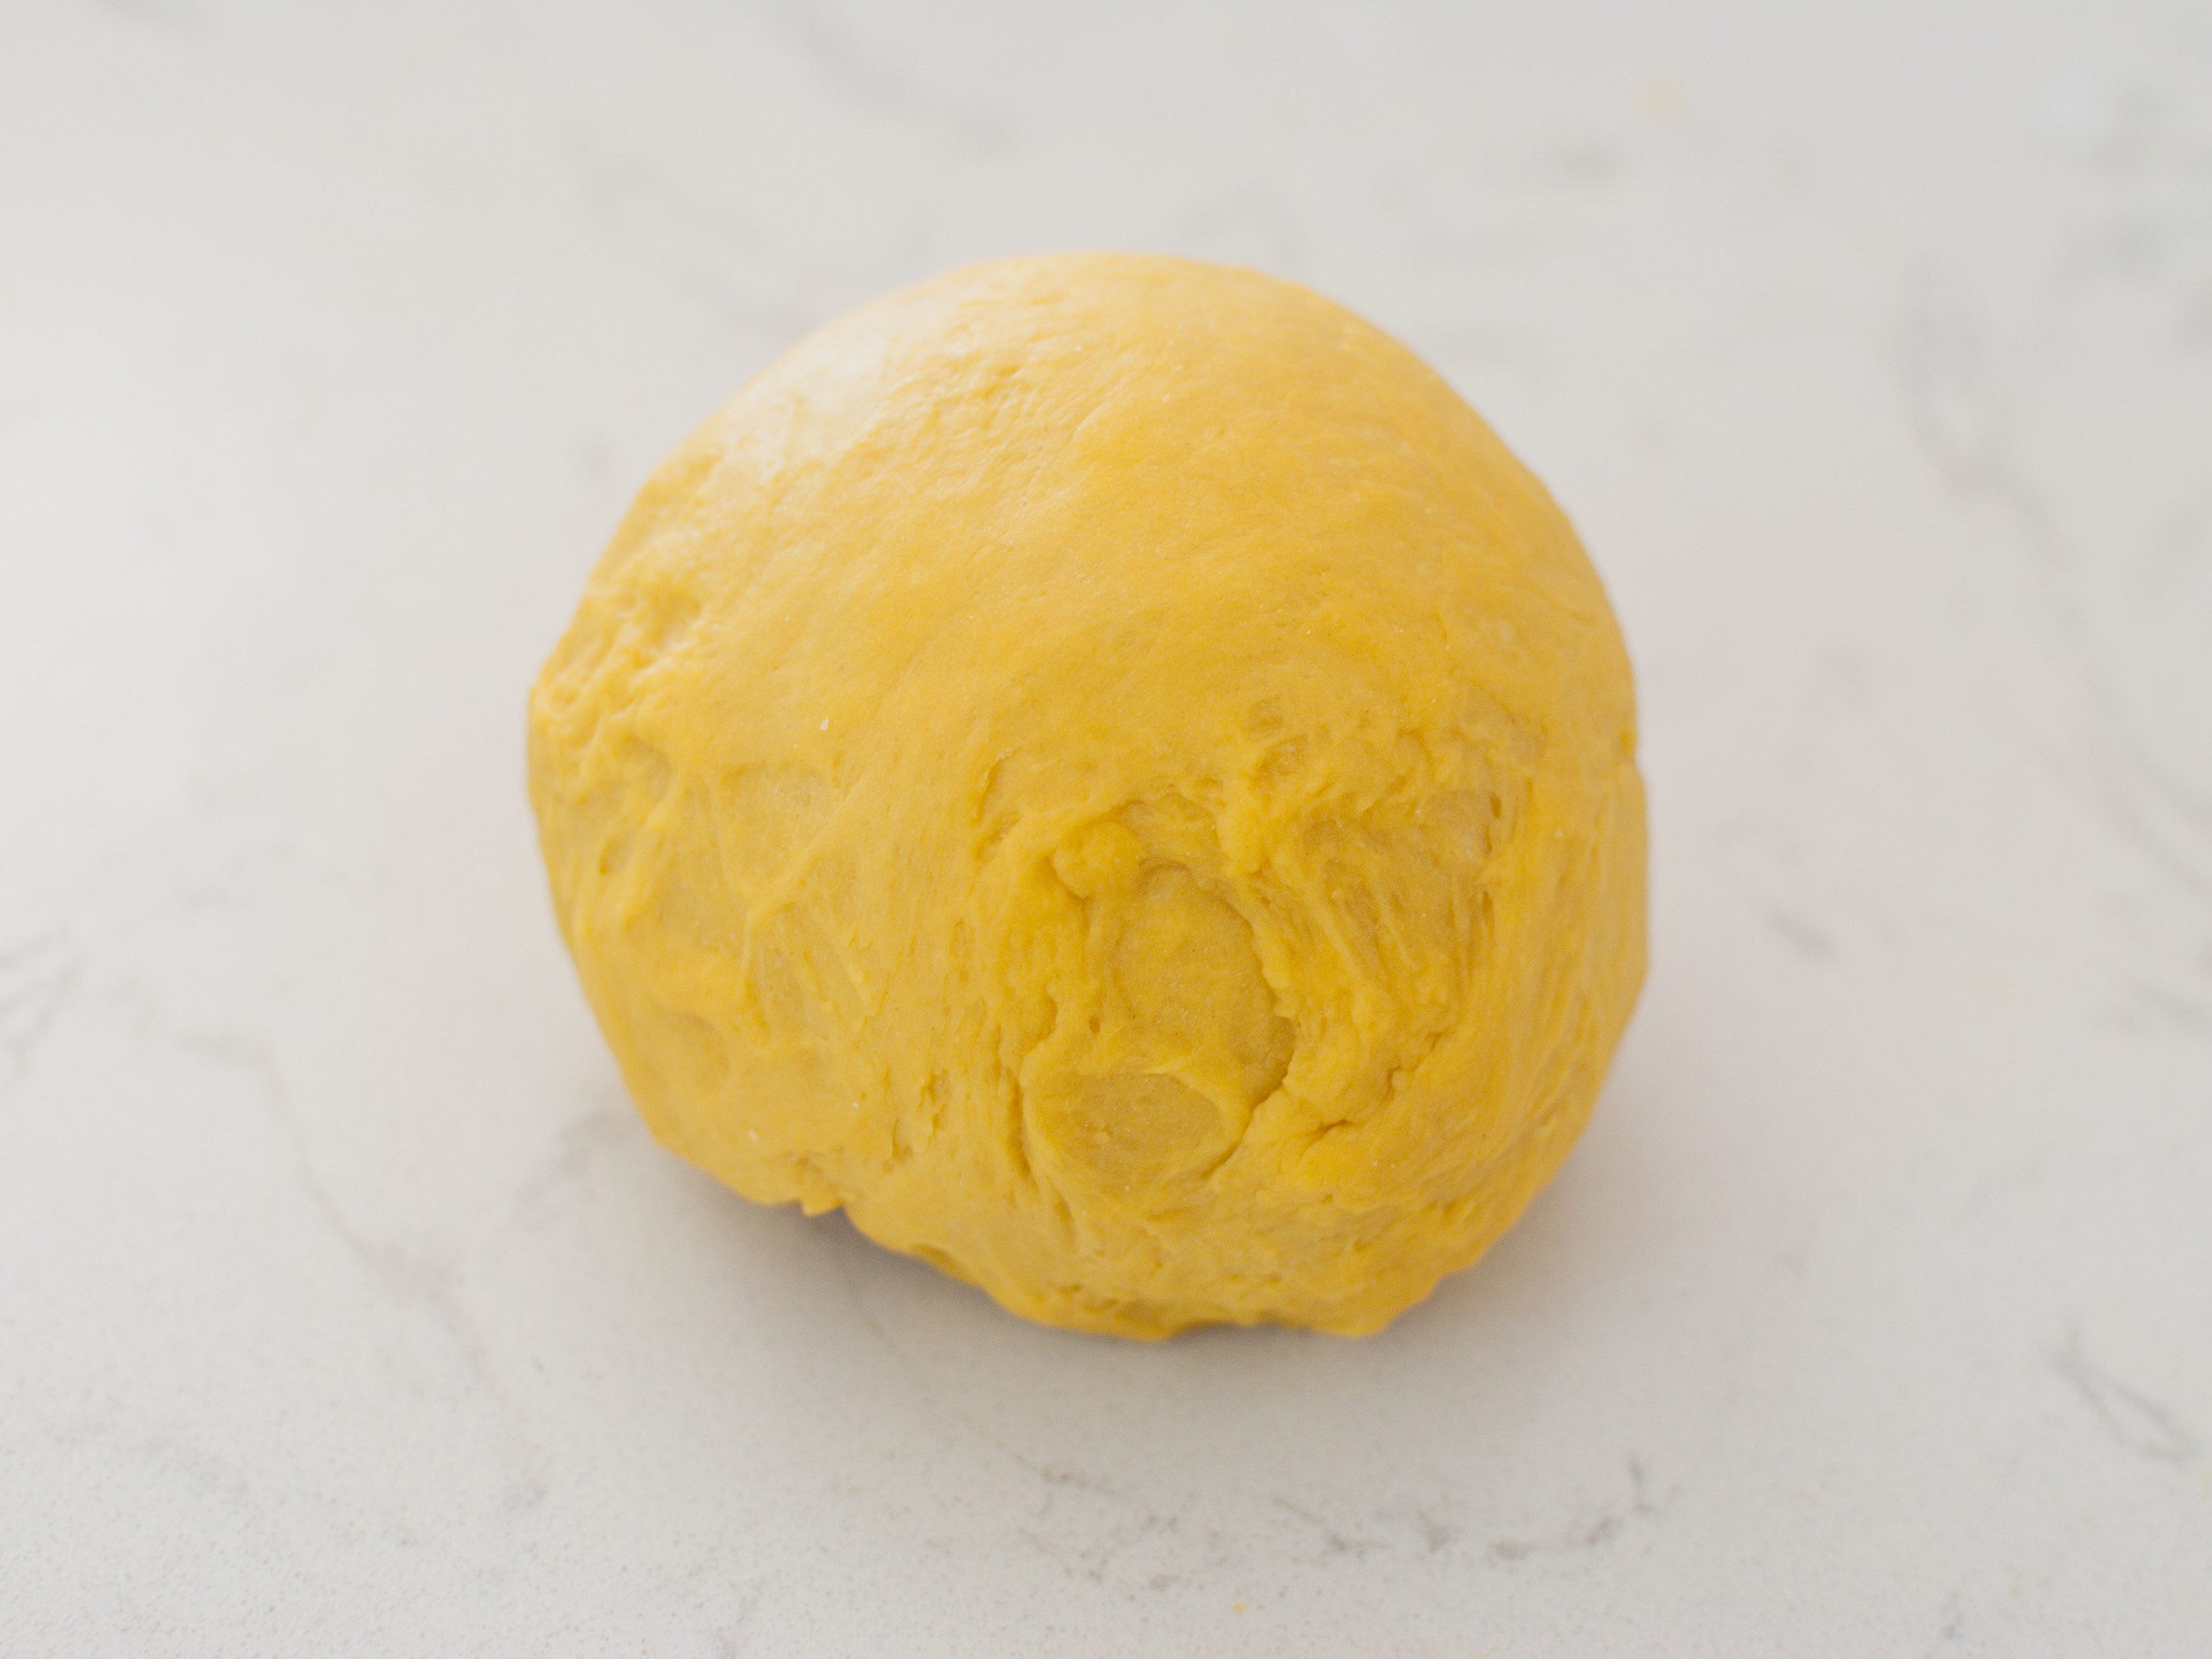
Dump the flour onto a clean work surface, making a large well in the center. Sprinkle the salt and drizzle the olive oil over the flour. Carefully pour the eggs and egg yolks into the well. Use a fork to break up the egg yolks and beat well. With a bench scraper, fold flour into the egg, creating a shaggy dough ball. Scrape the dough from fingers then continue to knead the dough using the heels of your hands until the dough is very smooth and elastic. Add additional water 1 tablespoon at a time, if the dough feels too dry, or add additional flour 1 tablespoon at a time, if the dough feels too wet. Wrap dough in plastic wrap and let rest at least 30 minutes on the countertop or overnight in the fridge.

To use a pasta machine:

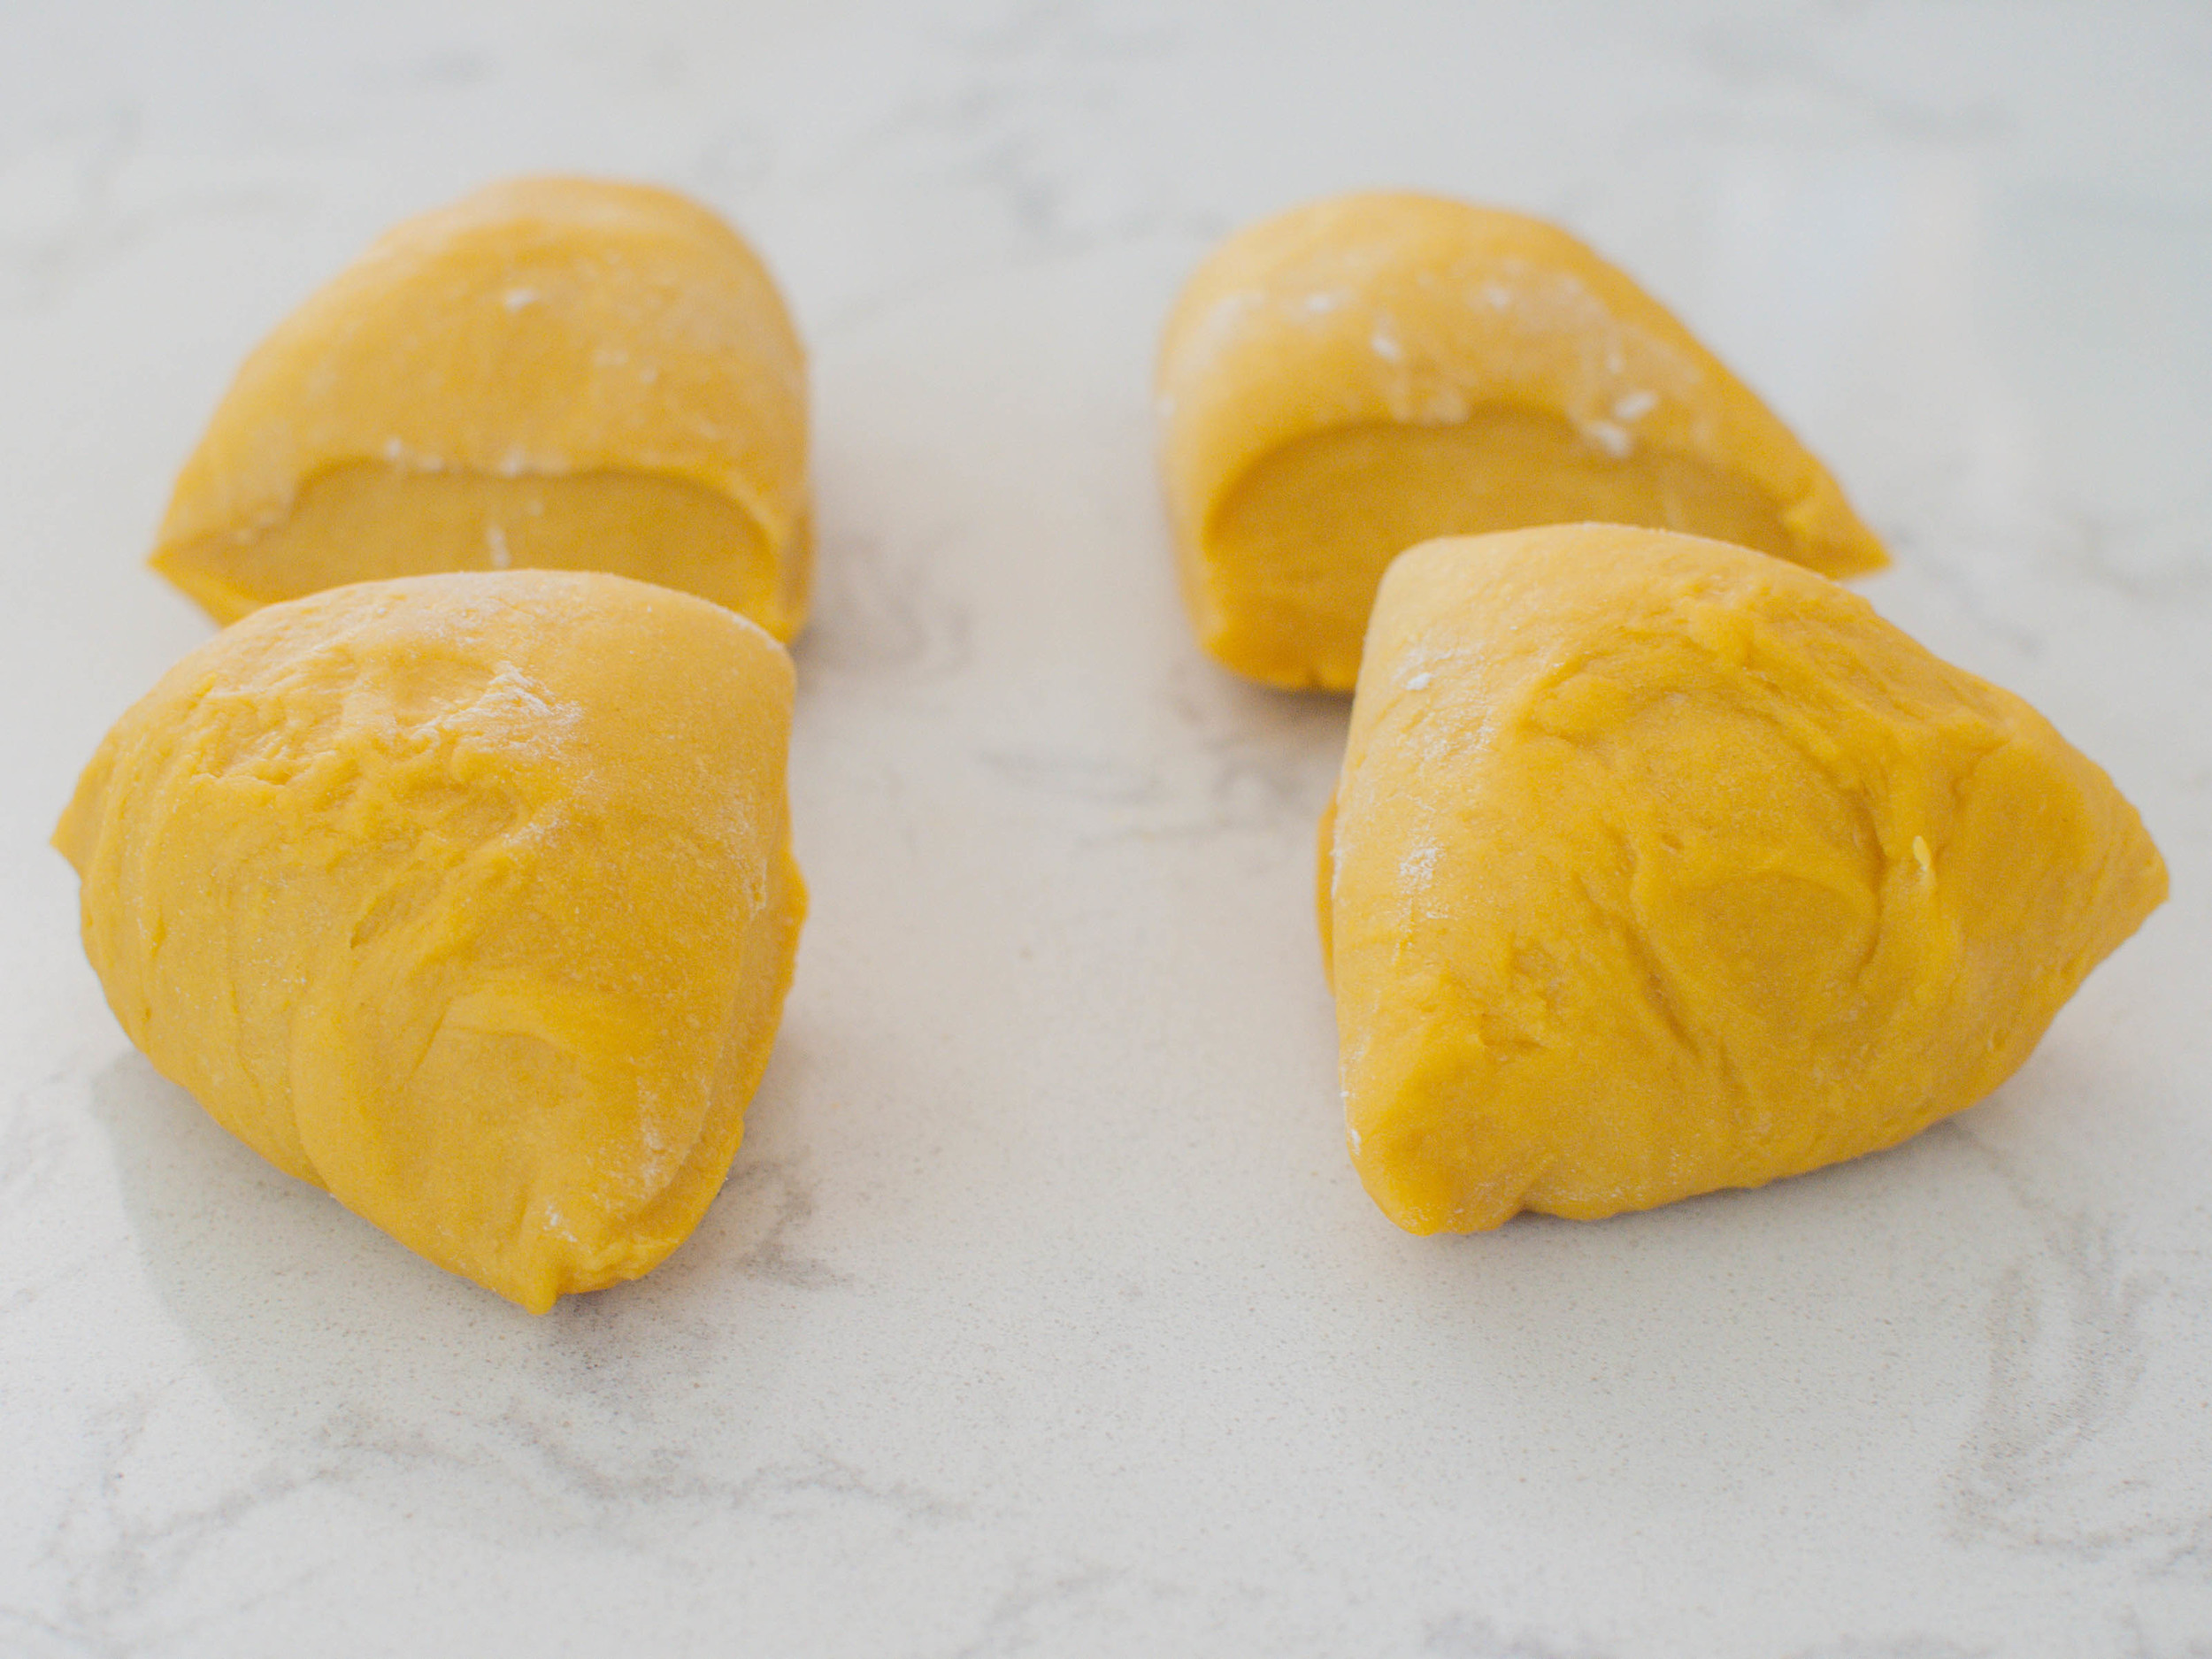
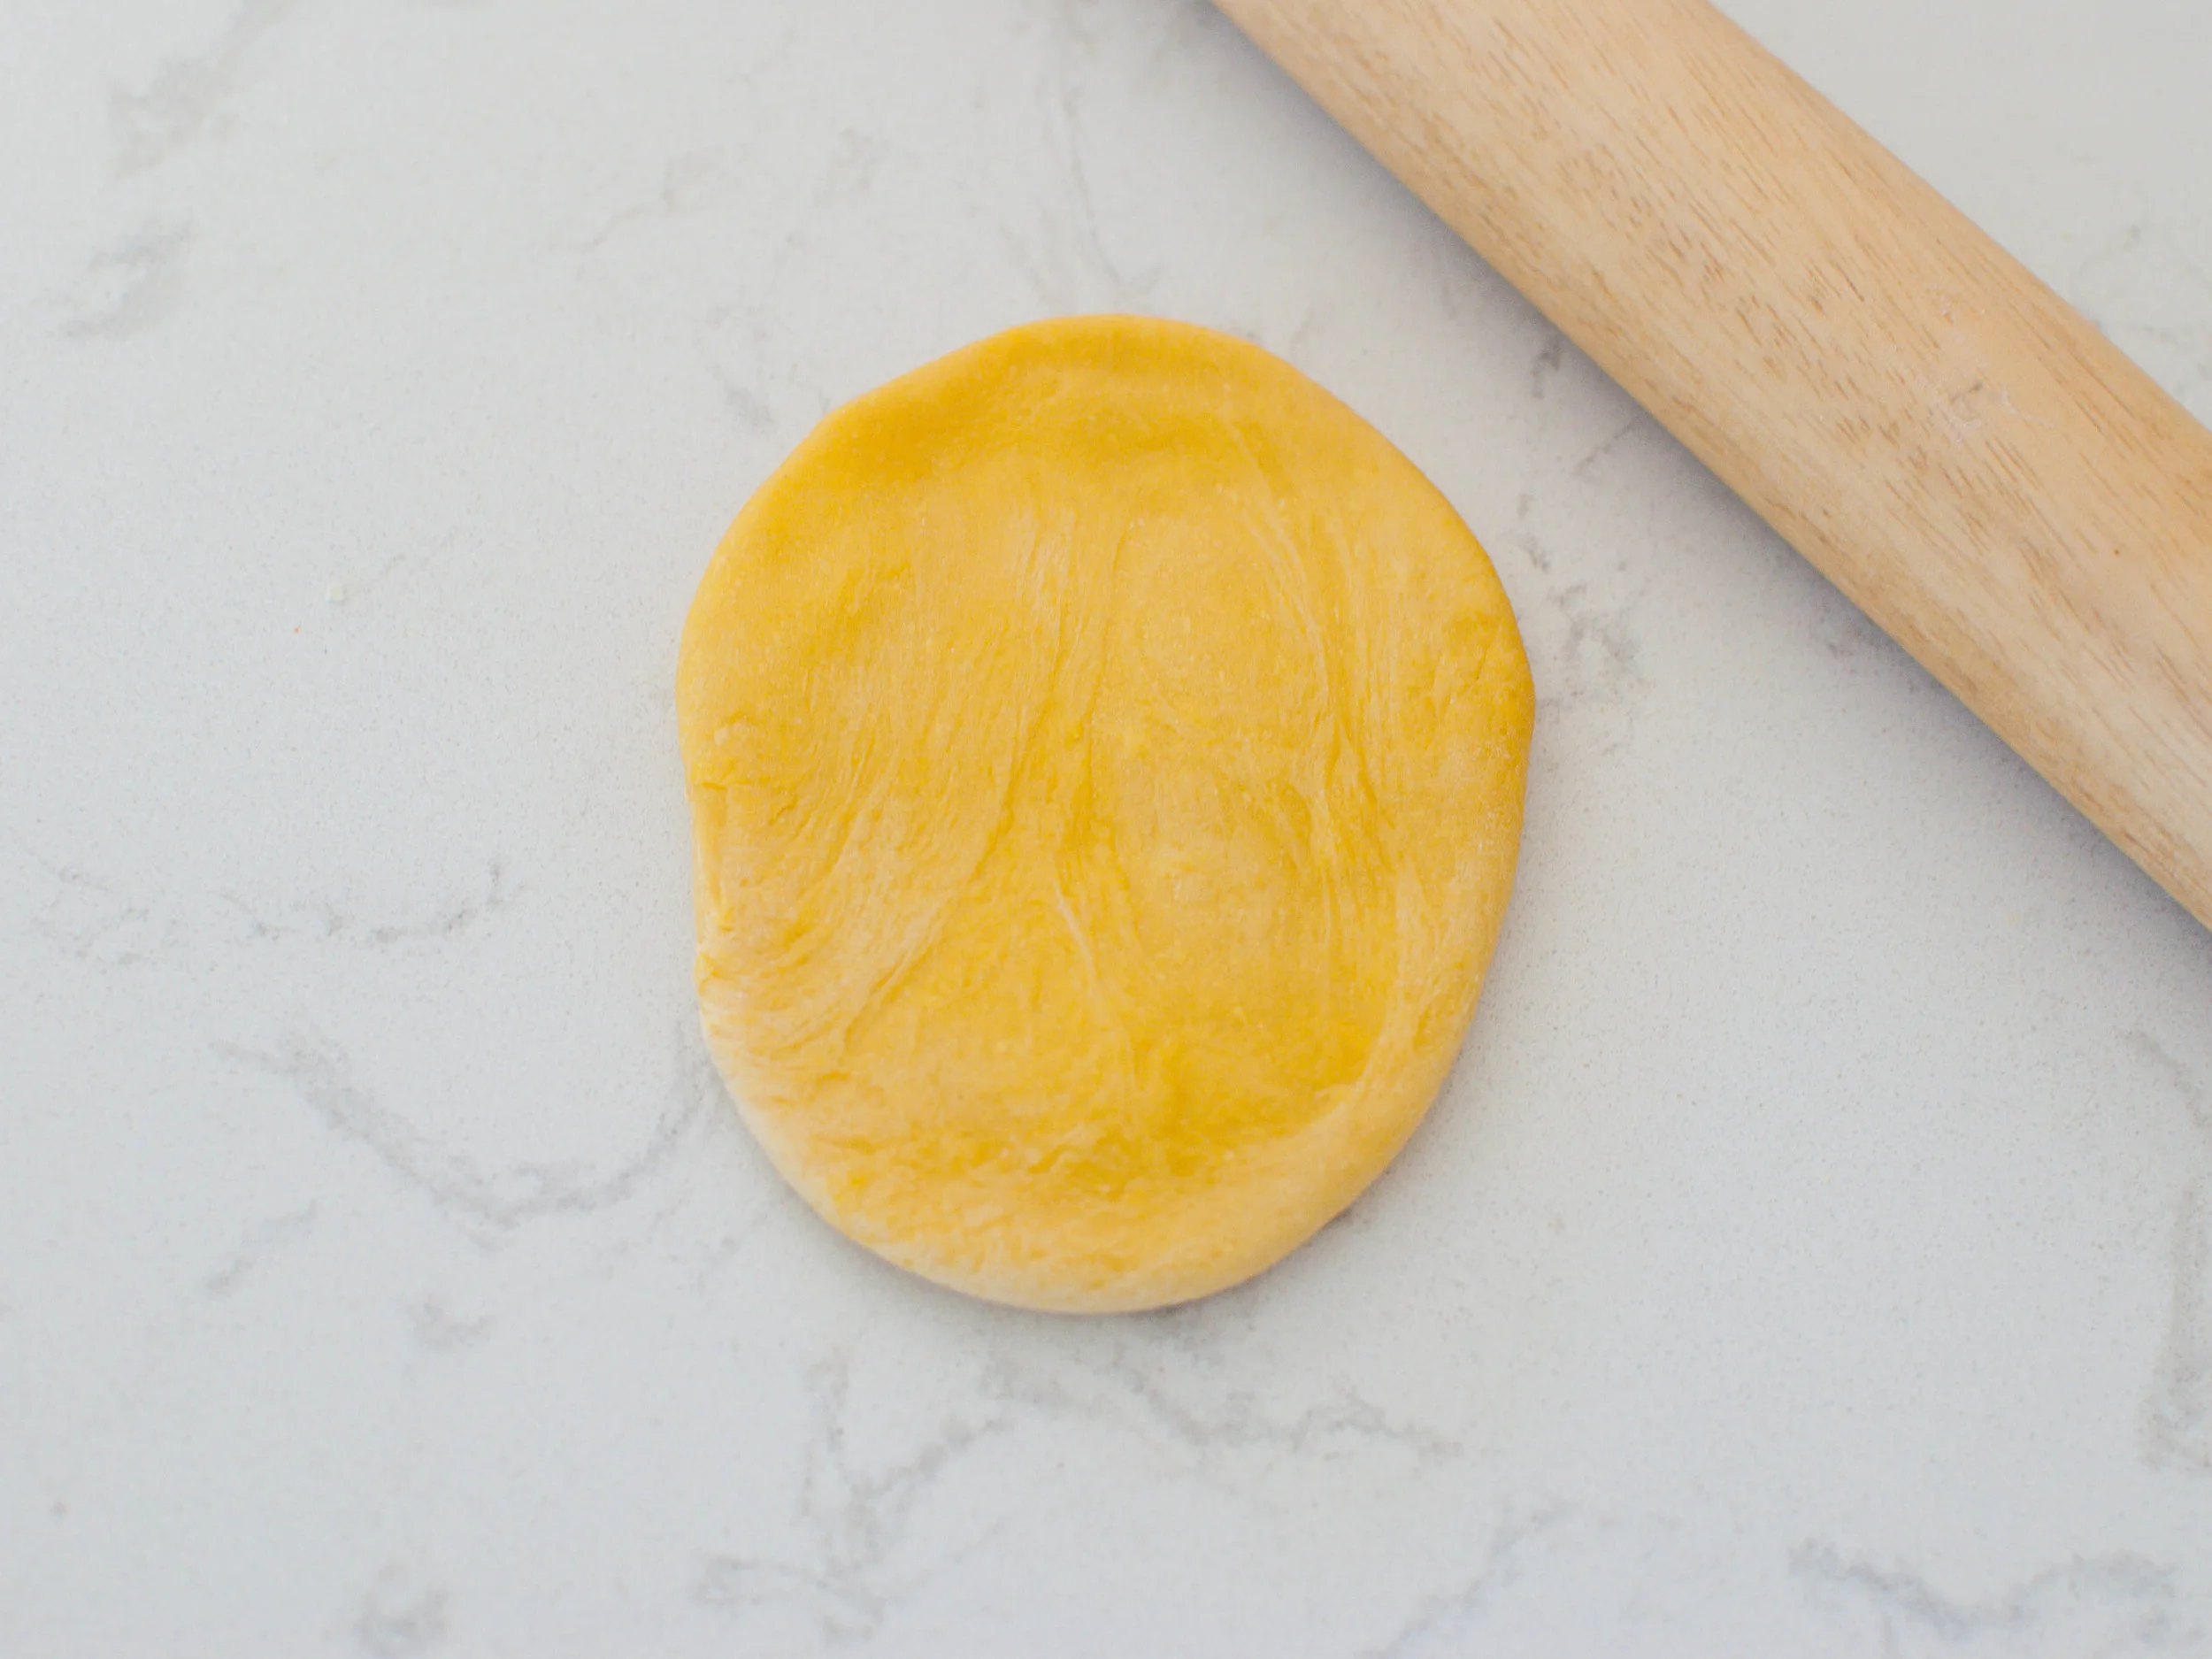
Cut dough into quarters. Place one quarter on a lightly floured work surface and re-cover the remaining dough. Using a rolling pin, roll the dough into an oblong shape about 1/2-inch thick.

Set the pasta machine to the widest setting. Pass the dough through the pasta machine to make a sheet, then repeat 2 more times. 

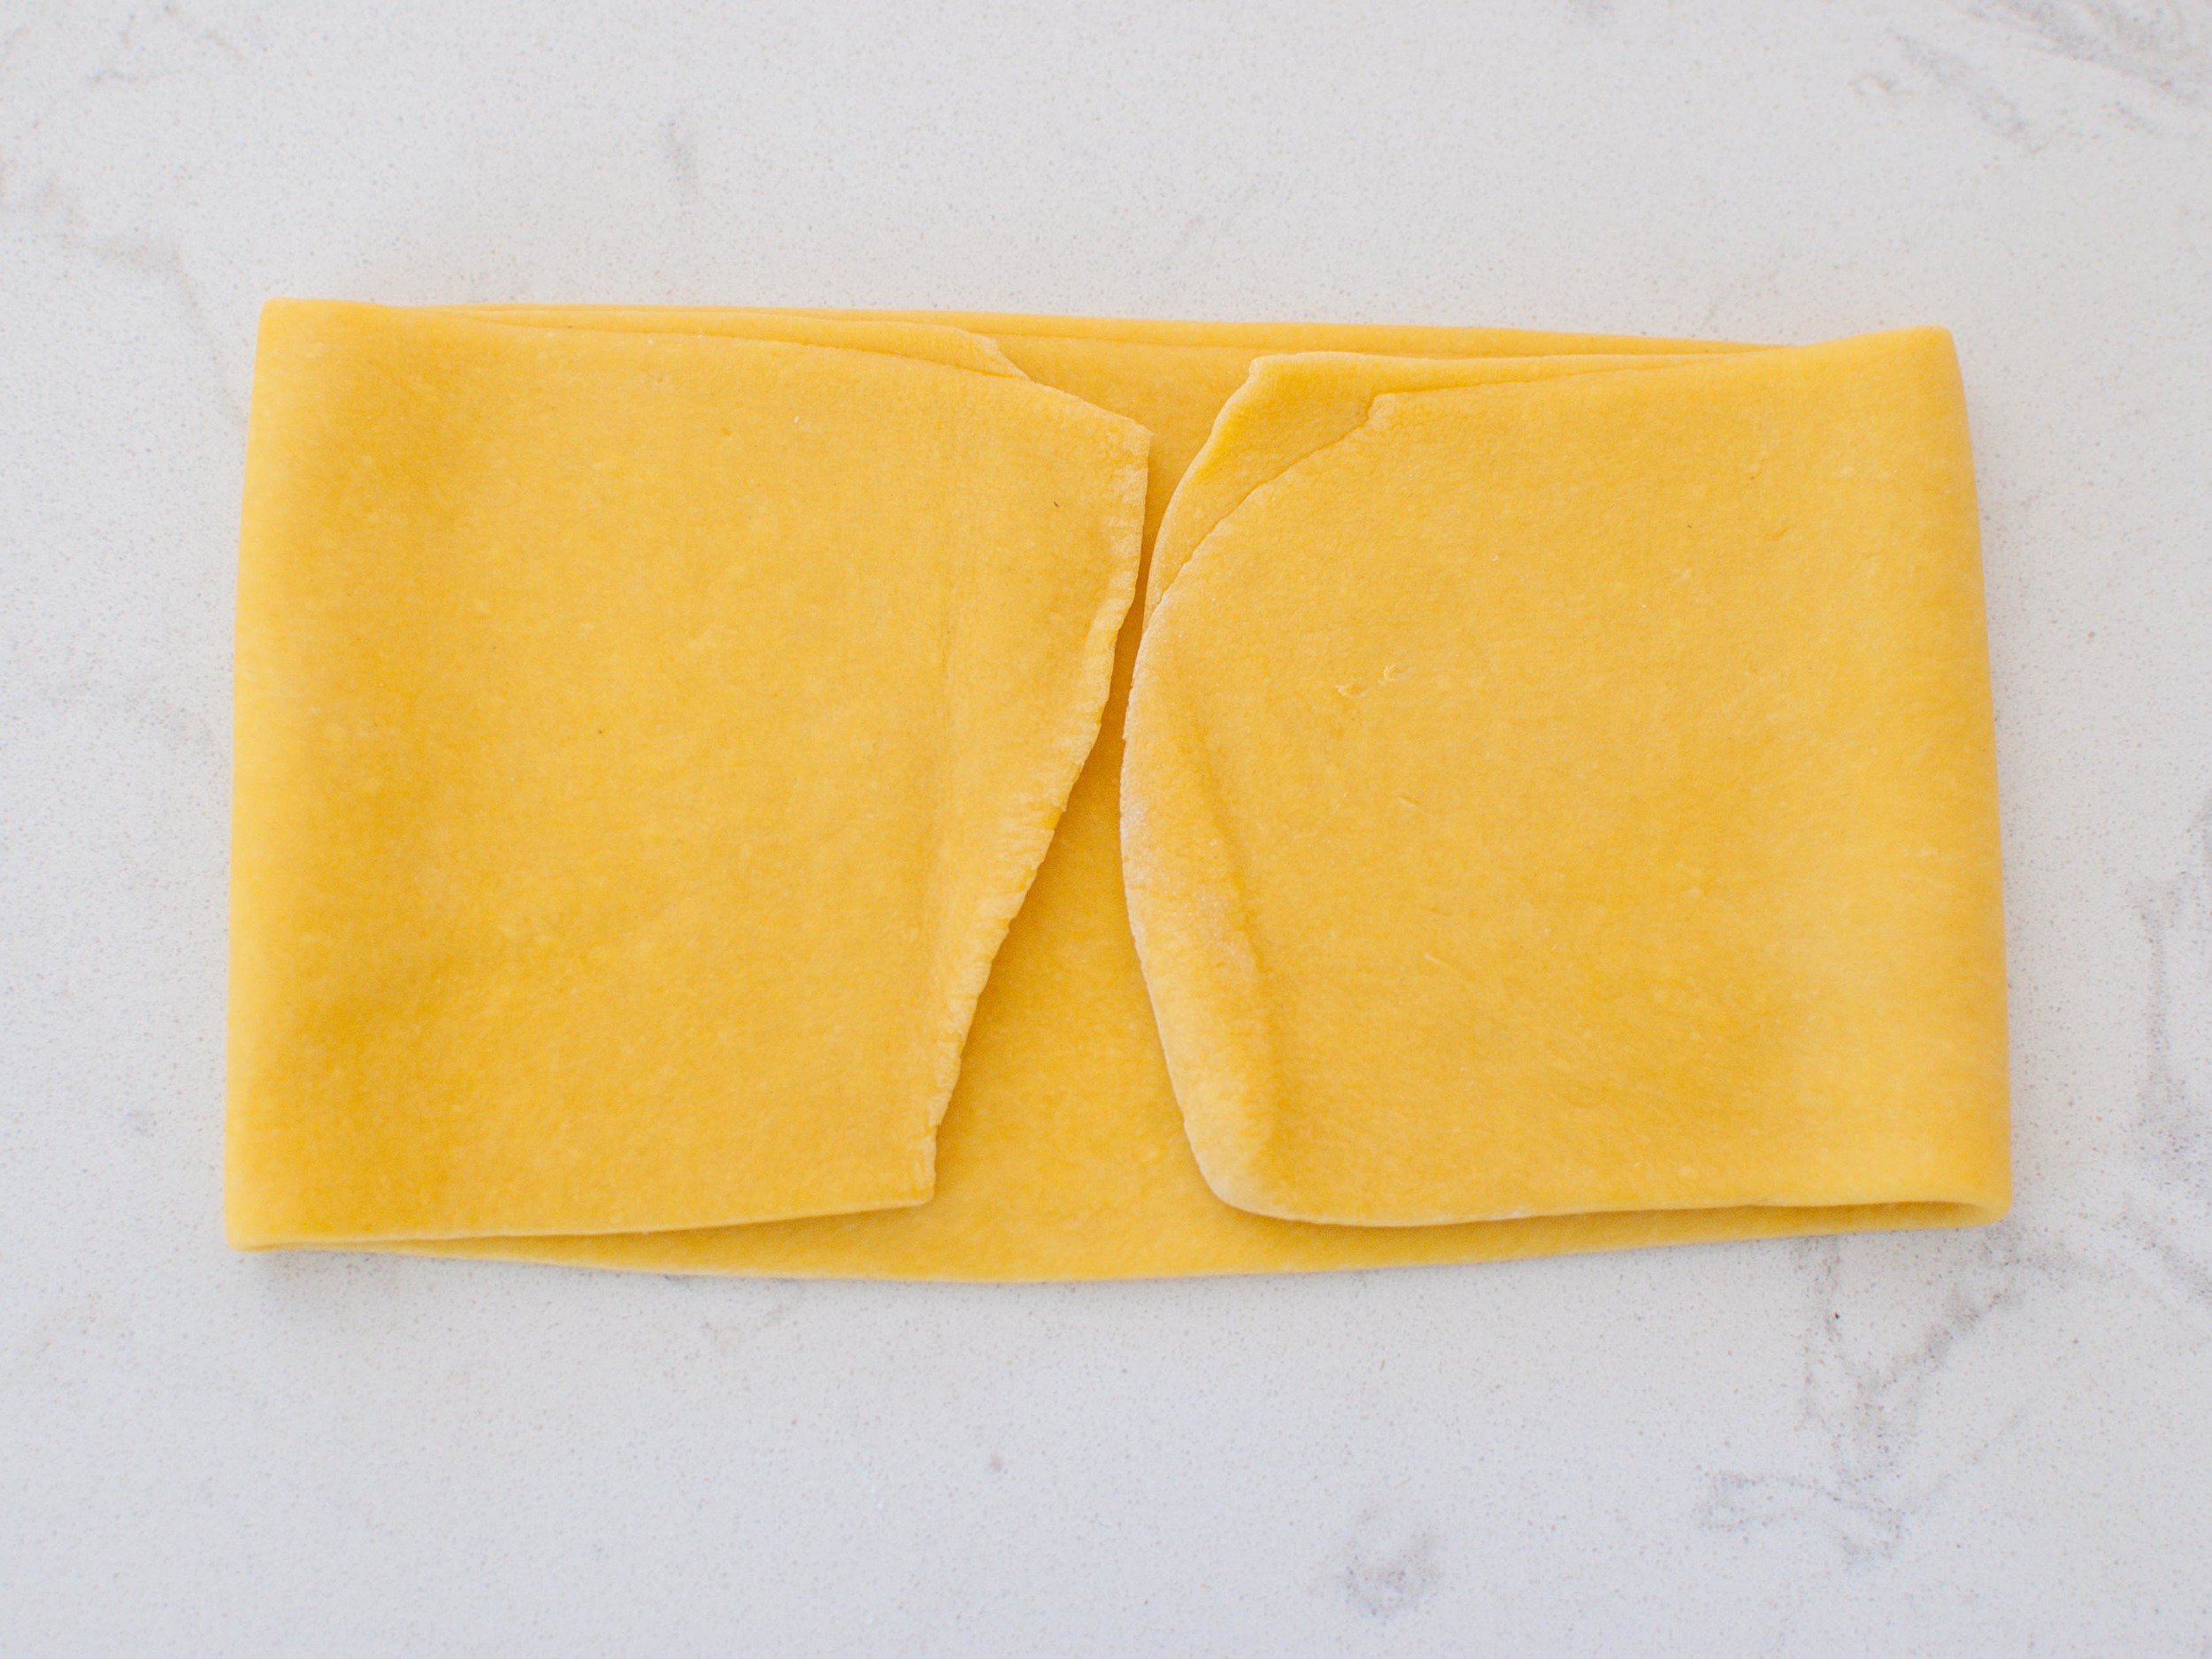
Place dough on a lightly floured work surface. Fold both ends in so that they meet at the center of the dough, and then fold the dough in half where the end points meet, trying not to incorporate too much air into the folds. Using rolling pin, flatten dough to 1/2-inch thick. Pass through the rollers 3 additional times.

Reduce the setting, and repeat rolling and folding the dough, passing it through the machine 2 or 3 times before going to the next setting. For pappardelle and fettuccine, stop rolling when the dough is about 1 or 2 settings wider than the thinnest one on your roller. For lasagna noodles, and for ravioli and other stuffed or filled pasta, go to the thinnest setting. 

Narrow the setting by 1 notch and repeat the folding and rolling process. Repeat once more (the dough should now have passed through the third widest setting). Continue passing the dough through the rollers, reducing the thickness by 1 setting each time until it reaches the desired thickness. It should now be very delicate and elastic to the touch, and slightly translucent.

Place rolled dough onto a work surface or baking sheet lightly dusted with flour or lined with parchment paper, folding the dough over as necessary so that it fits; sprinkle with flour or line with parchment between folds to prevent sticking.

Cover dough with plastic wrap or a kitchen towel to prevent drying, then repeat rolling and folding process with remaining dough quarters. If making noodles, cut dough into 12- to 14-inch segments. Run the dough through the pasta machine again using the cutter attachment, or cut the dough into your desired width using a pizza cutter or chefs knife.

If rolling by hand:

Cut the rested dough into 2 pieces, keeping them covered with plastic wrap or a dish towel when not in use. Use a rolling pin to flatten the dough until it is as thin as a penny for fettuccine and pappardelle, or even thinner for lasagna sheets. This will take some time and arm strength, but the process is easy and the results are rewarding! Cut the noodles to the desired width and length using a pizza cutter or chefs knife.

To cook the pasta:

Bring a large pot of well-salted water to a boil, add fresh pasta and boil for 1 to 3 minutes, depending on thickness of the pasta. Drain well. 

To enjoy this simple indulgence, toss noodles with butter, a light sprinkling of coarse salt, and a heavy shower of freshly grated parmesan cheese. Perfection!

Asparagus, Peas and Fava Beans with Gremolata and Mozzarella by Cynthia Raub

Print Friendly and PDF

Suddenly, they were everywhere. Delicate, thin stalks of asparagus appeared in the markets in all of their glory. They are on special! They are as tender and flavorful as all get out! It was time to get excited about spring vegetables. Granted, asparagus, like most all other produce, is now available year-round. While it is tolerable during the other seasons, out of season asparagus does not compare to the first of the season, local crop. The other spring beauties that shine like green diamonds in the spring are fresh English peas and finicky fava beans. Combined, these veggies make a beautiful statement as a side dish or an alternative to a salad. My initial thought was to dress the vegetables simply with olive oil, salt, pepper and lemon juice. But then I remembered that the lemon juice would turn the green vegetables brown and unappealing. Boo! That's when it occurred to me to dress it with a gremolata: a minced combination of lemon zest, parsley and garlic. The lemon zest would provide the acidic zing, the parsley would bring brightness and even more freshness to the veggie party and the garlic does what garlic was created to do (aka make everything more delicious). Topping this loose, green dish with a soft and white cheese really brought it together and made it a perfect accompaniment to Amy's Fresh Egg Pasta.

Notes: Gremolata can be prepared several ways. I primarily used a microplane to finely grate the garlic and zest the lemon - I found that this method cut down my chopping time tremendously. Some people use a mortar and pestle to make a paste with all of the ingredients, others chop everything completely with a knife, and some use a food processor to get the results they want. Fava beans have a very short and sweet season so they can be cumbersome to acquire. They are also time intensive to shell and prepare. I was committed to fava beans, but if you can't find them or don't want to prepare them, omitting them won't do any harm, either.


Time: 50 minutes
Serves: 4-6

2 bunches of asparagus
1 cup of english peas
1/2 cup fava beans (optional)
3 tablespoons extra virgin olive oil
2 teaspoons kosher salt
1 teaspoon freshly cracked pepper

1 lemon
3 garlic cloves
1 cup of parsley leaves, packed

8 oz fresh mozzarella (or burrata)

In a large pot, bring salted water to a rolling boil over medium heat. Fill a large bowl with ice and water - set ice bath aside. Prepare asparagus bunches by cutting off the woody ends (about 2 inches). Blanch asparagus for 1-2 minutes depending on the thickness of your asparagus stalks and your vegetable doneness preference. Remove from boiling water with tongs and submerge in the ice bath to stop the cooking. Remove asparagus from the ice bath onto a towel to absorb the excess water.

In the same pot of boiling water, blanch and cool the peas as you did the asparagus. Set aside.

Lastly, blanch the fava bean pods in the boiling water for 2-4 minutes cooking them through. Strain the pods and set aside to cool. Once the pods are cool, remove the waxy bean shells from the pod. Using a small pairing knife, slit the waxy shells to release the beans. Set the shelled beans aside.

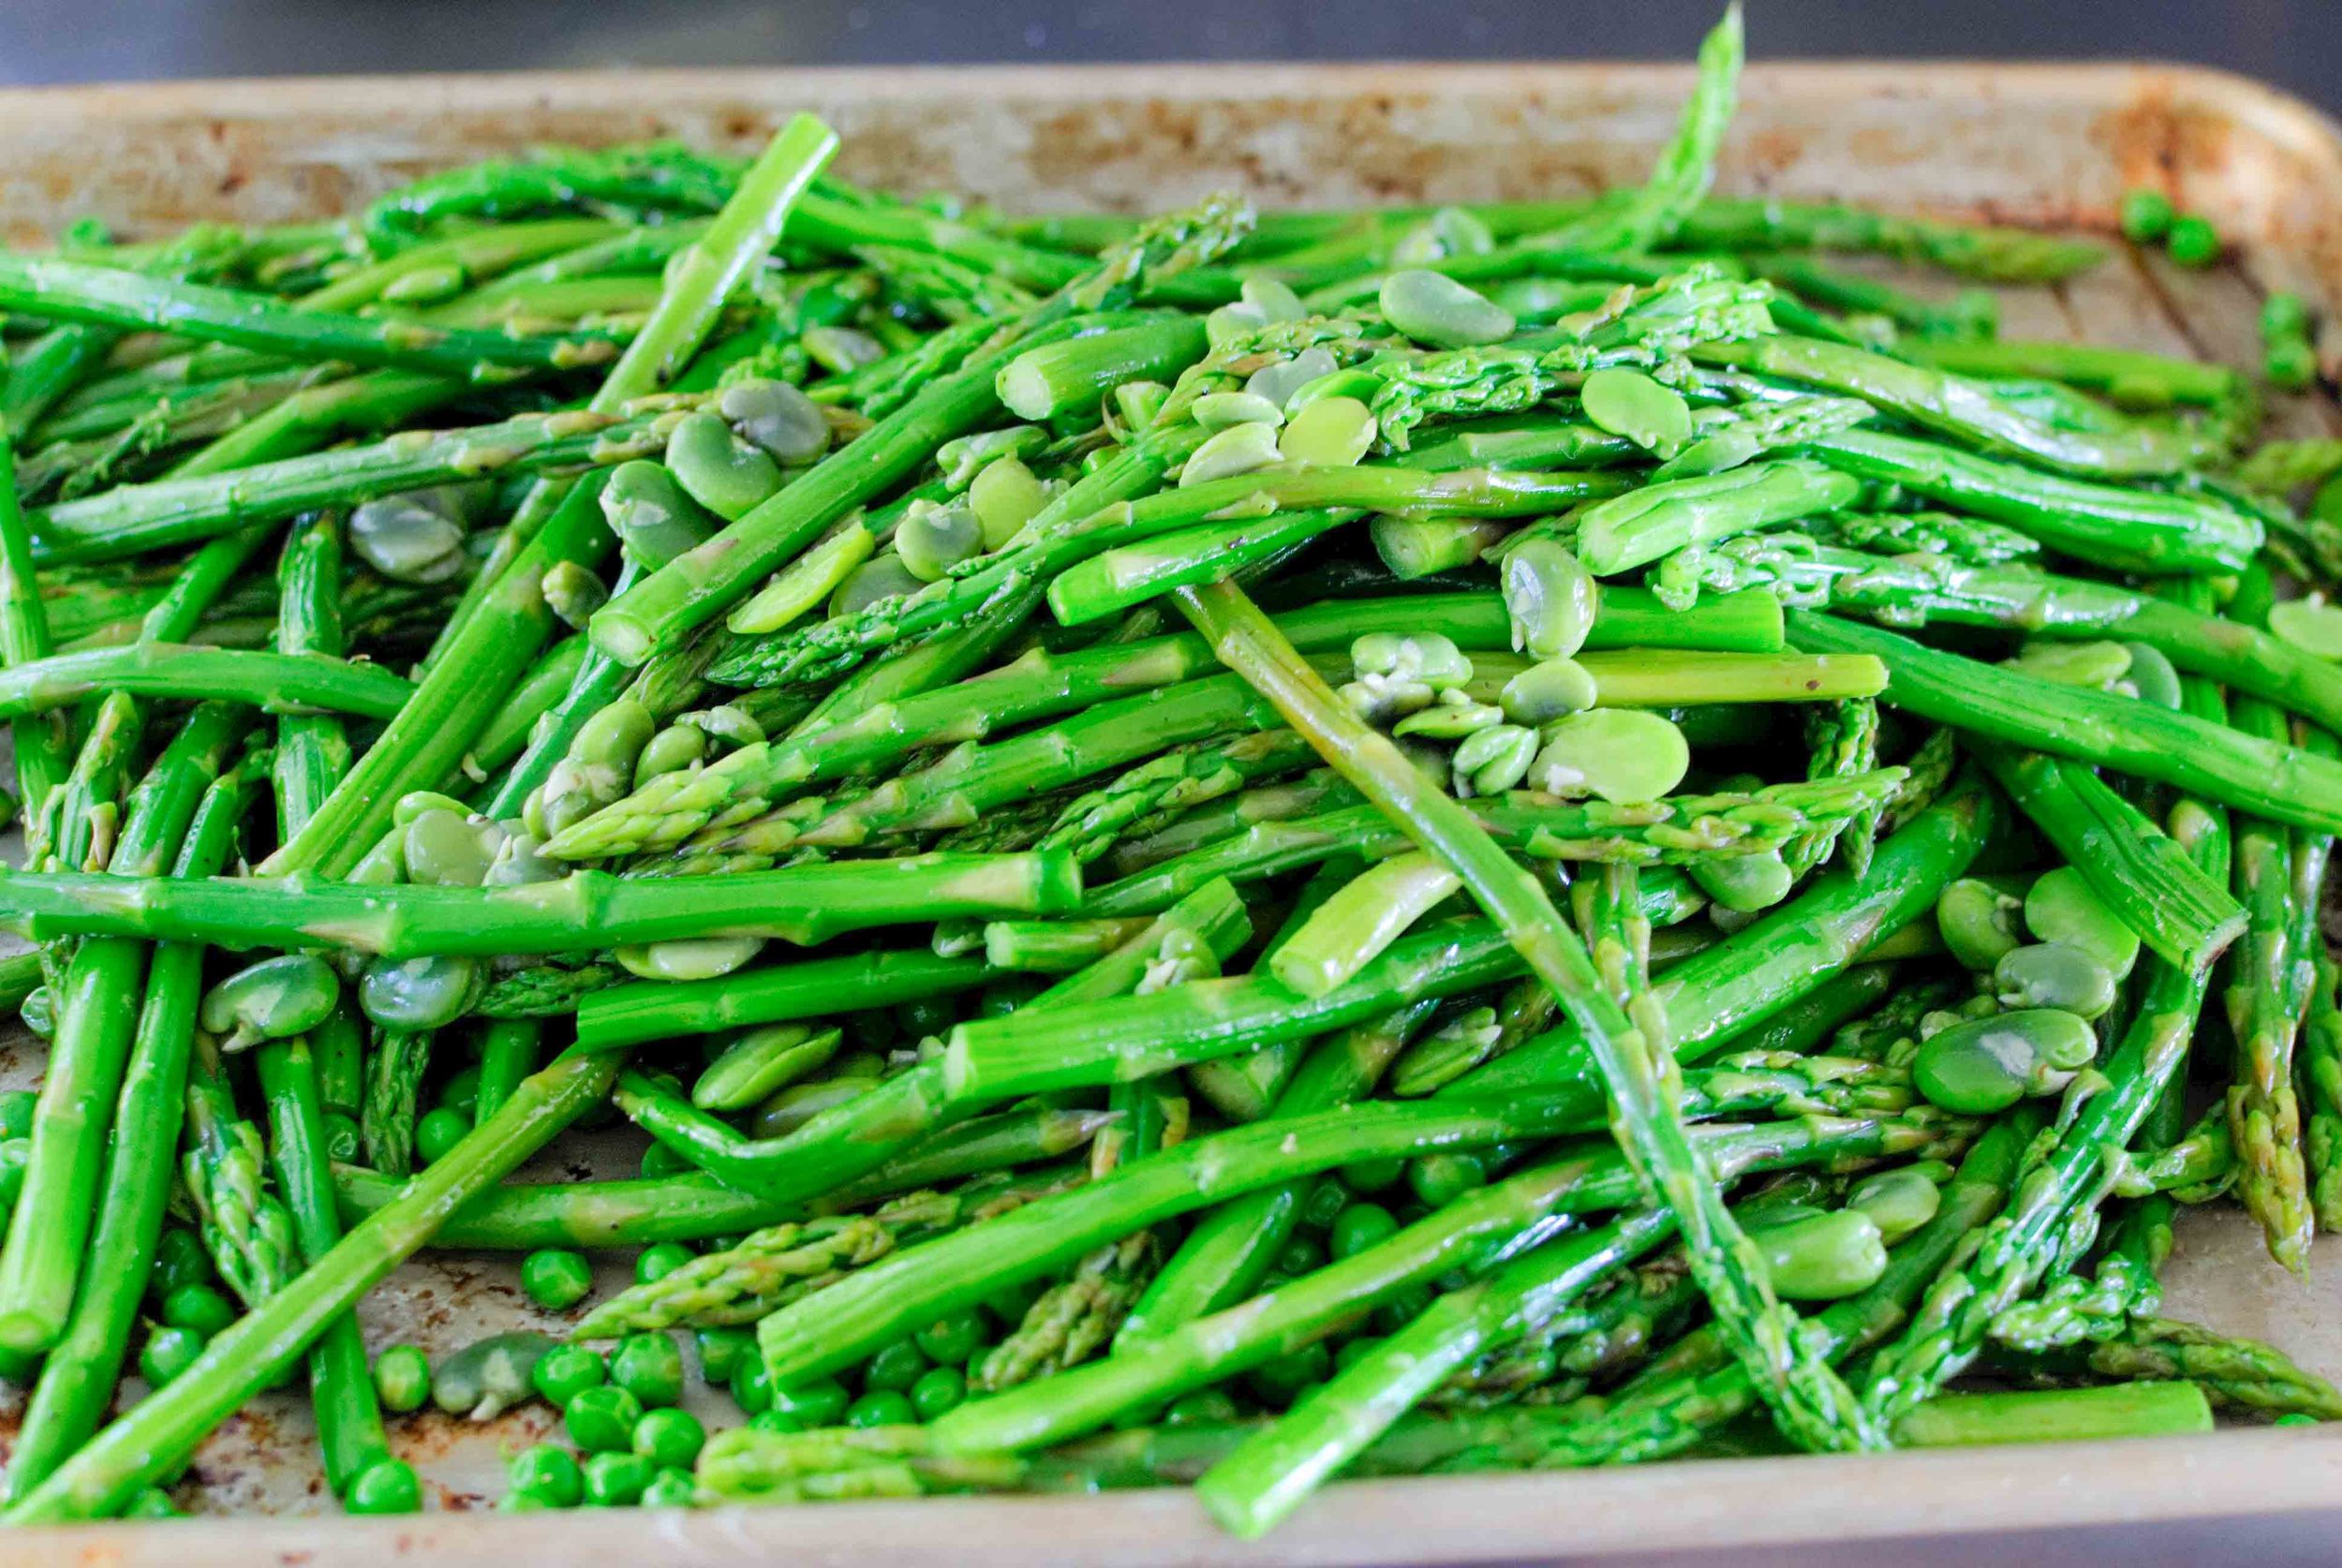
In a large bowl (I used a half sheet baking pan), gently combine the asparagus, peas and fava beans. Season the vegetables with kosher salt, pepper and olive oil.

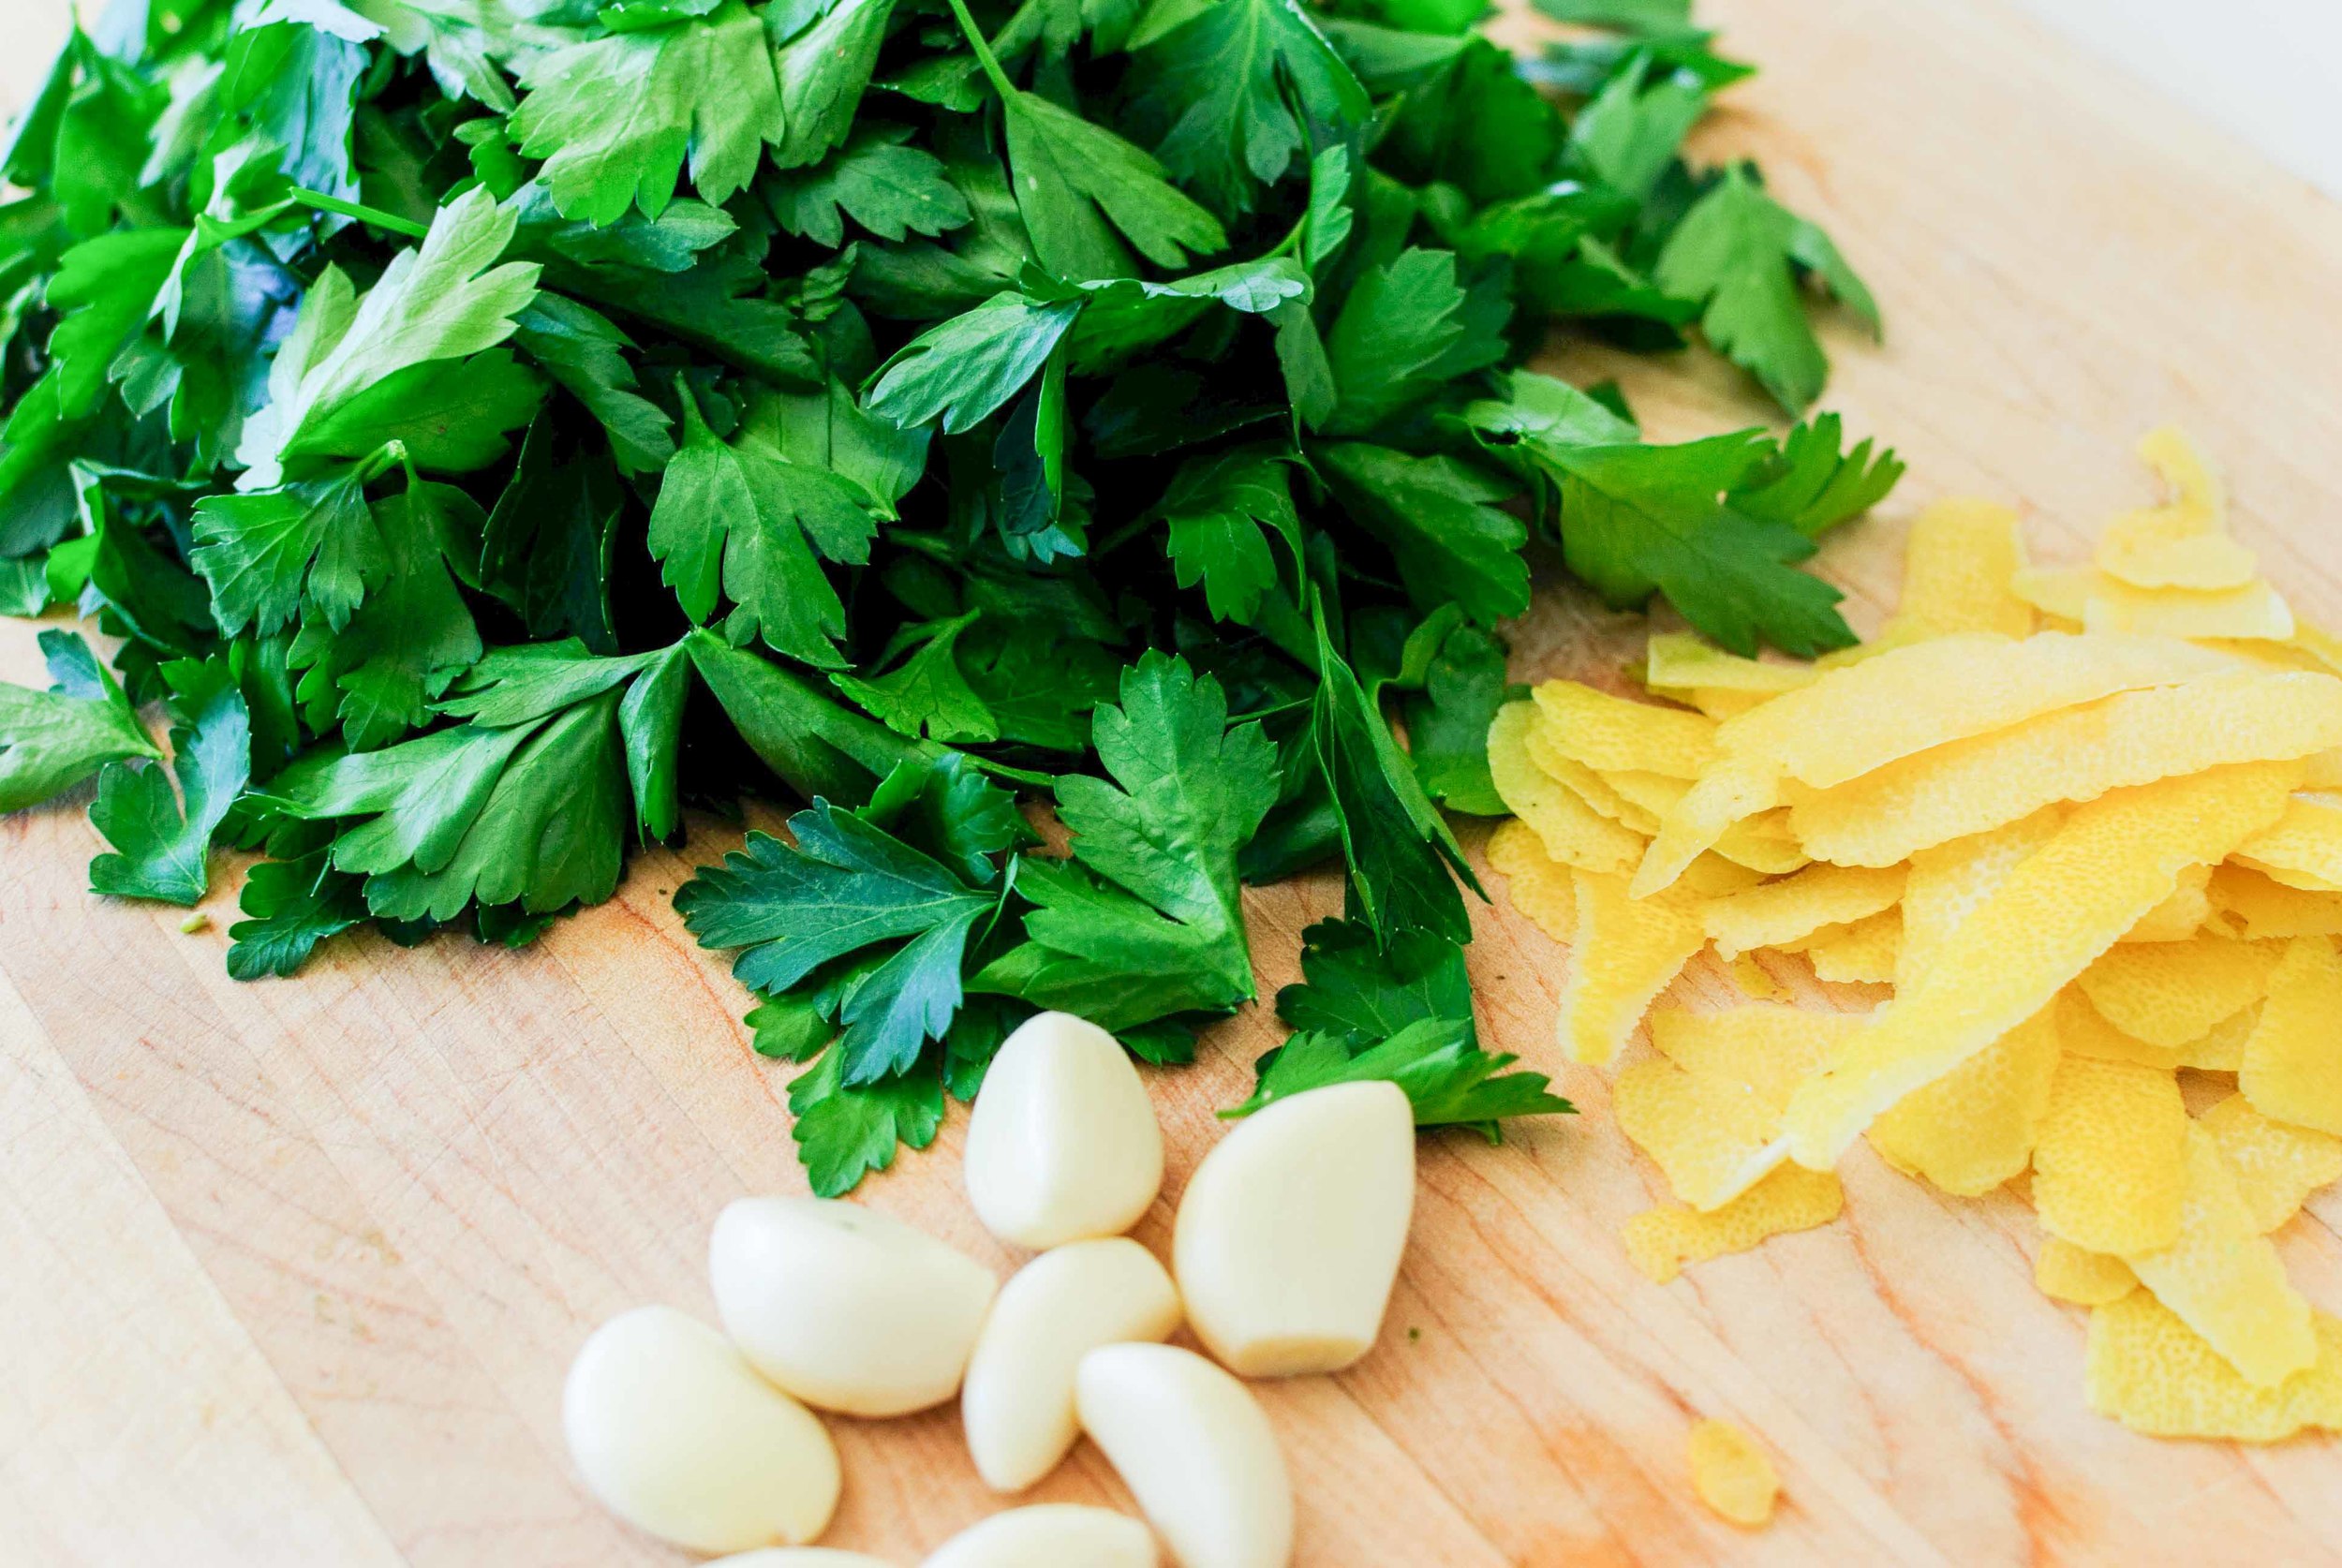
For the gremolata: using a microplane, zest one entire lemon onto your cutting board. Microplane the garlic on top of the lemon zest. Finely chop the parsley on the same cutting board, incorporating the lemon zest and grated garlic as you mince away until everything is well combined.

Sprinkle the asparagus mixture with the gremolata to taste. Mix and combine, and let sit for 15 minutes to allow the flavors to meld before serving. Tear mozzarella and dot over asparagus. Taste and adjust seasoning, adding salt or gremolata as necessary!

Purple Rain Smoothie by Christine Pedlar

Print Friendly and PDF

Smoothies are a quick easy way to make sure you get your fruits and veggies in and can be as varied as your imagination, tastes, and nutritional aspirations. Need some extra protein or Omega-3's? Smoothies can do the trick. I like them any time I'm feeling too lazy to make a salad, 'cause let's face it, dealing with a bunch of veggies can sometimes feel like a chore. They're also great pre or post workout, when you want something to go, or crave something simple, satisfying but not heavy.

You've probably heard, Prince went to the Afterworld this week. This makes me sad. But maybe you didn't know, Prince dug smoothies. So it's only fitting I have something in my repertoire honoring him. When I'm craving something sweet and decadent, this is it. Chocolate covered berries in a glass that will have you partying like it's 1999, or at the very least, Paisley Park in 2010. And the Greek yogurt packs a lot of protein, you know, in case you have to go do the splits on top of a Grand Piano or something. Or maybe just recover from a run or spin class like the rest of us mortals.

Notes: I find some Greek yogurts to be a bit chalky for my taste (ahem, Fage), so you might want to experiment with what you like and is available in your area. If I'm feeling flush, Strauss' Organic Nonfat Plain Yogurt is my favorite, but Trader Joe's Greek Style Nonfat Plain Yogurt is the best choice I've found for a decent price.

If you want to make this recipe vegan like Prince, simply swap out the Greek yogurt for cultured coconut milk or soy yogurt.

Raw cacao powder can be found at natural food stores or online. My 88 year-old grandfather turned me on to putting it in smoothies. He buys it on Amazon 'cause he's fly like that, but I get it might be hard to find or on the spendy side. So it's totally cool with me if you want to use good old fashioned cocoa powder instead. You can also substitute the almond milk with any other kind of milk you enjoy.


Time: 10 minutes
Servings: Two 16 ounce glasses

Place ingredients in a blender going down this list in order, first to last. The layering order makes a difference. 

1 cup unsweetened vanilla (or regular) almond milk
1 teaspoon vanilla extract
2 tablespoons raw cacao powder
½ to 1 tablespoon honey
5 ounces baby spinach
1 cup Greek yogurt
2 cups frozen berries (take your pick – blueberries or cherries are my favorites) 
1 frozen banana
Optional: 2 tablespoons hemp hearts or chia seeds if you're looking for some Omega-3's. Add into the blender after yogurt. 

Blend well. Party!

Buttery Soft Pretzels by Amy Cantu

Print Friendly and PDF

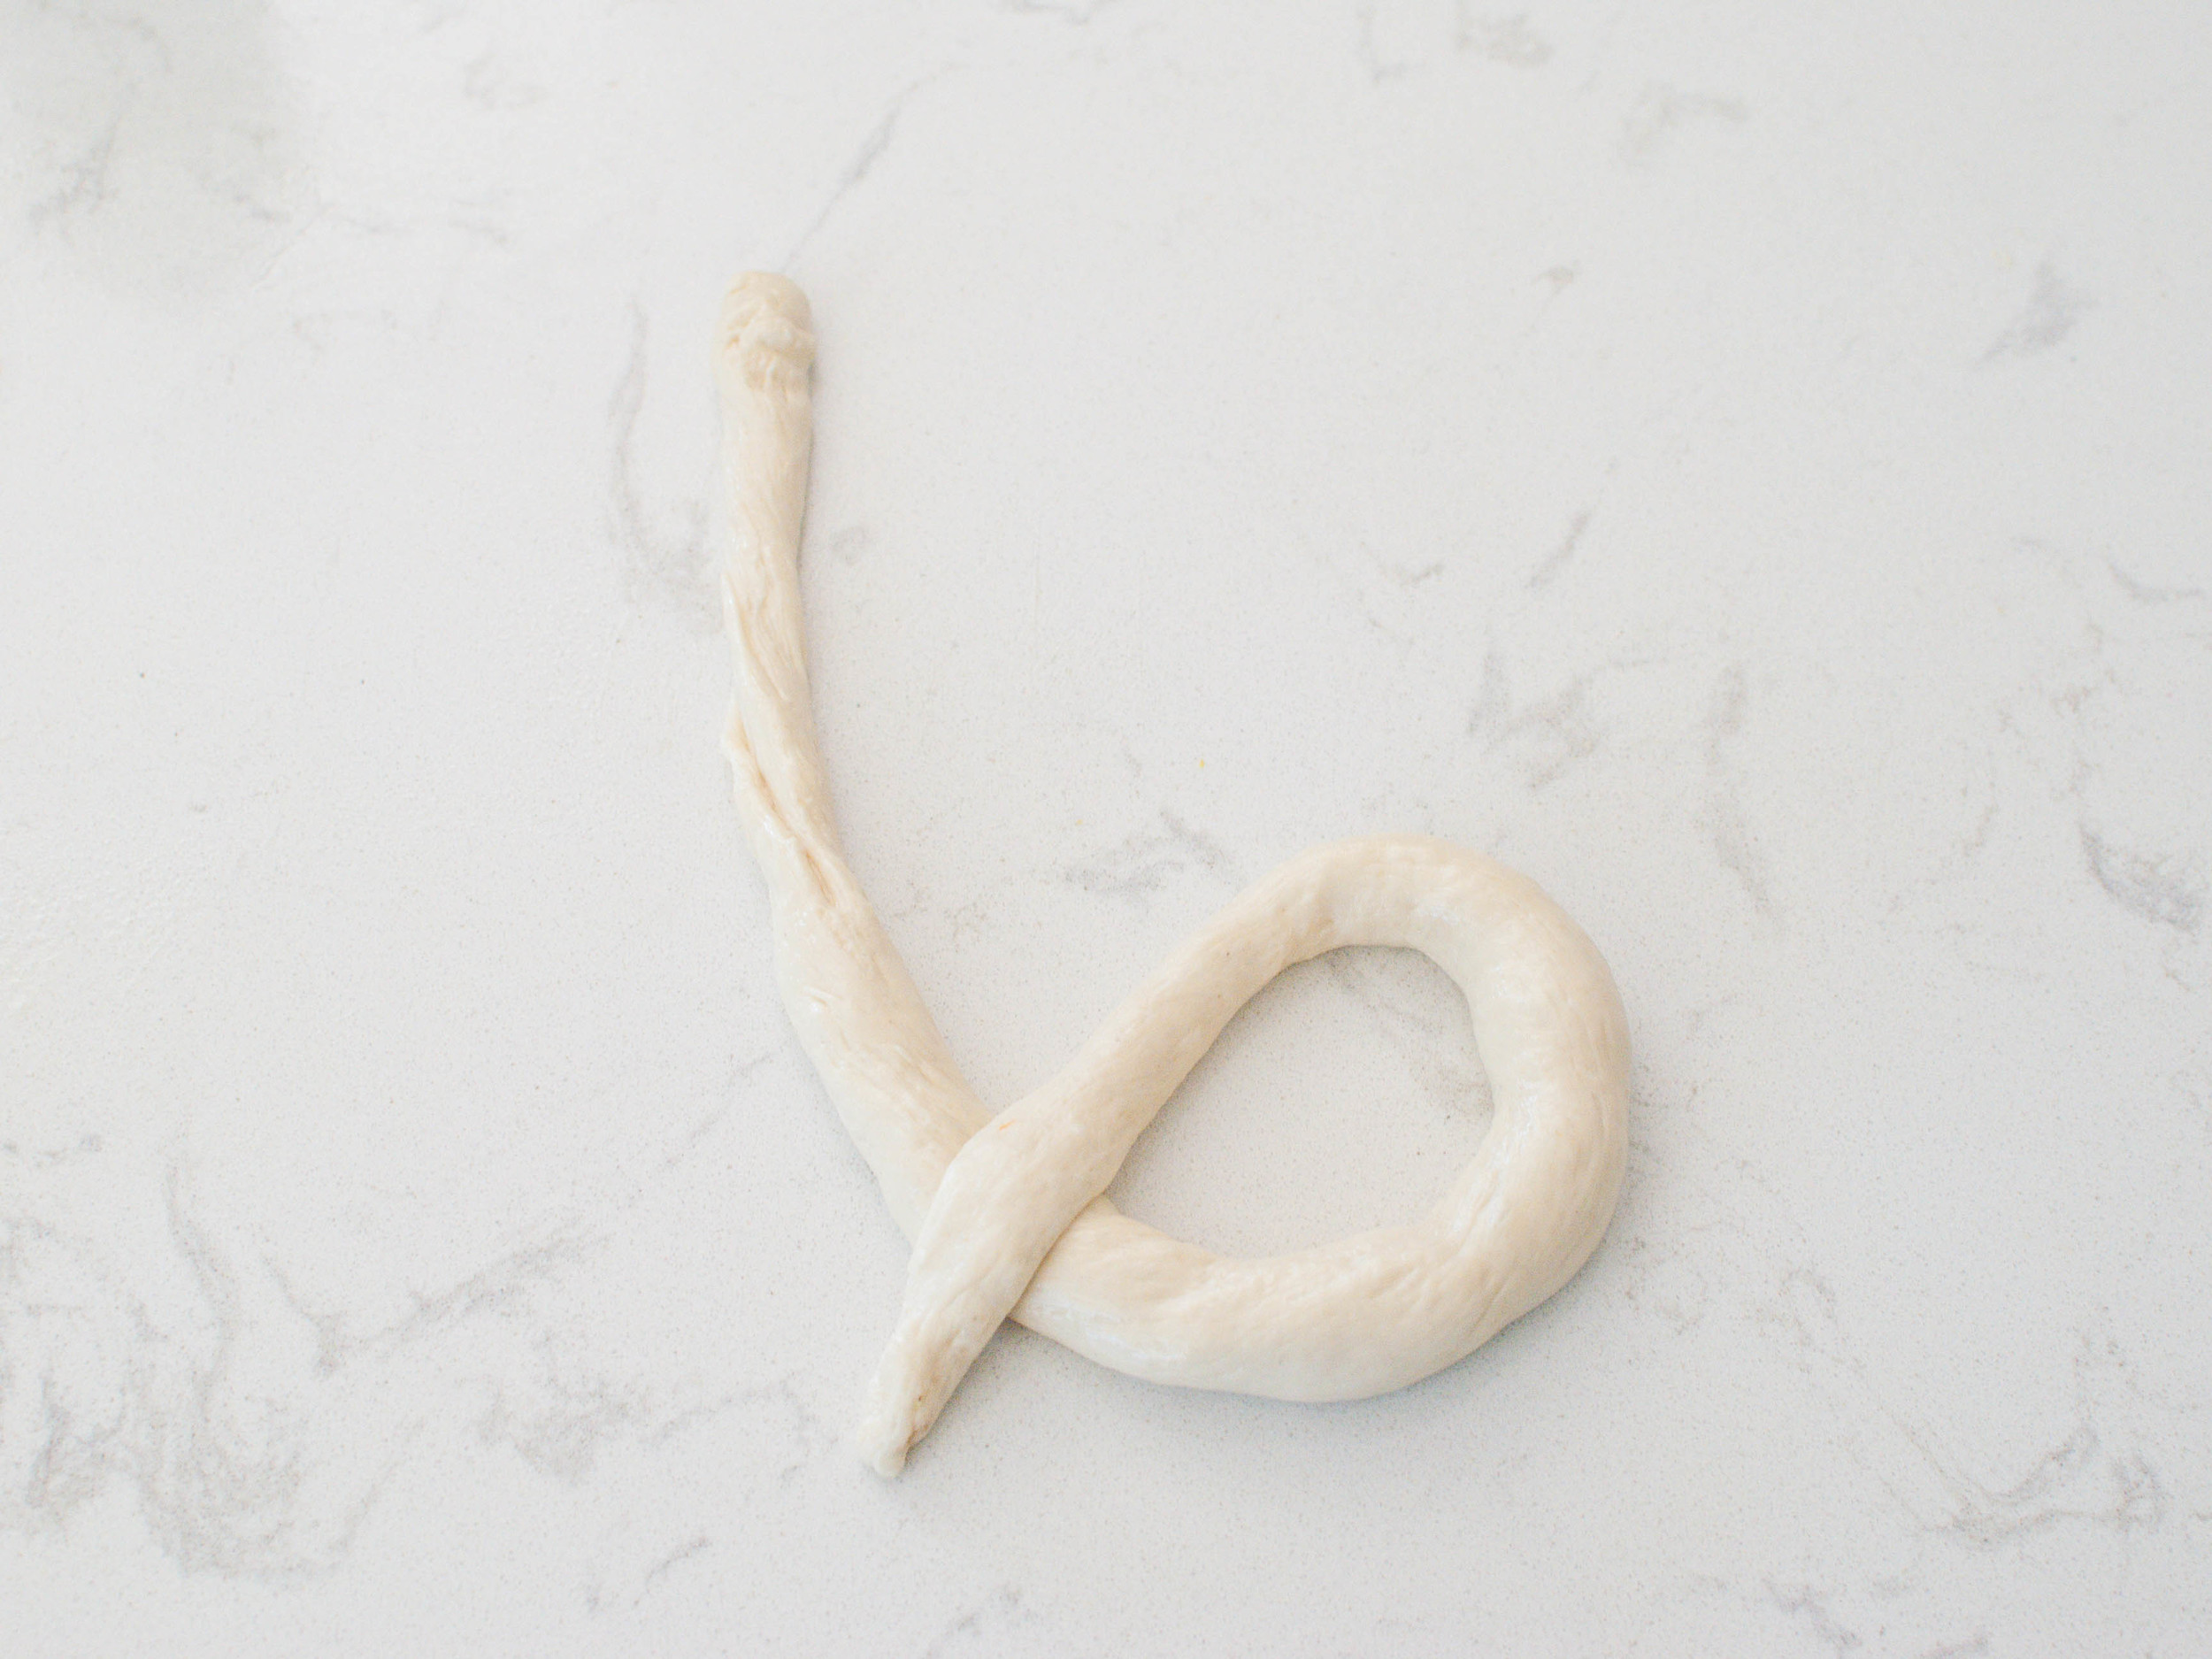
I fell in love with the soft, chewy, buttery, salty goodness that are these pretzels, the moment I sank my teeth into them. To make these even more appealing, they can be made from start to finish in an hour. There's no fussy waiting for an hour or more begging the dough to rise or fiddly boiling them in pot of baking soda water. The process has been streamlined to get these beauties in your mouth as quickly as possible!

Notes: I would not and did not change one thing about this recipe. I do have a couple thoughts on it though. (Don't I always?) I did not have pretzel salt on hand, so I used a very light sprinkling of Fleur de Sel. Coarse sea salt or any other larger crystal finishing salt would work great.

Fun variations - Sprinkle these with cinnamon sugar after brushing the butter onto the pretzels - oh yes! Stir together granulated sugar and finely grated orange/lemon zest, then dust over the buttered pretzels - so zesty! Or shower finely grated parmesan and dried oregano over the buttery tops - oh my!  Add a minced garlic clove to the butter before brushing over the pretzels - mmhmm! Or go the mini-route, and cut the dough into bite-sized pieces for pretzel bites - perfect party food!

These are best eaten the day they are baked and are heavenly if eaten straight from the oven. 


Recipe from King Arthur Flour.

TIme: 1 hour
Yield: 8 pretzels

Dough
2 1/2 cups Unbleached All-Purpose Flour
1 teaspoon salt
1 teaspoon sugar
2 1/4 teaspoons instant yeast
7/8 to 1 cup warm water*
*Use the greater amount in the winter, the lesser amount in the summer, and somewhere in between in the spring and fall. Your goal is a soft dough.

Topping
1 cup boiling water
2 tablespoons baking soda
coarse, kosher or pretzel salt, optional
3 tablespoons unsalted butter, melted

To make dough by hand, or with a mixer: Place all of the dough ingredients into a bowl, and beat until well-combined. Knead the dough, by hand or machine, for about 5 minutes, until it's soft, smooth, and quite slack. Flour the dough and place it in a bag, and allow it to rest for 30 minutes.

To make dough with a bread machine: Place all of the dough ingredients into the pan of your bread machine, program the machine for dough or manual, and press Start. Allow the dough to proceed through its kneading cycle (no need to let it rise), then cancel the machine, flour the dough, and give it a rest in a plastic bag, as instructed above.

To make dough with a food processor: Place the flour, salt, sugar and yeast in the work bowl of a food processor equipped with the steel blade. Process for 5 seconds. Add the water, and process for 7 to 10 seconds, until the dough starts to clear the sides of the bowl. Process a further 45 seconds. Place a handful of flour in a bowl, scoop the slack dough into the bowl, and shape the dough into a ball, coating it with the flour. Transfer the dough to a plastic bag, close the bag loosely, leaving room for the dough to expand, and let it rest at room temperature for 30 minutes.

While the dough is resting, prepare the topping: Combine the boiling water and baking soda, stirring until the soda is totally (or almost totally) dissolved. Set the mixture aside to cool to lukewarm (or cooler).

Preheat your oven to 475°F. Prepare a baking sheet by spraying it with vegetable oil spray, or lining it with parchment paper. Transfer the dough to a lightly greased work surface, and divide it into eight equal pieces (about 70g, or 2 1/2 ounces, each). Allow the pieces to rest, uncovered, for 5 minutes. Pour the baking soda/water into a 9" square pan.

Roll each piece of dough into a long, thin rope (about 28" to 30" long), and twist each rope into a pretzel. Working with 4 pretzels at a time, place them in the pan with the baking soda/water, spooning the water over their tops; leave them in the water for 2 minutes before placing them on the baking sheet. This baking soda "bath" will give the pretzels a nice, golden-brown color.

Transfer the pretzels to the prepared baking sheet. Sprinkle them lightly with coarse, kosher, or pretzel salt, if desired. Allow them to rest, uncovered, for 10 minutes.

Bake the pretzels for 8 to 9 minutes, or until they're a dark golden brown. (If your oven runs hot or you are using a convection oven, start checking at 6 minutes.) Remove the pretzels from the oven, and brush them thoroughly with the melted butter. Keep brushing the butter on until you've used it all up; it may seem like a lot, but that's what gives these pretzels their ethereal taste. Eat the pretzels warm, or reheat them in an oven or microwave.