Bread

Coconut Bourbon Banana Bread by Amy Cantu

Print Friendly and PDF

I'm of the belief that you can't cram enough goodness into banana bread; it can totally handle it! This banana bread is made with browned butter, big chunks of walnuts, toasted coconut, and a splash of bourbon–browned butter for it's rich nutty flavor, walnuts because my two-year-old is obsessed with nuts, toasted coconut since we were out of chocolate chips, and I cannot stop myself from putting some form of coconut in everything, (here's a short list: Coconut Bars, Buddha Bowls, Coconut Tres Leches Cake, Mango with Coconut Sticky Rice, Olive Oil Granola . . . ) and bourbon makes everything seem a little bit more sinful and therefore delicious. (That was a crazy run-on sentence, and I can't fix it, so just bear with me. It's that kind of day.) The reasoning behind this banana bread is perfectly sound, and I can promise not a crumb will be left behind. No seriously.

Notes: Like any good banana bread recipe, this one is highly adaptable to whatever you have in the pantry. I let the kids pick their favorite "mix-ins", so that each loaf is uniquely their creation. On this day, my two-year-old was adamant about "more and more and more nuts", so I obliged with a whole cup of toasted chopped walnuts. We all enjoyed it immensely, but if nuts aren't your thing, feel free to leave them out. For that matter, add whatever mix-ins make your day happy, (chocolate or peanut butter chips, nuts, coconut flakes, raisins, cranberries, etc.) or none at all!


Time: 1 hour 30 minutes
Yield: One 9"x13" loaf

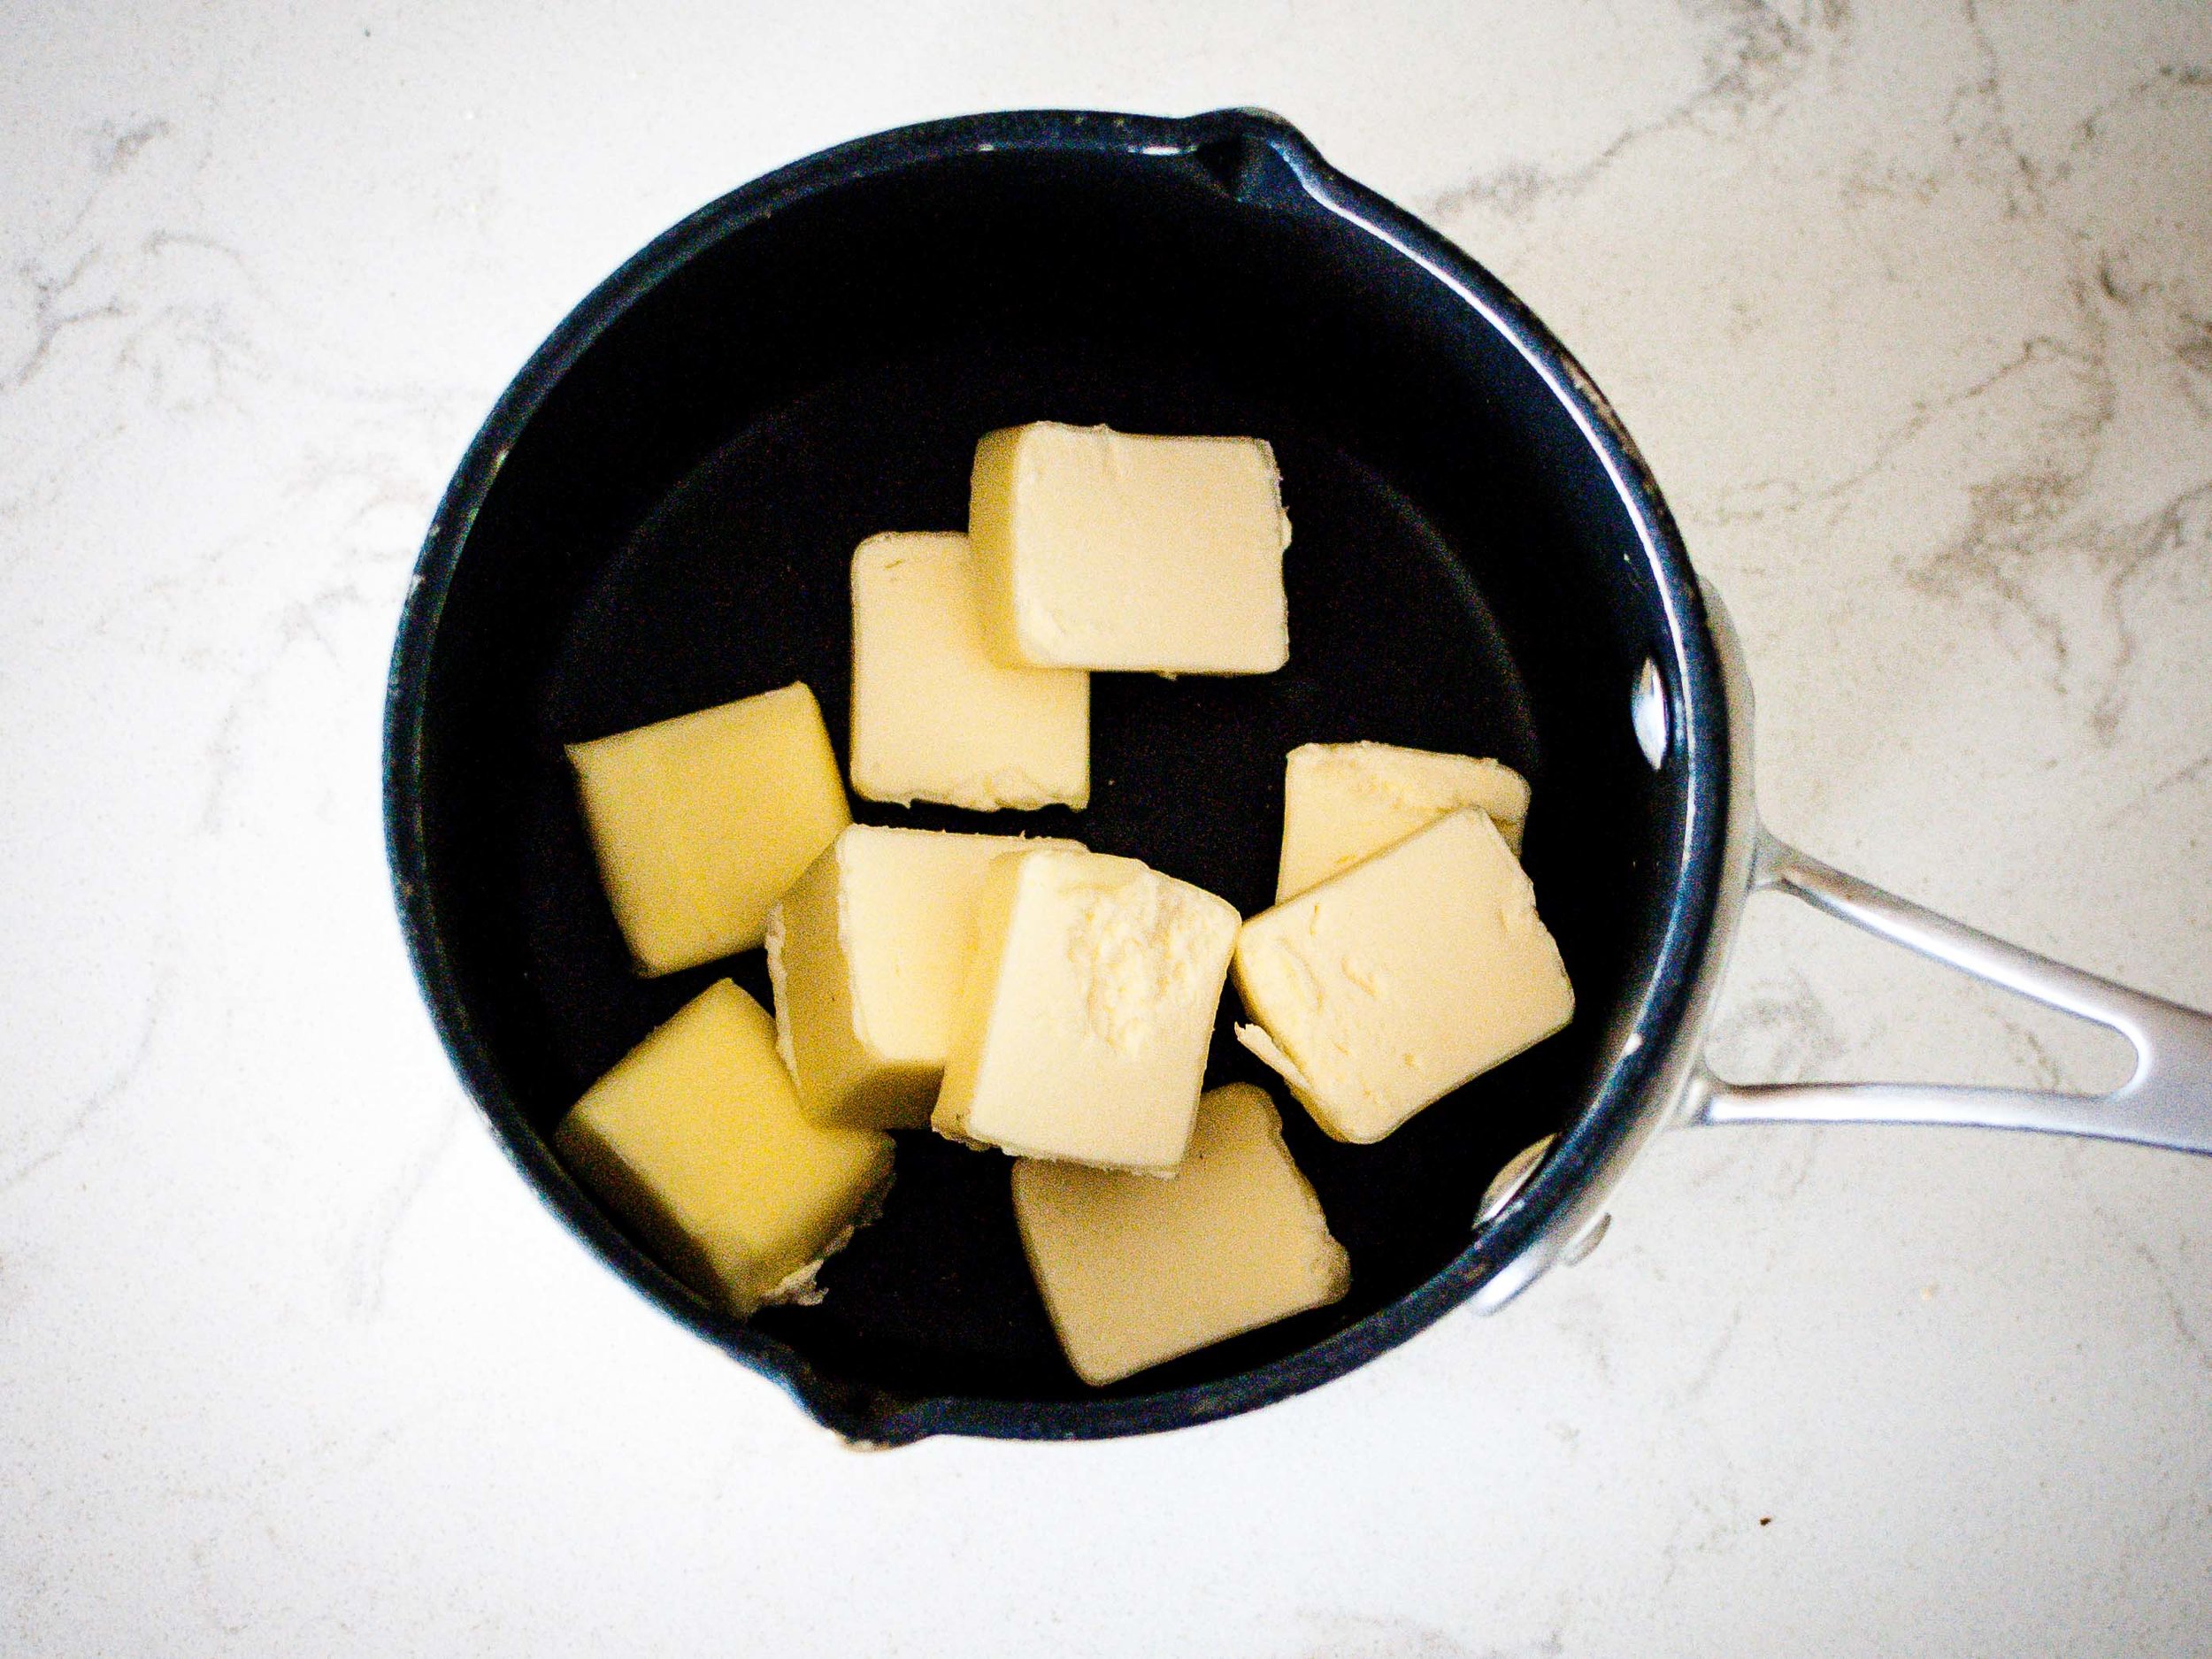
1/2 cup butter, diced
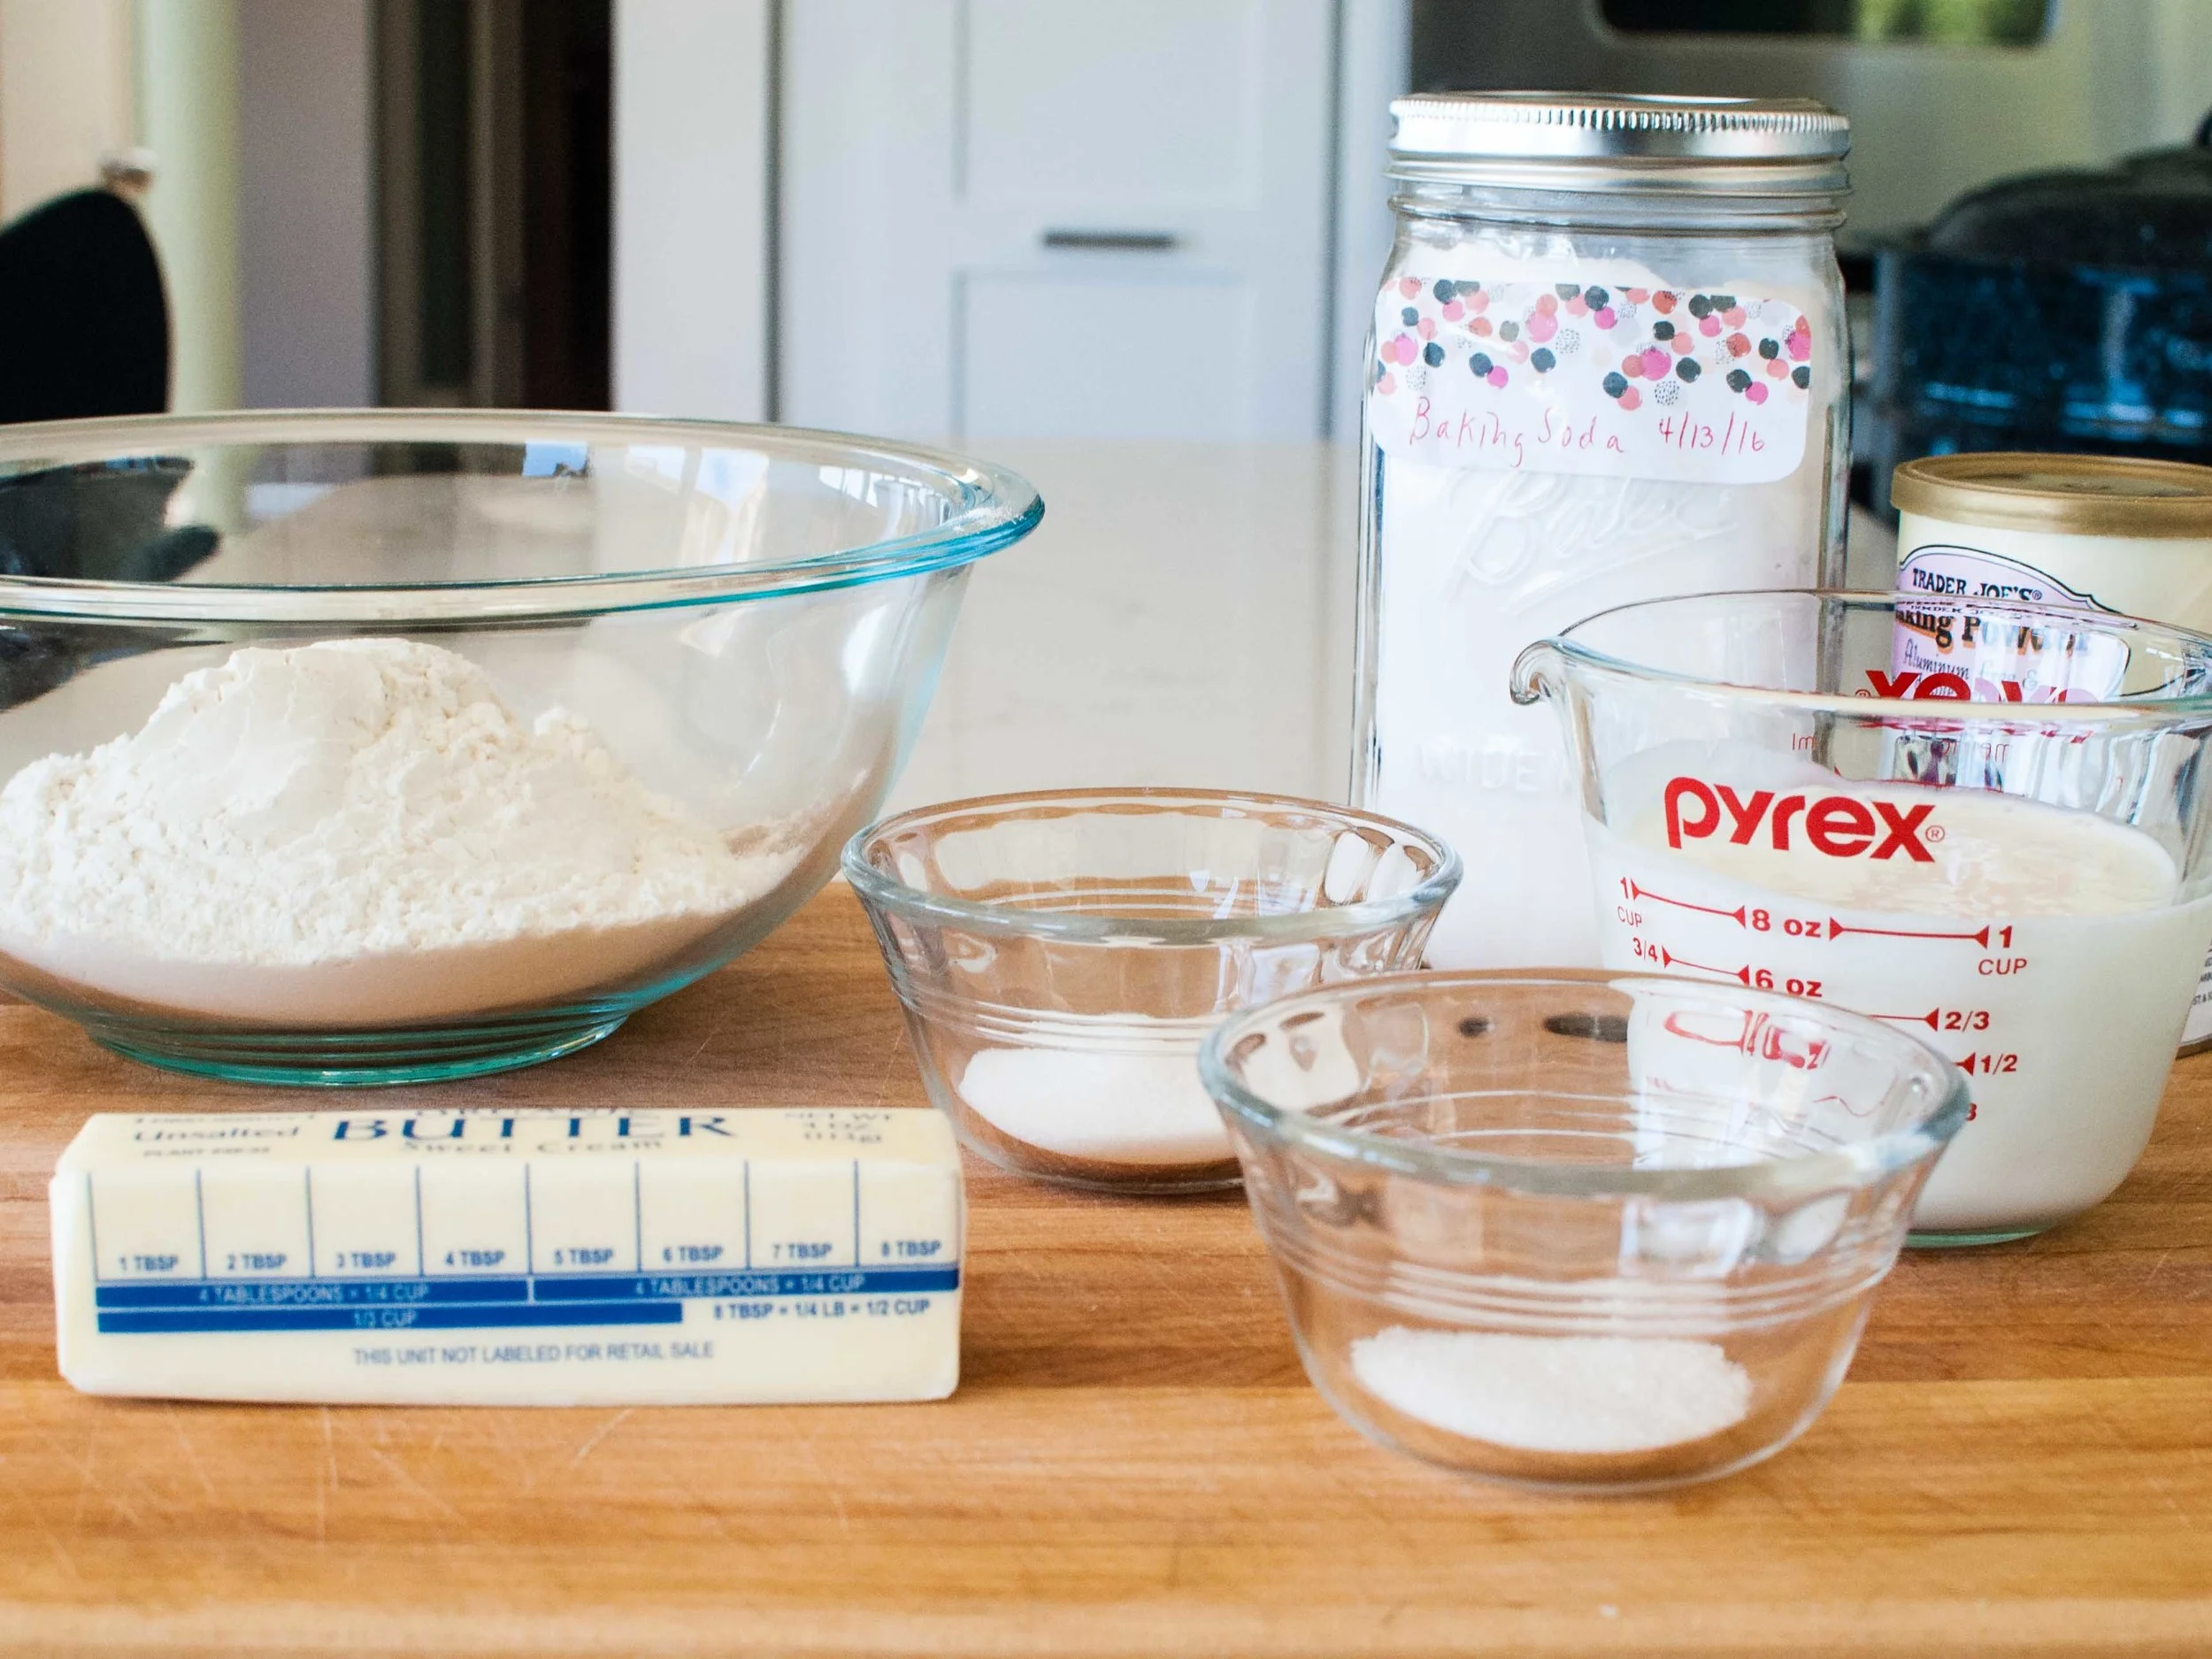
1 cup all purpose flour
1 cup whole wheat flour
1/4 cup dark brown sugar
1/2 cup granulated sugar
1 teaspoon baking powder
1/2 teaspoon baking soda
3/4 teaspoon kosher salt
1/2 teaspoon cinnamon
4 small (or 3 medium) ripe bananas, mashed
2 large eggs
1/2 cup greek yogurt (any kind)
1/2 cup unsweetened shredded coconut, toasted + extra un-toasted for sprinkling on top
Optional: 1 cup walnuts, toasted and coarsely chopped + extra un-toasted for sprinkling on top

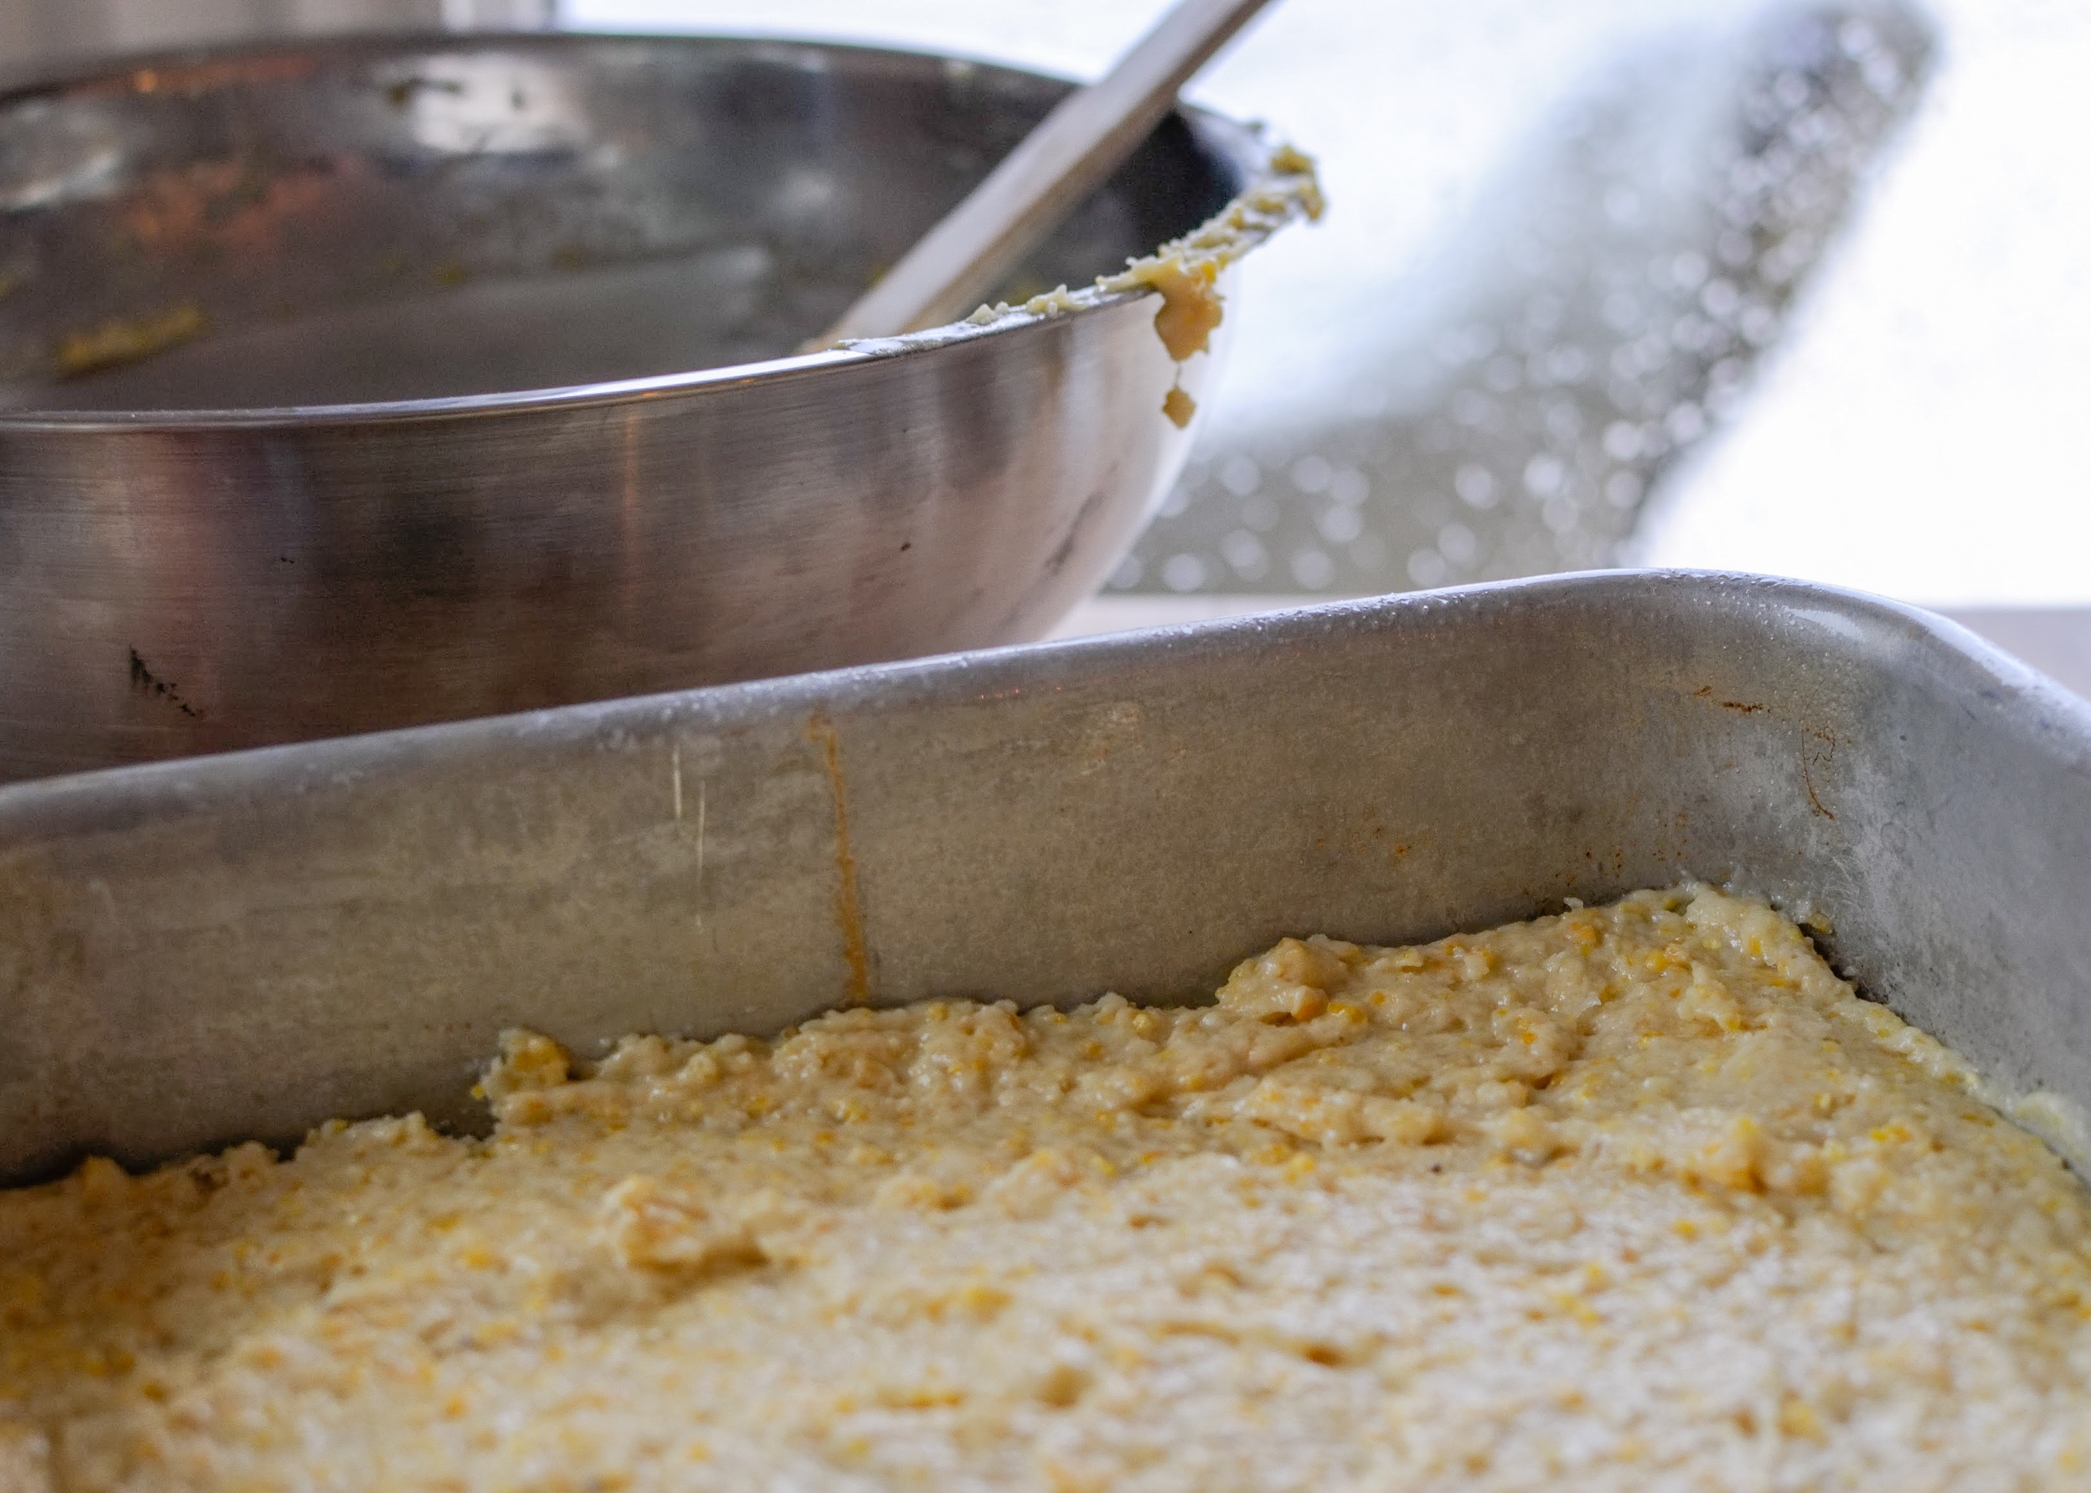
Preheat oven to 350 degrees F. Line a 9"x5" loaf pan with oil and parchment paper (or oil and flour). 

Line a rimmed baking sheet with two pieces of parchment paper (one piece of paper covering each half of the sheet). Place walnuts on one half and coconut on the other. Toast in the oven, removing when they are golden. (5-10 minutes for walnuts and 3-5 minutes for coconut).

Melt the butter over medium heat in a small saucepan, swirling butter occasionally until butter smells toasty and is golden brown. (Watch closely, because it will go from browned to burnt quickly!) Transfer to a medium bowl to cool.

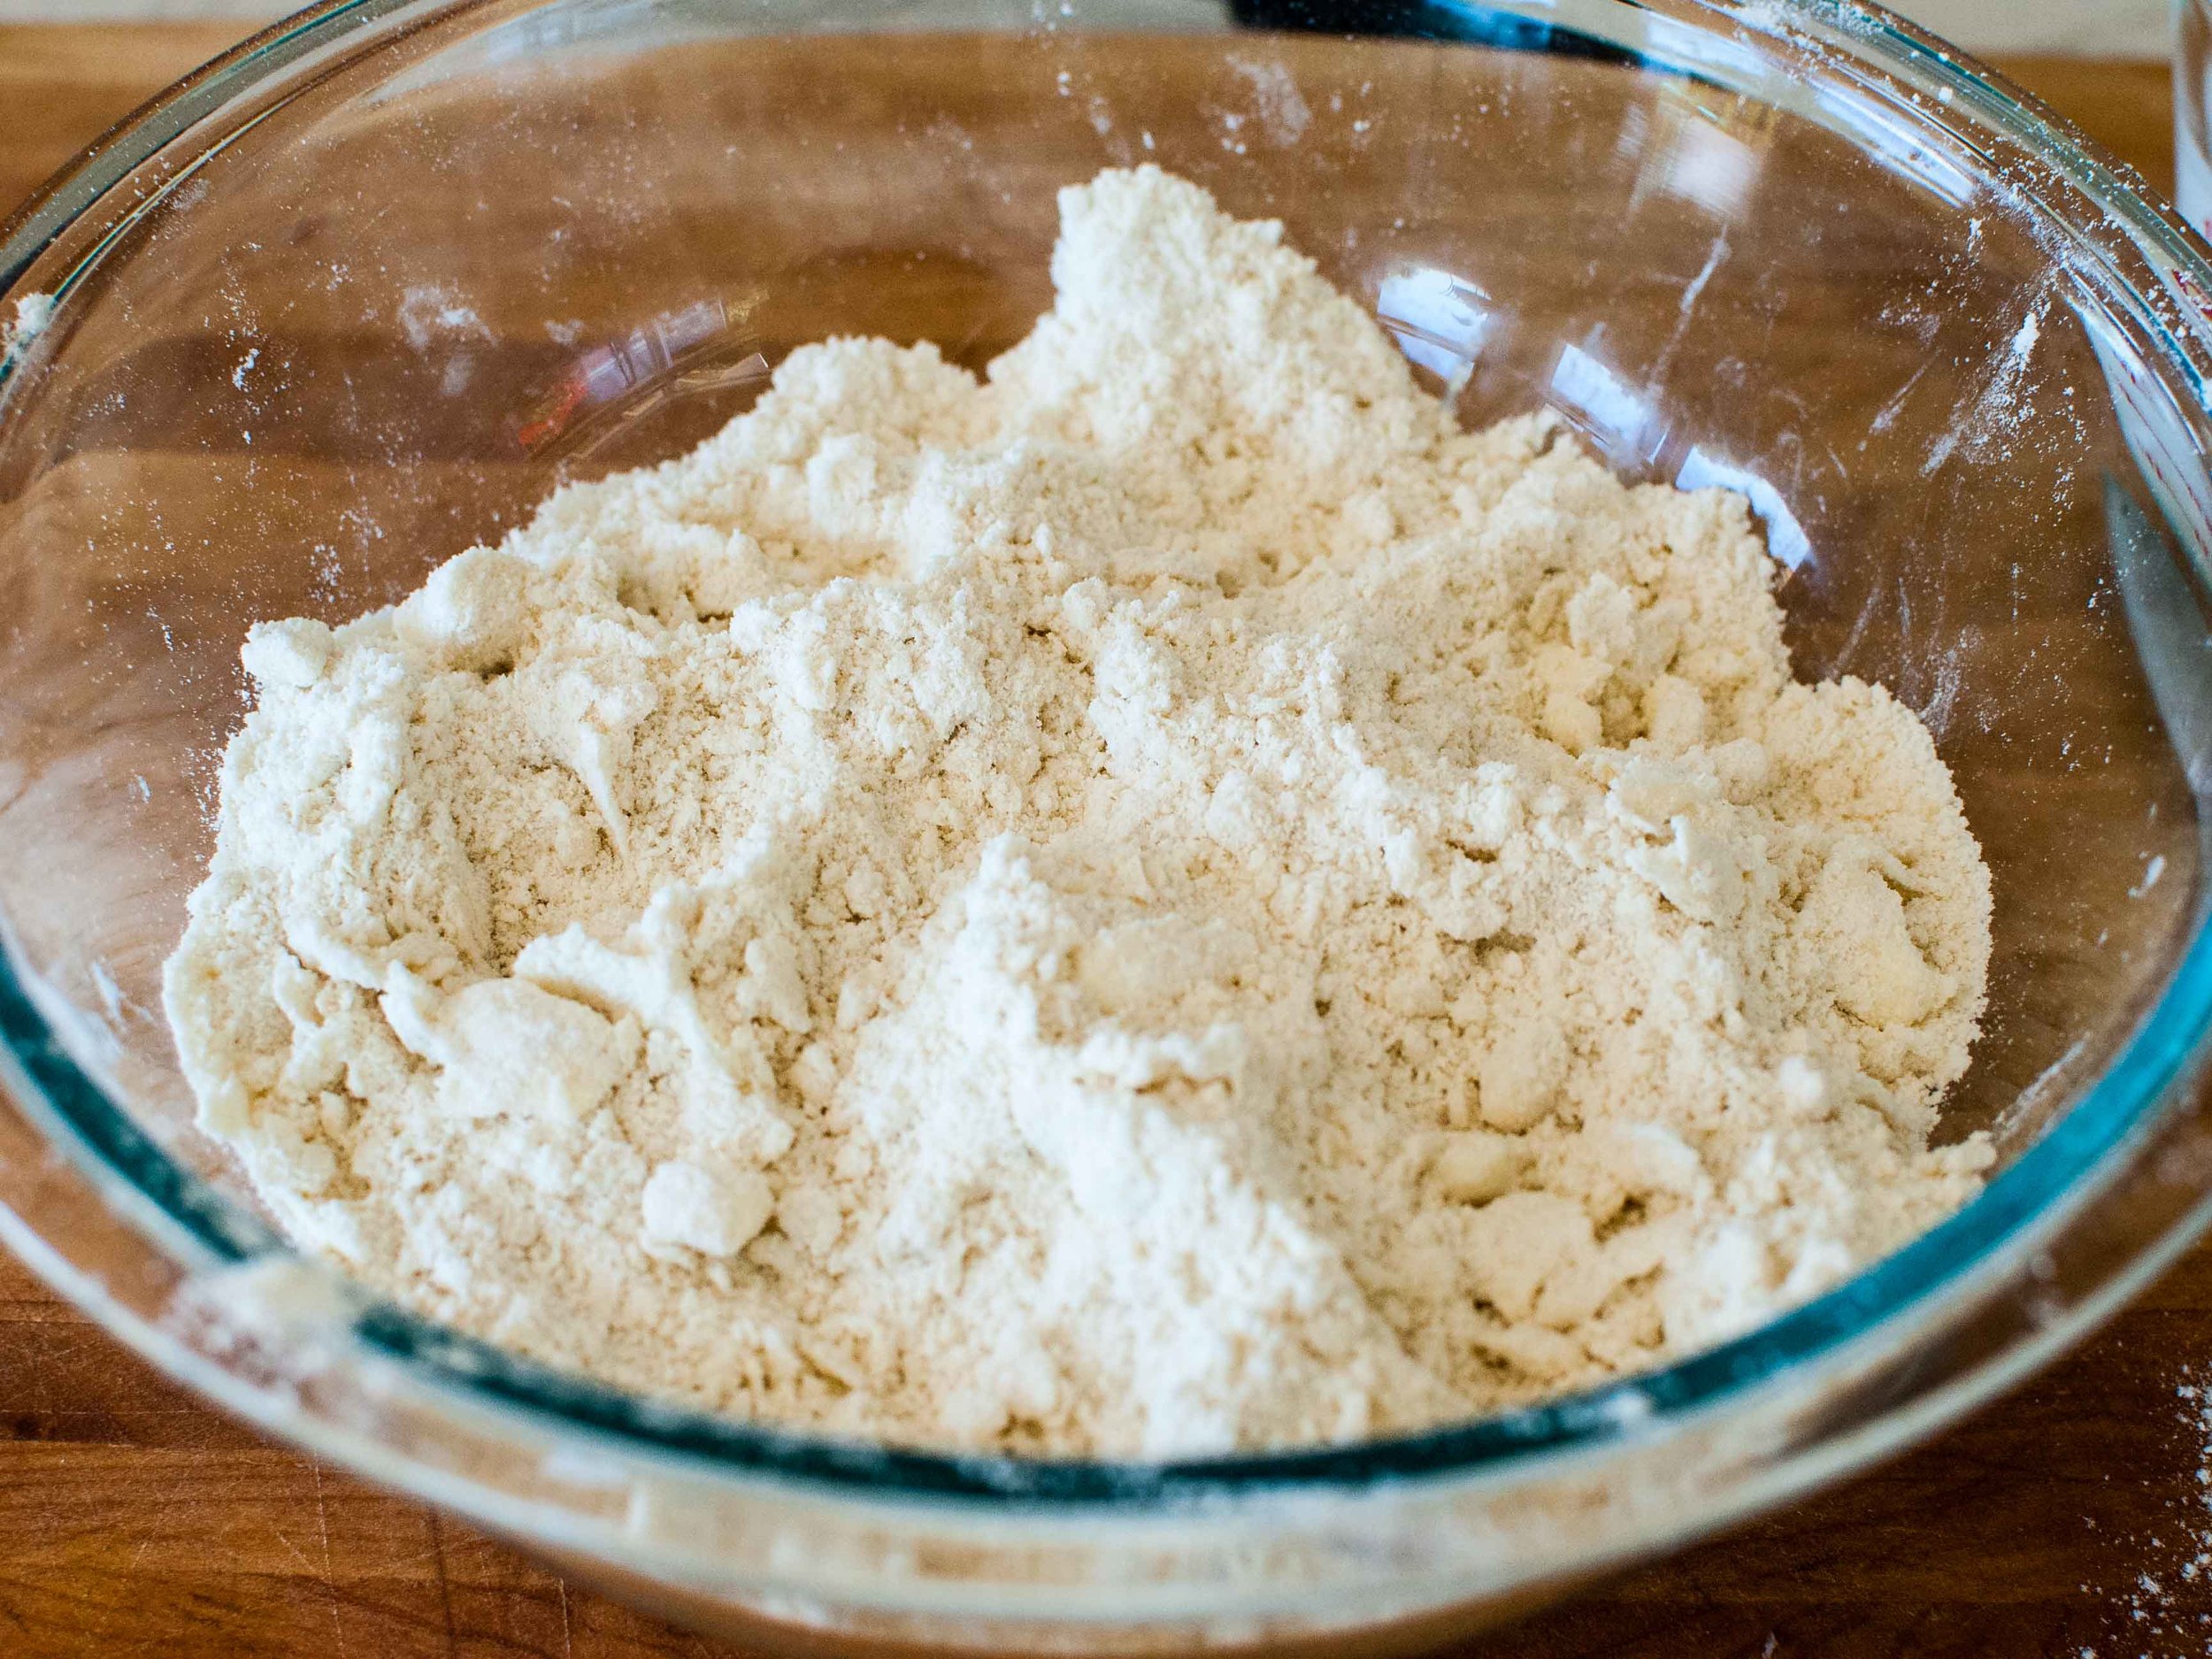
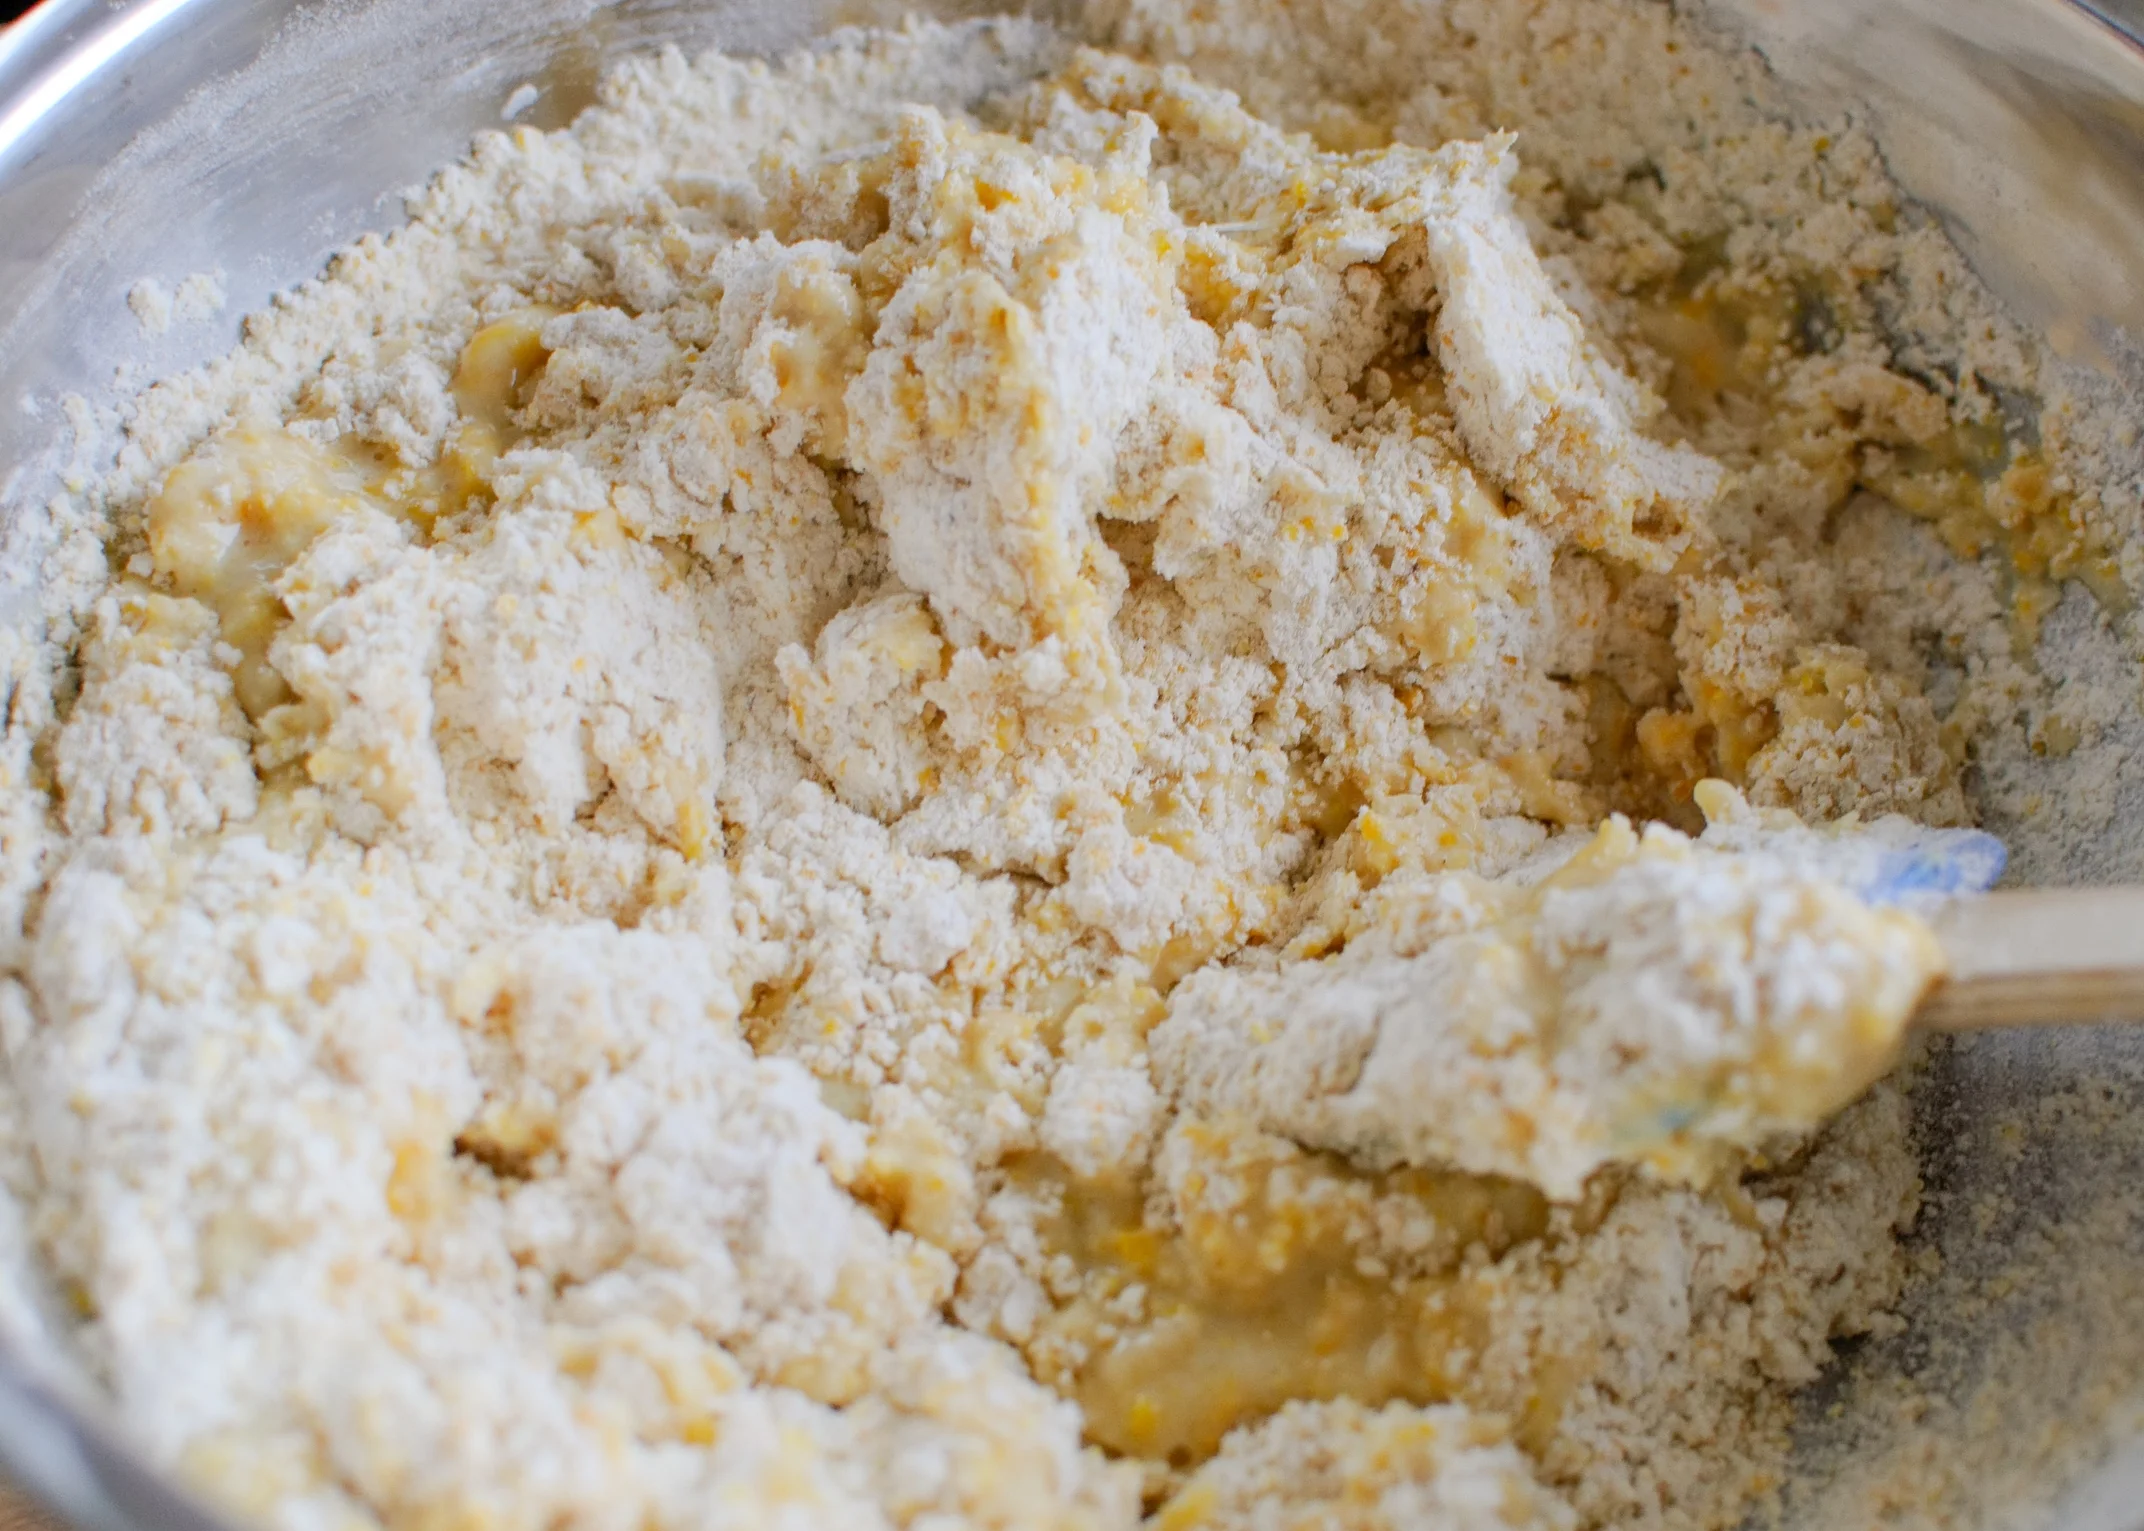
In a large bowl, whisk together all-purpose flour, whole wheat flour, brown sugar, granulated sugar, baking powder, baking soda, salt, and cinnamon.

Add mashed bananas, eggs, yogurt, vanilla, and bourbon to the browned butter and whisk together, until well combined.

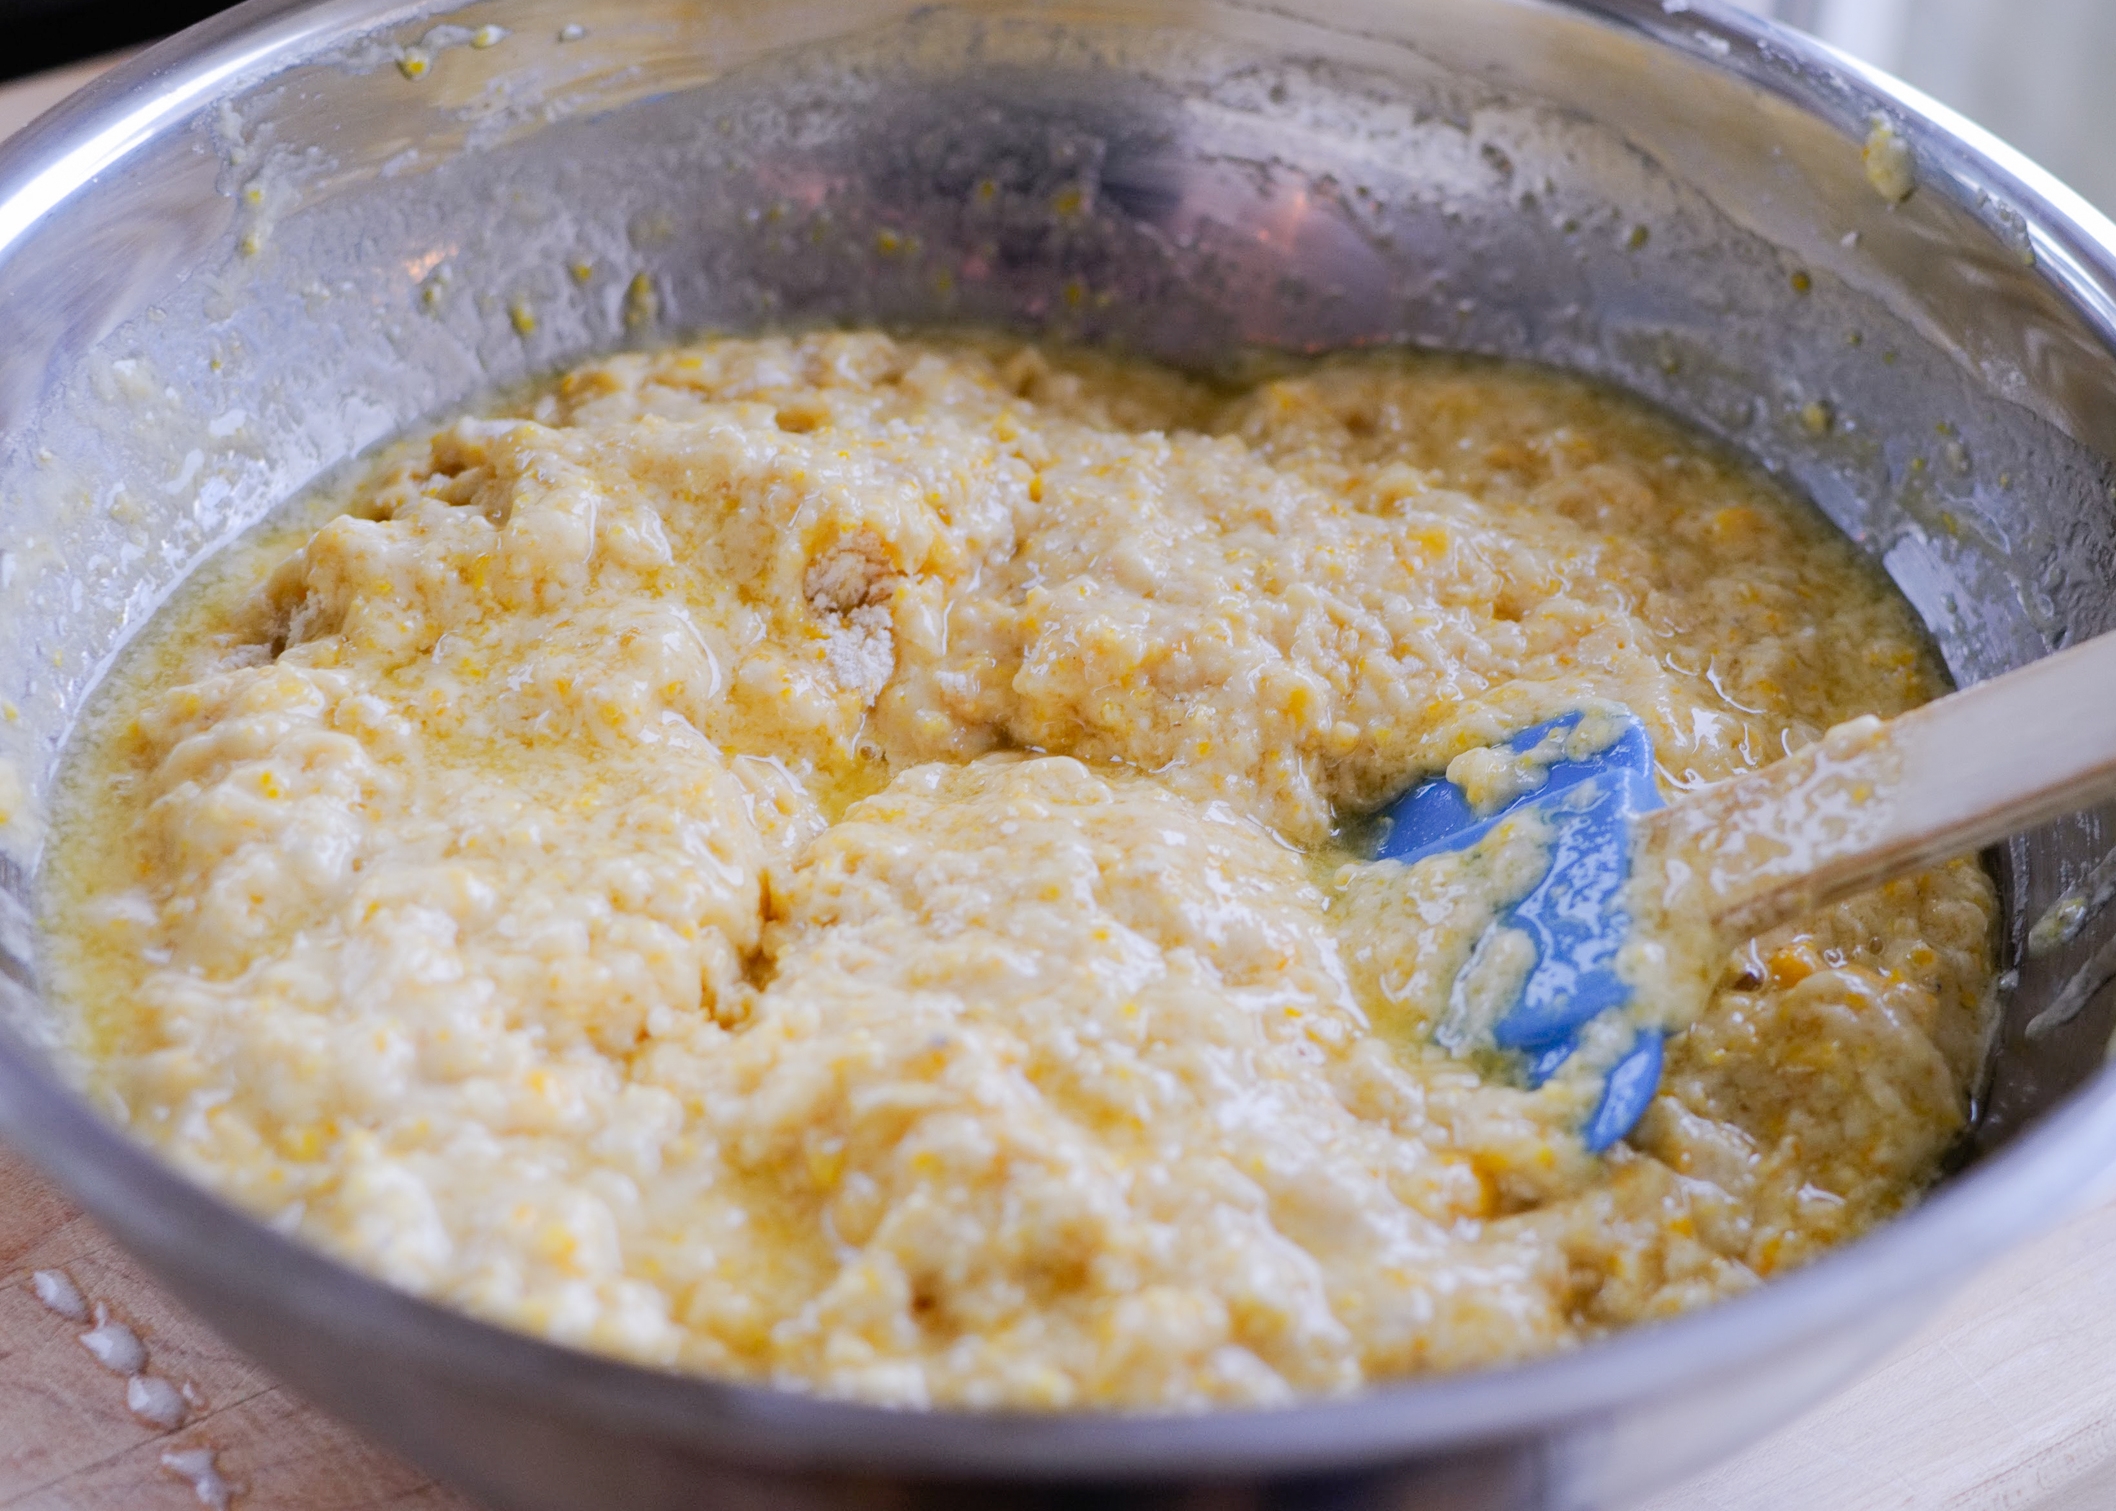
Pour the banana mixture into the flour mixture all at once and stir together until just combined and no patches of flour remain. Batter will be thick and not pourable. Lightly fold in the toasted coconut and walnuts, then scrape the batter into prepared loaf pan. Give the pan a little jiggle and spread the batter as evenly as you can. Sprinkle the top with a un-toasted walnut pieces and coconut.

Bake for 55-65 minutes, or until a toothpick inserted into the center comes out clean. Remove from oven and let cool for 10 minutes in the pan, then remove and place on a wire rack until completely cool. (Who are we kidding? Slice into that baby and try not burn your fingers and your mouth as you devour it!)

Pane Bianco by Cynthia Raub

Print Friendly and PDF

When I first laid eyes on a photo of this golden and curvy loaf of Pane Bianco, I was in awe and intrigued. As a baking newbie, I was intimidated by the gorgeous loaf until I read the recipe. Very little special equipment is required, (a stand mixer or rolling mat aren't necessarily required, they just make the work easier,) and the recipe uses straightforward ingredients I always have on hand. Since I am actively working on developing my baking skills, this was a great confidence boosting recipe to try. The attractive valleys created by slicing through a rolled log are filled with aromatic and colorful specs of tomato and basil. The scent of freshly baked bread and garlic was intoxicating. So much so, that my children followed their noses down the stairs to the kitchen to ask what I was cooking. I turned the oven light on and they sat in my lap in front of the oven and we watched it bake away together. "I can't wait to eat that!" Emily exclaimed. "Mommy, can I have that for lunch tomorrow?" Asked Olivia. I responded with, "Yes, you can have that in your lunch tomorrow . . . if we don't end up eating the whole thing tonight!" 

Notes: King Arthur Flour notes that you may substitute all-purpose flour for the bread flour in the recipe but to reduce the water in the recipe to 1/4 cup. They also warn that the bread may not hold its form as well. This recipe is endlessly adaptable and can be filled with a myriad of combinations! If you're a novice baker like me, sometimes bread recipes can be intimidating or confusing because you might not trust your judgement on what exactly the visual descriptions are supposed to look like. Because of that and because I am a visual learner, I have watched many a YouTube video on bread and scrolled through thousands of pictures on Instagram to expose myself to the process of baking. This may or may not help you, but I have found it helped my judgement in what to look for, immensely. 


Time: 3 hours (2 hours inactive, 35 minutes baking, 25 minutes preparing)
Yields: 1 loaf

Bread
3 cups bread flour
2 teaspoons instant yeast
2 teaspoons sugar
2 teaspoons salt
1 large egg
1/2 cup lukewarm milk
1/3 cup lukewarm water
3 tablespoons olive oil

Filling
2 tablespoons olive oil
4 cloves garlic, finely minced
1 cup shredded Parmesean (or cheese of your choice) divided
1/2 cup oil-packed sun-dried tomatoes, drained and cut into 1/2″ pieces
1/3 cup torn fresh basil

1 egg, beaten with a splash of water

Combine the eight bread ingredients (flour through olive oil) in your stand mixer (with a dough hook), in your bread machine, or in a large mixing bowl. On the lowest setting (or with a wooden spoon), begin to mix the dough until smooth and elastic (about 6 minutes). The dough should pull away from the sides and "clean" the sides of the bowl.

Grease a large bowl with olive oil, place the dough ball into the bowl and cover. Place the bowl in a warm area in your kitchen and allow to rise until about double in size, 45-60 minutes. Meanwhile, gather your remaining filling ingredients and set aside. 

Once the dough has risen, gently deflate it on your clean and flat work surface. Reshape into a ball and allow to rest for 10 more minutes. Then roll the dough into a rectangle, about 22" x 10". Combine 2 tablespoons of olive oil and finely minced garlic in a small bowl and brush or massage this mixture onto the rolled out dough. Sprinkle 3/4 cup of cheese, sun dried tomato and basil over the garlic mixture evenly. 

Carefully roll the dough lengthwise from one end to another. Once rolled, pinch the flap closed against the log and place the dough seam-side down on a piece of parchment paper that fits your baking pan. 

Starting from 1/2" from one end, snip through 1" depth of the roll with kitchen scissors, exposing the layers and filling. Continue to cut through the length of the roll.

Shape the log into a figure-8 shape by tucking one end of the roll underneath the center of the roll. Tuck the remaining side underneath the roll on the opposite side. Transfer the parchment paper with your loaf onto your sheet tray.

Cover the shaped dough and allow to rise until doubled in size, another 45 minutes to 1 hour. Preheat oven to 350 degrees at this time.

Once the loaf has risen, brush with egg wash and sprinkle with remaining 1/4 cup of cheese if desired. Bake the loaf for 20 minutes and check for browning. It should begin to develop a golden color, so tent the loaf to prevent too much browning and scorching of the delicate and exposed filling ingredients. Bake another 10 minutes to finish cooking. Remove from oven and place on wire rack to cool completely. 

Gougères (Cheese Puffs) by Cynthia Raub

Print Friendly and PDF

Pâte à choux, (also referred to as choux pastry,) is a basic French pastry paste made from flour, water/milk, butter and eggs. From the basic ingredients, other ingredients are added to transform the choux pastry into gougères (flavored with cheese), eclairs (sweet, rod-shaped, and filled with pastry cream), profiteroles (similar appearance to gougères but filled with pastry cream or ice cream), and even Parisian gnocchi. Choux pastry does not include a leavening (or rising) agent, such as baking powder or yeast. The piped pastry mounds puff during cooking due to the high moisture content of the soft dough, which evaporates and results in a golden pastry shell. This is a classic, easy to master, and versatile dough that can be used in a multitude of ways. I encourage you to try it and never look back! Not to be dramatic or anything . . . but your life will never be the same once you can make homemade gougères.

Notes: This recipe might seem daunting, but once you make it successfully once, (hopefully the first time,) you will feel like a rockstar. The most important thing to remember when it comes to this recipe, is to have everything prepared and measure before you begin. The steps move quickly, and there should be very little lag time between steps. You can substitute the milk for water and any kind of semi-hard and hard cheese will work, depending on your preference. I have made them with Parmesan, Gruyere, Comte, Emmental and Cheddar. In this instance, I used Dubliner, which I find multi-dimensional: nutty, sweet, sharp and salty. You can also jazz it up with herbs and other seasonings. Thyme is one of my favorite herbs for these cheesy, airy puffs.


Time: 50 minutes
Yield: ~30 puffs

1 cup milk
1 stick unsalted butter, cut into large pieces
1/2 teaspoon kosher salt
1/4 teaspoon freshly ground black pepper
1 cup all-purpose flour
4 large eggs
1 cup grated cheese
Egg wash (1 well beaten egg, splash of milk or water)
1/4 cup finely grated cheese (for sprinkling)

1. Begin by preheating oven to 425 degrees and lining two sheet trays with parchment paper.

2. Meanwhile, bring milk, butter, salt and pepper to a boil of medium-high heat.

3. Once at a boil, turn heat down to medium and add flour to the pot. Stir vigorously, incorporating the flour into the milk mixture.

4. Continue to cook and stir until a cohesive, soft dough is formed (the dough will pull away from the sides of the pot). Once the dough has taken shape, continue to cook for 1 minute more, stirring constantly.

5. Add the mixture to a stand mixer bowl fitted with a paddle attachment (or a mixing bowl, or a food processor) and mix on low for 1 minute to release steam and cool down the dough. Add an egg, one at a time and mix on medium-low until it the egg has been fully incorporated (about 30 seconds to 1 minute). This photo has one egg and has been mixed for 10 seconds. The appearance of the dough is curdled and not cohesive. Continue to mix until it looks like the following photo.

6. Continue adding the remaining eggs until the dough resembles this constancy. 

7. Add shredded cheese and fold in.

8. Scrape dough into a gallon-sized freezer bag or piping bag. (I used a large beer stein to keep my bag open.)

9. Squeeze dough to a bottom corner of the bag and twist and pinch the bag at the top of the dough to create pressure. Snip the corner to approximately the diameter of a dime.

10. Standing directly above your prepared baking sheet, position the tip of the bag to kiss the parchment. Gently squeeze bag from the top, releasing the dough, while simultaneously and slowly drawing the bag upwards.
 

11. Continue piping mounds on the baking sheet with 2" of space between each one.

12. Dip your finger into the egg wash and gently push down each of the unruly tails that formed on your mounds. With a pastry brush, brush the top of each mound with egg wash.

13. Sprinkle finely shredded cheese on top.
 

14. Place baking sheets into the preheated oven, with the racks positioned at 1/3 and 2/3 distance. Bake for 15 minutes at 425 degrees. Carefully turn the pans in the oven to ensure even cooking. Be gentle! You don't want to bang them around and have any collapse - they are still fragile at this point. Turn oven down to 375 degrees and continue to cook for 10 minutes more, until beautifully golden brown and hollow on the inside.

Enjoy immediately or store in an airtight container, and rewarm in a 350 degree oven for 8 minutes.

Easy Buttermilk Biscuits by Amy Cantu

Print Friendly and PDF

These Buttermilk Biscuits are big, fluffy, and ethereally buttery. (In fact, I baked them multiple times just to ensure that this description is accurate.) Even better, these biscuits are EASY and quick to make (under 30 minutes). There's no special equipment required - just two clean hands! The Buttermilk Biscuits are perfect split open while still hot with a little pat of butter, or amazing with this Raspberry Peach Jam. I was so excited about them, that I just slapped a thick slice of ham into a split biscuit and devoured it without a second thought.

Notes: I used a round cutter to make these buttermilk biscuits, but you could also use a clean, empty soup can or just shape the dough into a rectangle and cut into large squares. Two-inch wide biscuits are great for breakfast or tea with a bit of jam, while 3-inch wide biscuits are the ideal mate for ham and egg sandwiches.

Variations - Make them extra decadent by brushing the baked biscuits with melted butter. Add 1/2 cup shredded sharp cheddar or other hard cheese. Add chopped chives or green onions.  

The dough can also be shaped and frozen to enjoy at a later date. Bake them from frozen and add a few extra minutes to the bake time.


Time: 30 minutes
Yield: 6 large 3" biscuits or 9 medium 2" biscuits

2 1/4 cups all-purpose flour
1 tablespoon sugar
1 tablespoon baking powder
1/2 teaspoon baking soda
1 teaspoon kosher salt (or 1/2 teaspoon table salt)
1/2 cup (1 stick) very cold, unsalted butter, diced into 1/2" pieces
1 cup buttermilk

Preheat the oven to 450 degrees.

Whisk together flour, sugar, baking powder, baking soda, and salt in a large bowl. Toss very cold butter pieces into the flour. Using your fingers, squish the butter into the flour, until the flour looks like wet sand with visible flattened pieces of butter.

Pour the buttermilk into the flour mixture and stir using a fork or your fingers until a soft, sticky dough is just formed.

For round or square biscuits: Turn the dough onto a lightly floured surface. Using a rolling pin or just your hands, flatten and shape the dough into a rectangle with an even 3/4 to 1-inch thickness. Use a round cutter or cut the dough into squares, pushing the cutter straight down, without twisting. Transfer biscuits to a cookie sheet lined with parchment paper, spacing them 2 inches apart.

For drop biscuits: Use a large spoon to drop large spoonfuls of dough onto a cookie sheet lined with parchment paper, spacing them 2 inches apart.

Bake for 12-15 minutes, or until buttermilk biscuits are fluffy and tops are lightly golden brown. Serve while still warm.

Blueberry Streusel Muffins by Amy Cantu

Print Friendly and PDF

Blueberry Streusel Muffins are the kind of breakfast I have when I've been eating spinach and egg white scrambles one too many days in a row. (I know some of you are super healthy and don't see a problem with that, and all I can say is that I deeply envy you, and please don't judge me!) The texture of these blueberry muffins is endlessly moist (thank you yogurt), bursting with juicy fruit, and reminds me of cake, thanks to it's delicate, airy crumb. Really, anything cake-like that I can eat for breakfast is instantly my most favorite thing in the whole entire world. (Never mind that I have a long list of "my most favorite" foods.) The streusel is the sweet, crunchy crowning glory of these blueberry muffins, and while you could certainly skip it in the name of health, I would argue that these are not the muffins one chooses for cutting calories. Indulge! Enjoy! Go back to spinach and egg white scrambles tomorrow!

Notes: For once, I don't have a ton of notes. These Blueberry Streusel Muffins are moist and delicious, and sure, you could sub whole wheat flour for half of the all-purpose flour, or grapeseed oil and/or apple sauce for some or all of the butter, but that would be a totally different kind of blueberry muffin. The only optional ingredient that I list is the walnuts - the muffins are lovely if you include them in the streusel, but equally delicious without. So go nuts (or not), but these Blueberry Streusel Muffins (with a glass of Cold Brew Coffee with Mint Syrup,) will definitely perk up any morning!


Adapted from Smitten Kitchen.

Time: 35 minutes
Yield: 9 or 10 muffins

For the streusel:
3 tablespoons sugar
2 tablespoons finely chopped walnuts (optional)
1/2 teaspoon cinnamon
pinch of salt
1/3 cup all-purpose flour
3 tablespoons cold unsalted butter, cut into small pieces

For the muffins:
5 tablespoons unsalted butter, softened
1/2 cup sugar
1 large egg, at room temperature
3/4 cup plain yogurt
1 teaspoon vanilla
1/2 teaspoon cinnamon
1 1/2 cups all-purpose flour
1 1/2 teaspoons baking powder
1/4 teaspoon baking soda
1 teaspoon kosher salt (1/2 teaspoon table salt)
1 cup blueberries, fresh or frozen (do not defrost)

Preheat oven to 375 degrees F. Line a 12 cup muffin pan with paper liners or grease with butter or cooking spray.

In a medium bowl, smash together all streusel ingredients with your fingers, rubbing the butter into the flour and sugar, until well-combined and crumbly. Set aside.

In a medium bowl, whisk together flour, baking powder, baking soda, cinnamon, and salt. Set aside.

In the bowl of an electric mixer, combine butter and sugar. Beat until light and fluffy, about 5 minutes. Beat in egg until well-incorporated. Add yogurt and vanilla, beating well. Pour in the flour mixture and beat until the batter is just mixed. With a rubber spatula, fold in the blueberries. Batter will be very thick and not pourable.

Using an ice cream scoop or a large spoon, fill the muffin cups 3/4 full. Top generously with streusel. Bake for 25-30 minutes, until tops are golden and a toothpick comes out clean when inserted into the middle of a muffin. Let cool for 5 minutes before removing from pan. Delicious warm (with a pat of butter???) or cooled to room temperature.

Salted Maple-Oat Scones by Amy Cantu

Print Friendly and PDF

The first time I ever made these scones was in the year 2000, and I was still in college. I had just purchased Ina Garten's The Barefoot Contessa Cookbook on a whim because the full-page color photos called to me at the bookstore (this was before everyone bought everything on Amazon). I saw her "Maple-Oatmeal Scones" and immediately needed to bake them. Like right that moment. I had a big midterm paper due the next day, but I needed a study snack, right?! Yes. I really, really needed these scones. I had never made scones before - it was a bit daunting. I imagined hard, brown stones coming out of the oven, but the photo of the scones was so enticing, that I just had to try. They were not dry - instead, these Maple-Oat Scones were a tender, small miracle. They are at once earthy and decadent - the oats and whole-wheat flour provide extra "health", texture, and flavor; but the butter and maple syrup ensure that these scones are still an indulgent treat. The addition of coarse salt sprinkled on top balances out the sweet maple glaze. In good faith, I've tried baking other maple-oat scone recipes or sampling them at bakeries, but these are still the best ones that I've found. And for the record, they were also the perfect study snack: it helped me score a big fat "A" on that English midterm.

Notes: This recipe is an old, tried and true friend from my early days of cooking. Ina Garten's The Barefoot Contessa Cookbook was one of my early cookbook muses, with her easy-to-follow recipes, bright enthusiasm, and beautiful, large photos that convinced me that I could and needed to cook each recipe. The original recipe called for a sprinkle of raw oats on top for garnish, but I like the update of a sprinkling of coarse salt instead. The salty-sweet craze is one of my favorite food fads that I'm willing to embrace whole-heartedly, and it works perfectly with these scones!

I rarely have buttermilk just hanging out in the fridge, so I substitute with a mix of milk and vinegar. Stir 2 teaspoons of white vinegar or lemon juice into 1/2 cup of milk (or 1 tablespoon vinegar and 1 cup milk) and let sit for a minute or two, until slightly thickened. Voila - "buttermilk" for use in baked goods and pancakes!

Lastly, this recipe makes a lot of scones. Ina's original recipe suggest 14 (very) large scones, but I find that it makes more like 20 medium scones. I have adjusted the baking time for the smaller size, but if you want to make mini scones, reduce the baking time by a few minutes, or if making the large size, add a few minutes. The fully baked scones (without the glaze) can be cooled to room temperature and frozen. Reheat frozen scones in a 350 degree Fahrenheit oven for 8-10 minutes (mini scones may only need 5-8 minutes). Unbaked scones can also be frozen - place on a baking sheet and freeze until solid (about 1 hour). Transfer to an airtight container to store in the freezer. To bake, pop as many frozen scones as needed onto a baking sheet and add an extra 5 minutes or so to the baking time. Don't forget to glaze them after they come out of the oven!


Read More: The Shared Scones


Time: 1 hour
Yield: About 20 scones

For the Scones:
3 1/2 cups all-purpose flour
1 cup whole-wheat flour
1 cup quick-cooking oats
2 tablespoons baking powder
2 tablespoons granulated sugar
2 teaspoons salt
1 pound cold unsalted butter, diced
1/2 cup cold buttermilk
1/2 cup pure maple syrup (preferably grade B)
4 eggs, lightly beaten
1 egg beaten with 1 tablespoon milk or water, for egg wash
Maple Glaze (see recipe below)
Coarse salt for sprinkling on top (such as Fleur de Sel, Sel Gris, or Coarse Sea Salt)

Preheat the oven to 400 degrees F.

In the bowl of an electric mixer fitted with a paddle attachment, combine the flours, oats, baking powder, sugar and salt.

Blend the cold butter in at the lowest speed and mix until the butter is in pea-size pieces.

Combine the buttermilk, maple syrup and eggs and add quickly to the flour-and-butter mixture. Mix until just blended. The dough will be sticky.

Dump the dough out onto a well-floured surface and be sure it is combined. Flour your hands and a rolling pin and roll the dough 3/4 to 1 inch thick. You should see lumps of butter in the dough.

Cut into 3-inch rounds with a plain or fluted cutter and place on a baking sheet lined with parchment paper.

Brush the tops with egg wash. Bake for 15 to 20 minutes, until the tops are crisp and the insides are done.

When the scones are done, cool for 5 minutes and drizzle each scone with 1 tablespoon of the Maple Glaze (recipe below). Sprinkle a bit of coarse salt on the top, for garnish. The warmer the scones are when you glaze them, the thinner the glaze will be.

Maple Glaze

1 1/4 cups confectioners' sugar
1/2 cup pure maple syrup (preferably grade B)
1 teaspoon pure vanilla extract

To make the glaze, combine the confectioners' sugar, maple syrup and vanilla. 

Rosemary-Cheddar Scones by Amy Cantu

Print Friendly and PDF

Scones seem like a special treat in a way that muffins seem ordinary. Don't get me wrong, I will never turn down a good muffin, but a scone is a bakery good that I eat slowly and savor with a big mug of coffee or tea. (I can't be bothered with those dainty tea cups at home.) These Rosemary-Cheddar Scones are stuffed with little cubes of cheddar cheese that ooze out when baked to form lacy, crunchy bits of crispy cheese around the scone. This might be my favorite part. It's like the bit of crunchy cheese that's left at the bottom of a fondue pot, or the cheese that escapes a grilled cheese sandwich onto the griddle. The Rosemary-Cheddar Scone itself is moist and tender, flecked with bits of fragrant rosemary, and happily cheesy. (Please don't compare these to the dry hockey puck scones that seem to be everywhere. Those scones are an abomination and should be banned from being sold.) Getting me up in the morning is like waking a sleeping monster, but this monster absolutely will get up early to bake these scones, because the results are so worth it!

Notes: This recipe is an old, tried and true friend from my early days of cooking. Ina Garten's The Barefoot Contessa Cookbook was one of my early cookbook muses, with her easy-to-follow recipes, bright enthusiasm, and beautiful, large photos that convinced me that I could and needed to cook each recipe. The original recipe called for dill, but I have substituted any fresh herb that I have hiding in the fridge - rosemary, chives, thyme, tarragon, etc. are all delicious. I happen to have an enormous rosemary bush in the backyard, so it's a convenient choice for me! Other delicious add-ins could be bacon bits, peeled and diced apple, jalapeño pepper, sun-dried tomatoes, or corn. You can also vary the type of cheese - brie, gruyere, mozzarella, jack . . . the possibilities are endless.

Lastly, this recipe makes a lot of scones. Ina's original recipe suggest 16 (very) large scones, but I find that it makes more like 24 medium scones. I have adjusted the baking time for the smaller size, but if you want to make mini scones, reduce the baking time by a few minutes, or if making the large size, add a few minutes. The fully baked scones can be fully cooled and frozen. Reheat frozen scones in a 350 degree Fahrenheit oven for 8-10 minutes (mini scones may only need 5-8 minutes). Unbaked scones can also be frozen - place on a baking sheet and freeze until solid (about 1 hour). Transfer to an airtight container to store in freezer. To bake, pop as many frozen scones as needed onto a baking sheet and add an extra 5 minutes or so to the baking time.


Read More: The Shared Scones


Time: 45 minutes
Yield: About 24 scones
 
4 cups plus 1 tablespoon all-purpose flour, divided
2 tablespoons baking powder
2 teaspoons salt
3/4 pound cold unsalted butter, diced
4 eggs, beaten lightly
1 cup cold heavy cream
1/2 pound extra-sharp yellow Cheddar, small-diced
1/3 cup minced fresh rosemary leaves
1 egg beaten with 1 tablespoon water or milk, for egg wash

Preheat the oven to 400 degrees F.

Combine 4 cups of flour, the baking powder, and salt in the bowl of an electric mixer fitted with a paddle attachment. 

Add the butter and mix on low speed until the butter is in pea-sized pieces. Mix the eggs and heavy cream and quickly add them to the flour-and-butter mixture. Combine until just blended.

Toss together the Cheddar, rosemary, and 1 tablespoon of flour and add them to the dough. Mix until they are almost incorporated.

Dump the dough onto a well-floured surface and knead it for 1 minute, until the Cheddar and rosemary are well distributed.

Roll the dough 3/4-inch thick. Cut into 3-inch squares and then in half diagonally to make triangles. Brush the tops with egg wash.

Bake on a baking sheet lined with parchment paper for 15 to 20 minutes, until the outside is crusty and golden, and the inside is fully baked.

Buttery Soft Pretzels by Amy Cantu

Print Friendly and PDF

I fell in love with the soft, chewy, buttery, salty goodness that are these pretzels, the moment I sank my teeth into them. To make these even more appealing, they can be made from start to finish in an hour. There's no fussy waiting for an hour or more begging the dough to rise or fiddly boiling them in pot of baking soda water. The process has been streamlined to get these beauties in your mouth as quickly as possible!

Notes: I would not and did not change one thing about this recipe. I do have a couple thoughts on it though. (Don't I always?) I did not have pretzel salt on hand, so I used a very light sprinkling of Fleur de Sel. Coarse sea salt or any other larger crystal finishing salt would work great.

Fun variations - Sprinkle these with cinnamon sugar after brushing the butter onto the pretzels - oh yes! Stir together granulated sugar and finely grated orange/lemon zest, then dust over the buttered pretzels - so zesty! Or shower finely grated parmesan and dried oregano over the buttery tops - oh my!  Add a minced garlic clove to the butter before brushing over the pretzels - mmhmm! Or go the mini-route, and cut the dough into bite-sized pieces for pretzel bites - perfect party food!

These are best eaten the day they are baked and are heavenly if eaten straight from the oven. 


Recipe from King Arthur Flour.

TIme: 1 hour
Yield: 8 pretzels

Dough
2 1/2 cups Unbleached All-Purpose Flour
1 teaspoon salt
1 teaspoon sugar
2 1/4 teaspoons instant yeast
7/8 to 1 cup warm water*
*Use the greater amount in the winter, the lesser amount in the summer, and somewhere in between in the spring and fall. Your goal is a soft dough.

Topping
1 cup boiling water
2 tablespoons baking soda
coarse, kosher or pretzel salt, optional
3 tablespoons unsalted butter, melted

To make dough by hand, or with a mixer: Place all of the dough ingredients into a bowl, and beat until well-combined. Knead the dough, by hand or machine, for about 5 minutes, until it's soft, smooth, and quite slack. Flour the dough and place it in a bag, and allow it to rest for 30 minutes.

To make dough with a bread machine: Place all of the dough ingredients into the pan of your bread machine, program the machine for dough or manual, and press Start. Allow the dough to proceed through its kneading cycle (no need to let it rise), then cancel the machine, flour the dough, and give it a rest in a plastic bag, as instructed above.

To make dough with a food processor: Place the flour, salt, sugar and yeast in the work bowl of a food processor equipped with the steel blade. Process for 5 seconds. Add the water, and process for 7 to 10 seconds, until the dough starts to clear the sides of the bowl. Process a further 45 seconds. Place a handful of flour in a bowl, scoop the slack dough into the bowl, and shape the dough into a ball, coating it with the flour. Transfer the dough to a plastic bag, close the bag loosely, leaving room for the dough to expand, and let it rest at room temperature for 30 minutes.

While the dough is resting, prepare the topping: Combine the boiling water and baking soda, stirring until the soda is totally (or almost totally) dissolved. Set the mixture aside to cool to lukewarm (or cooler).

Preheat your oven to 475°F. Prepare a baking sheet by spraying it with vegetable oil spray, or lining it with parchment paper. Transfer the dough to a lightly greased work surface, and divide it into eight equal pieces (about 70g, or 2 1/2 ounces, each). Allow the pieces to rest, uncovered, for 5 minutes. Pour the baking soda/water into a 9" square pan.

Roll each piece of dough into a long, thin rope (about 28" to 30" long), and twist each rope into a pretzel. Working with 4 pretzels at a time, place them in the pan with the baking soda/water, spooning the water over their tops; leave them in the water for 2 minutes before placing them on the baking sheet. This baking soda "bath" will give the pretzels a nice, golden-brown color.

Transfer the pretzels to the prepared baking sheet. Sprinkle them lightly with coarse, kosher, or pretzel salt, if desired. Allow them to rest, uncovered, for 10 minutes.

Bake the pretzels for 8 to 9 minutes, or until they're a dark golden brown. (If your oven runs hot or you are using a convection oven, start checking at 6 minutes.) Remove the pretzels from the oven, and brush them thoroughly with the melted butter. Keep brushing the butter on until you've used it all up; it may seem like a lot, but that's what gives these pretzels their ethereal taste. Eat the pretzels warm, or reheat them in an oven or microwave.

Pizza Two Ways by Amy Cantu

Print Friendly and PDF

The idea to make pizzas came from an obsession with Broccoli Cooked Forever and my family's deep love for pizza and cheese. If you've never made pizza dough from scratch, I promise it's worth the effort. This dough is easy to stretch (much more so than the stuff you buy from the store), and the crust tastes better than a lot of pizza you'd get delivered! The Broccoli Cooked Forever makes a "sauce" for the pizza that's both creamy and even a little sweet, while the soft, melty fresh mozzarella is the perfect complement. The mushrooms lend the pizza some earthiness. The second pizza was born from another one of my (and Cynthia's) favorite pairings - fontina and roasted tomatoes. Roasted tomatoes topped with fontina cheese - so good! The Canadian bacon adds that salty, meaty bite. One could also make a case for using smoky bacon pieces instead. I certainly wouldn't argue! Bake this as a leisurely weekend meal, or make the dough and/or broccoli ahead of time to make this a quick weekday meal.


Time: 45 minutes
Yield: Two 14" pizzas (serves 6)

For Pizza #1:
Pizza dough (see recipe below)
Cornmeal (to prevent sticking)
1 cup Broccoli Cooked Forever
1/2 pound fresh Mozzarella, 1/4 - 1/3" slices
1/2 cup cremini or button mushrooms, thinly sliced
1/4 red onion, thinly sliced
1/2 cup parmigiano-reggiano cheese, grated
Italian (flat-leaf) parsley, finely chopped, for garnish (optional)

For Pizza #2
Pizza dough (see recipe below)
Cornmeal (to prevent sticking to pizza peel/stone) or Olive Oil (is using a pizza pan)
1 tablespoon extra-virgin olive oil
1/2 pound fontina cheese, shredded
1/2 cup parmigiano-reggiano cheese, grated
1/2 cup grape or cherry tomatoes, halved
6 oz Canadian bacon
1/4 small red onion, thinly sliced
Italian (flat-leaf) parsley, finely chopped, for garnish (optional)

If you have a pizza stone, place it on your oven's middle rack. Preheat the oven to 500 degrees Fahrenheit or as high as it will go. Let heat for 30 minutes or more (1 hour would be better).

If using a pizza stone, sprinkle cornmeal liberally on a wooden pizza peel or the back of a baking sheet. If using a pizza pan or baking sheet, sprinkle the pan liberally with cornmeal. Stretch rested pizza dough into a 14" round. Not being an experienced pizza tosser (and lacking good hand-eye coordination), I flatten a ball of dough into a disc. Then stretch the dough out from the middle, using my knuckles and backs of my hands - as to not poke holes in the dough with my fingernails. As it begins to stretch further, I concentrate on evenly stretching the edges. When the dough is close to the correct size, I put it on the pizza peel (or pizza pan) and continue to stretch and shape the dough until it is roughly 14" and covers almost the entire pizza peel (or pizza pan).

For Pizza #1: Spread Broccoli Cooked Forever evenly over the pizza crust. Place fresh mozzarella slices evenly over the broccoli. Next distribute the mushrooms and red onion over the top. Lastly, sprinkle the grated parmigiano-reggiano. 

For Pizza #2: Brush olive oil lightly over pizza crust. Evenly sprinkle fontina, Canadian bacon, tomatoes, red onion, and parmigiano-reggiano cheese over the crust in that order.

If using a pizza stone, transfer the pizza from the pizza peel/back of a baking sheet to the stone. (If using a pizza pan, place pizza in the oven.) Bake for 10-15 minutes. Pizza is done when cheese is melted with a few golden spots and crust is brown and crispy. Remove from oven, sprinkle with parsley (optional), and serve.

Pizza Dough


Notes: This pizza dough is very forgiving. If you don't have bread flour, you can use all-purpose flour for a chewier crust. If you don't have time to let the dough rise to double in size, let rest for at least 30 minutes before continuing. If you'd like to make it ahead, just put the dough in the fridge and let it rise slowly for several hours. If it rises too much, you can just poke a hole in the dough to deflate it. You can freeze the dough before or after letting it rise, just make sure to defrost and come to room temperature before proceeding with the next step of the recipe.

If you don't have a stand mixer, you could also use a food processor. Simply add the water and oil mixture with the processor running, until it forms a ball (less than a minute). 

To make the dough by hand, make a well in the middle of the flour mixture, and pour liquid mixture into the well. Combine with your fingers or a fork, to make a shaggy dough. Then turn the dough out onto a well floured surface and knead dough until you have a smooth, slightly tacky dough. 

Time: 20 minutes (plus 1 hour and 10 minutes inactive time)
Yield: Pizza dough for two 14" pizzas

4 cups bread flour
2 1/4 teaspoons (or 1 envelope) instant yeast
2 teaspoons kosher salt (or 1 teaspoon table salt)
1 1/2 cups warm water, 110 degrees F
1 tablespoon honey
2 tablespoons olive oil, plus extra to grease bowl

Whisk together flour, yeast, and salt into the bowl of a stand mixer, fitted with a dough hook. 
Combine water, honey, and olive oil. With the mixer running, slowly pour liquid into the flour mixture. Beat until a dough ball forms. If the dough is sticky, add additional flour one tablespoon at a time. If the dough is dry, add additional water one tablespoon at a time. Dough will form a ball and feel slightly tacky when done. 

Scrape dough onto a lightly floured surface and knead dough for 1 or 2 minutes. Form dough into a ball, transfer to a large, greased bowl, and cover with plastic wrap. Place in a warm place like a sunny window or an oven with the light on, and let rise for 1 hour or until doubled in size.

Divide dough evenly into two pieces and form into two balls. Cover with plastic wrap or a clean towel, and let rest at least 10 minutes before proceeding to make pizza.

Hot Cross Buns by Amy Cantu

Print Friendly and PDF

Notes: You can start these buns the day before a couple different ways. The first way - make the dough and then let rise overnight in the fridge for the first rise. Bring the dough to room temperature, and continue with the recipe by punching down the dough and shaping into the small rolls. The second way - follow the recipe through shaping the dough into small rolls. Cover with plastic wrap, and leave in the fridge overnight for the second rise. Bring the rolls to room temperature, and if they are not double the original size, let rise until they are. Continue with the recipe as written.


Loosely adapted from Nigella Lawson's cookbook, Feast.

Time: 1 hour active time, 2 1/2 hours inactive time
Yield: 12 buns

For the dough:
2/3 cup milk, plus extra as needed
1/4 cup unsalted butter
zest of 2 clementines or 1 small orange
1 clove
1 vanilla bean
3 cups bread flour
2 1/4 teaspoon (1/4 ounce) instant yeast
3/4 cup mixed dried fruit (I used dried tart cherries, cranberries, and raisins)
1 teaspoon ground cinnamon
1/2 teaspoon ground ginger
1/2 teaspoon ground nutmeg
1/4 teaspoon ground cardamom
1 egg, at room temperature

For the egg wash:
1 egg, beaten with a little milk

For the crosses on the buns:
3 tablespoons all-purpose flour
1 1/2 teaspoons granulated sugar
2-3 tablespoons water

For the glaze:
runny honey, for brushing

Split the vanilla bean in half length-wise using a small, sharp knife. Scrape the seeds out of the vanilla bean pod into a small saucepan and drop the vanilla bean pod in too. Stir the milk, butter, zest, and clove into the saucepan, and heat over low heat until the butter melts. Remove from heat and let cool until mixture is just warm to the touch (about 110 to 115 degrees F). 

Combine bread flour, instant yeast, dried fruit, cinnamon, ginger, nutmeg, and cardamom into the bowl of a stand mixer (or a medium bowl, if kneading by hand). Remove vanilla bean pod and clove from the milk. Beat a room-temperature egg into the warm milk mixture, and pour into the flour bowl. Knead using a stand mixer fitted with a dough hook (or by hand), adding additional warm milk 1 tablespoon at a time, if the dough seems dry. Keep kneading until the dough is silky and elastic (about 5 minutes or a little longer by hand). Lightly grease a large bowl with oil or butter. Form the dough into a ball and place inside the greased bowl. Cover with plastic wrap and set in a warm place (like an oven with the light turned on or a sunny window) to rise until double in size (about 1 to 1 1/2 hours).

Preheat an oven to 425 degrees F. 

Punch the dough down, and knead it again by hand until it is smooth and elastic - 2 or 3 minutes. Divide into 12 equal pieces and roll each into a ball. Place the buns on a baking sheet lined with parchment paper or a silpat, so that there is a little space between them. Using the back of knife (any one will do), score the tops of the buns with the imprint of a cross. Cover loosely with a kitchen towel or plastic wrap, and let rise for about 45 to 60 minutes, until puffy and roughly doubled in size.

Make an egg wash by beating one egg with a bit of milk. Brush the tops of the buns with the egg wash. Then, mix the flour, sugar, and water into a smooth, thick  paste. Using a squeeze bottle or teaspoon, dribble two lines over the buns in the indent of the cross. Bake buns for 15-20 minutes, until golden brown.

When the hot cross buns come out of the oven, brush each one with a little honey to give them a sweet and shiny disposition. If the honey seems too thick, microwave the honey for 10 seconds to help liquefy it before brushing. Buns are best eaten the first day as is, or still warm and slathered with a pat of butter (my favorite). The next day, toast the buns and eat with a bit of butter and jam.

Lemon-Berry Muffins by Amy Cantu

Print Friendly and PDF
Lemon-Berry Muffins


Total time: 30 minutes
Servings: 12

2 cups all-purpose flour, spooned and leveled
2 teaspoons baking powder
1/2 teaspoon kosher salt
Zest from 1 lemon
2/3 cup granulated sugar
1/2 cup (1 stick) unsalted butter, melted and cooled
1/2 cup whole milk
2 large eggs
1 1/2 cups mixed berries (blueberries, strawberries, blackberries, etc.)
2 tablespoons turbinado sugar, optional

Preheat oven to 375° F. Line 12 muffin cups with paper liners or coat with nonstick cooking spray. 

In a large bowl, whisk together the flour, baking powder, lemon zest and salt.

In a medium bowl, whisk together the granulated sugar, butter, milk, and eggs. Add to the flour mixture and stir until just combined (a few flecks of flour is OK). Fold in the berries (do not overmix).

Spoon the batter into the prepared muffin cups and sprinkle with turbinado sugar, if using.
Bake until a toothpick inserted in the center of a muffin comes out clean, 20 to 25 minutes. Let cool in the pan for 5 minutes. Transfer to a wire rack to cool completely or serve warm.

All-Purpose Cornbread by Cynthia Raub

Print Friendly and PDF
cornbread

Cornbread is what happens when my two favorite things: corn and bread, get a little crazy - one thing leads to another, and 25 minutes later . . . they make a baby. A crumbly, slightly sweet, and aromatic baby. A cornbread baby that begs for a pat of butter or a drizzle of honey on it’s warm browned top. The variations in cornbread can make one dizzy. People get crazed and lose their minds when it comes to the “right” or “best” way to make it. Street brawls, wars, divorces . . . sadly, all started by disagreements over cornbread. And if I’ve learned anything in life, it’s to avoid the following topics for the sake of polite conversation: religion, politics, and you guess it, cornbread. When Amy said she was making Chicken Chili, I grabbed the basic pantry items for this recipe, got pants on my kids, and drove to her house to cook and eat. This cornbread was the perfect unfussy accompaniment to her tomato-y chili.

Notes: This is a solid recipe for a basic and uncomplicated cornbread that will not let you down. Pureeing (fresh, frozen or canned) corn kernels into the wet ingredients will give you the distinct flavor you won’t get from cornmeal alone, and a sweetness that honey cannot replicate. According to Cook’s Illustrated, this recipe calls for the cornbread to be cooked at a high temperature in a regular baking pan to produce a crunchy, toasted crust. If you’re a cast-iron skillet for everything (especially cornbread) type, you can ratchet down the temperature for this recipe since the skillet will produce a golden crust with less heat.

Yes, this recipe calls for a stick of butter. But it’s not like you’re going to eat the whole pan by yourself, right? Right . . . ? OK, even if you do eat the whole pan by yourself, (Go you! Now THAT’S commitment!) just remember that chewing and breathing burns calories too. You're a winner and don't let anyone tell you otherwise.


SEE MORE: The Shared Chili


Servings: 8"x8" pan
Time: 45 minutes

Cook's Illustrated All-Purpose Cornbread

Ingredients:
1 1/2 cups unbleached all-purpose flour
1 cup yellow cornmeal
2 teaspoon baking powder
1/4 teaspoon baking soda
3/4 teaspoon table salt
1/4 cup packed light brown sugar
3/4 cup frozen corn kernels, thawed
1 cup buttermilk
2 large eggs
8 tablespoons (1 stick) unsalted butter, melted and cooled slightly

Directions:
Preheat oven to 400 degrees, adjust oven rack to the middle position. Butter an 8-inch square baking dish or cake round, set aside.

Whisk flour, cornmeal, baking powder, baking soda, and salt in a large bowl until combined.

In a food processor or blender, process brown sugar, thawed corn kernels, and buttermilk until combined, about 5 pulses. Add eggs to the wet mixture and process until combined (corn pieces will remain), about 5 more pulses.

Make a well in the center of the dry ingredients; pour wet ingredients into the well. Fold dry ingredients into wet, mixing until barely incorporated. Add melted butter and continue folding until the dry ingredients are moistened.

Pour batter into prepared baking dish, smooth surface with a rubber spatula.

Bake for 25-35 minutes until golden brown, and toothpick inserted in the center comes out clean. Slice and enjoy!

Adapted From: Cook's Illustrated