vegetables

Orecchiette with Roasted Broccoli by Cynthia Raub

Print Friendly and PDF

Olivia has a spectacular appetite, and she really enjoys eating, much like her mommy and daddy. This year, in Junior Kindergarten, she is required to bring her own lunch every day. This excited both of us, and we made quick work to brainstorm ideas of things she loves. She started a journal and began drawing pictures of meals that she enjoyed, so we could remember what to include for lunch. Her very first idea was pasta and broccoli, and this recipe is a version with seasoned breadcrumbs that she really loves. This pasta dish is light and tasty and simple to make. The reserved pasta water and a pungent cheese make a light sauce and the tender-crisp broccoli is the perfect texture for kids. I find that kids cannot be fooled and really just want to eat delicious food like cheesy pasta! This is a healthier alternative to macaroni and cheese, so it's imperative to season these simple and few ingredients very well. 

I find that involving my kids in any part of the planning or cooking of meals makes them more enthusiastic to eat. The foods I send with Olivia to school are an extension of our food priorities at home: I focus on homemade and simple. Because Olivia has such an impressive appetite, satisfying meals are another priority since a variety of snacks will most likely not fill her up when she's hungry. This makes a filling lunch or an easy weeknight dinner!

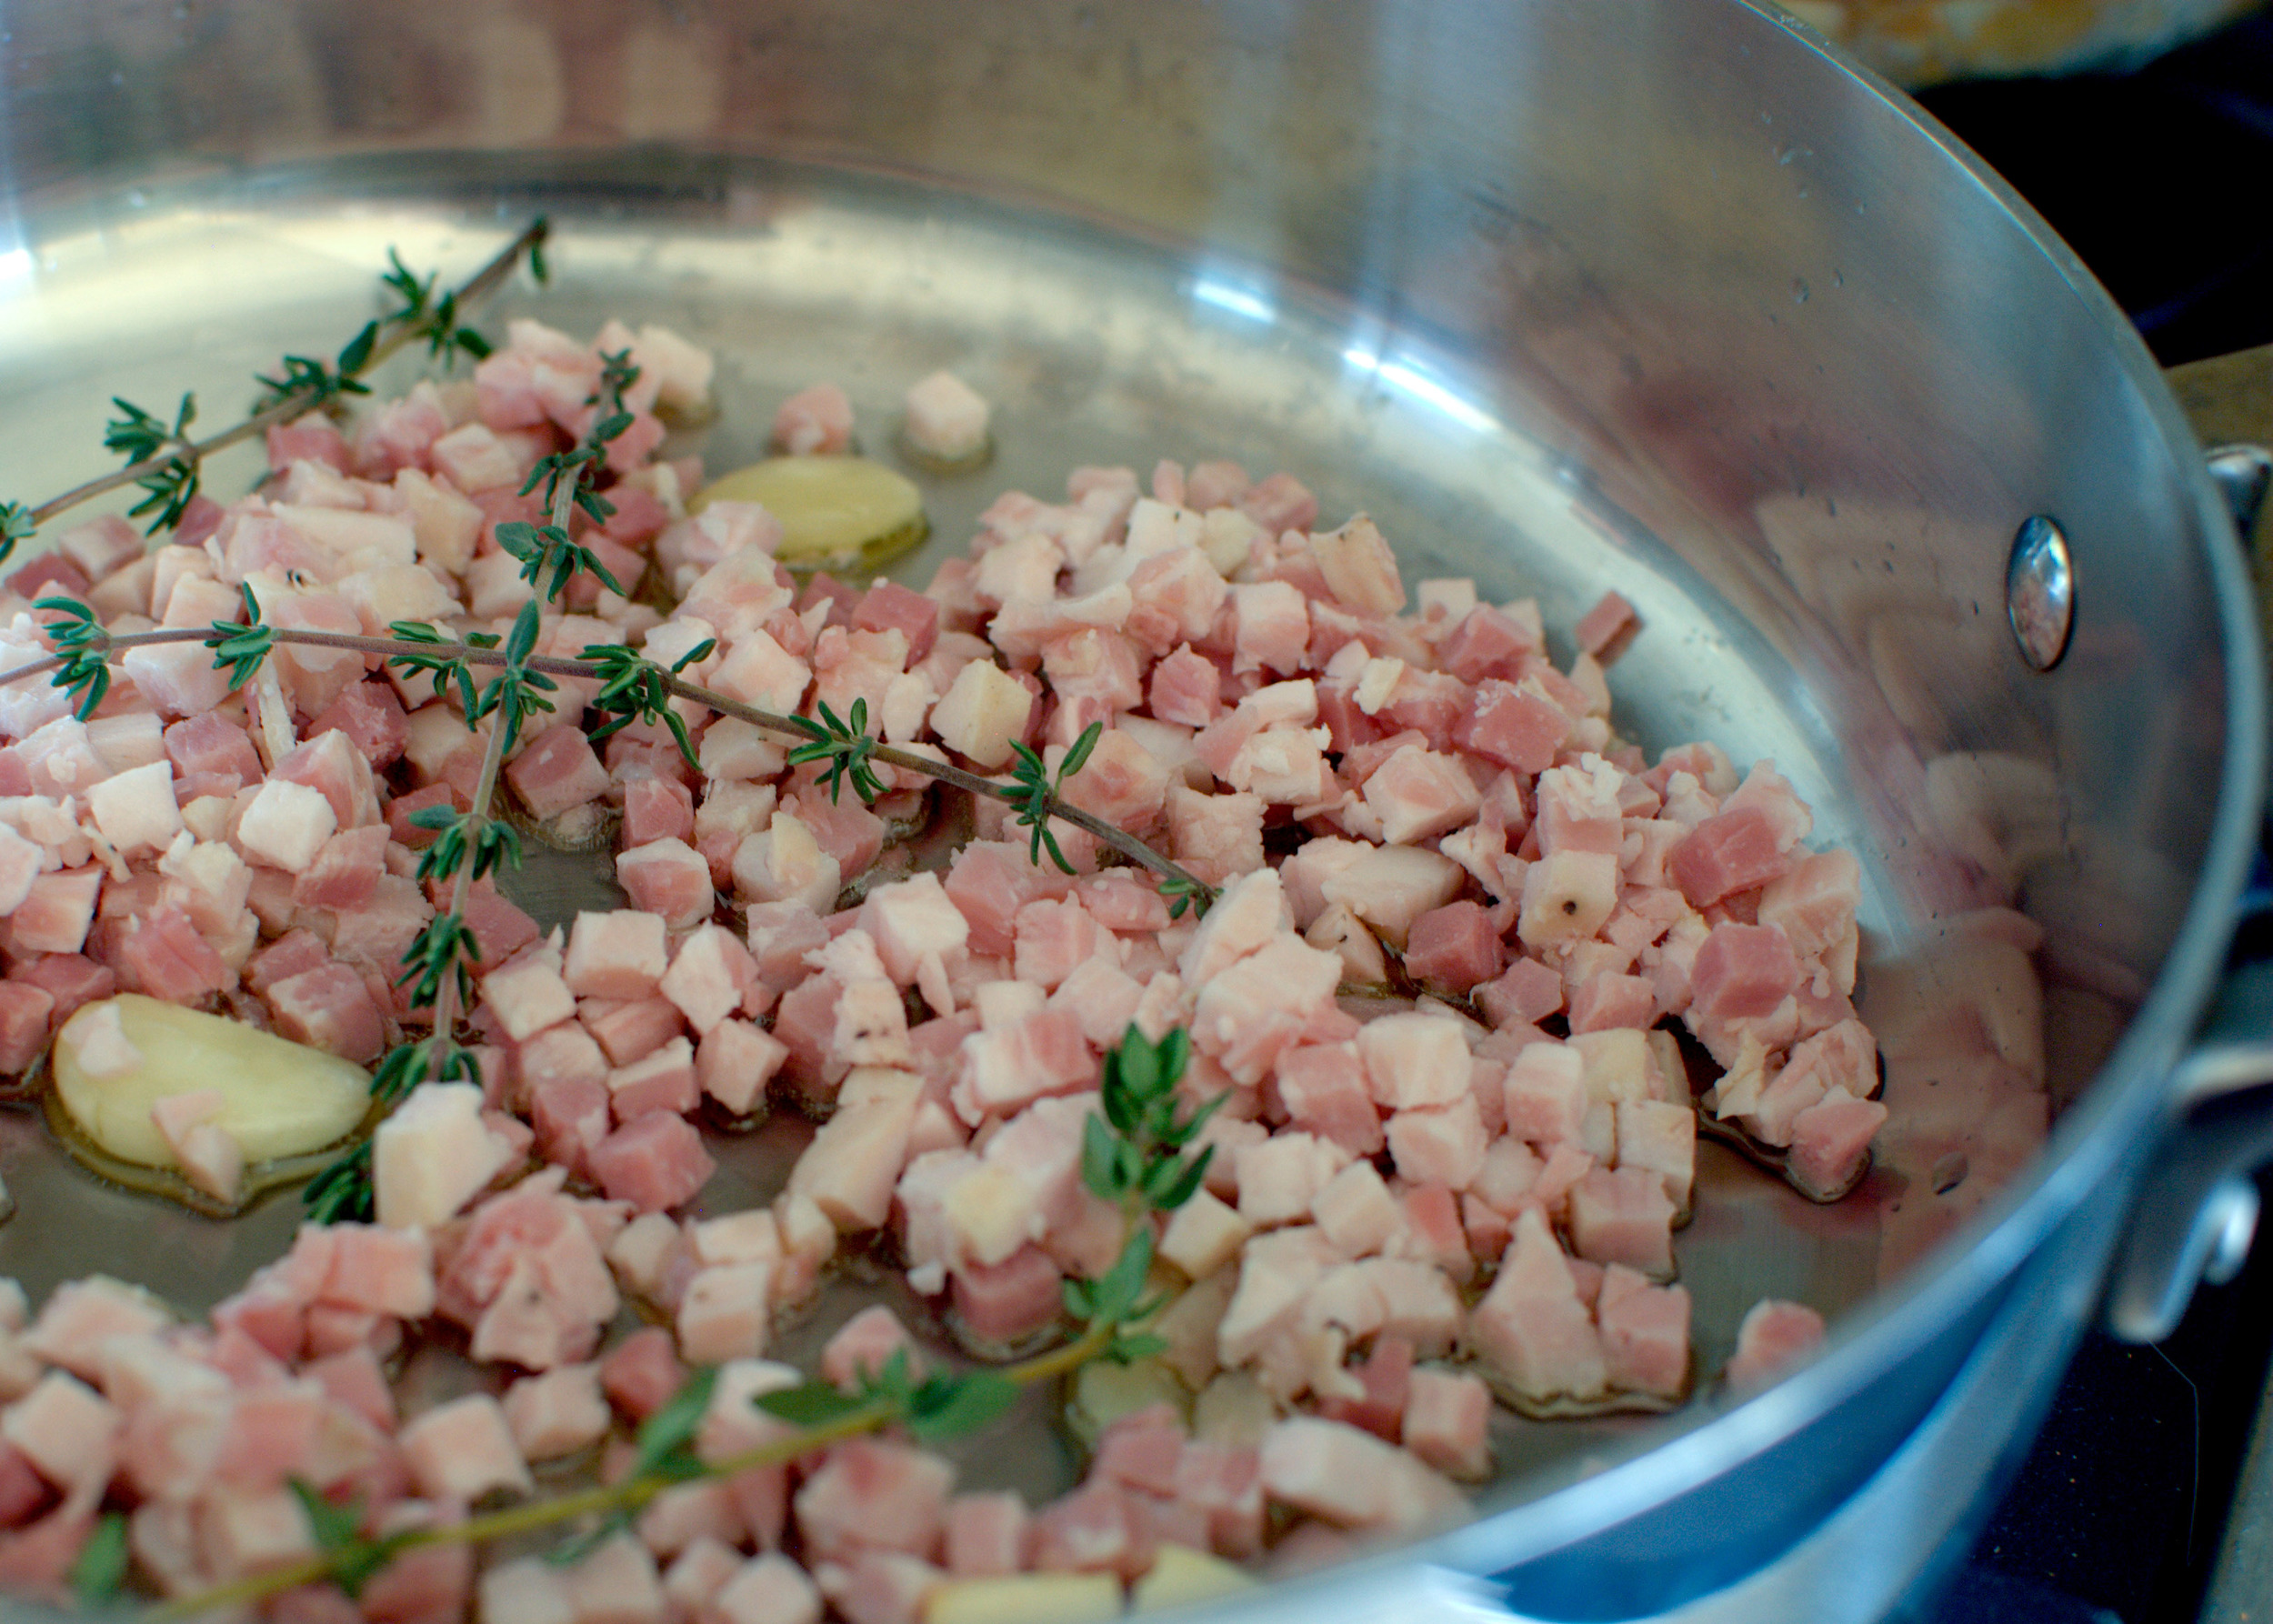
Notes: This recipe can be simplified even further by skipping the blanching step for the broccoli before roasting it; you can even oven roast the broccoli for a nuttier flavor and a less hands on step. Substitute the cheese for any other finely grated hard cheese like Parmesan, but personally, I like the more pungent flavor of Pecorino-Romano with broccoli. These breadcrumbs are delicious on EVERYTHING and you can also enhance them in so many ways. A while back, I cooked them in rendered pancetta fat and herbs, which would be spectacular in this dish too.


Time: 35 minutes
Servings: 6

1 lb pasta
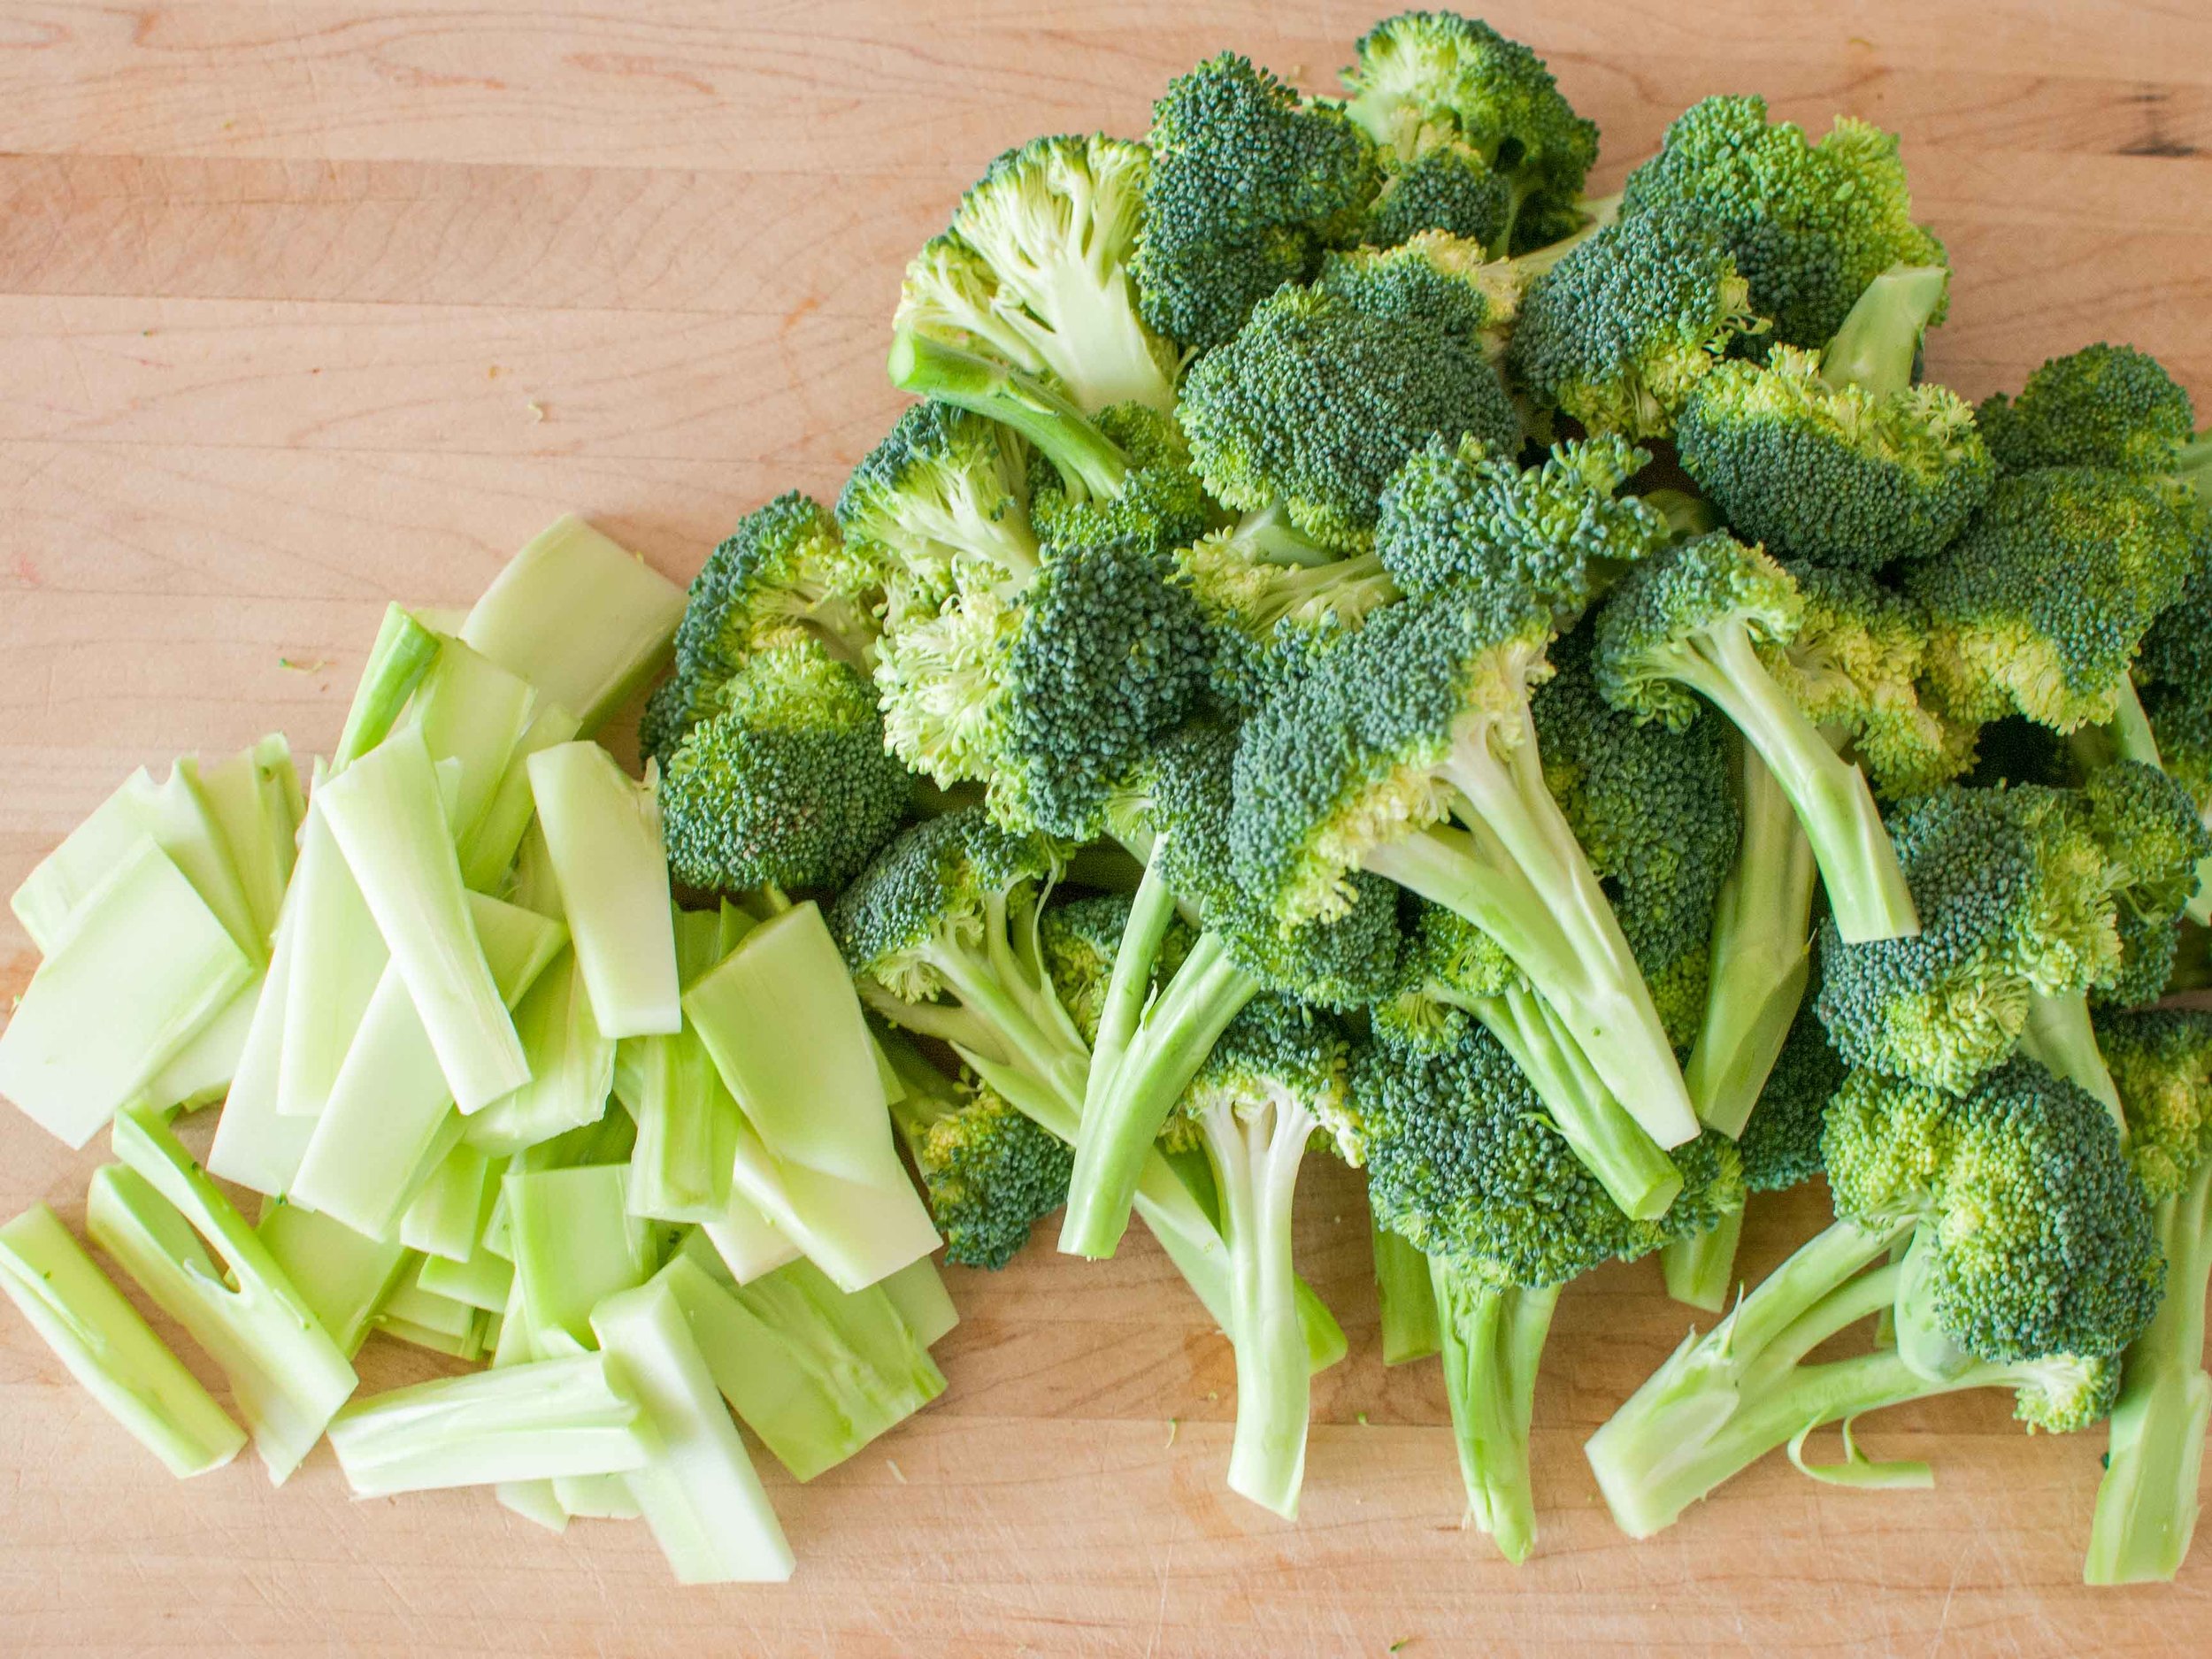
5 cups broccoli florets
6 tablespoons olive oil (divided)
2/3 cup bread crumbs
Kosher salt
Freshly cracked black pepper
1/2 teaspoon garlic powder
2 cloves of garlic, smashed
1 cup finely grated Pecorino-Romano
1 teaspoon lemon zest (about 1 small lemon)

Cook pasta according to package directions and your preference. Don't forget to season the boiling water liberally with salt! Strain pasta, reserving 2/3 cup of pasta water. Fill your pot back up with water and bring to a boil (for the broccoli).

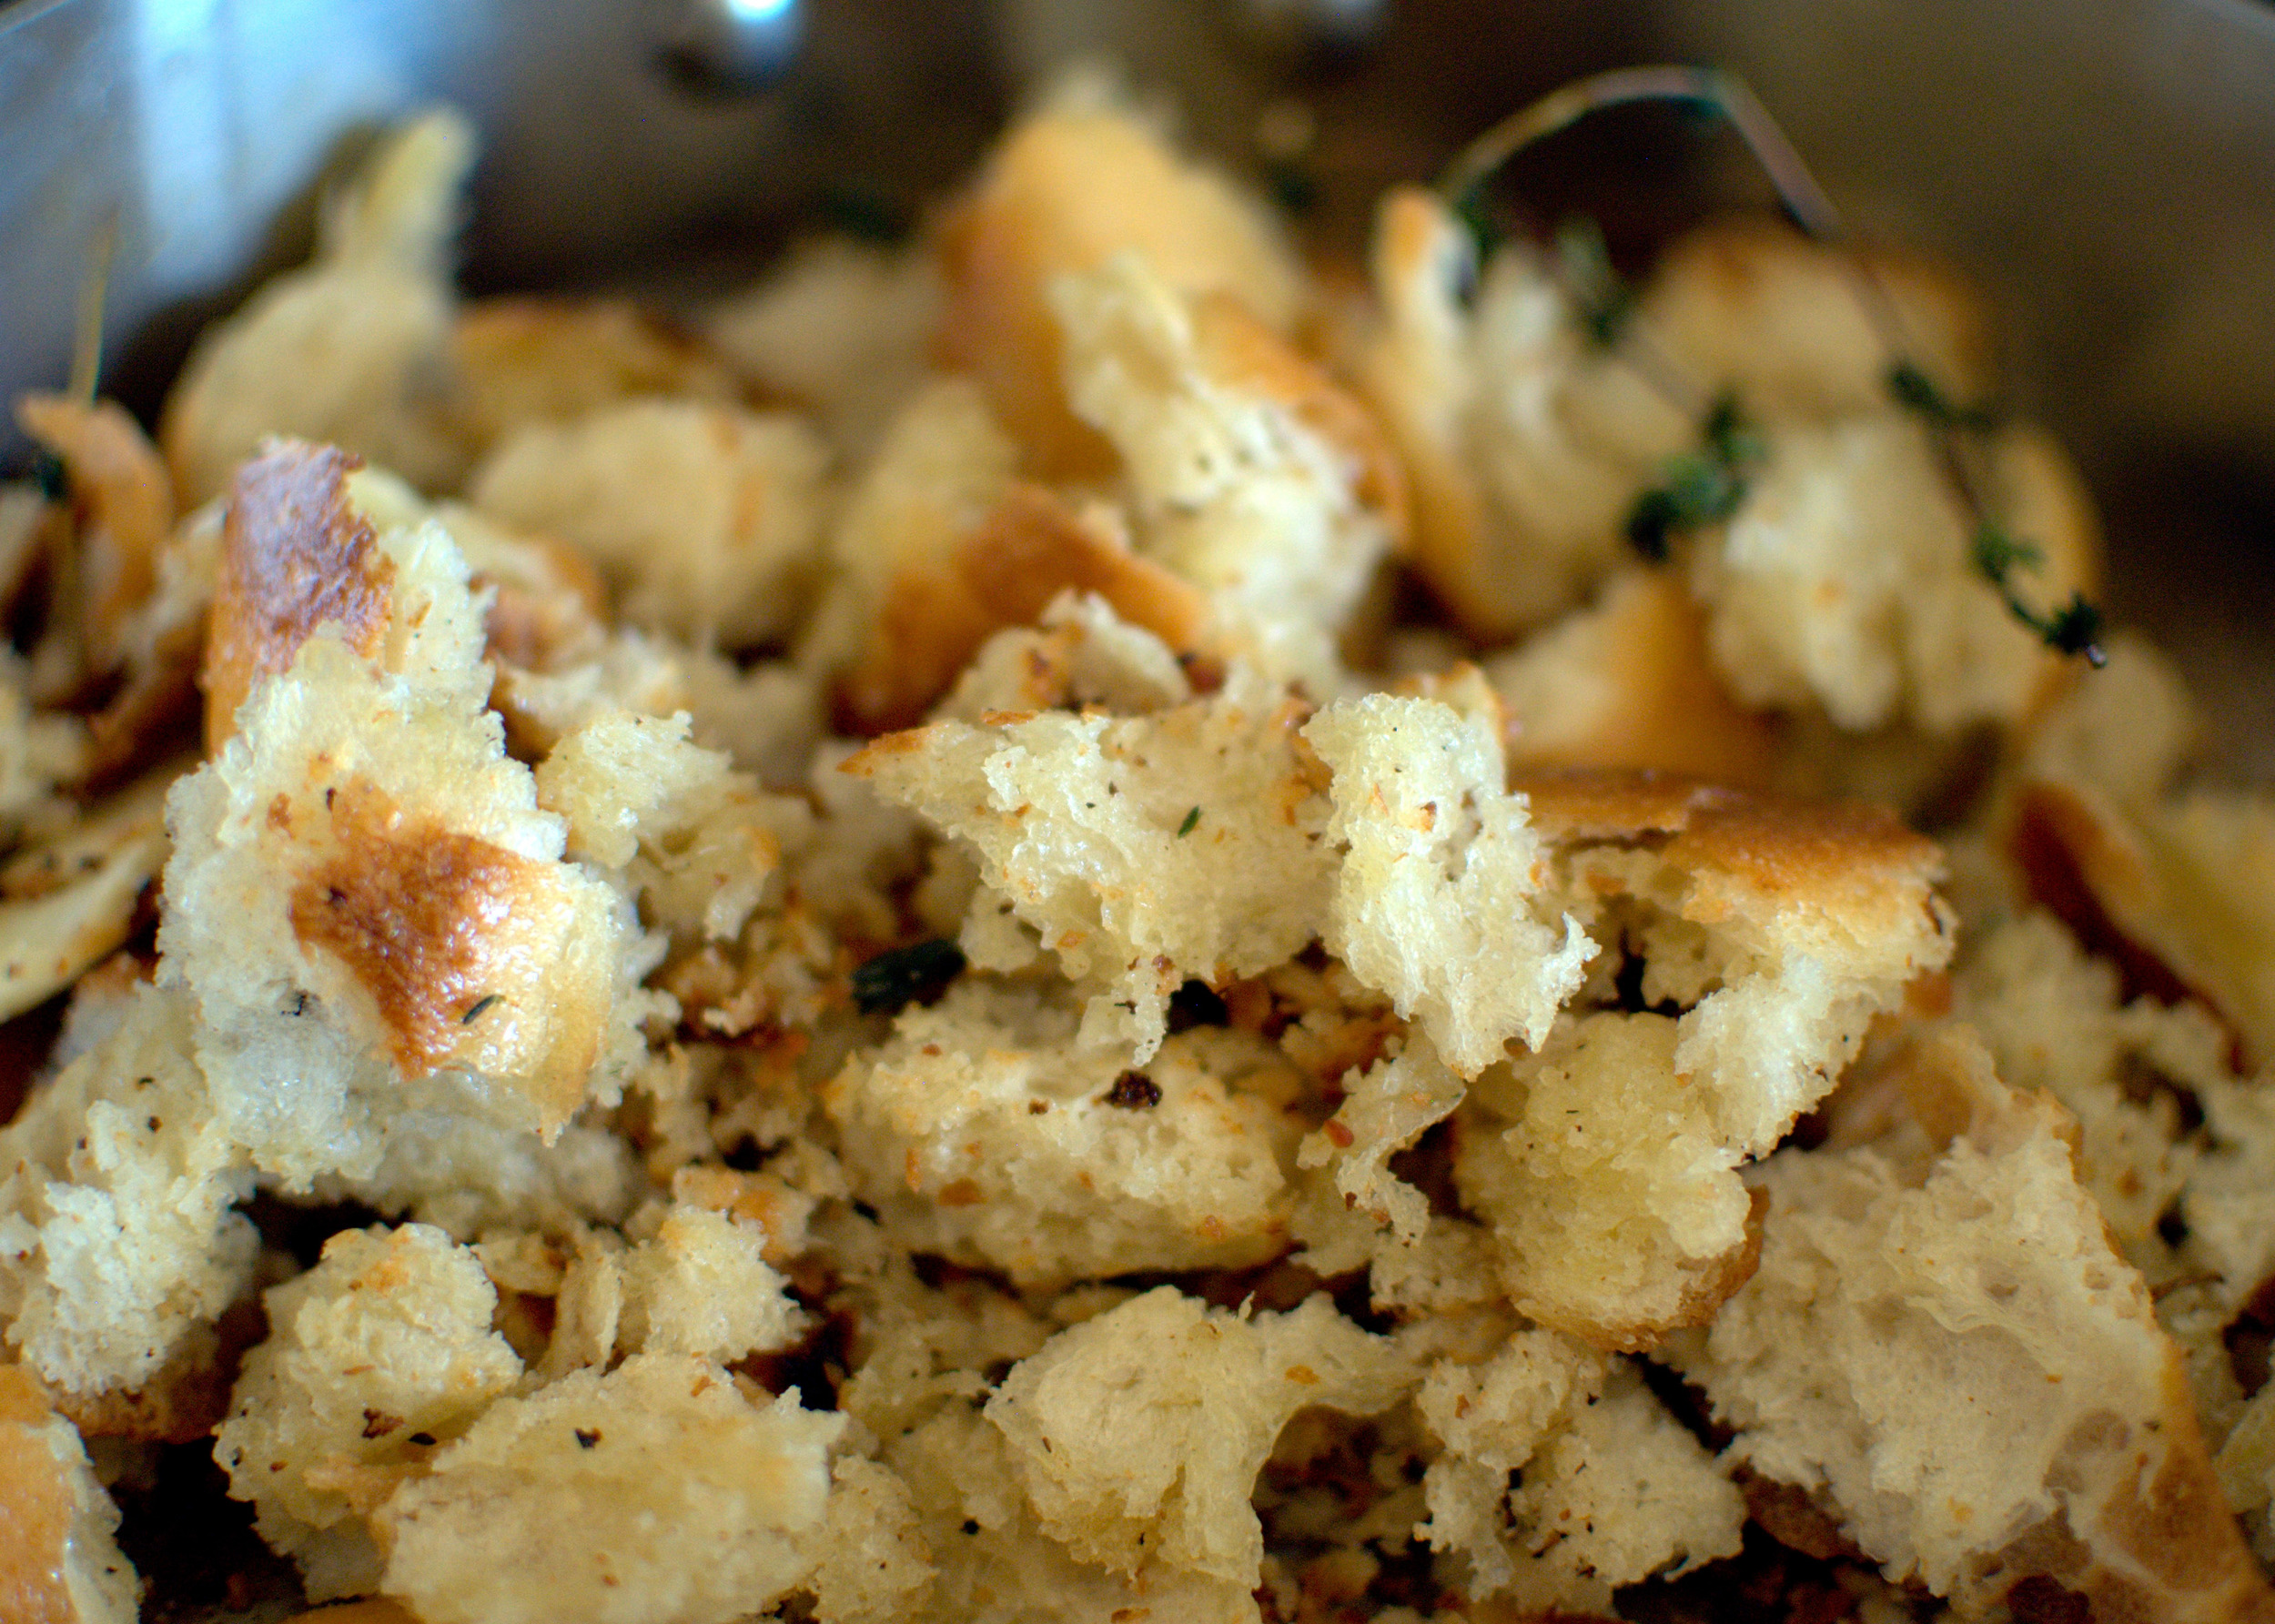
While your pasta is cooking, make the breadcrumbs. In a large skillet, heat 3 tablespoons of olive oil on medium heat. Add breadcrumbs to the hot oil and stir to combine. Season breadcrumbs with 1/2 teaspoon of salt, garlic powder, and a pinch of black pepper. Cook breadcrumbs until golden and crunchy. Set aside.

Cut broccoli into large bite sized pieces. Blanch broccoli florets: bring water to a boil in a large pot and season with salt. Drop in broccoli and cook for 60-90 seconds or until desired doneness has been reached. Plunge broccoli into an ice bath, (large bowl filled with ice and water,) to stop broccoli from overcooking. Once cooled, drain, dry on a clean kitchen towel and set aside.

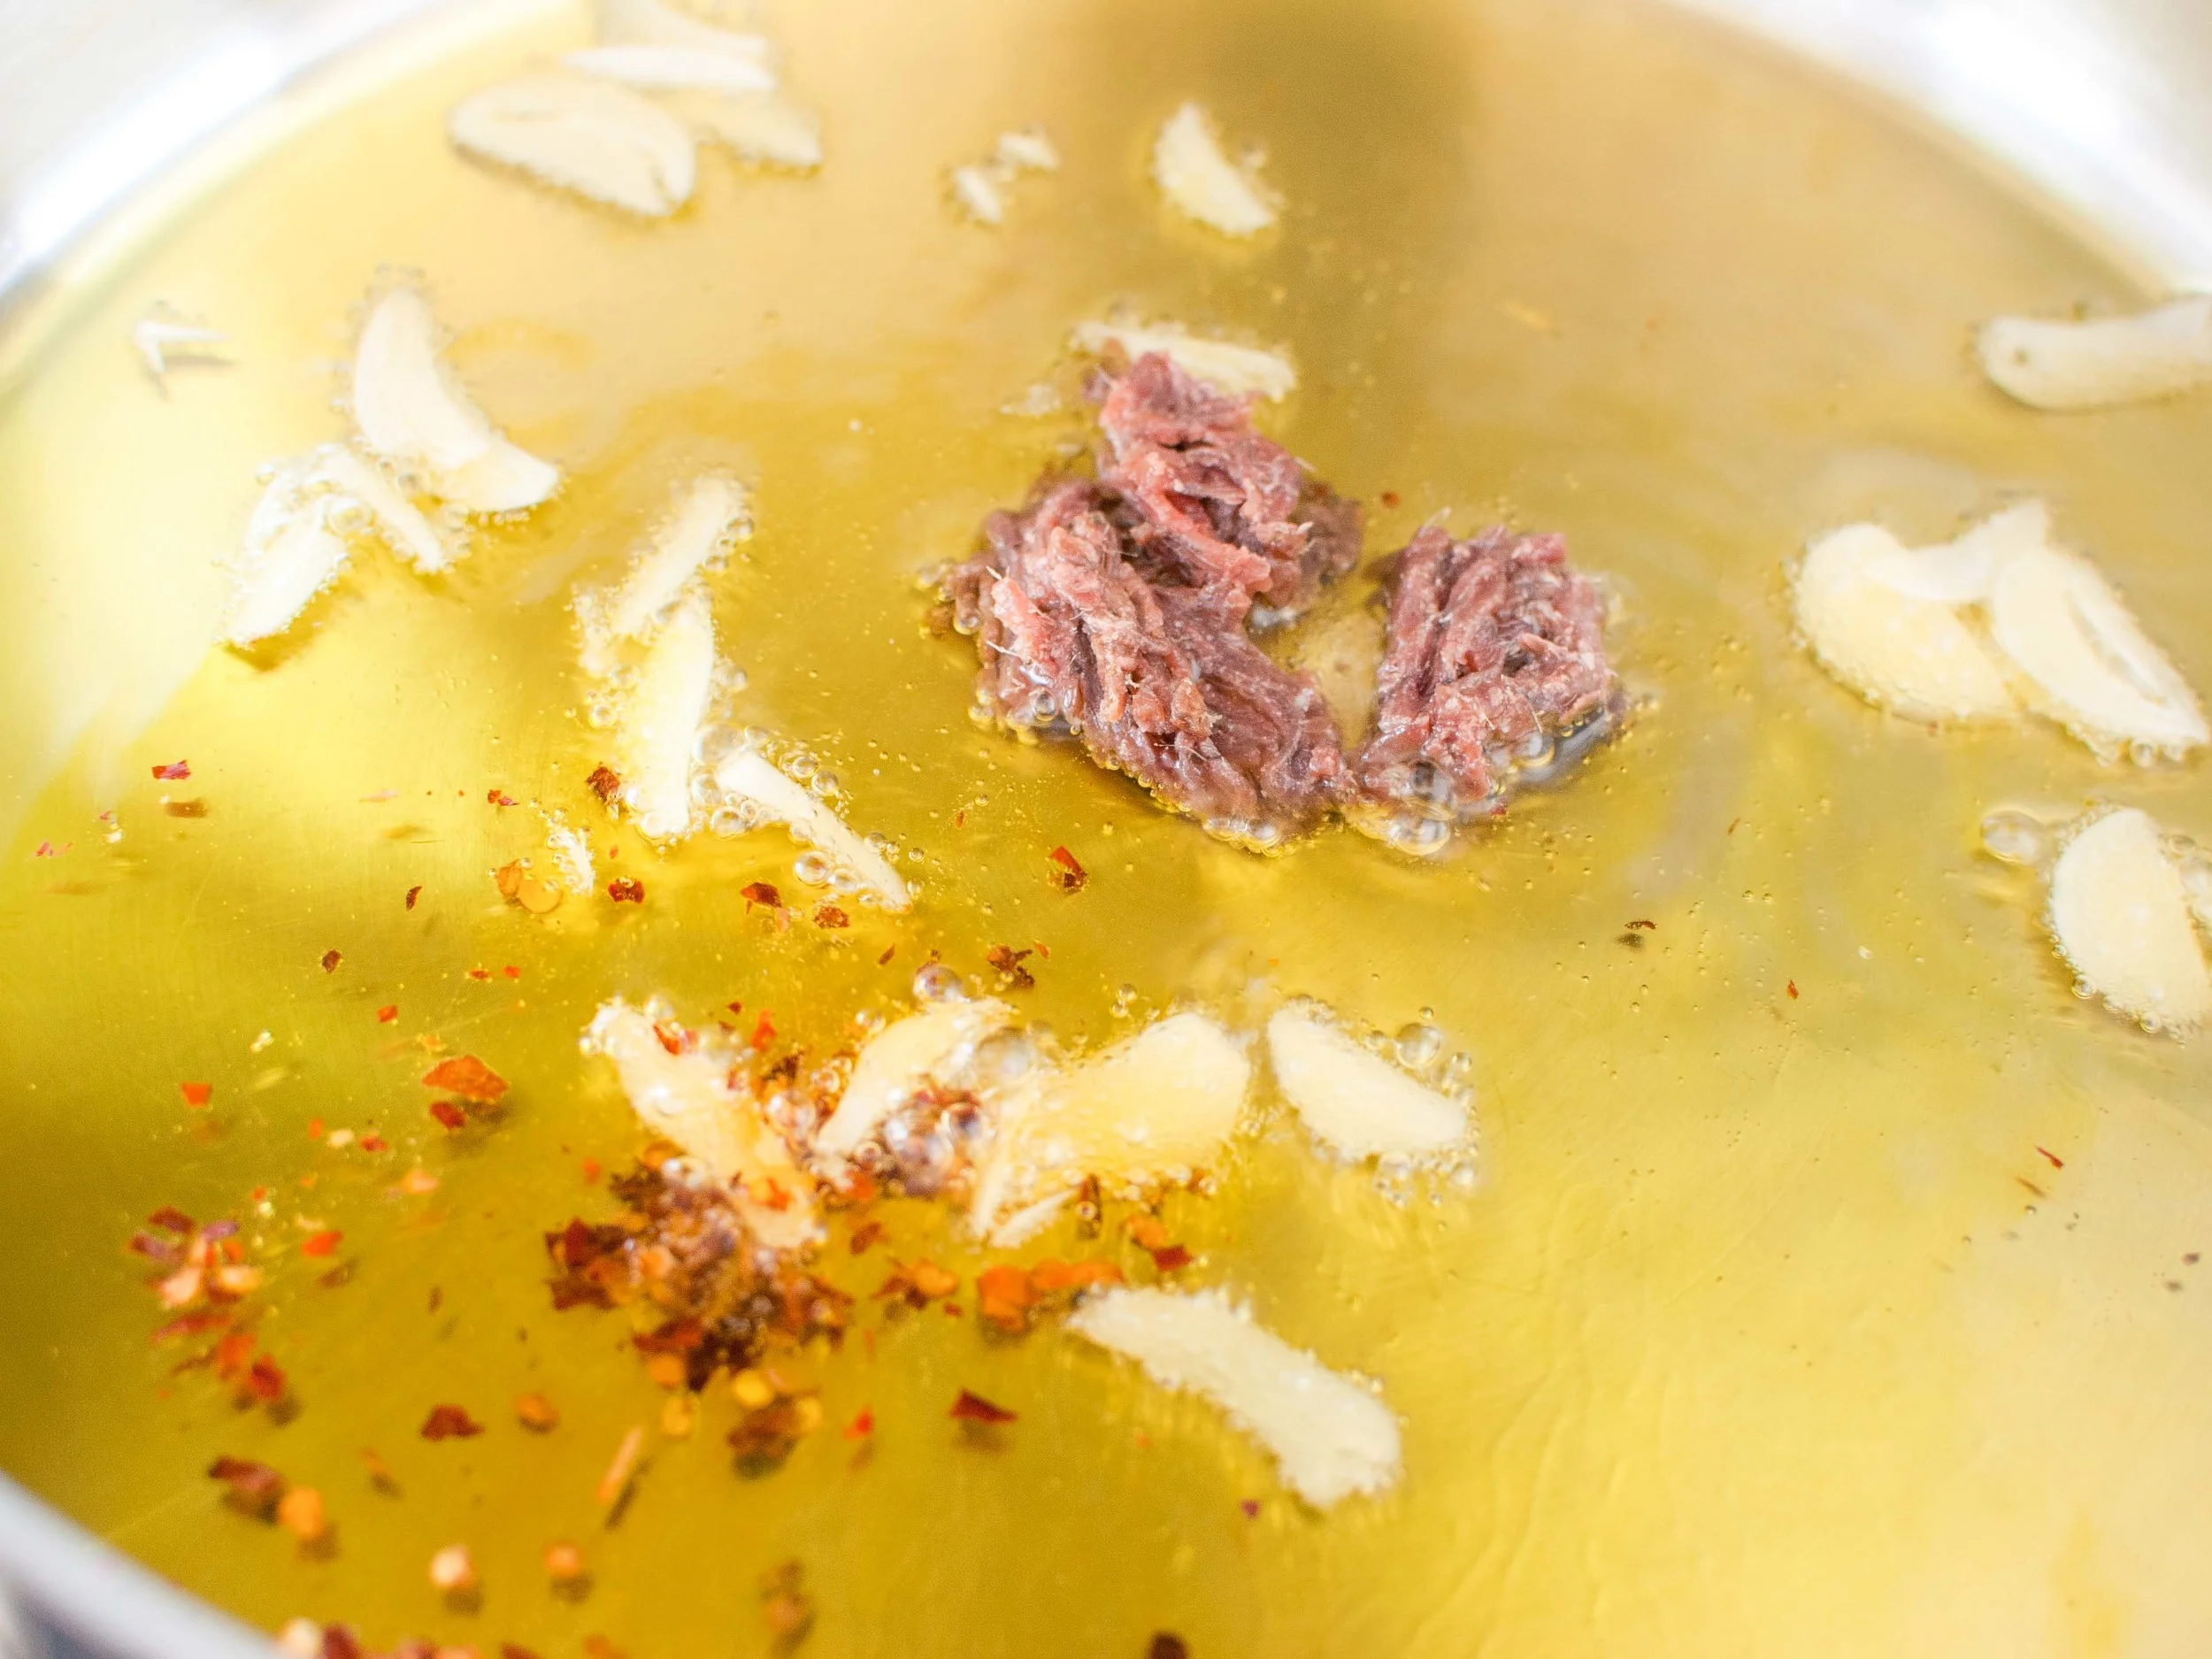
In a large skillet, add 3 tablespoons of olive oil and garlic and cook garlic until fragrant and barely browned. Remove garlic from oil and dispose. Add strained broccoli to the oil and season with salt and pepper. Over high heat, roast broccoli on the first side until crisp and browned. Toss the broccoli to roast on another side. Once browned, remove broccoli from the pan and set aside.

In the same large skillet, heat reserved pasta water and pasta together. Add finely grated cheese and stir to combine until pasta becomes creamy. Add roasted broccoli and lemon zest and heat through together. Transfer to a serving plate and garnish with breadcrumbs.

Bi Bim Bap with Beef and Spicy Sauce by Cynthia Raub

Print Friendly and PDF
Bi Bim Bap with Beef and Spicy Sauce (Korean Mixed Rice)

I love the Perfect Bite. Salty, a hint of acid, some sweetness, something crunchy, something soft, and a little chew all comprised of vegetables, carbs and protein. This is why I love sandwiches, loaded nachos, burritos or rice salads! Last week, I shared Ottolenghi's Rice Salad with Nuts and Sour Cherries. Similar to that recipe, bi bim bap (translated from Korean it means "mixed rice") has multiple facets, steps, and ingredients that come together to make a delicious bowl of food. The cold vegetables temper the steaming hot rice and beef, which is bound by a luscious and sticky egg yolk. Each heaping spoonful is balance of cold, hot, crunch, soft, sweet, salt and heat. This dish may take a bit of preparation and organization, but don't let that dissuade you from making it! I like to make bi bim bap in large quantities as it stores well in the fridge for a few days. It can then be thrown together from the fridge in the amount of time that it takes you to fry an egg.

Notes: In this recipe I am using and preparing very common vegetables to make a delicious bi bim bap (Korean mixed rice). But to make your own, the vegetable world is your oyster. You can include: sautéed mushrooms, lightly pickled radish, or kale instead of spinach . . . the possibilities are endless! The beauty of this dish is it's inherent flexibility. When storing the different vegetables, it's best to store each vegetable by itself. This way, when you go to make a bowl from the fridge, the vegetables keep their individual characteristics even when they are eventually mixed together. My mom always reminds me to not aggressively season the vegetables, so I'm going to tell you the same thing. This dish is most harmonious when the vegetables are a tad under seasoned to delicately balance the rich egg yolk, spicy sauce and flavorful beef.

Additionally, the bi bim bap sauce recipe I've shared is a versatile sweet and spicy condiment that is delicious and addictive. It's sweeter and less acidic than sriracha, making it a great addition to your hot sauce arsenal. Gochujang, used in the bi bim bap sauce recipe, is a Korean fermented chili paste (kind of like a spicy miso paste), that can be found in the refrigerated section of most Asian supermarkets. 


Serves: 4
Time: 1 hour

For the Marinated Beef
1 pound ground beef
4 garlic cloves
1/2 yellow onion
1" piece of peeled ginger
6 tablespoons soy sauce
1 tablespoon roasted sesame oil
1 tablespoon vegetable oil
3 tablespoon light brown sugar or honey
1 teaspoon black pepper
1 teaspoon kosher salt

Combine all of the ingredients in a blender or food processor and liquify. Place beef in a large bowl and add marinade, combining until well incorporated. Cover and keep in the refrigerator until ready to cook. Marinate for at least 30 minutes up to 2 hours.

Bi Bim Bap Sauce (fermented red pepper paste sauce)
2 tablespoons gochujang (Korean chile paste, found in most Asian markets)
1 teaspoon kosher salt
1 tablespoon rice vinegar
2 cloves garlic, minced
1 tablespoon toasted sesame seeds
2 tsp honey
1 teaspoon sesame oil

Combine all of the ingredients in a medium bowl, whisk to combine, taste to adjust seasoning and set aside.

For the Bi Bim Bap
2 medium zucchini, julienned
12 oz mung bean sprouts
3 carrots, julienned
2 small bunches of spinach (standard size, not baby), washed with root ends trimmed
3 tablespoons sesame seed oil
1 tablespoon vegetable oil
Pinch of sugar
3 teaspoons kosher salt (divided)
2 teaspoons crushed garlic (divided)

To Serve
4 cups of prepared rice (short grain white rice is traditional, but brown rice would be delicious, too!)
4 eggs
Bi Bim Bap Sauce (recipe above)
Marinated Beef (recipe above)

Bring a large pot of water to a boil. Place julienned zucchini in the boiling water for about one minute until cooked through. Remove the zucchini (delicately with tongs or a strainer) and plunge it into an ice bath. Remove, strain well and set the zucchini aside in a small bowl. Dress with 1 heaping teaspoon of kosher salt and 1 tablespoon of sesame seed oil. Taste and adjust seasoning.

In the same boiling water, place mung bean sprouts in the water for 3-5 minutes until just translucent and limp. Remove the mung bean sprouts and plunge into the previously used ice bath. Remove, strain and squeeze sprouts of excess liquid, and set the mung bean sprouts aside in a small bowl. Dress with 1 heaping teaspoon of kosher salt, 1 tablespoon of sesame seed oil and 1 teaspoon of crushed garlic. Taste and adjust seasoning.

Refresh the ice bath. In the pot of boiling water, place carrots in the boiling water for 1 minute until cooked through and limp. Remove the carrots and plunge into the ice bath. Remove, strain very well and set the carrots aside in a small bowl. Dress with 1 teaspoon of kosher salt, a pinch of sugar, 1/4 teaspoon of black pepper, and 1 tablespoon vegetable oil. Taste and adjust seasoning.

Clean spinach of dirt and trim the ends. In the pot of boiling water, place spinach in the boiling water for 1 minute until cooked through and the stems are tender. Remove the spinach and plunge into the previously used ice bath. Remove, strain well (pressing out any additional liquid) and set the spinach aside in a bowl. Dress with 1 heaping teaspoon of kosher salt, 1 tablespoon sesame seed oil and 1 teaspoon crushed garlic. Taste and adjust seasoning. A note on spinach: I would not recommend using bagged baby spinach - it doesn't cook the same as large bunch spinach, and it doesn't hold up well during the final mixing process.

Cook the beef by heating a large skillet on medium-high heat and cook the beef until browned, fragrant, and cooked through. You may have to cook the beef in two batches to avoid overcrowding the pan.

Meanwhile, heat a nonstick pan on medium-high heat and coat with cooking oil. Crack eggs into pan and fry until the whites are opaque and the bottoms of the eggs are crisp and brown.

To Assemble: In a large bowl, scoop 1 cup of fluffed rice into the center. Around the perimeter, arrange 1/4 of each vegetable around the rice, spoon 1/4 of the beef mixture. Top with a fried egg.

Serve the bowl with the spicy Bi Bim Bap sauce on the side and a spoon to eat with. Immediately before eating, mix and toss all of the ingredients in the bowl together: break up the egg white, incorporate the yolk into the rice, while tossing the vegetables together. Dress with sauce and enjoy!

Lentils with Broiled Eggplant by Amy Cantu

Print Friendly and PDF

Luxurious. I would not have ever imagined that I might describe a lentil salad this way, but luxurious is exactly the perfect word. Smoky, silky, creamy, spicy, and a bit tangy: All of these sensations tangle together into one luxurious bite after another. Eggplant can be sensual. Yes, I said it. The broiled eggplant lifts ordinary lentils into a sensual tizzy of textures and flavors, and I don't think I've been the same ever since! Please eat this. It's a feast of colors for the eyes, sustaining nutrients for the body, and sensual luxury for the mouth and tongue. I understand completely now why Yotam Ottolenghi's approach to treating and eating vegetables can become an obsessive experience. I am forever changed, and now seeking to cook every single recipe in his cookbooks. (Speaking of which, Cynthia shared Ottolenghi's Rice Salad with Nuts and Sour Cherries with us, and I will be making this immediately. So good.)

Notes: The smoky broiled eggplant is what makes this dish so special. Roasting them directly over a gas stove is the fastest way to cook them and achieve that smoky flavor, but it definitely made a mess that took scrubbing to clean up. If you can lay down aluminum foil around the flame to catch some of the drippings, that would help a lot, but this was hard to do with my particular stovetop. Using the oven broiler to roast the eggplant is a less messy alternative, but it does take an hour instead of 15 minutes. If you choose the broiler method, please ensure that you poke the eggplant all over with a small sharp knife, to allow steam to escape. Otherwise, the eggplant may explode all over the oven - an even bigger mess to clean up!

The harissa is optional, but I was so happy to have a jar of homemade harissa gifted to me from Cynthia. It elevated this already excellent lentil salad into something truly special.


Time: 45 minutes to 1 hour, 30 minutes (depending on your method for roasting the eggplant)
Servings: 4

2 medium eggplants
2 tablespoons top-quality red wine vinegar
salt and black pepper
1 cup small dark lentils (such as Puy or Castelluccio), rinsed
3 small carrots, peeled
2 celery stalks
1 bay leaf
3 thyme sprigs
1/2 white onion
3 tablespoons olive oil, plus extra to finish
12 cherry tomatoes, halved
1/3 teaspoon brown sugar
1 tablespoon each roughly chopped parsley, cilantro and dill
2 tablespoon crème fraîche (or natural yogurt, if you prefer)
2 tablespoons harissa (purchased or homemade), optional

To cook the eggplants on a gas stovetop, which is the most effective way: Start by lining the area around the burners with foil to protect them. Put the eggplants directly on two moderate flames and roast for 12 to 15 minutes, turning frequently with metal tongs, until the flesh is soft and smoky and the skin is burnt all over. Keep an eye on them the whole time so they don’t catch fire.

To broil the eggplants in an oven instead: pierce the eggplants all over with a sharp knife. (This creates exit points for the steam to escape the eggplant; otherwise, the eggplant will explode and make a giant mess!) Put them on a foil-lined tray and place directly under a hot broiler for 1 hour, turning them a few times. The eggplants need to deflate completely and their skin should burn and break.

Remove the eggplants from the heat. If you used an oven broiler, change the oven to its normal setting. Heat the oven to 275°F. Cut a slit down the center of the eggplants and scoop out the flesh into a colander, avoiding the black skin. Leave to drain for at least 15 minutes and only then season with plenty of salt and pepper and 1/2 tablespoon of the vinegar.

While the eggplants are broiling, place the lentils in a medium saucepan. Cut one carrot and half a celery stalk into large chunks and throw them in. Add the bay leaf, thyme and onion, cover with plenty of water and bring to the boil. Simmer on a low heat for up to 25 minutes, or until the lentils are tender, skimming away the froth from the surface from time to time. Drain in a sieve. Remove and discard the carrot, celery, bay leaf, thyme and onion and transfer the lentils to a mixing bowl. Add the rest of the vinegar, 2 tablespoons of the olive oil and plenty of salt and pepper; stir and set aside somewhere warm.

Cut the remaining carrot and celery into 3/8-inch dice and mix with the tomatoes, the remaining oil, the sugar and some salt. Spread in an ovenproof dish and cook in the oven for about 20 minutes, or until the carrot is tender but still firm.

Add the cooked vegetables to the warm lentils, followed by the chopped herbs and stir gently. Taste and adjust the seasoning. Spoon the lentils onto serving plates. Pile some eggplant in the center of each portion and top it with a dollop each of crème fraîche or yogurt and harissa. Finish with a trickle of oil.

Korean Green Onion and Seafood Pancakes (Pa Jun) by Cynthia Raub

Print Friendly and PDF

Korean people love their pancakes! Kimchi pancakes, green onion pancakes, sliced fish pancake fritters, mung bean pancakes, chive pancakes with a million jalapeños . . . the list is seemingly endless. If it's a thing, it can be pancaked. I love them all, but I especially like this one because it doesn't require any ingredients you couldn't find in a standard grocery store. I can confidently speak for myself, for you, and every other living being in the world when I say: when you are craving Korean food, it must be satisfied immediately. Mung beans, Asian chives and kimchi can often require a special trip to an Asian market. Ain't nobody got time for that! These green onion pancakes are tender, crisp and beautifully golden. The mild sweetness of the cooked and aromatic green onion is absolutely addictive. If you've never made Korean food before, this is an accessible and tremendously delicious place to start.

Notes: The green onion pancake my mom made at her restaurant was 80% green onion and that's the recipe I'm sharing with you. Some people prefer less green onion and more batter and this recipe is flexible enough for you to suit your own preferences. This is a very hands on cooking process as you can tell by the photos. I use my hands to lay the battered green onions into the pan, to distribute the raw egg, and to press the pancake to create a crunchy crust. Don't be afraid to use your hands - it will be so much easier than a multitude of utensils. To reheat the pancakes, place them in a non-stick pan on medium heat and heat through on both sides to enjoy them again. Please don't put them in the microwave; that will make everyone sad.

The dipping sauce is such a great accompaniment to the pancakes - it's worth the added few steps. The onions and jalapeño impart their flavors into the liquid and the hot liquid quickly pickles the onion and jalapeño to tone down their harshness and heat.


Yield: 3 large pancakes
Time: 40 minutes

2 large bunches green onions
4 eggs, divided
1 1/2 cups water
1 cup flour
1/4 cup cornstarch
2 tablespoons salt
6 tablespoons grape seed oil (or any other neutral oil), divided
1/2 cup chopped raw shrimp, divided
1/2 cup chopped raw squid, divided

Pancake Dipping Sauce for serving (see recipe below)

Rinse green onions and remove tops. Trim bottoms to make all of the green onions similar in length. Lay them on the cutting board and slice through the entire length of the vegetable - this will make biting through the cooked green onion easier and less stringy. Halve the green onions and set aside.

In a medium bowl, combine water and one egg and whisk until foamy. In a shallow pan (I used an 8 x 13 cake pan) combine flour, cornstarch and salt. Start by pouring 1 cup of foamy water/egg mixture into dry ingredients and stir gently until roughly combined - like a standard pancake mixture, wet and dry patches are OK since you don't want to over-mix the batter! From there, add more liquid a few tablespoons at a time until the batter is thick enough to hold together and coat the green onions, but is not gloopy and sticky, nor runny.

Heat a large pan or griddle on medium high heat with 2 tablespoons of grape seed oil. Add 1/3 of the green onions to the batter and toss until fully coated. Turn the heat down and arrange batter covered green onions in the pan in a single row with no space between the green onions. Turn the heat back up to medium-high and press the green onions into the pan to create a cohesive crust. Once the batter begins to brown and the green onions are heating through, scatter 1/3 of the seafood over the top of the pancake. Beware of oil popping at this point!

Press the seafood down into the pancake. Crack an egg into a small bowl and whisk lightly. Pour the egg over the top of the pancake, making sure to cover the seafood (the egg will help to secure the seafood to the pancake). When the seafood begins to warm and 70% of the pancake is cooked through (4-6 minutes), flip the pancake over to finish cooking and brown the second side (about 2 minutes). The pancake is done when the batter throughout the green onions is throughly cooked the edges are deeply browned and crisp. Flip the pancake onto a cutting board with the seafood and egg mixture facing up. Cut into generous bite sized pieces. Repeat two more times for a total of 3 pancakes. Serve immediately with the Pancake Dipping Sauce.

Pancake Dipping Sauce

1 cup soy sauce
1/2 cup water
1/4 cup sugar
1/4 white vinegar
1 jalapeño, halved
1 small onion, sliced thin

In a small sauce pan over medium heat, combine soy sauce, water, sugar and vinegar. Bring to a simmer until all of the sugar is dissolved. In a medium heat-proof bowl, place sliced onion and halved jalapeño. Pour the simmered soy sauce mixture over the onions and jalapeño and allow to fully cool before serving.

Asparagus, Peas and Fava Beans with Gremolata and Mozzarella by Cynthia Raub

Print Friendly and PDF

Suddenly, they were everywhere. Delicate, thin stalks of asparagus appeared in the markets in all of their glory. They are on special! They are as tender and flavorful as all get out! It was time to get excited about spring vegetables. Granted, asparagus, like most all other produce, is now available year-round. While it is tolerable during the other seasons, out of season asparagus does not compare to the first of the season, local crop. The other spring beauties that shine like green diamonds in the spring are fresh English peas and finicky fava beans. Combined, these veggies make a beautiful statement as a side dish or an alternative to a salad. My initial thought was to dress the vegetables simply with olive oil, salt, pepper and lemon juice. But then I remembered that the lemon juice would turn the green vegetables brown and unappealing. Boo! That's when it occurred to me to dress it with a gremolata: a minced combination of lemon zest, parsley and garlic. The lemon zest would provide the acidic zing, the parsley would bring brightness and even more freshness to the veggie party and the garlic does what garlic was created to do (aka make everything more delicious). Topping this loose, green dish with a soft and white cheese really brought it together and made it a perfect accompaniment to Amy's Fresh Egg Pasta.

Notes: Gremolata can be prepared several ways. I primarily used a microplane to finely grate the garlic and zest the lemon - I found that this method cut down my chopping time tremendously. Some people use a mortar and pestle to make a paste with all of the ingredients, others chop everything completely with a knife, and some use a food processor to get the results they want. Fava beans have a very short and sweet season so they can be cumbersome to acquire. They are also time intensive to shell and prepare. I was committed to fava beans, but if you can't find them or don't want to prepare them, omitting them won't do any harm, either.


Time: 50 minutes
Serves: 4-6

2 bunches of asparagus
1 cup of english peas
1/2 cup fava beans (optional)
3 tablespoons extra virgin olive oil
2 teaspoons kosher salt
1 teaspoon freshly cracked pepper

1 lemon
3 garlic cloves
1 cup of parsley leaves, packed

8 oz fresh mozzarella (or burrata)

In a large pot, bring salted water to a rolling boil over medium heat. Fill a large bowl with ice and water - set ice bath aside. Prepare asparagus bunches by cutting off the woody ends (about 2 inches). Blanch asparagus for 1-2 minutes depending on the thickness of your asparagus stalks and your vegetable doneness preference. Remove from boiling water with tongs and submerge in the ice bath to stop the cooking. Remove asparagus from the ice bath onto a towel to absorb the excess water.

In the same pot of boiling water, blanch and cool the peas as you did the asparagus. Set aside.

Lastly, blanch the fava bean pods in the boiling water for 2-4 minutes cooking them through. Strain the pods and set aside to cool. Once the pods are cool, remove the waxy bean shells from the pod. Using a small pairing knife, slit the waxy shells to release the beans. Set the shelled beans aside.

In a large bowl (I used a half sheet baking pan), gently combine the asparagus, peas and fava beans. Season the vegetables with kosher salt, pepper and olive oil.

For the gremolata: using a microplane, zest one entire lemon onto your cutting board. Microplane the garlic on top of the lemon zest. Finely chop the parsley on the same cutting board, incorporating the lemon zest and grated garlic as you mince away until everything is well combined.

Sprinkle the asparagus mixture with the gremolata to taste. Mix and combine, and let sit for 15 minutes to allow the flavors to meld before serving. Tear mozzarella and dot over asparagus. Taste and adjust seasoning, adding salt or gremolata as necessary!

Swiss Chard and Leek Crostata by Cynthia Raub

Print Friendly and PDF

I first laid eyes on this beautiful and majestic creature several years ago on Anne Burrell's Secret of a Restaurant Chef on the Food Network. As she effortlessly prepared this beautifully browned and rustic crostata, I vividly remember salivating and wondering when I should make it and for what occasion. This recipe is not for the faint of heart, as it includes MORE than four cups of various cheeses (I refuse to count and acknowledge the true amount of cheese in the recipe). For the sheer volume of cheese alone, this recipe is perfect for sharing with a group of people. I have made it for friends at brunch, for potlucks, and for holidays. It can be the main or it can be a side for a meal. Dreamers like me would consider it a serving of vegetables. It's showy and beautiful, incredibly delicious, and makes a statement on any table for every occasion. 

Notes: Because this recipe yields such a large crostata, I split the recipe to make two smaller crostatas: one to gift to sweet new parents and one to Amy and her family. This recipe is adaptable and you can substitute any vegetables that you love for the leeks and/or swiss chard. Mushrooms! Squash! Roasted TOMATO! Don't get me started on tomatoes in a savory crust . . . Anyway, this recipe is also just perfect as written. So make this one before you start doing your own jazzy riffs. I promise, it's GOOD.


Read More: The Shared Brunch


Time: 2 hr 30 min (1 hour inactive)
Serves: 8 to 10

Crust:
2 cups all-purpose flour
1 cup grated Parmesan
1/2 cup mascarpone
Pinch kosher salt
Pinch cayenne pepper
1 stick cold butter, cut into pea-sized pieces
2 eggs

Filling:
Extra-virgin olive oil
2 cloves garlic, smashed
Pinch crushed red pepper flakes
1 bunch white Swiss Chard, stems removed cut into 1/4-inch lengths, leaves cut into 1-inch lengths
2 leeks, tough green tops removed, cut in 1/2 lengthwise and then cut crosswise into 1/4-inch lengths
2 to 3 tablespoons water
Kosher salt
2 cups fresh ricotta
1 cup grated Parmesan
2 eggs
Pinch cayenne pepper
Egg wash: 
1 egg beaten with 2 tablespoons water

Combine the flour, Parmesan, mascarpone, salt, cayenne and butter in the bowl of a food processor and pulse until combined and crumbly in texture. Add the eggs and pulse until the mixture tightens up. Turn mixture over onto a clean and flat work surface, shape into a disc, cover with plastic wrap and refrigerate for at least 30 minutes.

Meanwhile, heat olive oil to a large sauté pan over medium heat. Add the garlic and crushed red pepper. When the garlic has become golden brown and is very aromatic remove it and discard. Add the swiss chard stems, leeks and 2 to 3 tablespoons of water and season with salt. When the water has evaporated and the stems and leeks are soft, add the leaves. Season the leaves with salt and sauté until they are very soft and wilted. Remove from the heat and allow the Swiss chard to cool.

In a large bowl combine the ricotta, Parmesan, eggs, cayenne and the Swiss chard mixture. Mix to thoroughly combine. Taste and adjust the seasoning if needed. Set aside.

Preheat the oven to 375 degrees F. Remove the dough from the refrigerator and let warm up for about 10 to 15 minutes.

Dust a large clean work surface with flour and roll the dough into a large circle about 1/4 to 1/8-inch thick. Transfer the dough to a large sheet try lined with parchment paper. Lay the dough out flat, don't worry about the overhang on the sides. Put the filling in a large circle in the center of the rolled out dough leaving a 3 to 4-inch border of dough along the outside edge. Fold the dough up around the filling to make a "free-form pie". Brush the top of the dough with egg wash and bake in the preheated oven until the crust is firm, golden brown and shiny, about 45 to 50 minutes. Remove from the oven and let cool for 10 to 15 minutes before slicing, this will allow it to up for easier slicing.

Serve hot or at room temperature.

You're a goddess, Anne Burrell!

Roasted Eggplant and Pickled Beet Sandwich by Cynthia Raub

Print Friendly and PDF


Serves: 4
Time: 45 minutes

2 medium eggplants (~2 pounds), sliced into 1/2"-thick rounds
1/4 cup olive oil
1/4 teaspoon smoked paprika
Kosher salt, ground pepper
1 garlic clove, finely grated
1/2 cup mayonnaise
2 teaspoons Sherry vinegar
4 scallions, thinly sliced
1 cup mixed tender fresh herb leaves (such as flat-leaf parsley, dill, and mint), torn if large
1/2 cup chopped pickled beets
1/4 cup chopped pitted oil-cured olives
2 tablespoons drained capers, chopped
1 tablespoon olive oil
4 6x4" pieces focaccia, split (I used La Brea Bakery torta rolls from Costco)
6 ounces feta, thinly sliced or crumbled

Preheat oven to 400°F. Place eggplant slices on a large rimmed baking sheet and rub both sides with oil. Season with paprika, salt, and pepper. Roast until golden and tender, 30-40 minutes. Whisk garlic, mayonnaise, and vinegar in a small bowl; set aside.

While the eggplant is in the oven, toss scallions, herbs, beets, olives, capers, and oil in a medium bowl to combine. Spread cut sides of focaccia with garlic mayo. Build sandwiches with focaccia, eggplant, feta, and beet salad.

Recipe from: Epicurious
 

Broccoli Cooked Forever by Amy Cantu

Print Friendly and PDF

I cannot rave more about this broccoli . . . confit? Sauce? Butter? Stuff that I could eat straight from the pot with a spoon? Whatever you want to call it, Roy FInamore's Broccoli Cooked Forever is truly magical. Normally broccoli cooked for longer than a few quick minutes conjures up words like soggy, mushy, stinky, and other rather unpleasant thoughts. I assure you, that this broccoli is none of that. Cooked slowly in a bath of rich olive oil, slivers of garlic, piquant peppers, and umami-rich anchovies, the broccoli transforms into this ethereal substance that tastes almost sinful when spread over slices of toasted rustic bread, smeared onto a pizza such as in Pizza Two Ways, tossed into a pasta, or spooned over softly scrambled eggs. It even makes a fantastic sandwich spread or topping for fish or chicken with a squeeze of lemon. You get the idea.

Notes: I did not change one thing about this recipe, but here are a few thoughts and tips.  I used the option for red pepper flakes, since that's what I had on hand. One cup of oil sounds like a lot, but honestly, that's also what makes it so delicious. You could certainly get away with using less oil, but then it won't quite produce the same richness. Please use a large pan for this recipe (not a stock pot or dutch oven) and don't buy pre-cut broccoli florettes. I once made this in a dutch oven with an extra pound of broccoli, using pre-cut florettes, and less olive oil. It was not the same. It was, dare I say it, tasteless mush. The broccoli needs to be cut into very large pieces (see the photos below) in order to keep just enough texture in the final product, so that it isn't pasty. It also needs the extra surface area from a large pan for the flavors to concentrate properly and not just steam. Also, even if you think you don't like anchovies, I swear that you will not taste anything remotely fishy. The anchovies add a deep, savory flavor that the broccoli wouldn't achieve on it's own. Don't leave it out! OK, if you really, really want to leave it out, you can. But maybe substitute some chopped capers for something a little different. I'm also considering giving cauliflower or butternut squash the same cooking treatment, and I imagine only great things!


Recipe from Roy Finamore's cookbook, Tasty: Get Great Food on the Table Every Day, and can also be found here.

Time: 20 minutes (2 hours inactive time)
Servings: 4 to 6

2 bunches (2-2 1/4 pounds) broccoli
1 cup olive oil
3 garlic cloves, sliced thin
2 small hot peppers, halved lengthwise (Finamore likes small red peppers, but you can substitute green Thai chiles, various dried ones, even a big pinch of red chile flakes)
4 anchovy fillets, chopped
Coarse salt and freshly ground black pepper

Bring a large pot of water to a boil.

While the water is heating, cut the florets off the broccoli, leaving them in large pieces. Peel the stems and cut them into rather thick slices, about 1/3 inch.

When the water comes to a boil, add the broccoli and cover the pot to bring it back to a boil quickly. Blanch the broccoli for five minutes. Drain.

Put olive oil and garlic in a large skillet over medium heat. When the garlic starts to sizzle, add the hot peppers and anchovies. Cook, giving a stir or two, until the anchovies melt. Add the broccoli, season with salt and pepper, and stir well. Cover the skillet, turn the heat to very low, and cook for two hours. Use a spatula to turn the broccoli over in the skillet a few times, but try not to break it up. It will be very tender when done.

Use a slotted spoon to transfer the broccoli to a serving dish. It is delicious hot or at room temperature.
 

Pico de Gallo by Amy Cantu

Print Friendly and PDF

Fresh Pico de Gallo is simple to make, and so much better than prepackaged stuff! It's the perfect accompaniment to Steak Fajitas or just a bowl of tortilla chips. 

Notes: When tomatoes aren't in season, use grape or cherry tomatoes to get a sweeter, more concentrated tomato flavor. Adjust the amount of jalapeño to your tastebuds - leaving the seeds and ribs in will make the salsa spicer, removing them will make it less spicy. Taking the time to dice the tomatoes, onions, cilantro, and jalapeño into very small pieces will give you the best flavor. You can also use a food processor to lessen the work, but be careful to only pulse a few times, or you'll end up with a watery mess. Liquid will accumulate as the salsa sits, so feel free to drain off any excess. Lastly, salt makes a big difference in a simple recipe such as this - make sure to taste it just before serving and add additional salt, if needed.


Time: 20 minutes
Yield: 4 cups

1 1/2 pounds tomatoes (use grape or cherry tomatoes during the off-season), seeded and finely diced (3 cups)
3/4 cup finely chopped cilantro
1/2 cup finely chopped onion (white onion is traditional; red, yellow, or green onions also work well)
1-2 small fresh jalapeño or serrano chiles, (seeds removed to make it mild) and finely chopped, or more to taste
2 garlic cloves, finely minced
3 tablespoons freshly squeezed lime juice, or more to taste
2 teaspoons kosher salt (or 1 teaspoon table salt)
1 teaspoon freshly ground black pepper (optional)

Combine all ingredients into a bowl and stir together. Season to taste with additional chile, lime juice, and salt. 

It will keep in the refrigerator for up to one day. Stir well and drain any excess liquid that has accumulated in the bowl before serving.

Three Cheese Fondue by Amy Cantu

Print Friendly and PDF

Fondue is so fun to eat! Who can resist crusty bread dipped into a pot of ooey-gooey, unctuous cheese? No one, that’s who. (Unless you hate cheese, in which case, I’m sorry- we can’t be friends. Just kidding . . . maybe.) Twirling bits of food into a pool of melty goodness is somehow therapeutic and it also bonds you with those dipping with you. Added bonus: My 4-year-old got a big kick out of dunking his broccoli and carrots into the cheese sauce, and he probably ate a week’s worth of veggies in this one meal alone.

Notes: This is a fairly classic fondue recipe, but make it your own by using any combination of good melting cheeses, liquid, and flavoring. For example, you could substitute smoked cheddar, hard apple cider, and apple butter for a completely different fondue. Or how about extra-sharp cheddar, beer, and bacon bits? You get the idea!


Time: 25 minutes
Servings: 4

1 medium clove garlic, cut in half
1 cup dry white wine, such as Sauvignon Blanc, plus more as needed
⅓ pound Gruyère or Comté cheese, grated
⅓ pound Emmentaler cheese, grated
⅓ pound Fontina cheese, grated
1 tablespoon cornstarch
1 tablespoon fresh juice from 1 lemon
1 tablespoon kirsch (optional)
Freshly ground pepper

Ideas for dipping:
Baguette or other rustic bread, large cubes
Small new potatoes, boiled and cooled (can be left whole or halved)
Broccoli or cauliflower florets, blanched
Carrots, bite-size pieces, blanched
Asparagus, blanched
Sausage, cooked and sliced into bite-sized pieces
Salami, diced into bite-sized pieces
Apple slices, Granny Smith or other tart apple

In a medium bowl, evenly coat the cheeses with cornstarch.

Rub the cut sides of garlic around the inside of a double boiler or stainless steel mixing bowl set over a pot of simmering water on low heat. The bowl should not touch the water. Pour in the wine and heat until hot. (You should see wisps of steam.)

Gradually stir in the cheese, one handful at a time. Stir each handful of cheese until it is completely melted, before adding another handful. Do not allow the cheese to come to a simmer. Once you have a smooth, glossy cheese sauce, stir in the lemon juice and kirsch, if using. Season with freshly ground pepper. Pour fondue into a fondue pot to keep it warm.

Choose your dippers, dunk and swirl into the cheesy goodness, and enjoy!

Cucumber and Beet Salad by Cynthia Raub

Print Friendly and PDF
beet and cucumber salad

In and of itself, grilled cheese is a perfect meal. It combines the three food groups: bread, butter and cheese. But because I added *bacon* in the Bacon Jam and Cheddar Grilled Cheese Sandwich, I thought I would lighten up the meal with a salad. This Beet and Cucumber Salad is simple and straightforward - you don't even have to make a vinaigrette! The crispy crunch from the cucumber and the velvety, sweet beets are a great accompaniment to the slightly spicy baby arugula. Don't be deceived - the recipe is very simple, but the salad turned out to be tasty and balanced.

Notes: Letting the salad sit for a minimum of 30 minutes after being dressed is a must. Let the cucumbers and beets marinate separately to avoid beet-stained cucumbers. I used prepared and packaged beets for this recipe, but you can roast your own if you have the time and patience. 


Time: 15 minutes
Servings: 8

1/2 cup rice vinegar
1/4 cup chopped shallots
1/4 cup sugar
1 pounds beets, trimmed
1 large English hothouse cucumbers (about 1 pound), halved lengthwise, seeded, cut crosswise into 1/4-inch-thick pieces
2 tablespoons chopped fresh chives or parsley
Baby Arugula (optional)
Extra Virgin Olive Oil
Kosher salt and pepper to taste

Combine vinegar, shallots and sugar in small bowl to make a marinade. Set aside while preparing vegetables.

Cut beets into wedges. Toss with 1/2 cup of marinade to coat.

Place cucumbers in large bowl and toss with remaining marinade. Season salads to taste with salt and pepper. Cover separately and chill for at least 30 minutes or up to one day.

Drain beets of liquid and arrange on platter towards the outer edges; rinse colander clean, drain cucumbers and arrange in the middle of the platter. Scatter a handful of arugula on top, garnish with herbs.

Adapted from: http://www.epicurious.com/recipes/food/views/pickled-beet-and-cucumber-salads-5409

Kale Salad with Butternut Squash and Cheddar by Amy Cantu

Print Friendly and PDF
kale salad

I began the new year like a lot of people do - thinking about ways I could eat more veggies. I’ll share this tidbit about myself - I’m super picky about salad and dislike a lot of them, including creamy dressings. (I know, who doesn’t like Ranch or Blue Cheese dressing??? Just me.) I generally prefer my vegetables cooked; maybe it’s growing up in an Asian household where vegetables were just incorporated into the dishes we were eating. Anyway, January rolled around, and I felt like I needed to give this salad eating business some real attention. A kale salad was in order. Has kale salad been overdone? Probably. It’s seems like it’s on every menu that includes a salad these days. So, I wanted a kale salad that would be simple, not overly thought out, and well . . . delicious! This salad is just the thing. The main ingredient is kale, so you can feel really good about eating a leafy green vegetable, but this salad also includes a healthy dose of delicious aged cheddar, which is equally important for making this salad too yummy to pass up. Add a sprinkling of toasted almonds and a tart lemon vinaigrette, and we’ve got a really simple salad that tastes amazing. I hate salad. I loved this salad.

Recipe adapted from Northern Spy’s Kale Salad.

Notes: This salad is highly adaptable. Instead of roasted squash, you could roast carrots or sweet potatoes. In the summer, you could use fresh or roasted strawberries or peaches, and experiment with a soft goat cheese or dollops of good ricotta. I’m a sucker for salad toppings, so I’m always extra generous with the squash, nuts, and cheese. To make this salad vegan, omit the cheese, but add 1 to 2 tablespoons of nutritional yeast (found in health food stores), which lends a savory, cheesy flavor.

If you are staring at the butternut squash thinking, “What do I do with this thing???” here’s how to peel it.

It’s tempting to buy those bags of pre-cut kale in the salad section, but to avoid having to masticate your greens like a cow, don’t do it! The kale pieces are too large, and they don’t remove the tough rib (stem) that runs down the center of each leaf. If you are reading this note too late, and you already have a bag of kale salad, never fear. Spend a few minutes to sort through the leaves to find the pieces with hard stems and tear away the soft leafy part from the stem and discard. Then tear the leaves into smaller pieces with your hands (or use a knife).

Lastly, sometimes both new and seasoned cooks alike, forget to taste their food before serving it. Add the salt, then taste it. Add additional salt and pepper until it tastes good to you. (I tasted the salad three times before I got it right.) The right amount of salt and pepper can change any dish (and especially salad) from ho-hum to wow!


Read More: The Shared Lunch


Time: 30 minutes
Servings: 4

1 1/2 cups cubed butternut squash, or other winter squash (about ¾ lb)
1 tablespoon plus 2 tablespoons extra-virgin olive oil (divided use)
1 teaspoon plus 1 teaspoon kosher salt (divided use)
½ teaspoon plus ½ teaspoon freshly ground pepper (divided use)
2 bunches kale (preferably lacinato, also called cavalo nero, black, tuscan, or dinosaur kale), ribs removed and sliced into thin ribbons, about 6 cups (see above photo)
3/4 cup almonds, cut roughly in half
1/2 cup crumbled or finely chopped Cabot clothbound cheddar (or any good, aged cheddar - I love Trader Joe’s Unexpected Cheddar for this recipe)
4 tablespoons fresh lemon juice (about 1 large juicy lemon)
Pecorino, Parmigiano-Reggiano, or other hard cheese, for shaving (Optional. Use a vegetable peeler to shave thin slices from a block of cheese.)

Heat oven to 425° F. Toss squash cubes in 1 tablespoon of olive oil to coat, and season with 1 teaspoon salt and ½ teaspoon pepper. Spread on a baking sheet (lined with parchment or foil for easier cleanup), leaving space between the cubes. Roast in the oven until tender and caramelized, about 40 minutes, tossing with a spatula every 10-15 minutes. Toast the almonds on a baking sheet in the same oven until they start to smell nutty, tossing once, about 10 minutes. Let cool.

In a large mixing bowl, toss the kale with the almonds, cheddar and squash. Season to taste with lemon juice and olive oil (approximately 4 tablespoons lemon juice and 2 tablespoons olive oil). Season with 1 teaspoon salt and ½ teaspoon pepper, adding more if needed.

Divide salad between four plates or shallow bowls. Garnish with shaved pecorino, if desired, and serve.

White Bean Soup with Wilted Greens by Cynthia Raub

Print Friendly and PDF
white bean soup

I love soup! I love lunch!!! The idea of a Soup and Salad lunch is lovely -- to eat a light meal during the day that won't weigh you down so you can continue to kick ass the rest of the day. I'm normally not that sensible, as my meal preferences skew towards heavy and regretful with a generous serving of guilt. Soups like this one, a White Bean Soup with Wilted Greens are deceptively delectable and satisfying despite its humble ingredients. Soups are easy and wholesome weeknight meals that transform into delicious leftovers for lunch the next day. Because I was so proud of myself for not starting this soup with browned sausage, I added the option of fried pancetta and pancetta-fat torn croutons at the end. Because as much as I love soup and lunch, I really REALLY love cured ham products and bread fried in oil. The soup alone is hearty and delicious; but when I prepared this for Amy and Christine, I felt compelled to finish it with additional optional garnishes to make it special.

Notes: I have made this soup numerous times and every time, it's a little different. This is the amazing thing about the forgiving nature of soups! I've made it with beans I have cooked, canned beans, water, chicken stock; I have added sausage, and most of the time I don't have a hard cheese rind to add- but it's always delicious despite the small changes! The acid at the end can also be changed to white wine vinegar or apple cider vinegar. This soup tends to thicken up as it sits. When reheating leftovers, add a splash of broth or water to thin out. To make this vegetarian, omit the pancetta croutons and perhaps make olive oil and garlic croutons instead. Additionally removing the parmesan and rind would make this recipe vegan.


READ MORE: THE SHARED LUNCH


Time: 55 minutes
Servings: 6 large meals, 8 smaller portions

White Bean Soup with Wilted Greens
8 tablespoons olive oil plus more for serving
1 cup onion (small dice)
1 cup celery (small dice)
1 cup carrot (large dice)
5 garlic cloves, minced
4 cups vegetable broth
1 teaspoon chopped fresh rosemary
2 fresh thyme sprigs
2 bay leaves
1/2 teaspoon crushed red pepper (optional)
2 (15-ounce) cans no-salt-added white beans (Great Northern, Cannellini or Navy beans all work here), rinsed and drained
1 (1 1/2-ounce) piece Parmigiano-Reggiano cheese rind (optional)
Kosher salt and pepper to taste
4 cups of greens (kale, escarole, or spinach)
Lemon juice to taste
Shaved fresh Parmesan cheese
1 tablespoon finely chopped rosemary for garnish

Pancetta Fat Torn Croutons
6 oz diced pancetta
1 sprig thyme (optional)
2 crushed garlic cloves (optional)
4 loose cups of a rustic bread (Ciabatta, Pugliese, etc.) torn into 1 inch pieces
Olive Oil
Salt

Tear 1 inch pieces of bread from a loaf of bread - about 4 loose cups, set aside.

Heat 2 tablespoons of olive oil in a large Dutch oven or stockpot over medium-high heat. Add onion and cook until translucent, about 4 minutes, stirring frequently. Add celery, carrots and garlic, and sweat for 2 minutes. Add vegetable broth, beans, herbs (except chopped rosemary), and cheese rind. Season with salt, pepper and crushed red pepper to taste. Bring to a boil, reduce heat, and simmer 10 minutes.

While the soup is simmering, sauté the pancetta, crushed garlic clove, and thyme sprig in 2 tablespoons of olive oil, until the fat is rendered and the pancetta is browned. Remove pancetta to a paper towel lined plate. Reserve fat, thyme and garlic in the pan.

Add 2 tablespoons of olive oil to the pancetta pan at medium-high heat. Add torn bread in a single layer to the pan. Toss the bread frequently, exposing all sides to the fat and heat, browning the bread until golden. Cooking the croutons may have to be done in batches, depending on the size of your pan. Add oil each time, enough to cover the bottom of the pan lightly, for every batch. Sprinkle croutons with kosher salt.

Add greens to the soup and simmer until the greens are wilted. Taste, adjusting salt and pepper to your palette, then finish with a squeeze of lemon juice for brightness. Remove and discard parmesan rind; ladle into a bowl, finish with a drizzle of nice olive oil, chopped rosemary, croutons and pancetta.

Recipe developed from:
30-minute Tuscan White Bean Soup
White Bean Soup with Escarole