holiday

Berry Trifle by Amy Cantu

Print Friendly and PDF

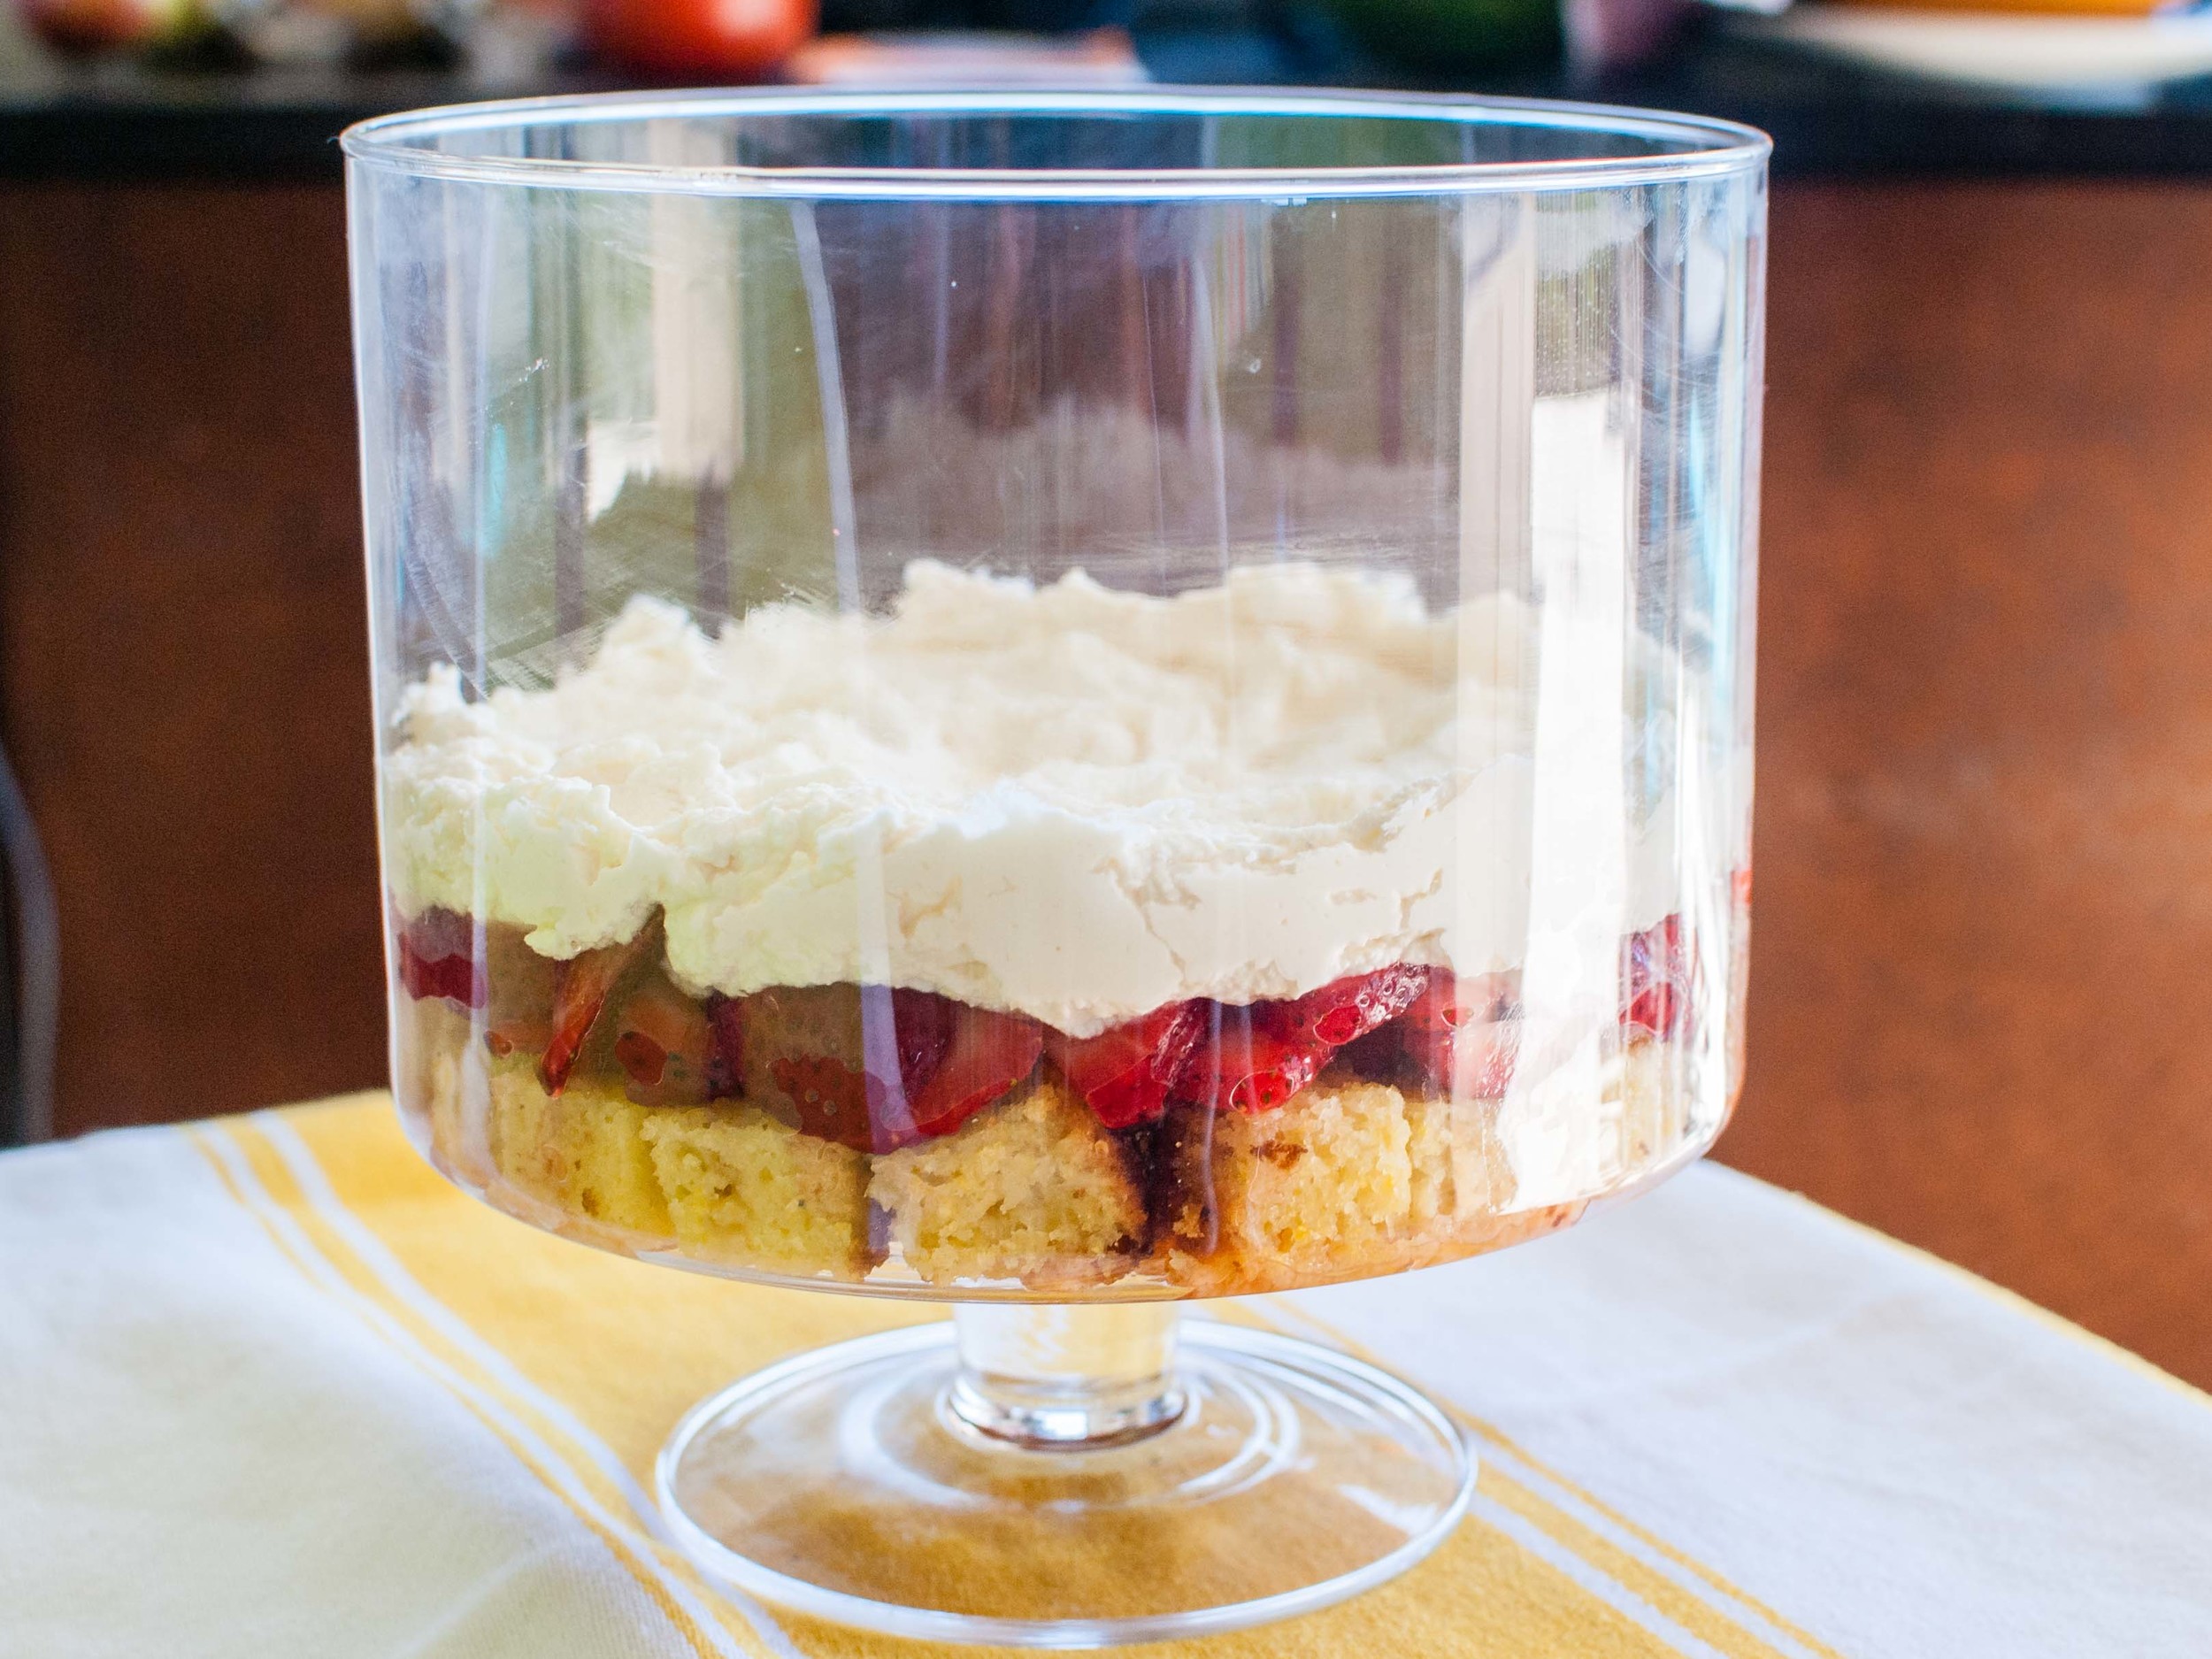
It's summer! Finally! I'm basking in the warmth of the sun. I'm in love with all the brightly colored produce at the farmer's market. The berries are local, sweet-as-candy, and a deep, ripe red. The blueberries pop in my mouth, surrendering their sweet juices. The raspberries are vibrantly tart and sweet. It's the perfect time to have a barbecue (or at least a supper out on the patio,) to celebrate the season! I need a simple dessert that tastes like the height of summer, and this red, white, and blue-hued Berry Trifle is just that. Fresh vibrant berries, clouds of whipped mascarpone cream, and squidgy pieces of cake come together in 15 minutes to create this dreamy Berry Trifle: An impressive, layered masterpiece that tastes as good as it looks. 

Notes: The only special equipment needed is a trifle dish (or a large glass bowl), so that the beautiful layers can be seen. Purchased pound cake or angel food cake make this a no-bake dessert, but Polenta Cake with Olive Oil and Lemon is perfect for this berry trifle and makes it extra-special. It's easy to make - just stir together the ingredients and bake. The Polenta Cake is extra moist from the olive oil and holds up well in the trifle layers thanks to it's sturdy texture from the polenta.


Time: 15 minutes
Servings: 8-10

3/4 pound raspberries
3/4 pound strawberries, tops removed and sliced
3/4 pound blueberries
1/4 cup granulated sugar, divided use
1/4 cup fresh orange juice, divided use
One recipe Polenta Cake with Olive Oil and Lemon or 9" loaf purchased pound cake, cut into 1-inch cubes
1/2 cup confectioners' sugar (powdered sugar)
1 teaspoon vanilla extract
1 pound (16 ounces) mascarpone cheese, at room temperature
Grated zest of 1 lemon
2 cups heavy cream
2 tablespoons seedless raspberry jam or currant jelly

Combine strawberries, 2 tablespoons sugar, and 2 tablespoons orange juice in a bowl. In a separate bowl, combine raspberries with remaining 2 tablespoons sugar and 2 tablespoons orange juice. Set bowls aside.

Using an electric mixer, whip together confectioners' sugar, vanilla extract, mascarpone cheese, and lemon zest at medium speed until well combined. Add heavy cream and continue to mix at high speed until the mixture is fluffy like whipped cream.

To assemble the trifle: Arrange 1/3 of the cake cubes into a 13-cup trifle dish (or a large glass bowl). Next, pour in the strawberries and spread to make an even layer. Spread 1/2 of the whipped mascarpone cream over the strawberries in an even layer. Arrange half of the remaining cake cubes evenly over the cream layer. Top the cake with all the raspberries to create another even layer. Spread the remaining whipped mascarpone cream over the raspberries. Add the remaining cake cubes evenly over the cream. For the final layer, distribute the blueberries evenly over the top.

Melt the jam in a small dish in the microwave or in a small saucepan over low heat. Using a pastry brush, anoint the blueberries with the melted jam to give them a sweet, glossy glaze. 

Cover and refrigerate for at least 1 hour before serving.

Slow-Roasted Pork with Crunchy Skin and Chimichurri Sauce by Amy Cantu

Print Friendly and PDF

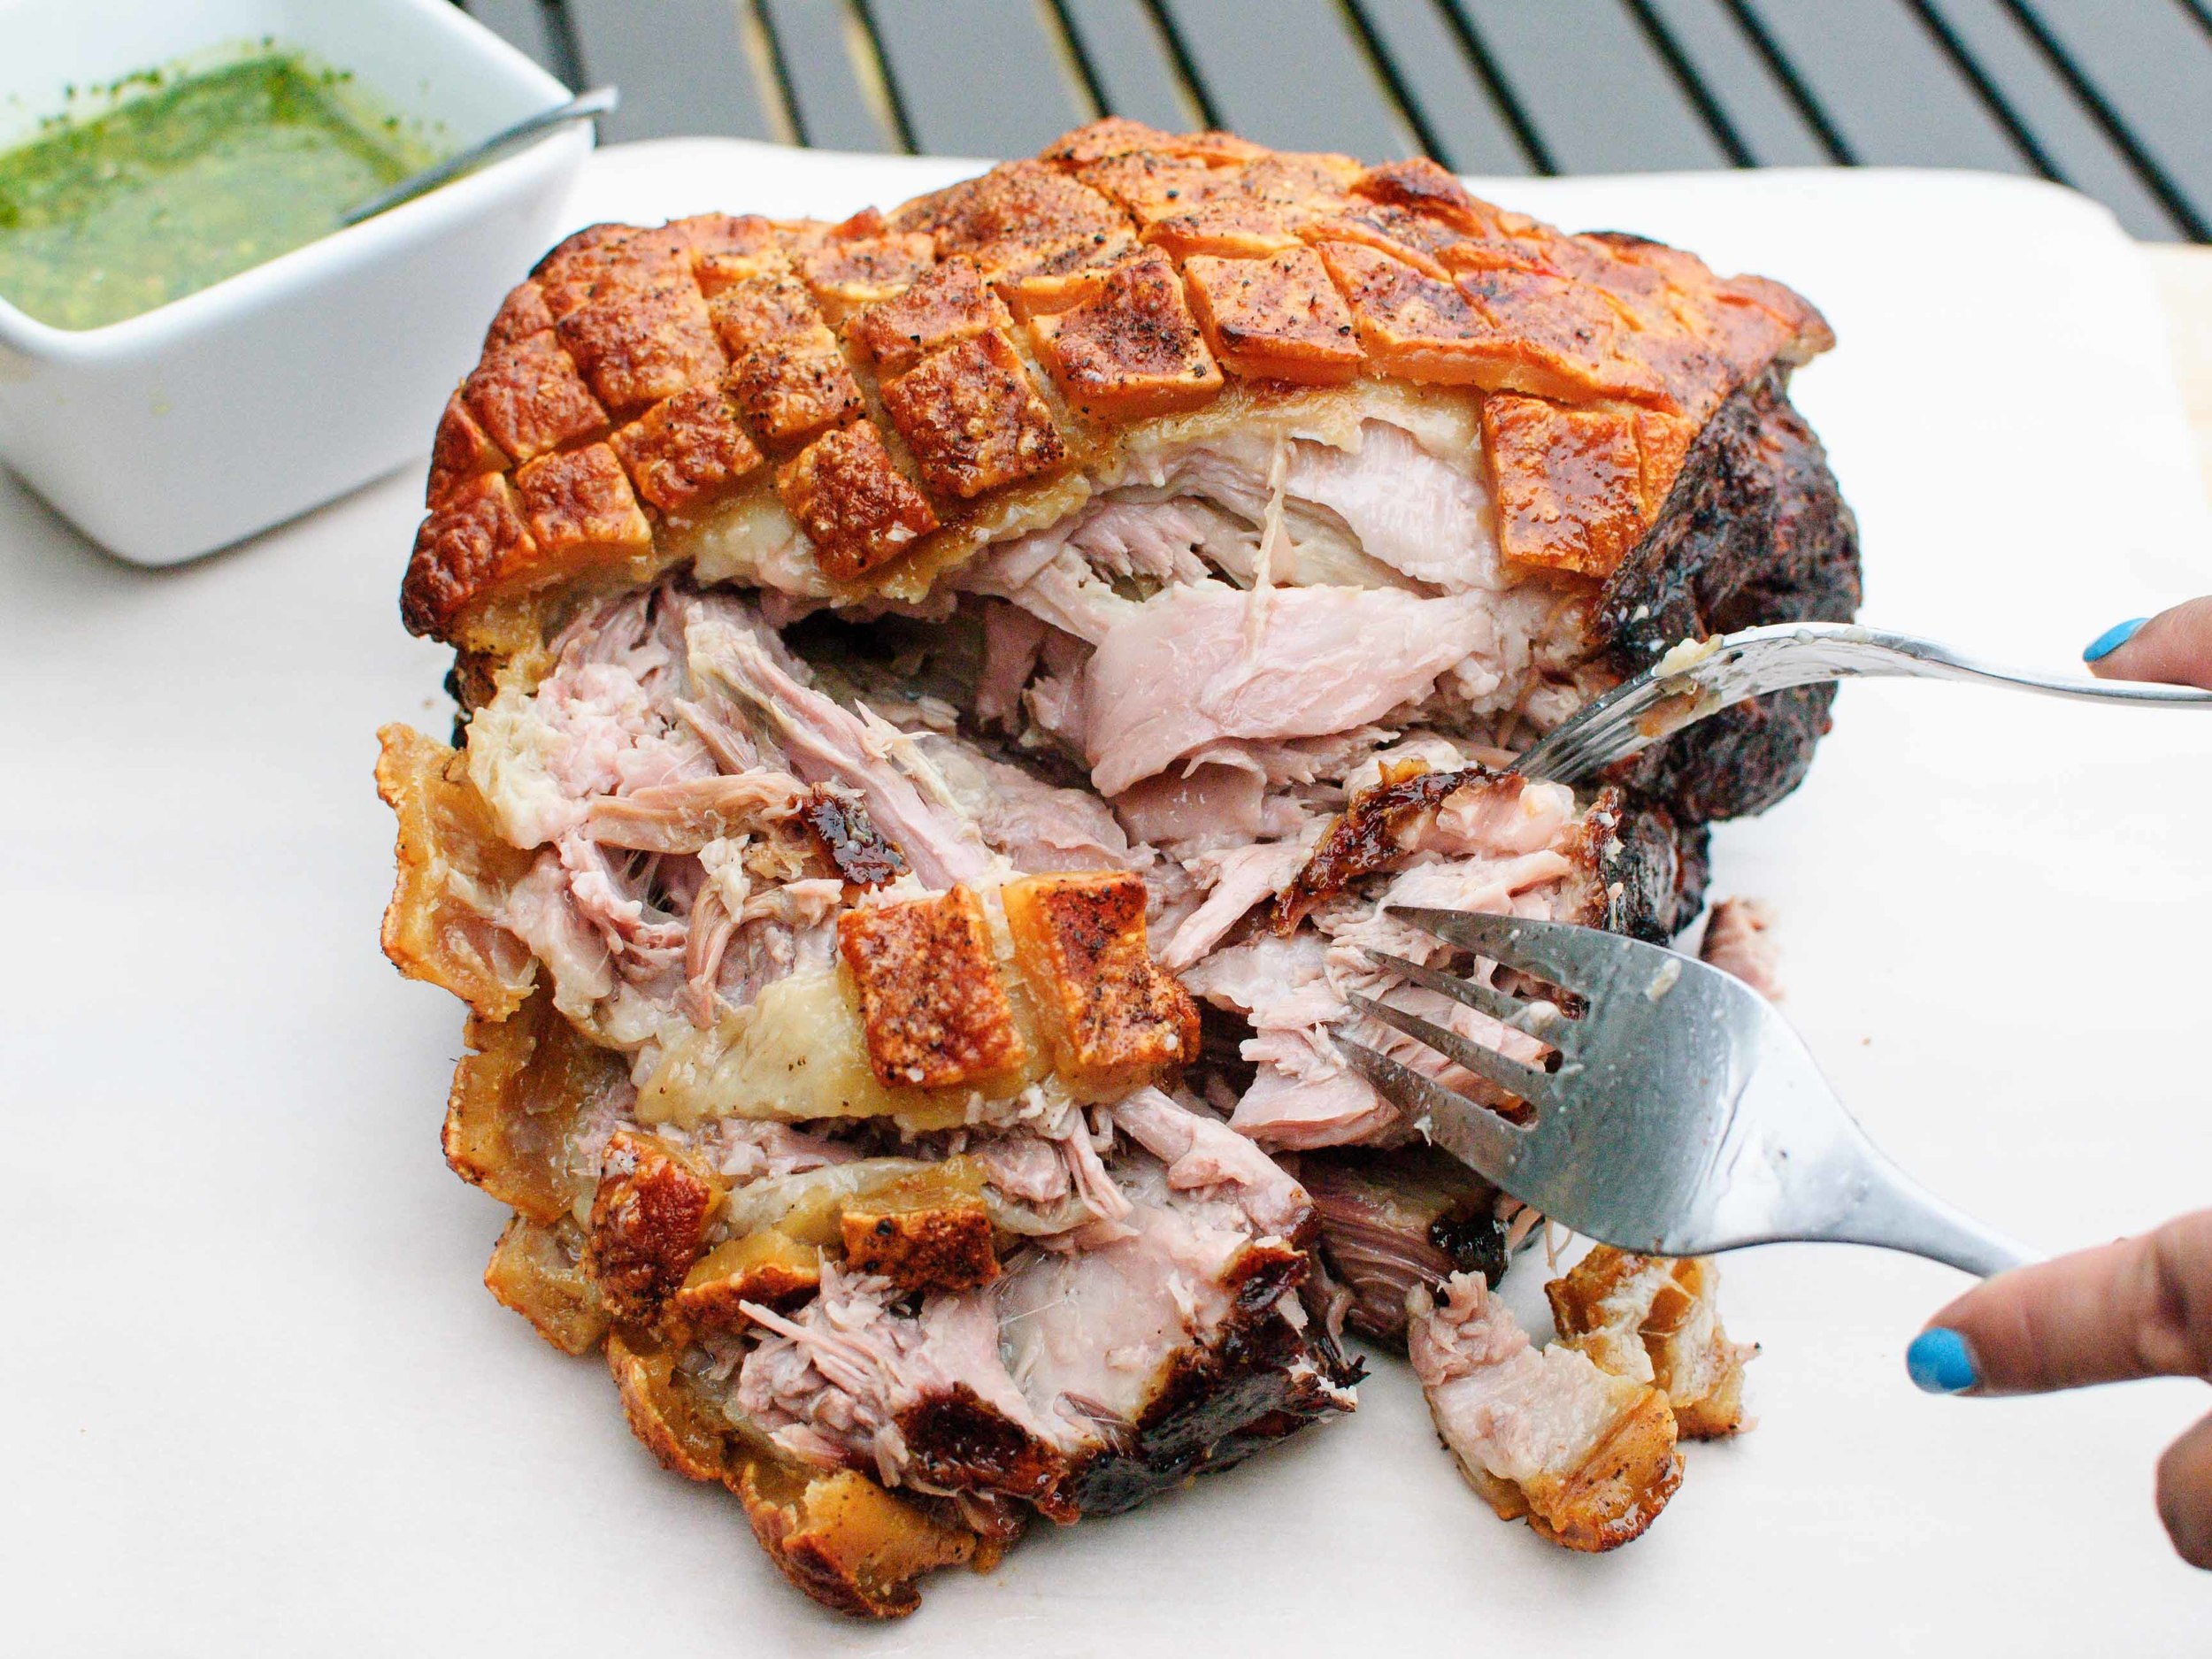
When faced with a very large, beautiful, bone-in, skin-on, fatty beast of a pork shoulder, do not be afraid. Revel in awe in its size, richness, and sacrifice to our privileged bellies. I gathered up my courage and treated this beast the best way I know how - with love and simplicity. I love pork so much. I especially love this slow-roasted, juicy, succulent, messy, pork shoulder complete with its crunchy, puffy, crackling skin. I really can't fully describe the love, joy, and pure elation that Cynthia and I felt, as we pulled this meat into thick shreds. I honestly just felt thankful. Thankful for the plentiful gifts of the pig. Thankful to have Cynthia to share it with. Thankful that Father's Day gave us an excuse to roast such a beast. As for the simplicity, just salt and pepper season this pork to allow all of its sweet, meaty flavor to shine through. I served it next to a bowl of bright green, tangy Chimichurri Sauce to cut through some of the pork's richness and contrast the slow-roasted flavors with fresh herbs. Even now, I breathe a deep, happy sigh at the thought of it.

Notes: I bought my pork from a butcher, so I asked for the skin to be scored and the meat tied (what you see in the photos below).  It never hurts to ask if the meat counter will do the same! Scoring the skin encourages crunchy pork skin (or pork rind), and it looks pretty. Tying the meat helps the roast keep its shape for even cooking. All of that said, it’s not totally necessary to score and tie the roast for great results, so don’t sweat it if you don’t feel like the hassle.
 
To score the skin on your own, use a really sharp knife or a clean box cutter to cut a diamond pattern into the skin. The cuts should go through the skin and into the fat, but not the meat. (See photos below for an example.)
 
No need to get fancy with tying the meat. Just use kitchen twine and tie the meat in 2-inch intervals. If you want to learn how to tie butcher knots, you can Google lots of tutorials.

This recipe is very simple and straightforward, but do notice that the cooking time has a wide range for a couple different reasons. 1) The time it takes for the meat to achieve the soft, shredding stage depends on the amount of fat and connective tissue. A thermometer is not super helpful here – check it with a fork to see if the meat is soft and giving. 2) This is a two-step process: Once the meat is cooked, the pork comes out of the oven to rest for at least 15 minutes, before going back into a very hot oven for another 20 minutes or so to crisp up the skin to its proper crunchy glory.

The seasoning on this pork roast is deliberately simple to allow for limitless options in the pork’s destiny. I have included a recipe for Chimichurri Sauce, which Cynthia and I used to judiciously dunk thick shreds of pork with our greasy fingers. (Forks were just getting in our way!) We also devoured Cynthia's Pork and Broccolini Sandwich made with this pork - so amazing. My family made various fun tacos with the leftover meat throughout the week. To reheat the meat, crisp the meat in either a hot pan (no extra oil needed), or in an oven/toaster oven at 400 degrees Fahrenheit for about 10 minutes. Some ideas: dollops of Pico de Gallo and Guacamole, topped with Harissa and plain yogurt, drizzled with spicy Korean Bi Bim Bap sauce, and heaped with Thai Cucumber-Peanut Relish. The pork recipe comes from the venerable Serious Eats, which has its own fun list of suggested sauces.


Time: 8-12 hours
Servings: 8-12
 
1 whole bone-in, skin-on pork shoulder, 8-12 pounds
Kosher salt
Black pepper, freshly ground

Set the oven rack to the middle position. Preheat the oven to 250 degrees Fahrenheit.

Line a rimmed baking sheeting with heavy-duty aluminum foil and set a wire rack inside it. Place a piece of parchment paper on top of the wire rack. (This prevents the pork from sticking to the wire rack.)
 
Optional: Score pork skin with a diamond pattern, using a very sharp knife or clean box cutter - cut through the skin and into the fat layer. Tie the meat in 2-inch intervals using kitchen twine.

Season the pork all over with a liberal shower of salt and pepper. Place skin-side up on top of the parchment paper.

Roast in the oven for 8-10 hours. Start checking for doneness at 8 hours, by twisting a fork into the meat – the fork should be met with little resistance.

Remove pork from oven, and let rest for 15 minutes and up to 2 hours with a piece of foil tented over it.
 
Preheat the oven to 500 degrees Fahrenheit. If the roast was tied, remove the string. Return the pork to the oven to crisp the skin.  Rotate the sheetpan every 5 minutes, for a total of about 20 minutes. The skin should be puffy and blistered, and you should be completely beside yourself with glee at this point!

Tame your beating heart, tent the pork with foil, and let rest for 15 minutes before serving. (And by serving, I really mean tearing into the meat and crunchy skin with your fingers and dunking the juicy morsels into your sauce of choice – see Notes.)

Recipe very slightly adapted from Serious Eats.

Chimichurri Sauce

½ cup packed fresh parsley leaves, washed and dried
½ cup packed fresh cilantro leaves, washed and dried
5 medium cloves garlic, peeled
2 tablespoons oregano leaves
½ shallot, roughly chopped
¼ cup red wine vinegar
1 teaspoon Kosher salt
¼ teaspoon red pepper flakes
½ cup extra-virgin olive oil

In the bowl of a food processor, pulse together parsley, cilantro, garlic, oregano, shallot, vinegar, salt, and pepper flakes until roughly chopped. With the motor running, drizzle in the olive oil, until just combined. Drizzle a little extra oil, if sauce seems too thick. Do not over-process – you should still see distinct flecks of herbs.

Alternatively, finely chop the herbs, garlic, and shallot. Combine chopped aromatics with vinegar, salt, and pepper flakes in a medium bowl. Whisk in olive oil, drizzling in extra if the sauce seems too thick. 

Use immediately or store up to 2 days in the refrigerator. (Also makes a great marinade.)

Hasselback Potato Gratin by Amy Cantu

Print Friendly and PDF

Notes: This is essentially the same as the recipe from J. Kenji Alt-Lopez's The Food Lab, except that I used half and half instead of heavy cream. The results are similar, albeit a bit lighter on the gut. Given how heavy holiday foods tend to be, this seemed like a good compromise to me!

Per Alt-Lopez's recipe notes: Because of variation in the shape of potatoes, the amount of potato that will fit into a single casserole dish varies. Longer, thinner potatoes will fill a dish more than shorter, rounder potatoes. When purchasing potatoes, buy a few extra in order to fill the dish if necessary. Depending on exact shape and size of potatoes and casserole dish, you may not need all of the cream mixture.


Time: 15 minutes (active), 1 hour 45 minutes (inactive)
Servings: 6

3 ounces finely grated Gruyère or comté cheese
2 ounces finely grated Parmigiano-reggiano
2 cups half and half or heavy cream
2 medium cloves garlic, minced
1 tablespoon fresh thyme leaves, roughly chopped
2 teaspoons kosher salt (or to taste)
1 teaspoon freshly ground pepper (or to taste)
3 to 3 1/2 pounds russet potatoes, peeled and sliced 1/8th-inch thick on a mandoline slicer or food processor slicer (5 to 6 medium, see note above)
2 tablespoons unsalted butter

Adjust oven rack to middle position and preheat oven to 400°F. Combine cheeses in a large bowl. Transfer 1/3 of cheese mixture to a separate bowl and set aside. Add cream, garlic, and thyme to cheese mixture. Season generously with salt and pepper. Add potato slices and toss with hands until every slice is coated with cream mixture, making sure to separate any slices that are sticking together to get the cream mixture in between them.

Grease a 2-quart casserole dish with butter. Pick up a handful of potatoes, organizing them into a neat stack, and lay them in the casserole dish with their edges aligned vertically. Continue placing potatoes in casserole, working around the perimeter and into the center until all potatoes have been added. Potatoes should be very tightly packed. If necessary, slice additional potato, coat with cream mixture, and add to casserole (see note above). Pour excess cream/cheese mixture evenly over potatoes until the mixture comes half way up the sides of the casserole. You may not need all excess liquid (see note above).

Cover tightly with foil and transfer to oven. Bake for 30 minutes. Remove foil and continue baking until top is pale golden brown, about 30 minutes longer. Carefully remove from oven, sprinkle with remaining cheese, and return to oven. Bake until deep golden brown and crisp on top, about 30 minutes longer. Remove from oven, let rest for a few minutes, and serve.

Red Velvet Cheesecake Brownies by Amy Cantu

Print Friendly and PDF
red velvet cheesecake brownies

Cynthia and I knew we wanted to make something “red velvet” for Valentine’s Day, but we weren’t sure what exactly. We brainstormed a long list of “red velvet” baked goods - cakes, cupcakes, mini bundt cakes, cookies, and moon pies - to name a few. The thought of these Red Velvet Cheesecake Brownies made us both simultaneously release a deep sigh and a moan. We knew immediately we had to eat these. I think there is already a cult-following for these Red Velvet Cheesecake Brownies, and I can certainly see why. They are moist, decadent, and ridiculously good. Seriously. They are addictive. You can halve this recipe, but honestly, you will end up making another batch anyway. Just make a full batch and share the love with your friends, family, co-workers, neighbors, or school staff. They will love you forever. And also help yourself to a second serving because you deserve it.

Adapted from Sally’s Baking Addiction.

Notes: What makes “red velvet” red is food coloring. The original recipe called for twice as much food coloring, but I found that 1 tablespoon of red gel food coloring was more than enough for a large batch. If you don’t like the idea of using food coloring, you can leave it out, and you will still have amazing cheesecake brownies instead. I use almond extract in this recipe, because I love the nutty, sweet flavor. You could use all vanilla extract instead, and you would have a more classic red velvet flavor.


Time: 1 hour (includes bake time)
Servings: 16

1 cup (2 sticks) unsalted butter, melted, plus extra to grease pan
2 cups granulated sugar
2 teaspoons vanilla extract
2 teaspoons almond extract
½ cup unsweetened cocoa powder
¼ teaspoon kosher salt
1 tablespoon gel or liquid red food coloring
1 ½ teaspoons white vinegar
4 large eggs, lightly beaten
1 ½ cups all-purpose flour
16 ounces cream cheese, softened
½ cup granulated sugar
2 egg yolks
1 teaspoon almond extract


Preheat the oven to 350 degrees F. Grease a 9x13 baking pan with butter or nonstick spray.

To make the brownie layer, whisk together melted butter, 2 cups sugar, 2 teaspoons vanilla extract, and 2 teaspoons almond extract in a medium mixing bowl, until well combined. Next add cocoa powder, salt, food coloring, and vinegar, mixing well after each addition. Whisk in the eggs, then fold in the flour until just mixed, with no dry spots - do not over beat. Pour the brownie batter into prepared baking pan, reserving ½ cup for the top.

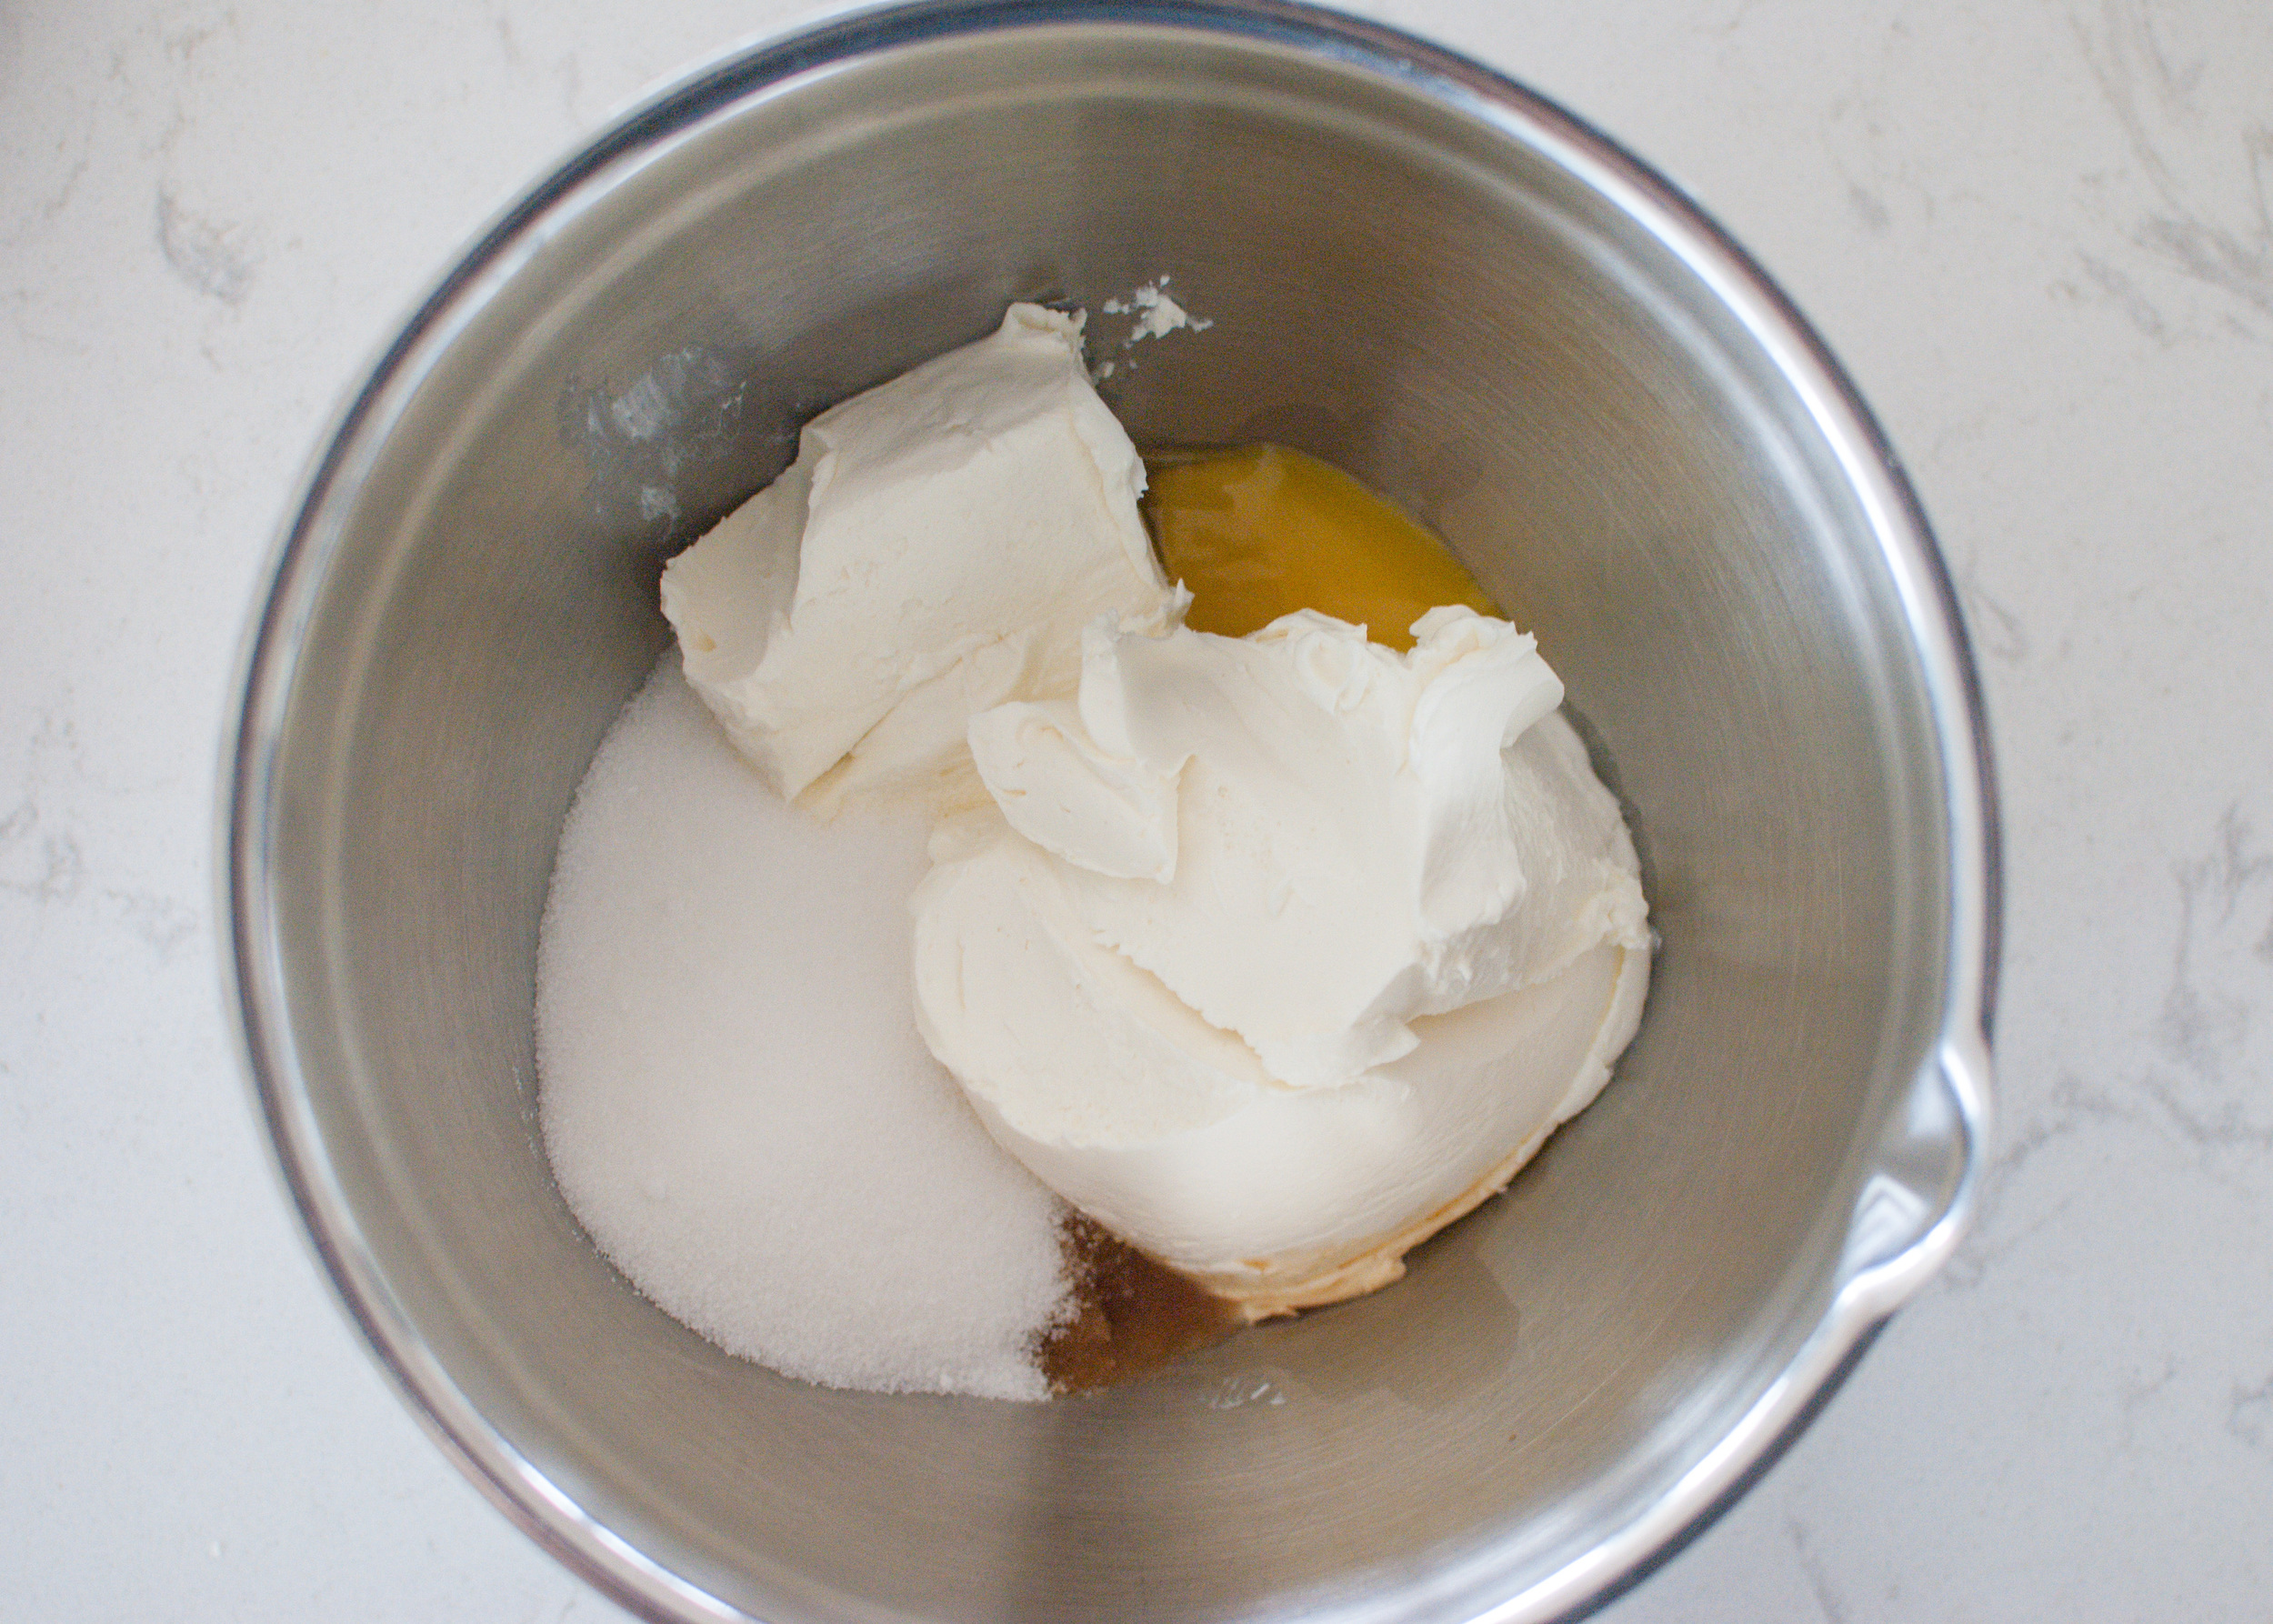
To make the cheesecake swirl, combine softened cream cheese, ½ cup sugar, egg yolks, and 1 teaspoon almond extract in a medium bowl. Use a hand-held mixer on medium speed to beat mixture until completely smooth - about 1 minute. Dollop large spoonfuls of the cream cheese mixture on top of the prepared brownie batter. Cover the cream cheese mixture with the remaining ½ cup brownie batter. Drag a knife through the layers, creating a swirl pattern.

Bake the brownies for about 40 minutes or until a toothpick inserted in the middle comes out clean. Allow the brownies to cool completely before cutting into squares. Cover brownies and store at room temperature for 3 days or in the refrigerator for up to 6 days. Brownies will freeze well, up to 2 months. Thaw overnight in the refrigerator.

Chocolate-Covered Strawberries by Amy Cantu

Print Friendly and PDF
chocolate dipped strawberries

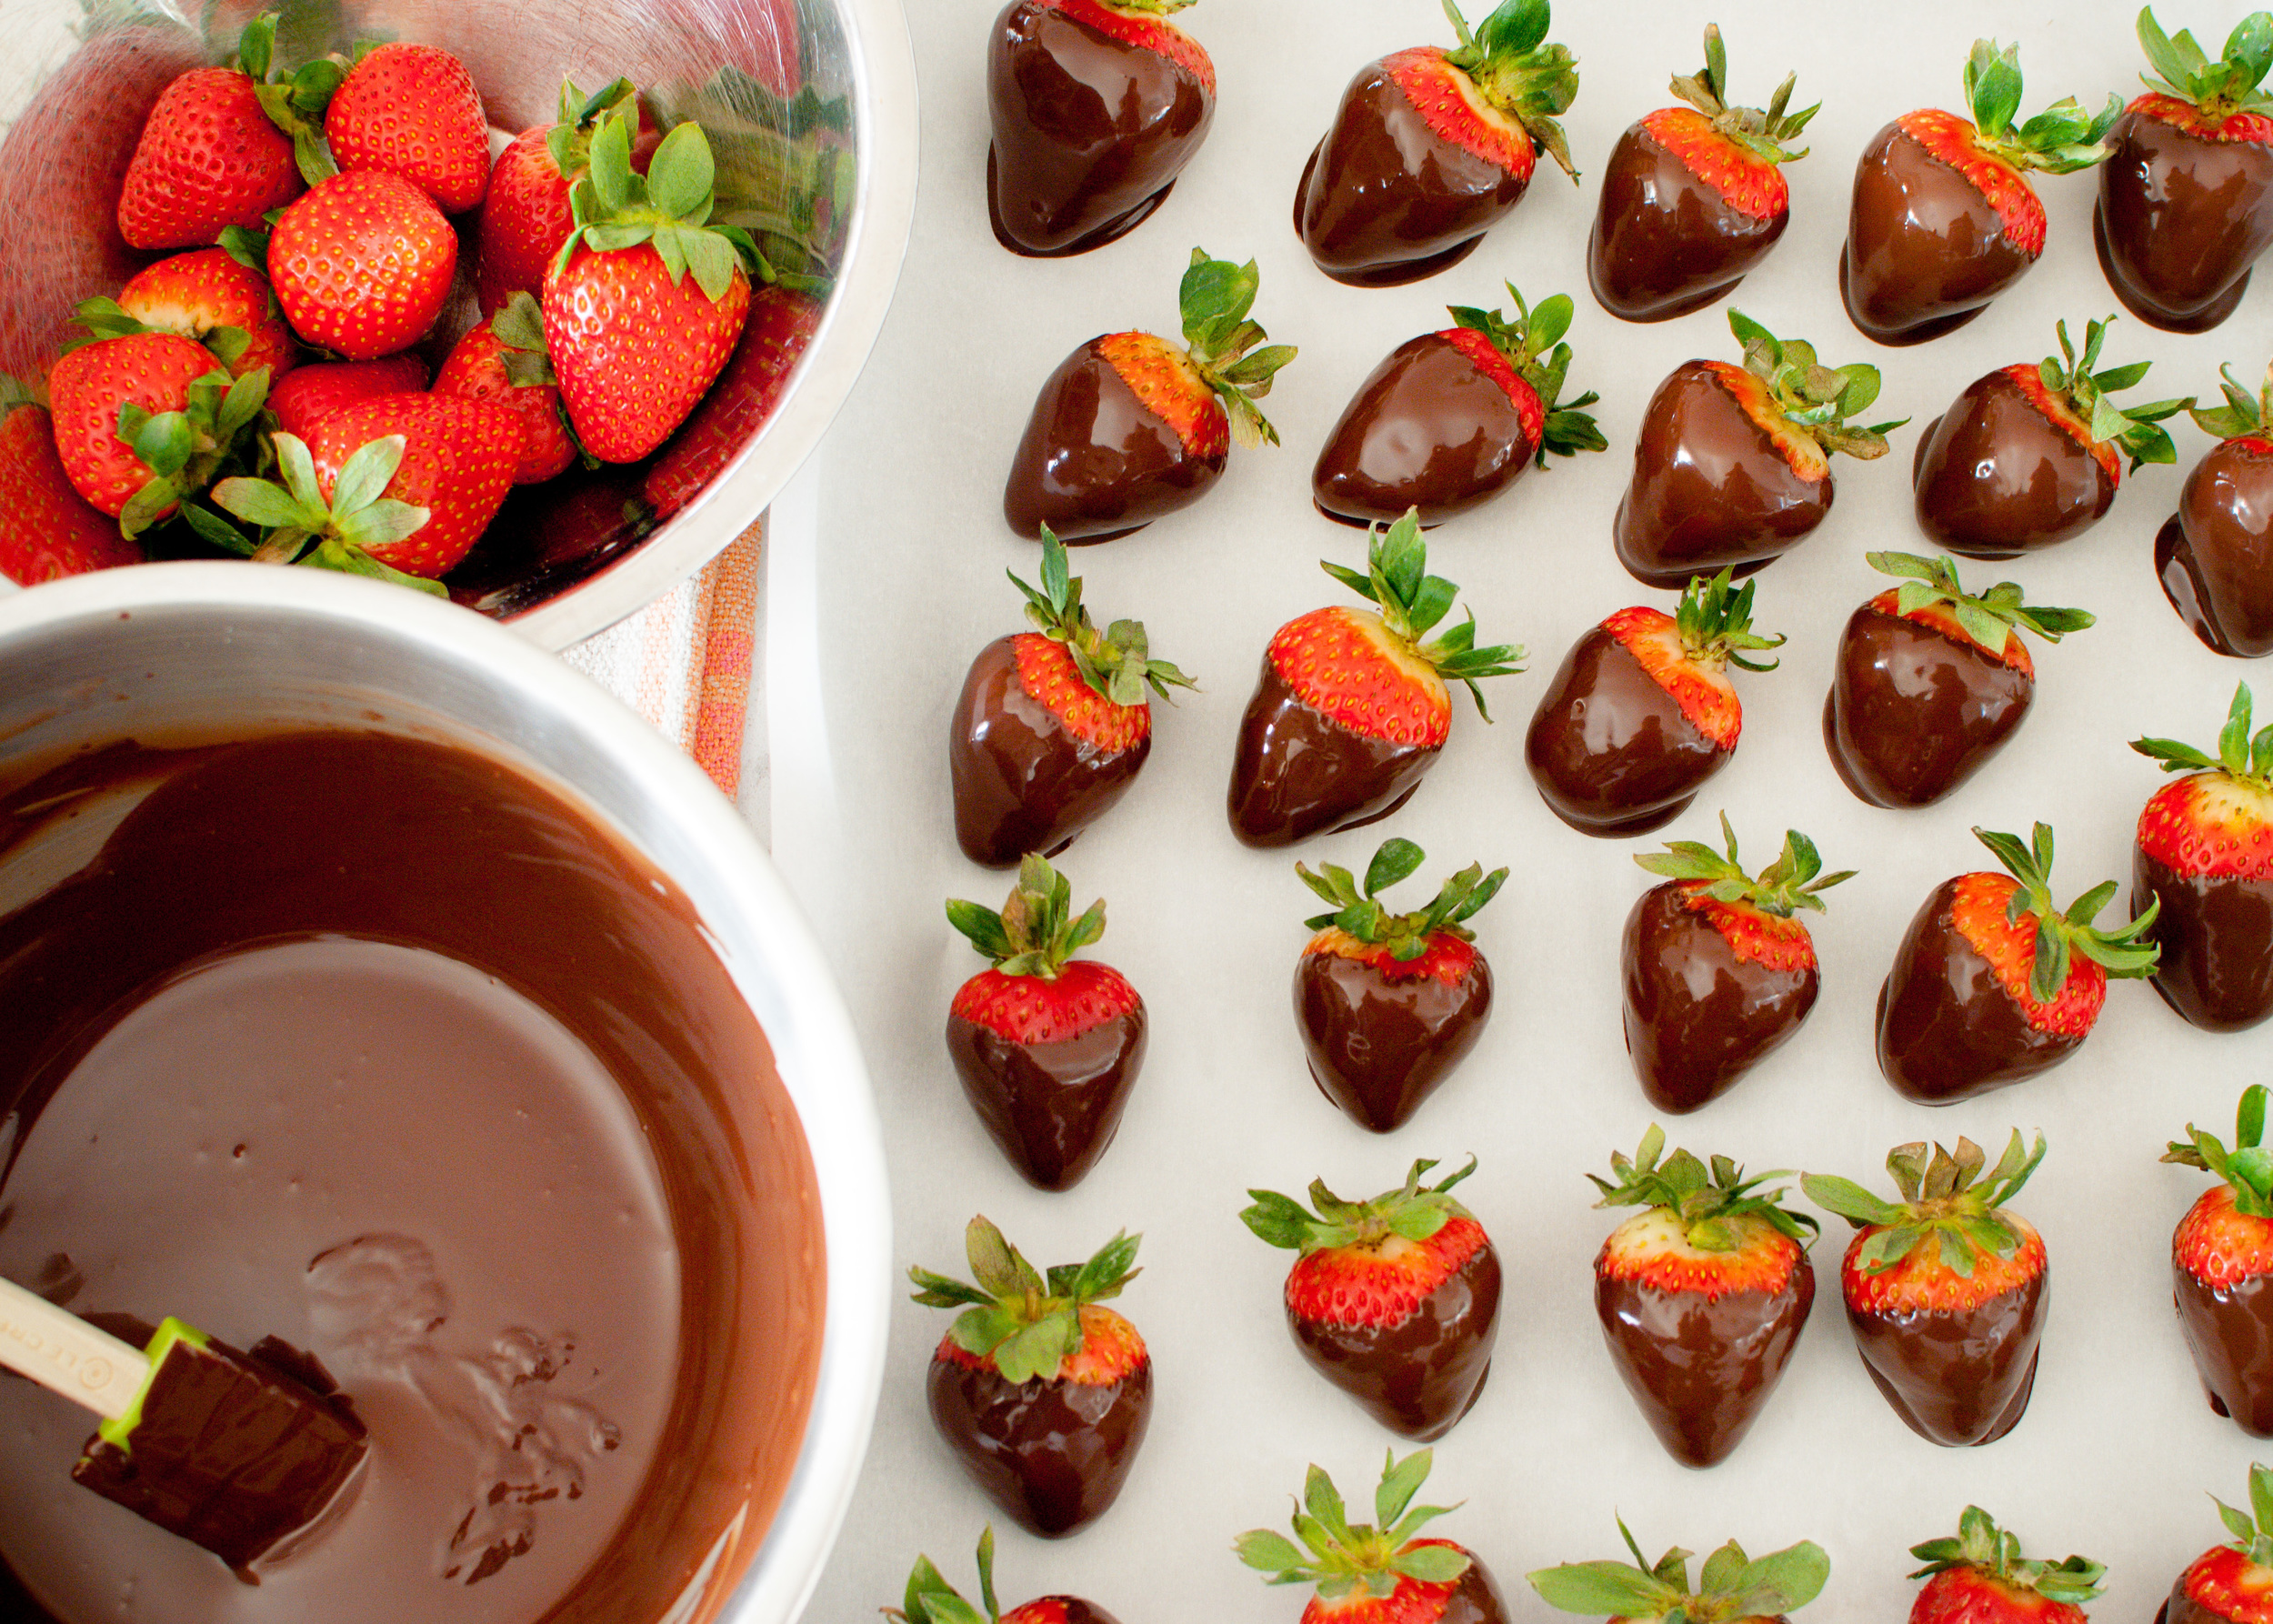
Chocolate-Covered Strawberries are a romantic classic. Also, my 4-year-old loves holding the strawberry by its tiny leaves, and dangling it in front of his mouth before attempting to shove in the entire thing. Dainty, I know. Dressing them up in white chocolate drizzles, nuts, or sprinkles are fun, but there’s something appealing about the simplicity of a perfect, red strawberry coated lovingly with nothing but glossy, crisp chocolate. Cynthia and I enjoyed them, just as much as the kids did - they’re a classic for a reason.

Adapted from The Kitchn.

Notes: Chocolate strawberries are easy to make, but it helps to be precise in each step. The strawberries need to be really dry, or the chocolate coating won’t adhere properly. If you don’t have a double boiler to melt the chocolate, just use a heat safe bowl (like a metal or Pyrex mixing bowl) set over a saucepan of water. Don’t try to melt the chocolate with direct heat because the chocolate will scorch. The directions in this recipe encourages the chocolate to temper, and the addition of coconut oil gives it a glossier sheen and a crisp bite. (The Kitchn has additional information on tempering chocolate without a thermometer.) Don’t let the tempering process intimidate you. Even if the chocolate isn’t tempered correctly, the chocolate dipped strawberries will still be delicious, and I promise no one will complain!


Time: 20 minutes (plus 30 minutes to cool)
Yield: 1 pound chocolate-covered strawberries

1 pint-basket (1 pound) fresh strawberries
1 ⅓ cups (8 ounces) plus ⅔ cup (4 ounces) good quality dark chocolate, chopped
1 teaspoon coconut oil (optional)

Double-boiler or heatproof bowl and saucepan
Heatproof spatula
Parchment, wax paper, or Silpat
Baking sheet

Rinse the strawberries under cool running water and gently pat dry. The strawberries need to be completely dry before dipping, so spread them out and let them air-dry if necessary.

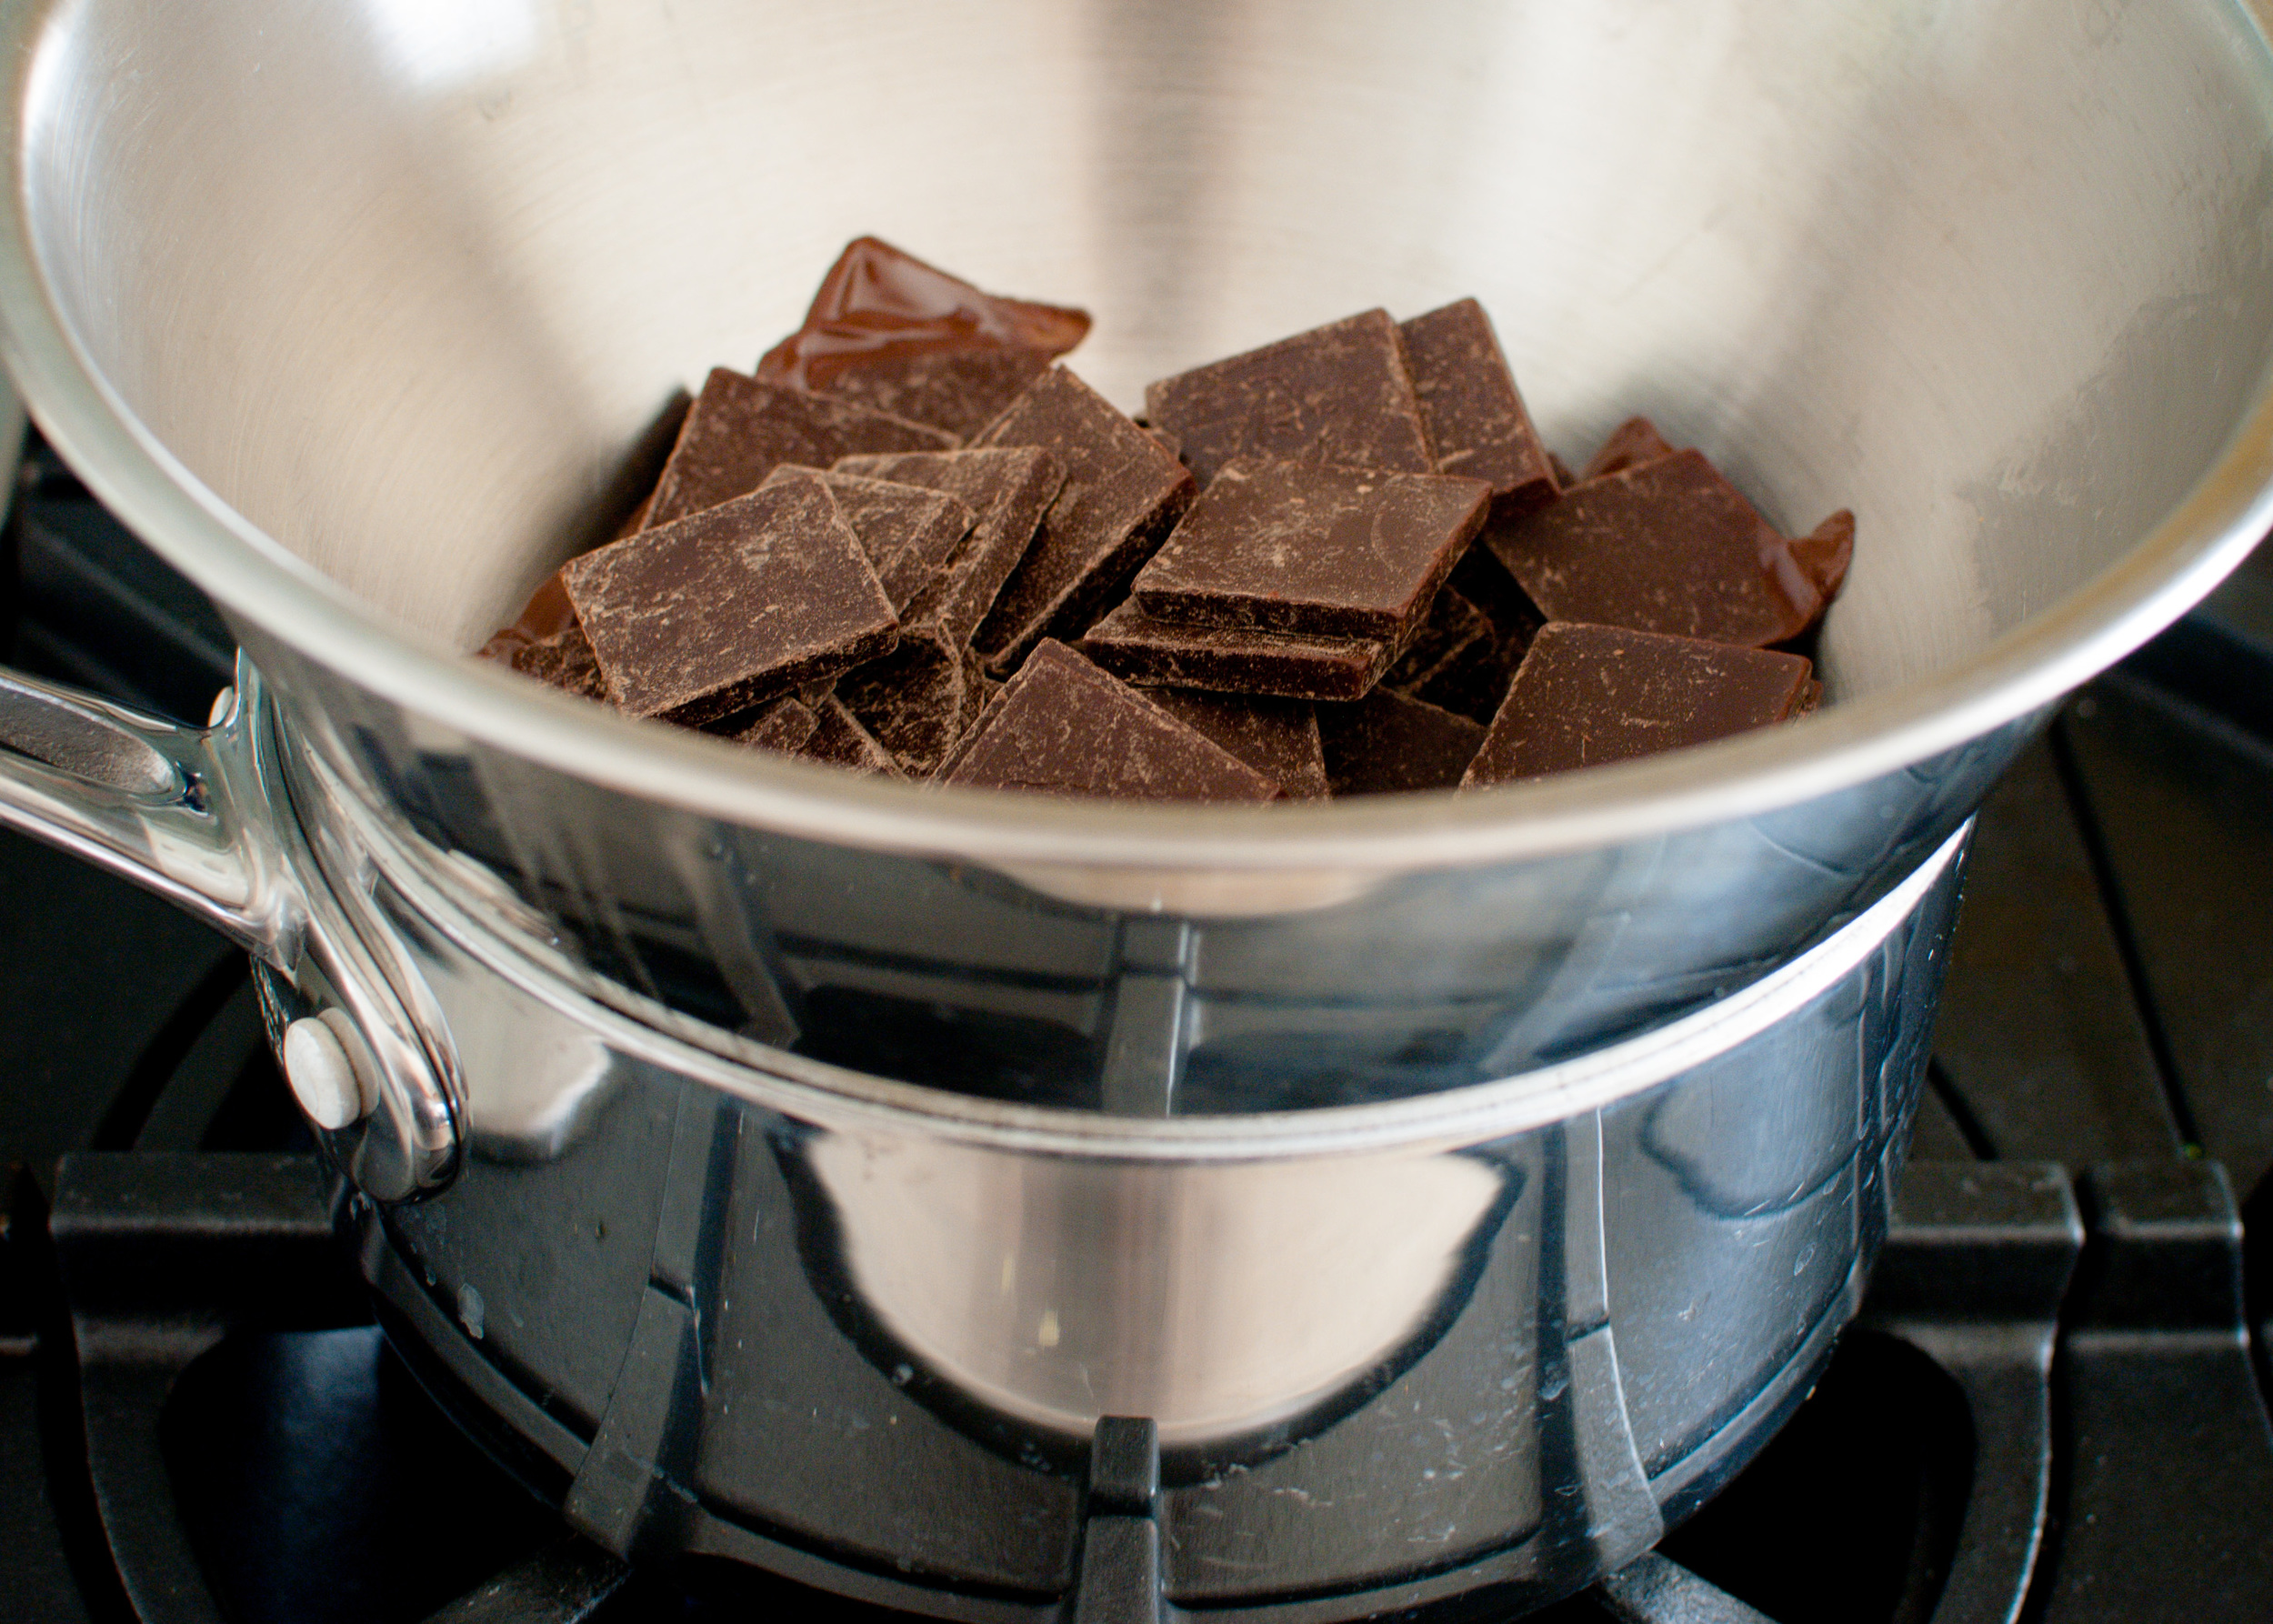
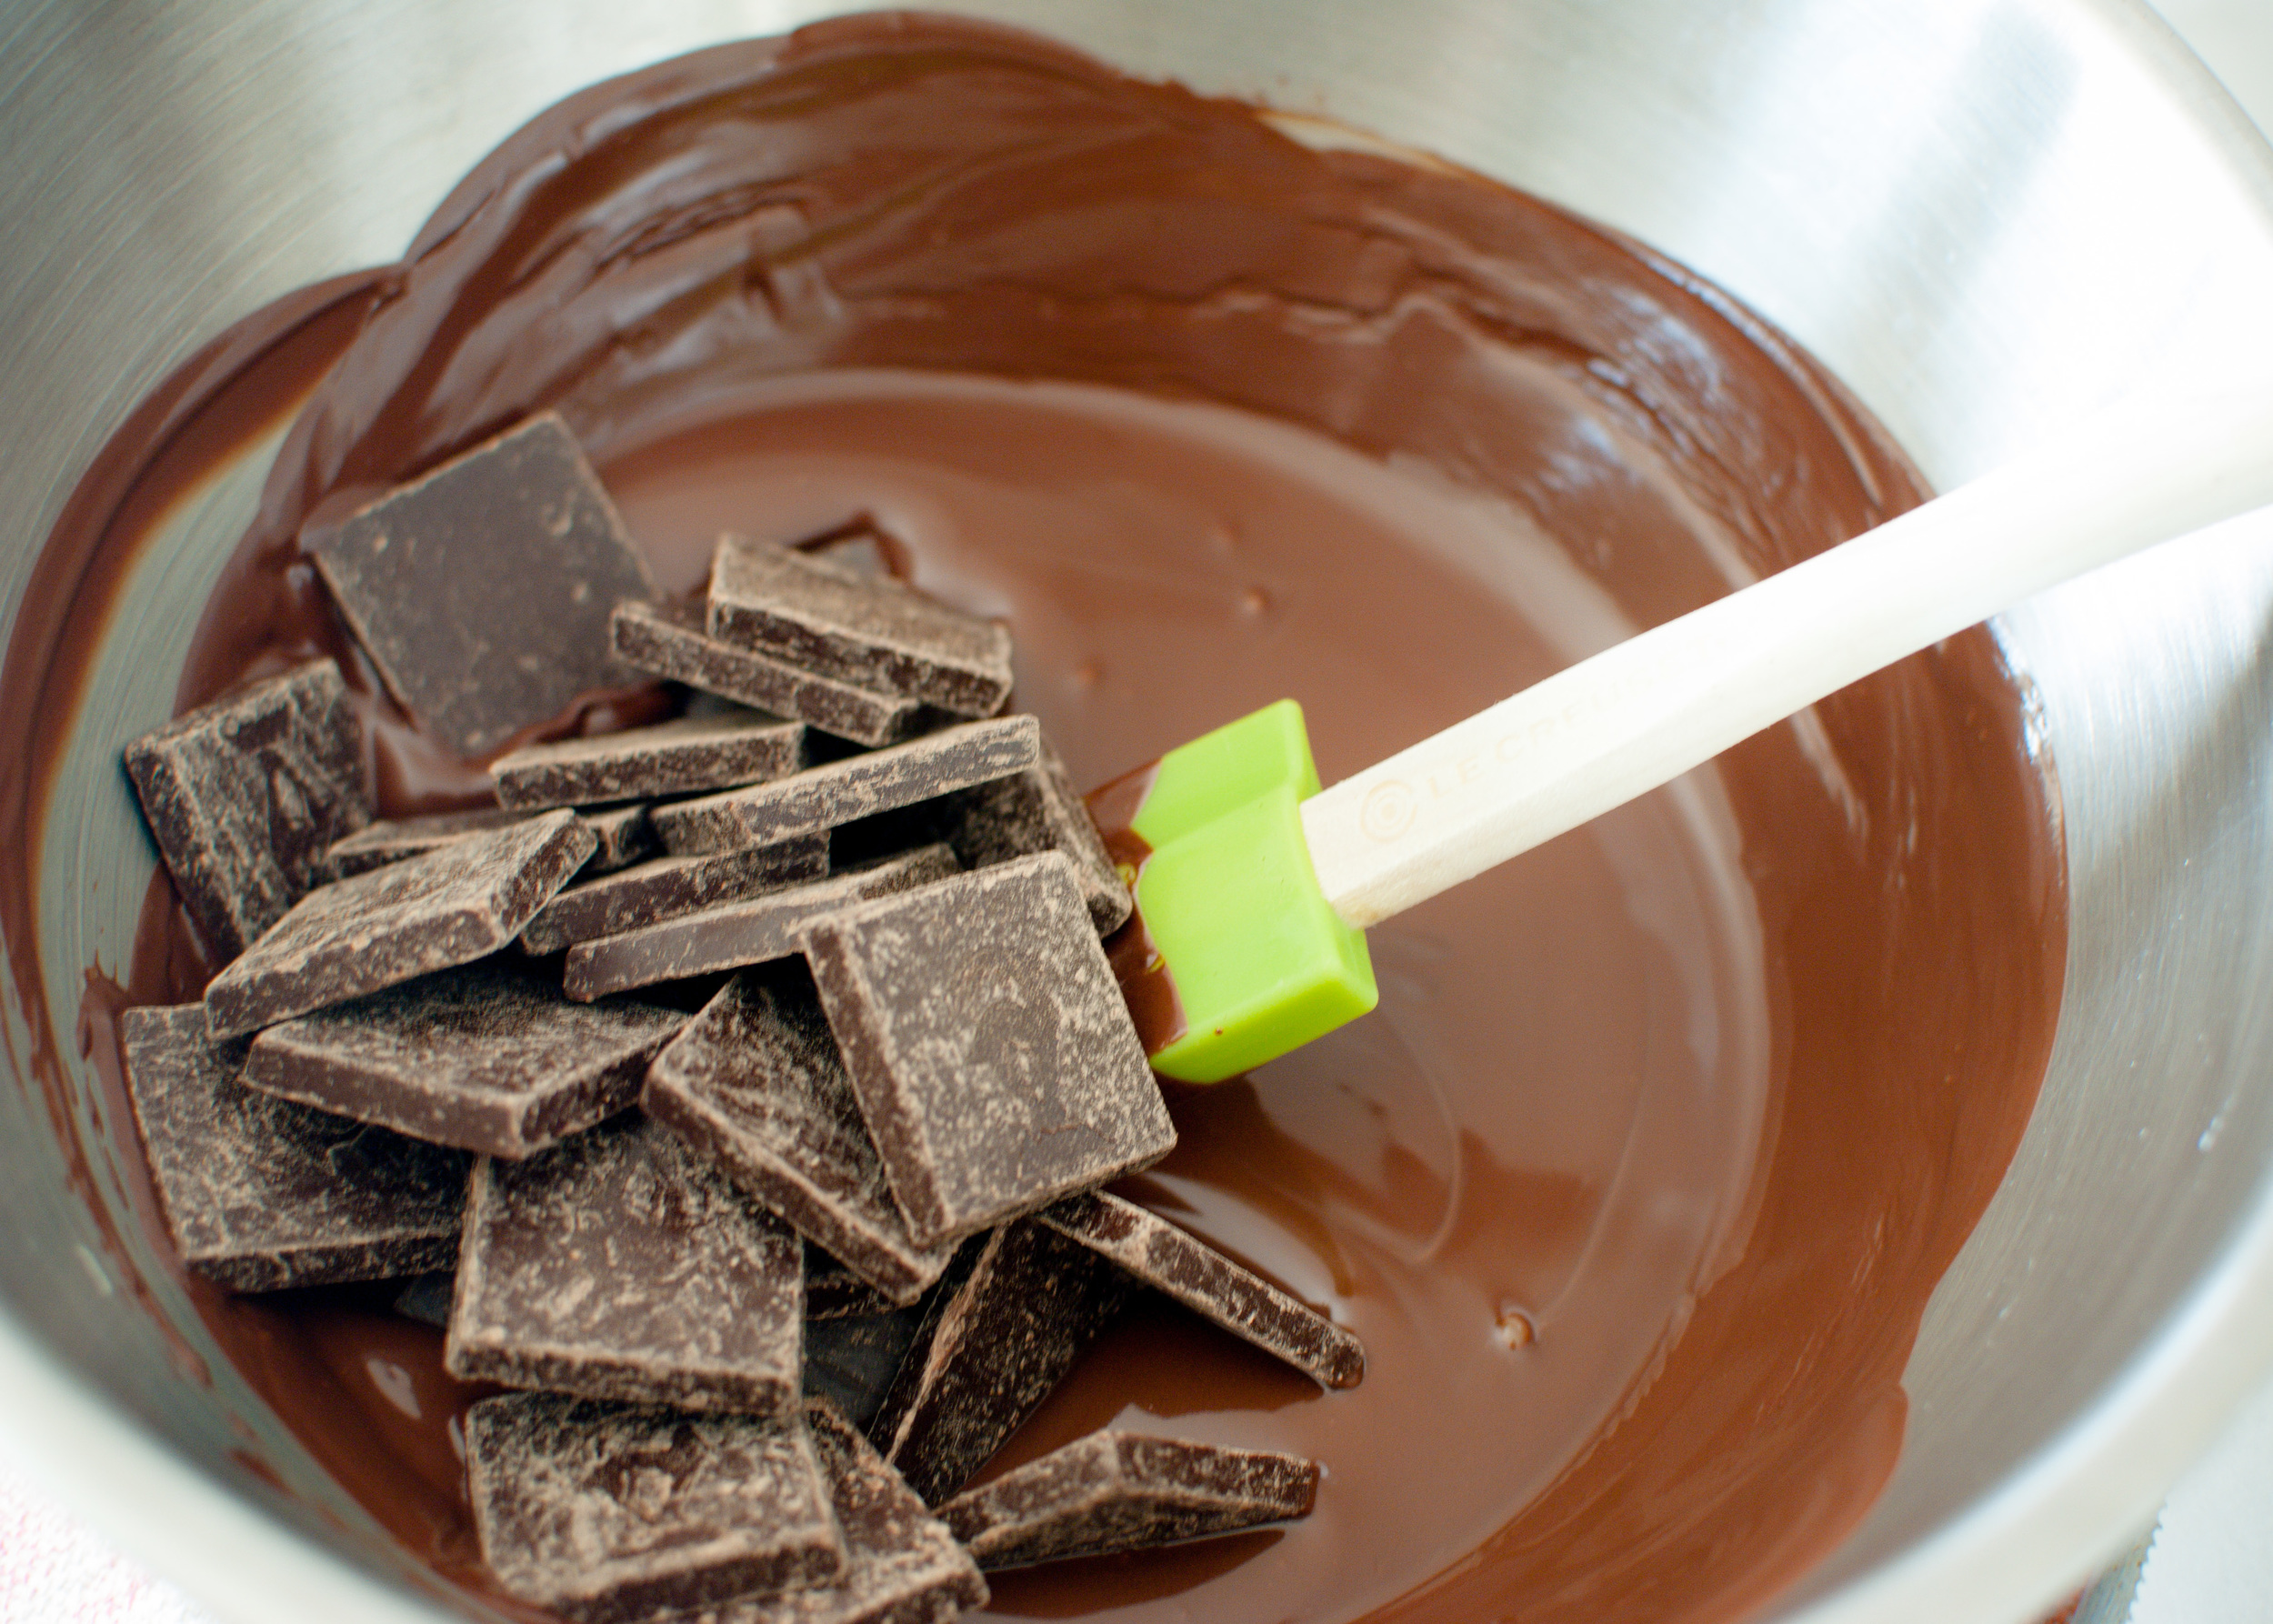
Fill the bottom of the double-boiler or saucepan with an inch or two of water and bring the water to a simmer over medium-high heat. Transfer 1 ⅓ cup chocolate into the top of the double-boiler or the heatproof bowl and set this over the simmering water. Let the chocolate melt, stirring occasionally, until no more lumps remain. Remove the bowl with the chocolate from heat. Stir in the remaining ⅔ cup chocolate, until all the chocolate has melted. Let slightly cool for 2 minutes. Stir in the coconut oil, if using.

Set the bowl of melted chocolate in front of you on a towel. Line a baking sheet with parchment.

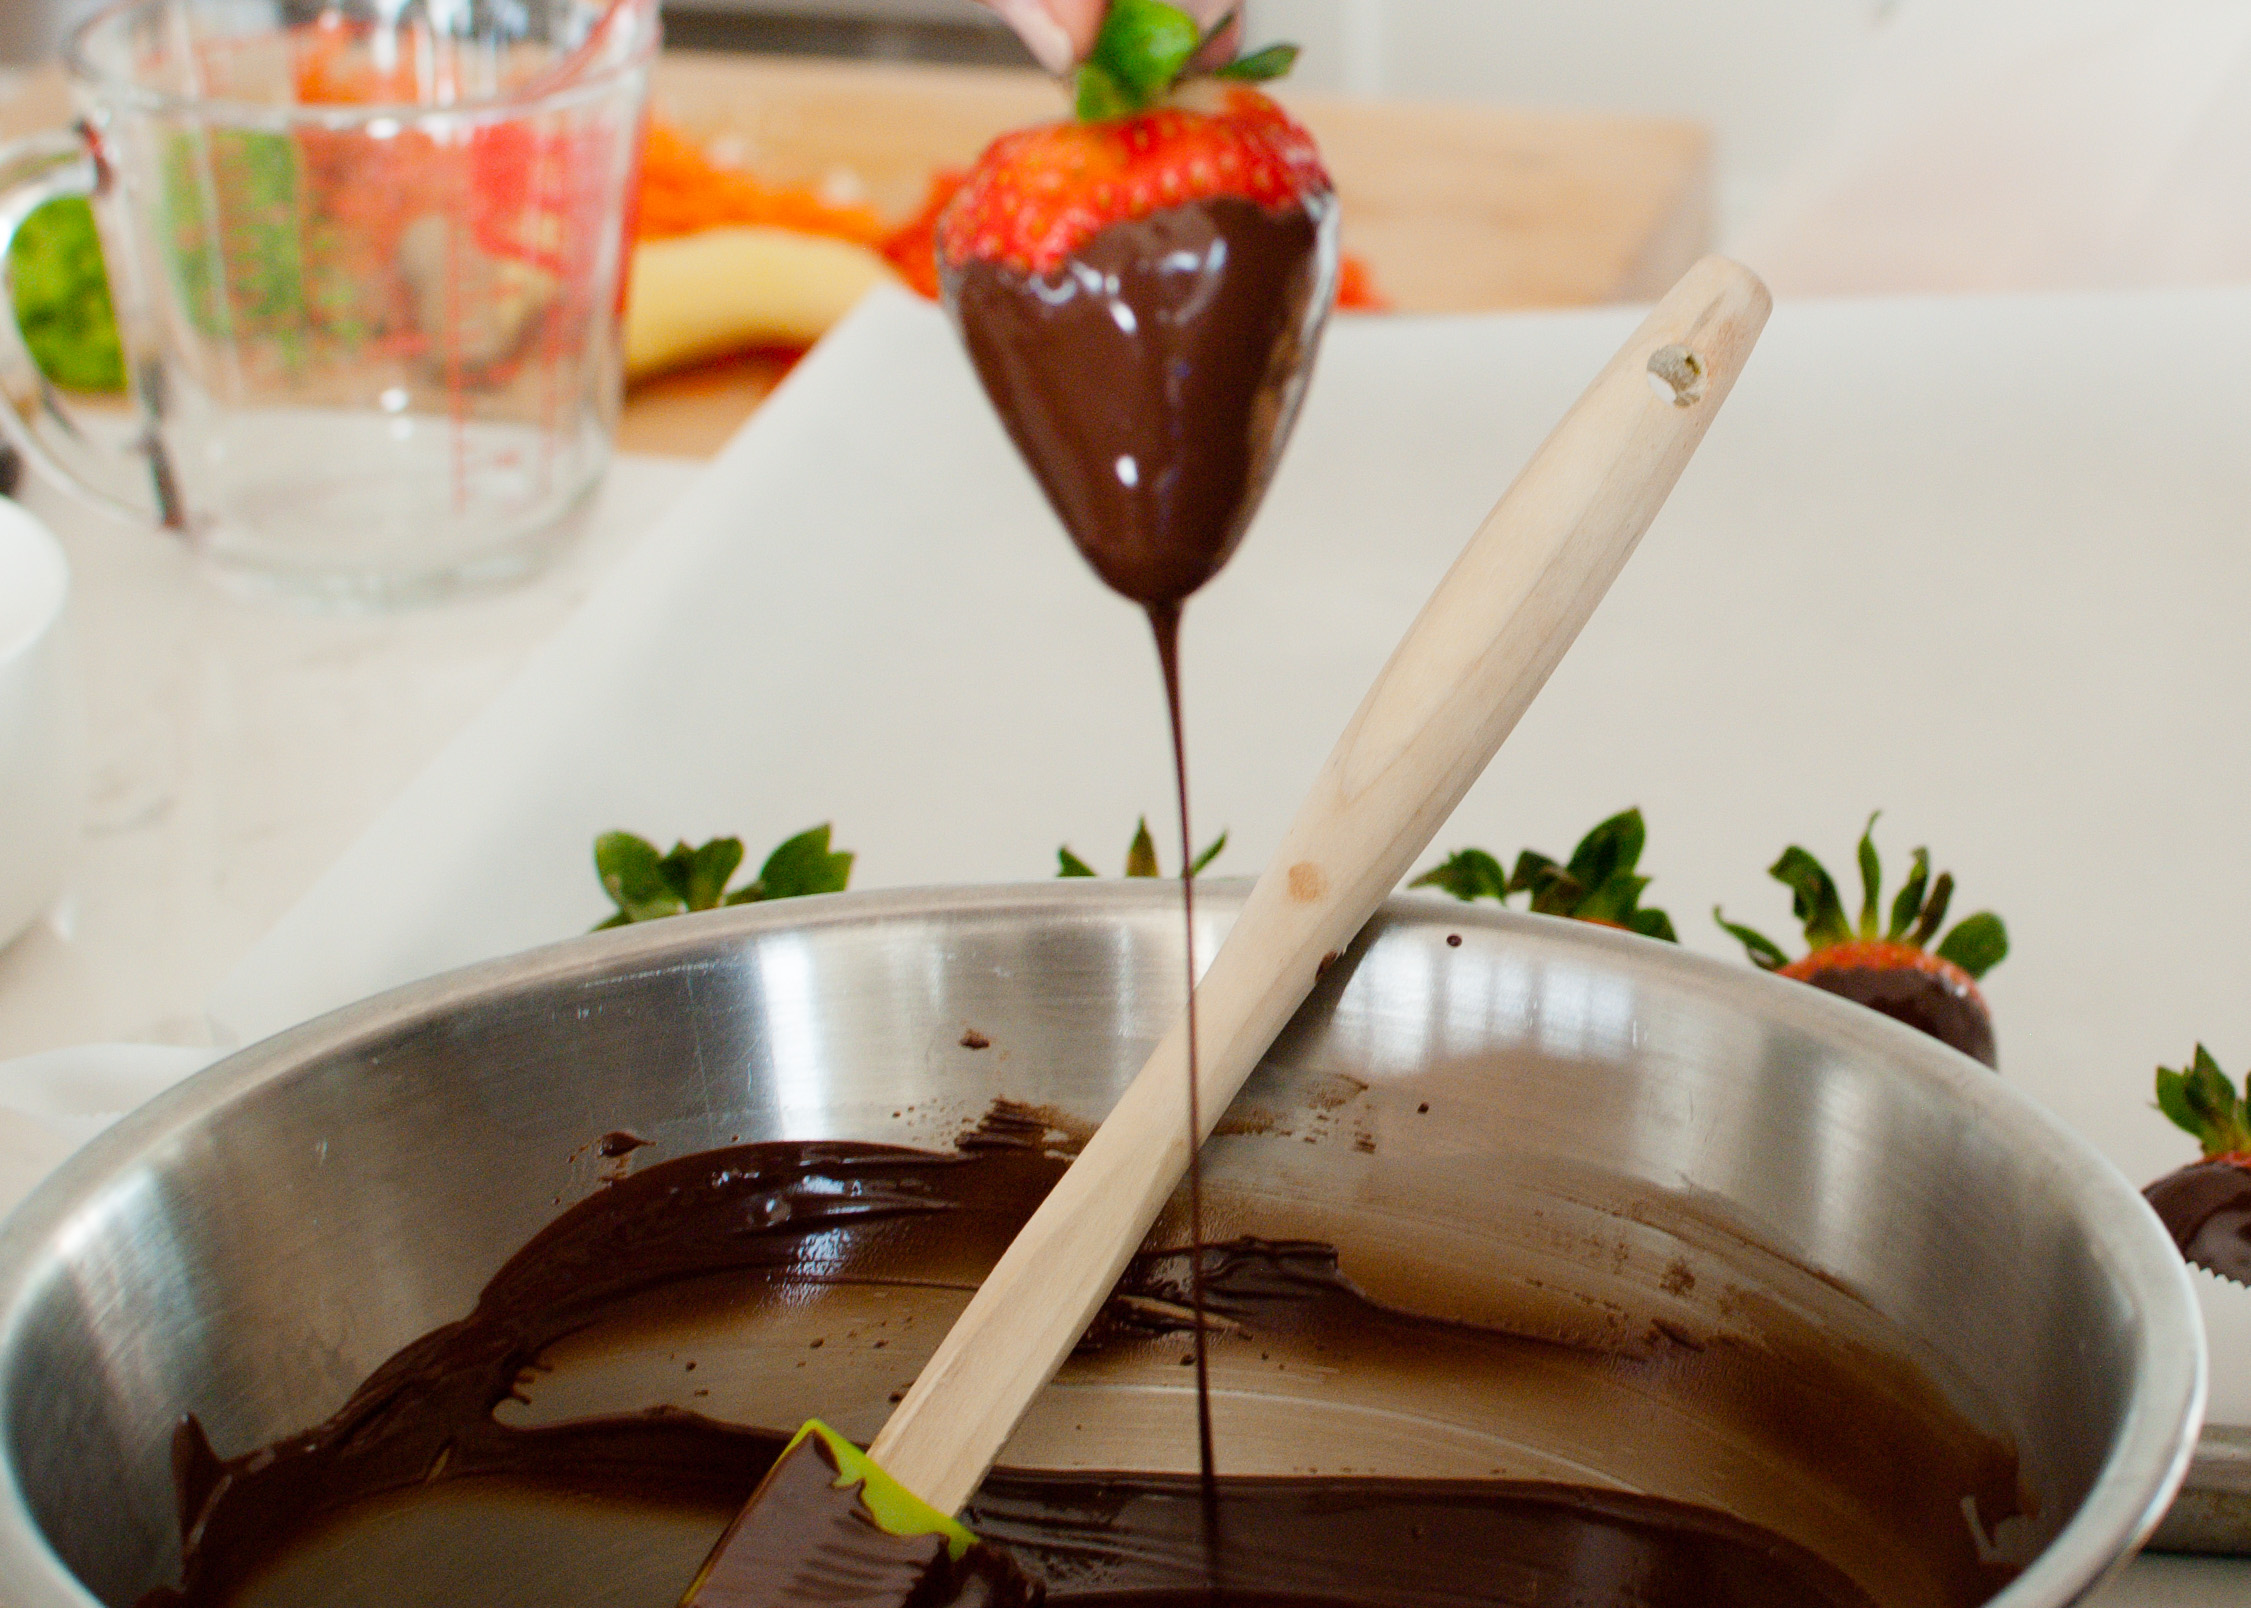
Grasp the strawberry by the top leaves and dip it into the chocolate. Turn or swirl the strawberry as needed to completely coat it in chocolate. Lift the strawberry out and shake gently to remove excess chocolate. Carefully lay the dipped strawberry on its side on the baking sheet. Repeat with dipping the remaining strawberries.

Let the strawberries sit until the chocolate coating is set and dry to the touch. You can put the baking sheet in the fridge to speed this along. Dipped strawberries can be kept for a few hours at room temperature. They can also be refrigerated for a few days, though they don't look as pretty.