cake

Chocolate Birthday Cake with Chocolate Frosting by Amy Cantu

Print Friendly and PDF

If you didn't know already, I have an absolute obsession with cake. Coconut Cake, Ice Cream Cake, Polenta Cake . . . it doesn't matter—I love it all! But sometimes nothing will do except rich, moist chocolate cake slathered with creamy, chocolate buttercream frosting, and this cake is exactly that. It's at once homey, impressive, and deeply satisfying to eat. Adults and kids both love it because . . . chocolate. It's the cake that strikes that nostalgic pang in my heart when I think of childhood birthday celebrations with balloons and streamers in primary colors. So go ahead: Make the time investment, bake this Chocolate Birthday Cake with Chocolate Frosting and eat your heart out, even if it's only your un-birthday.

Notes: I used the cake batter to make 12 cupcakes, (for a birthday play-date with a few besties,) and a small 6-inch double layer cake to enjoy with the family. I've also included instructions for using the batter to make all cupcakes, a 9x13 cake, or an 8-inch 3-Layer cake: Don't be scared off by all the text! I love the included recipe for Chocolate Buttercream Frosting because it stays beautifully shiny and creamy even as it sits out, and it's not cloyingly sweet. If the frosting begins to curdle as you are beating it, switch to high speed and keep whipping it until it looks smooth again. Don't worry, just keep whipping, and I promise it will come together. The cake is best at room temperature and will keep for 3 days without refrigeration . . . if it lasts that long!


Time: 2 hours
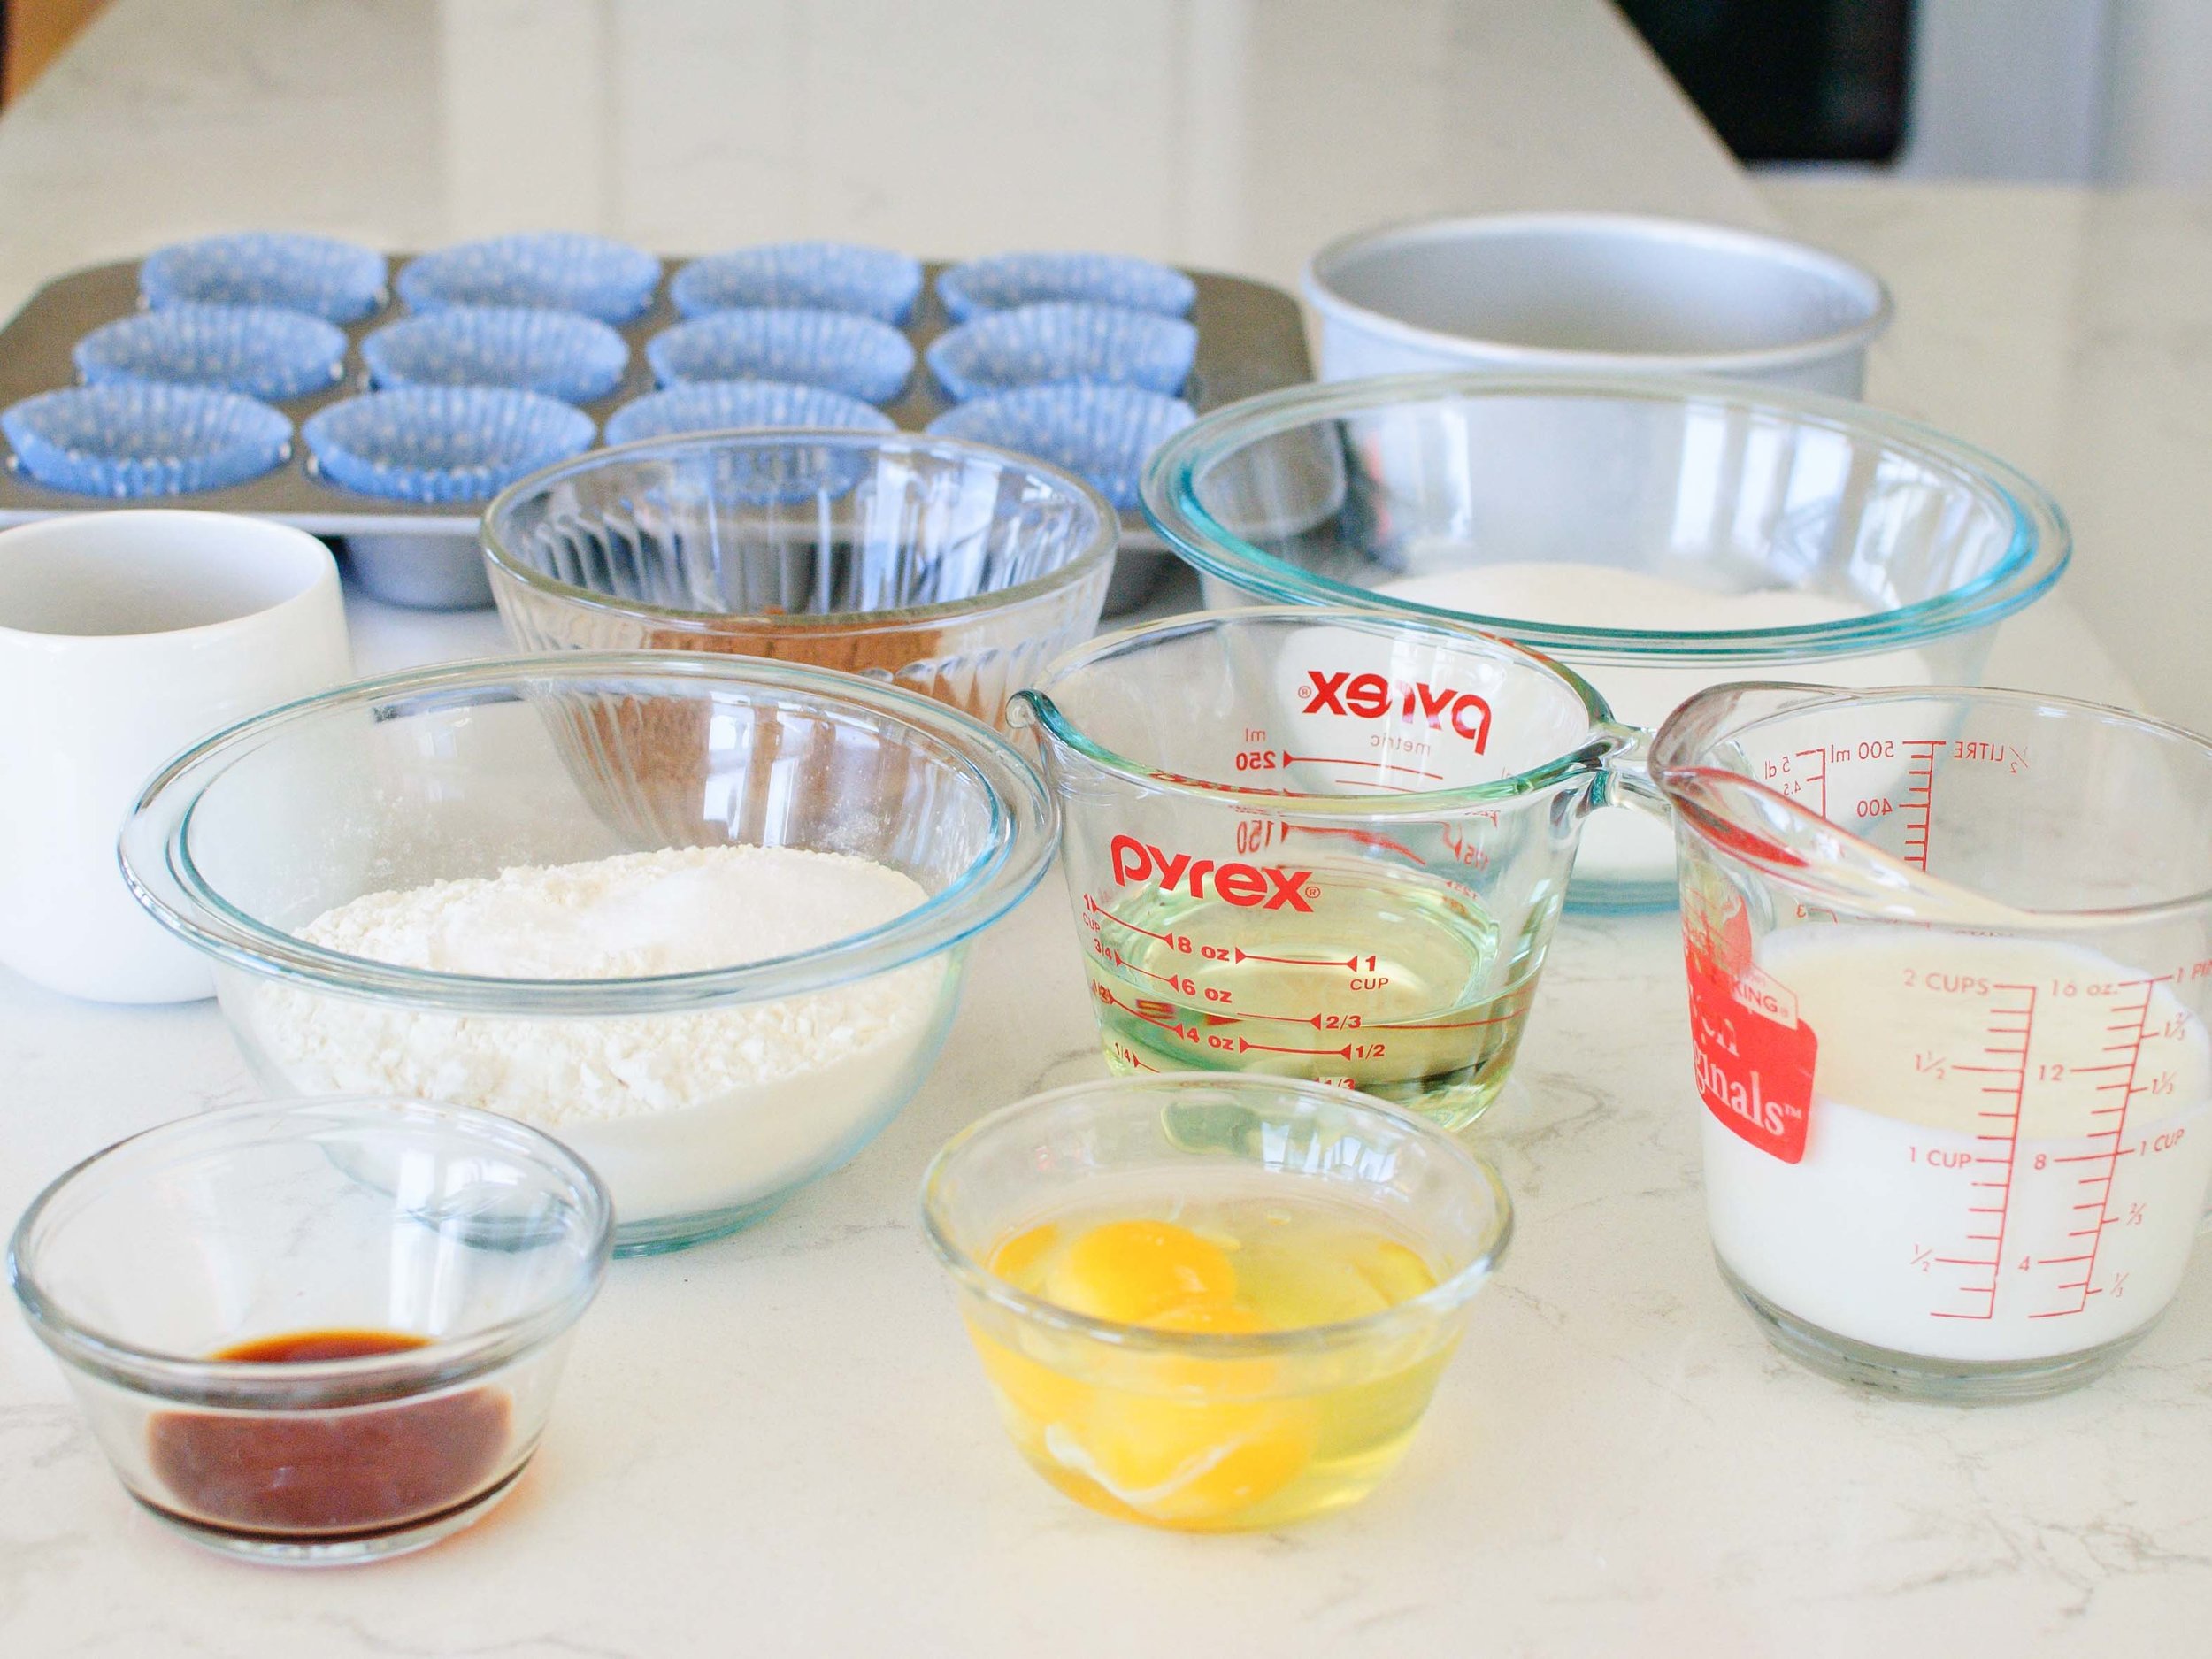
Yield: 12 cupcakes + 6-inch double-layer cake (I used a 6x3" round pan), 30 cupcakes, 13x9x2-inch baking pan, or 3-layer cake (8" rounds)

2 cups sugar
1 3/4 cups all-purpose flour
3/4 cup cocoa (natural, not dutch process)
1 teaspoon baking powder
1 1/2 teaspoons baking soda
1 1/2 teaspoons kosher salt (3/4 teaspoon table salt)
2 eggs
1 cup shaken buttermilk
1/2 cup vegetable oil
2 teaspoons vanilla extract
1 cup very hot brewed coffee
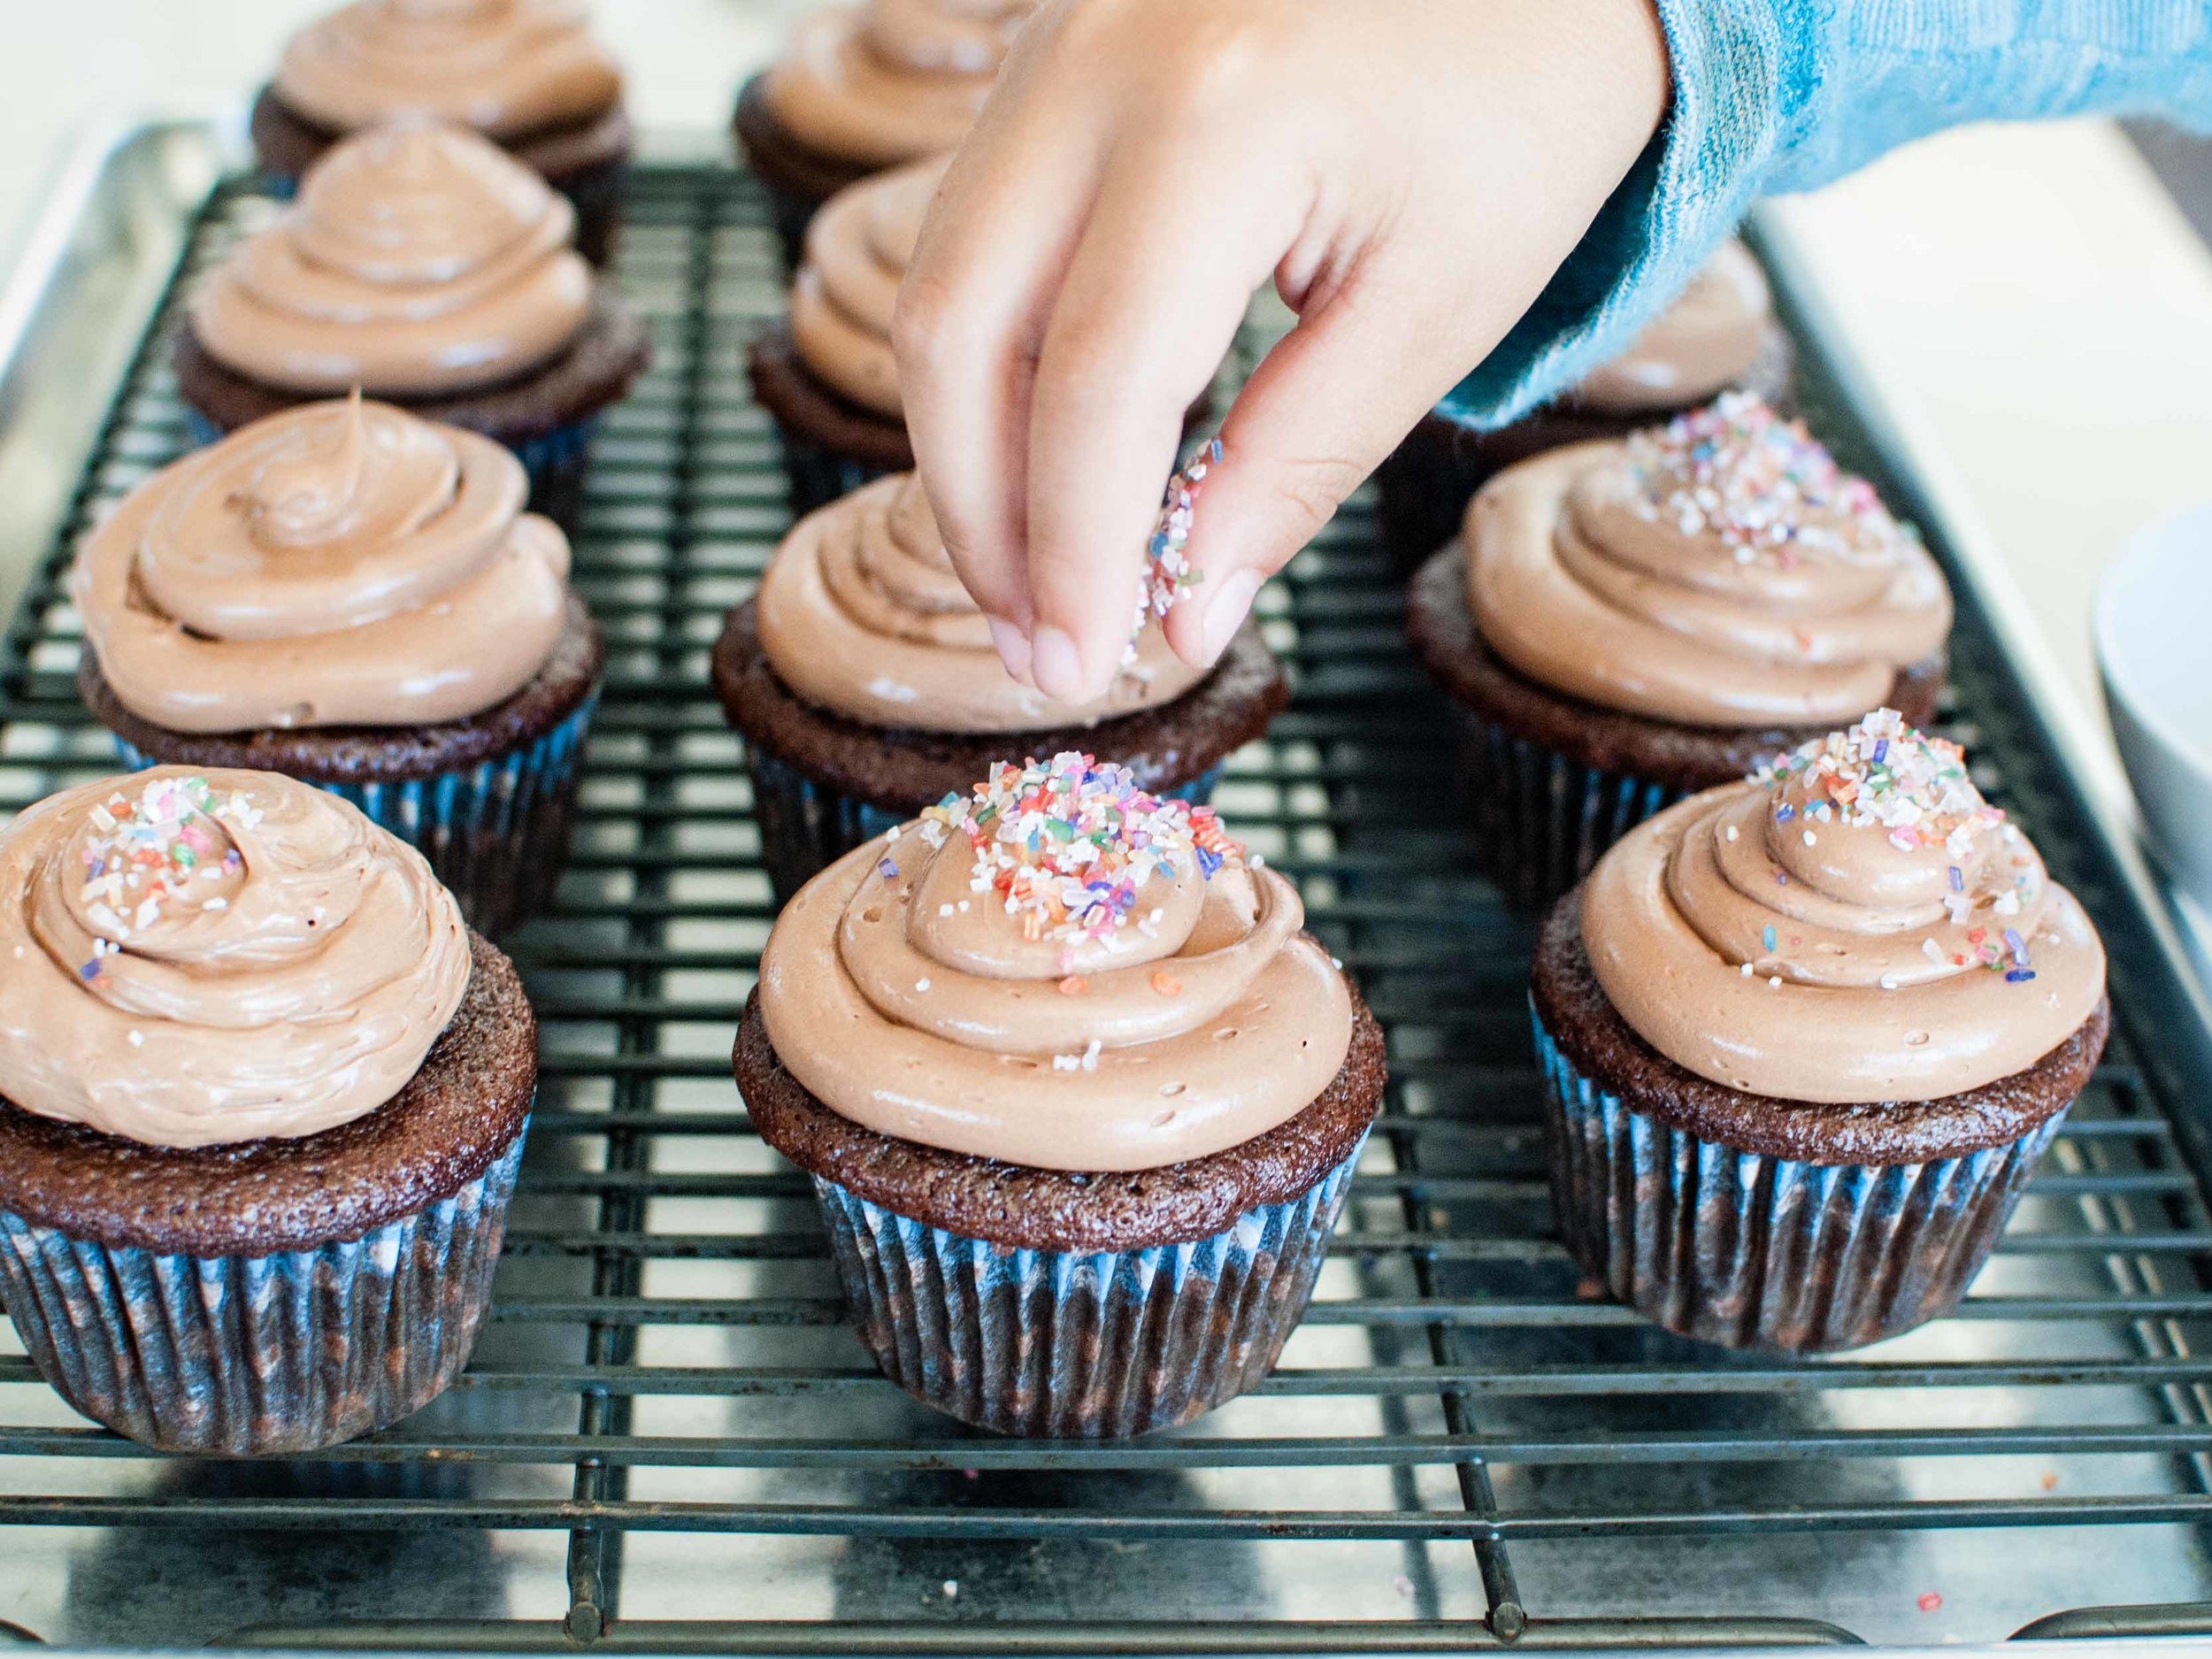
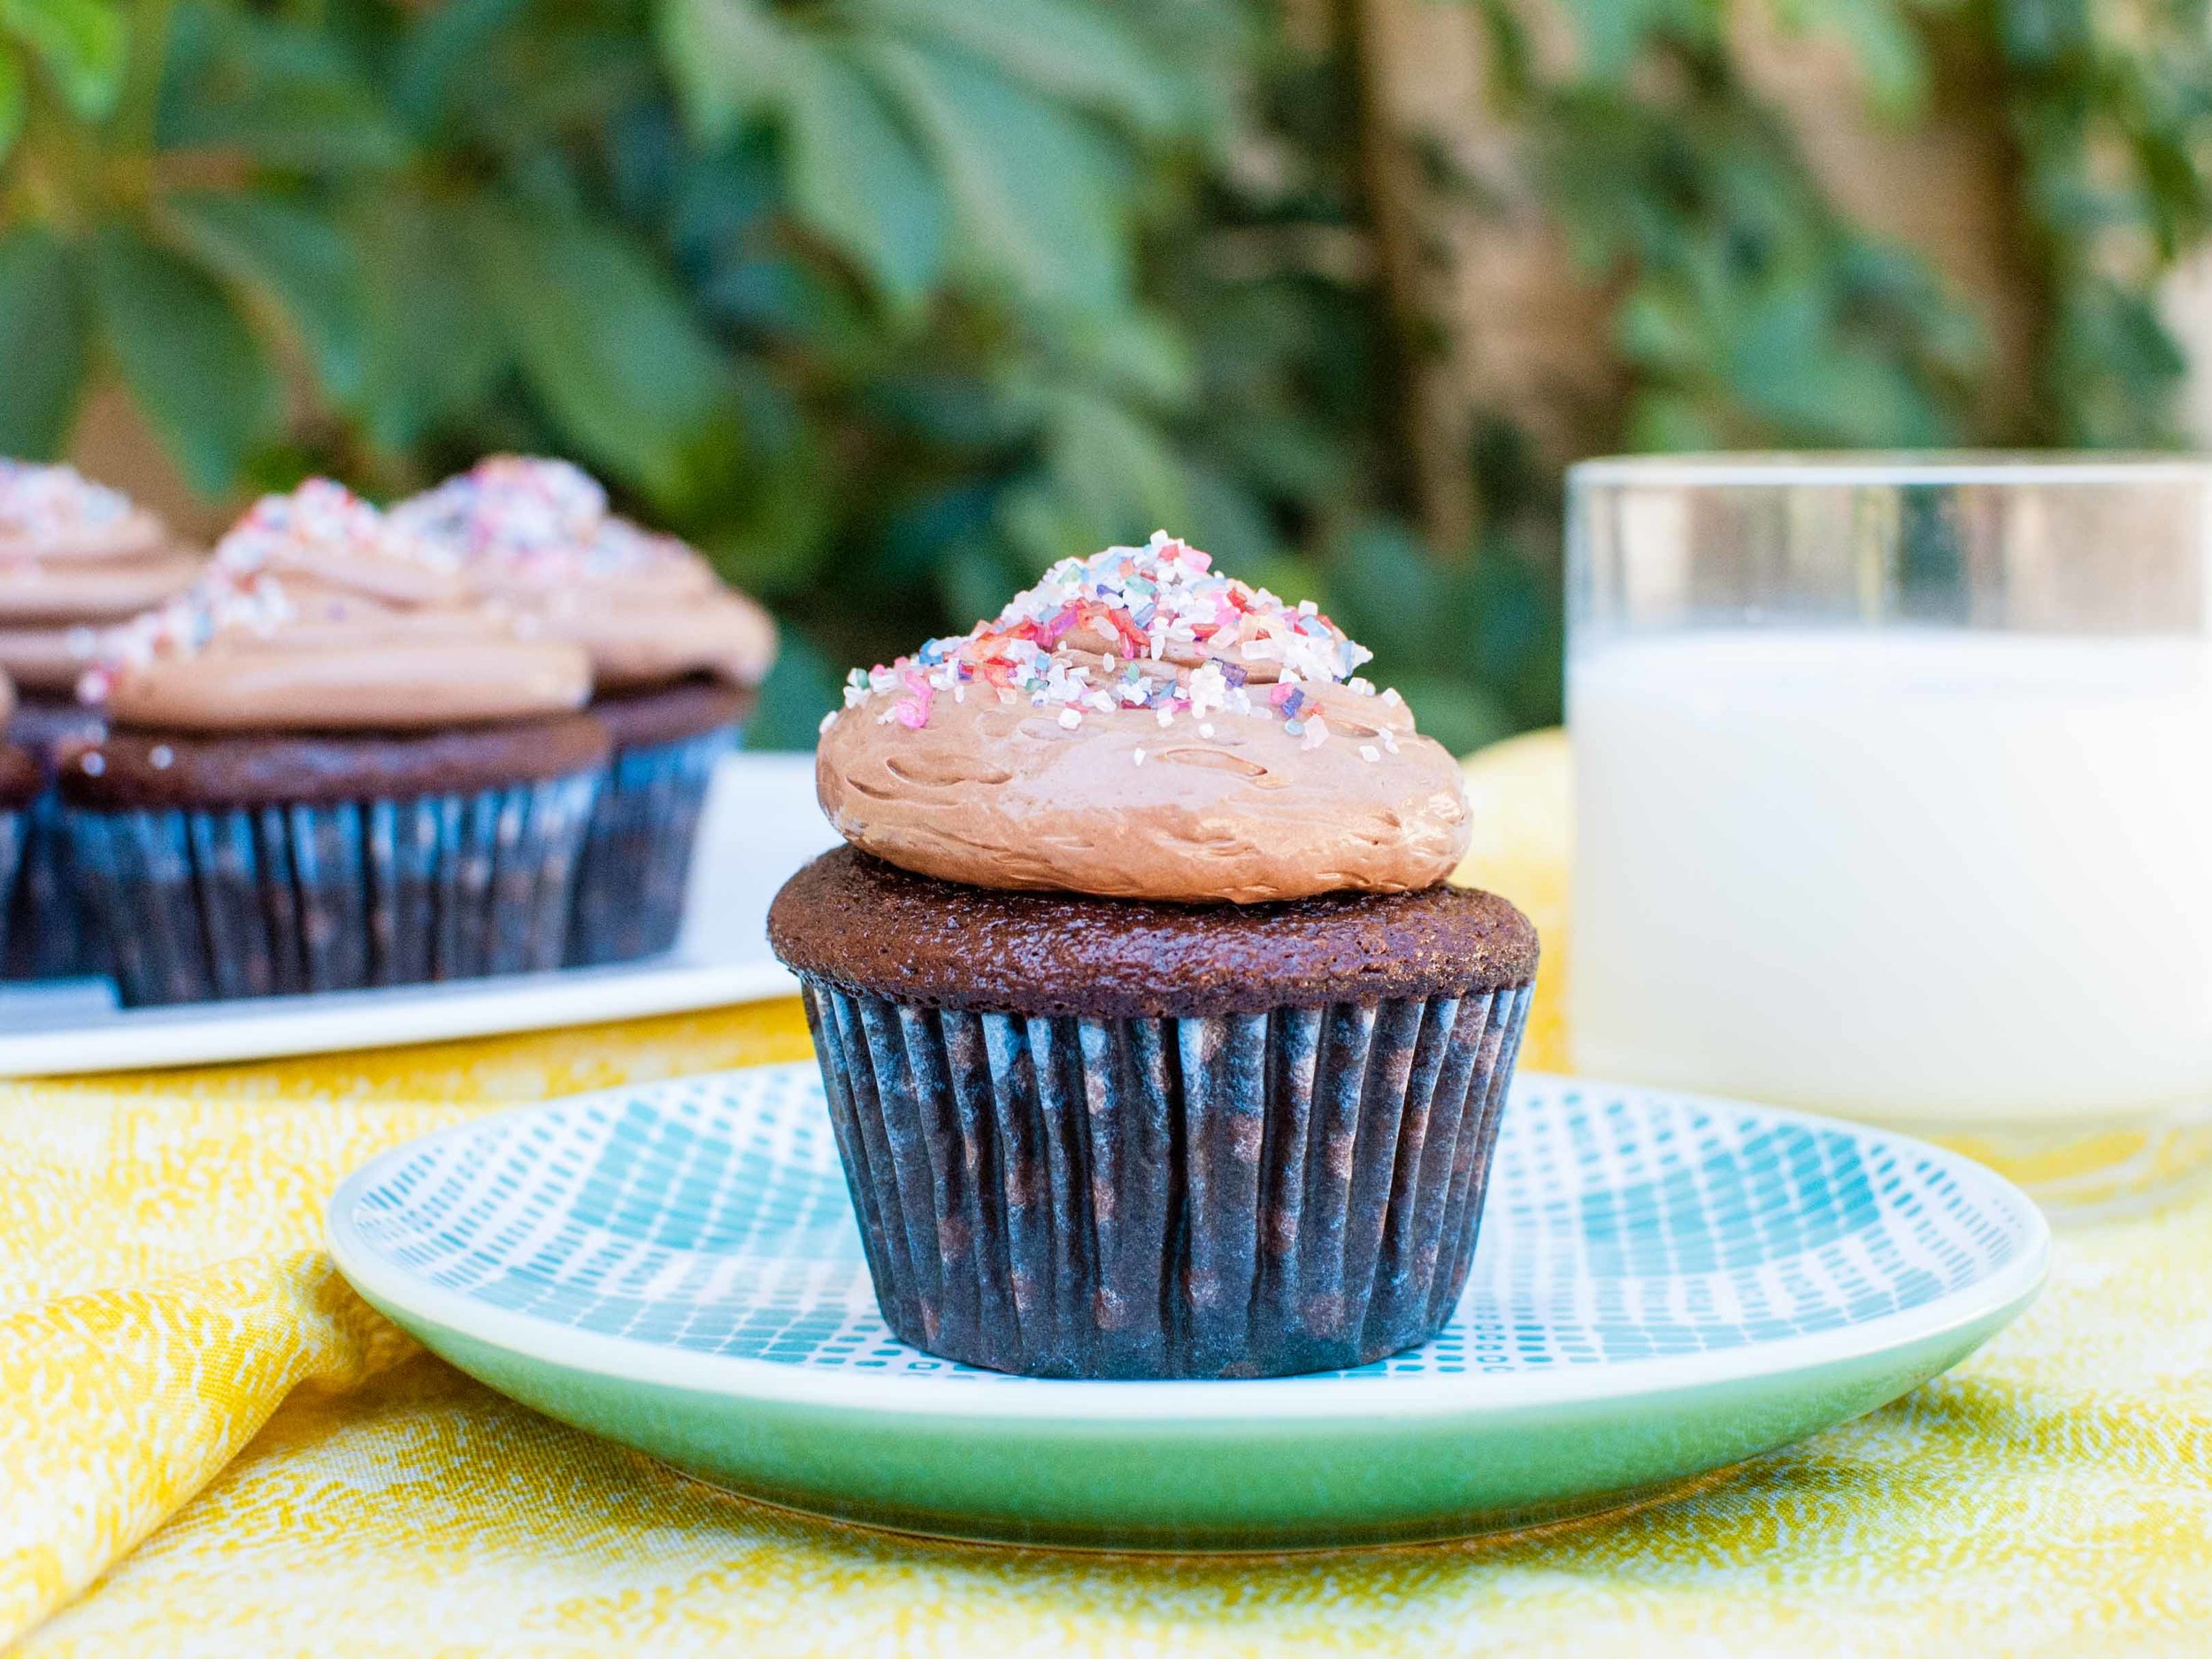
1 recipe Chocolate Buttercream Frosting (See recipe below.)
Loads of sprinkles

Preheat oven to 350 degrees F. Cupcakes: Line with cupcake liners. Cake pans: Cut parchment paper to fit the bottom of the pans. (I trace the bottom of the pan onto the parchment paper, then cut it out for a perfect fit.) Grease the bottoms and sides of the pan(s), line with the parchment paper, then grease the top of the parchment paper. (The extra parchment paper step ensures no wasted effort from the cake sticking to the pan!)

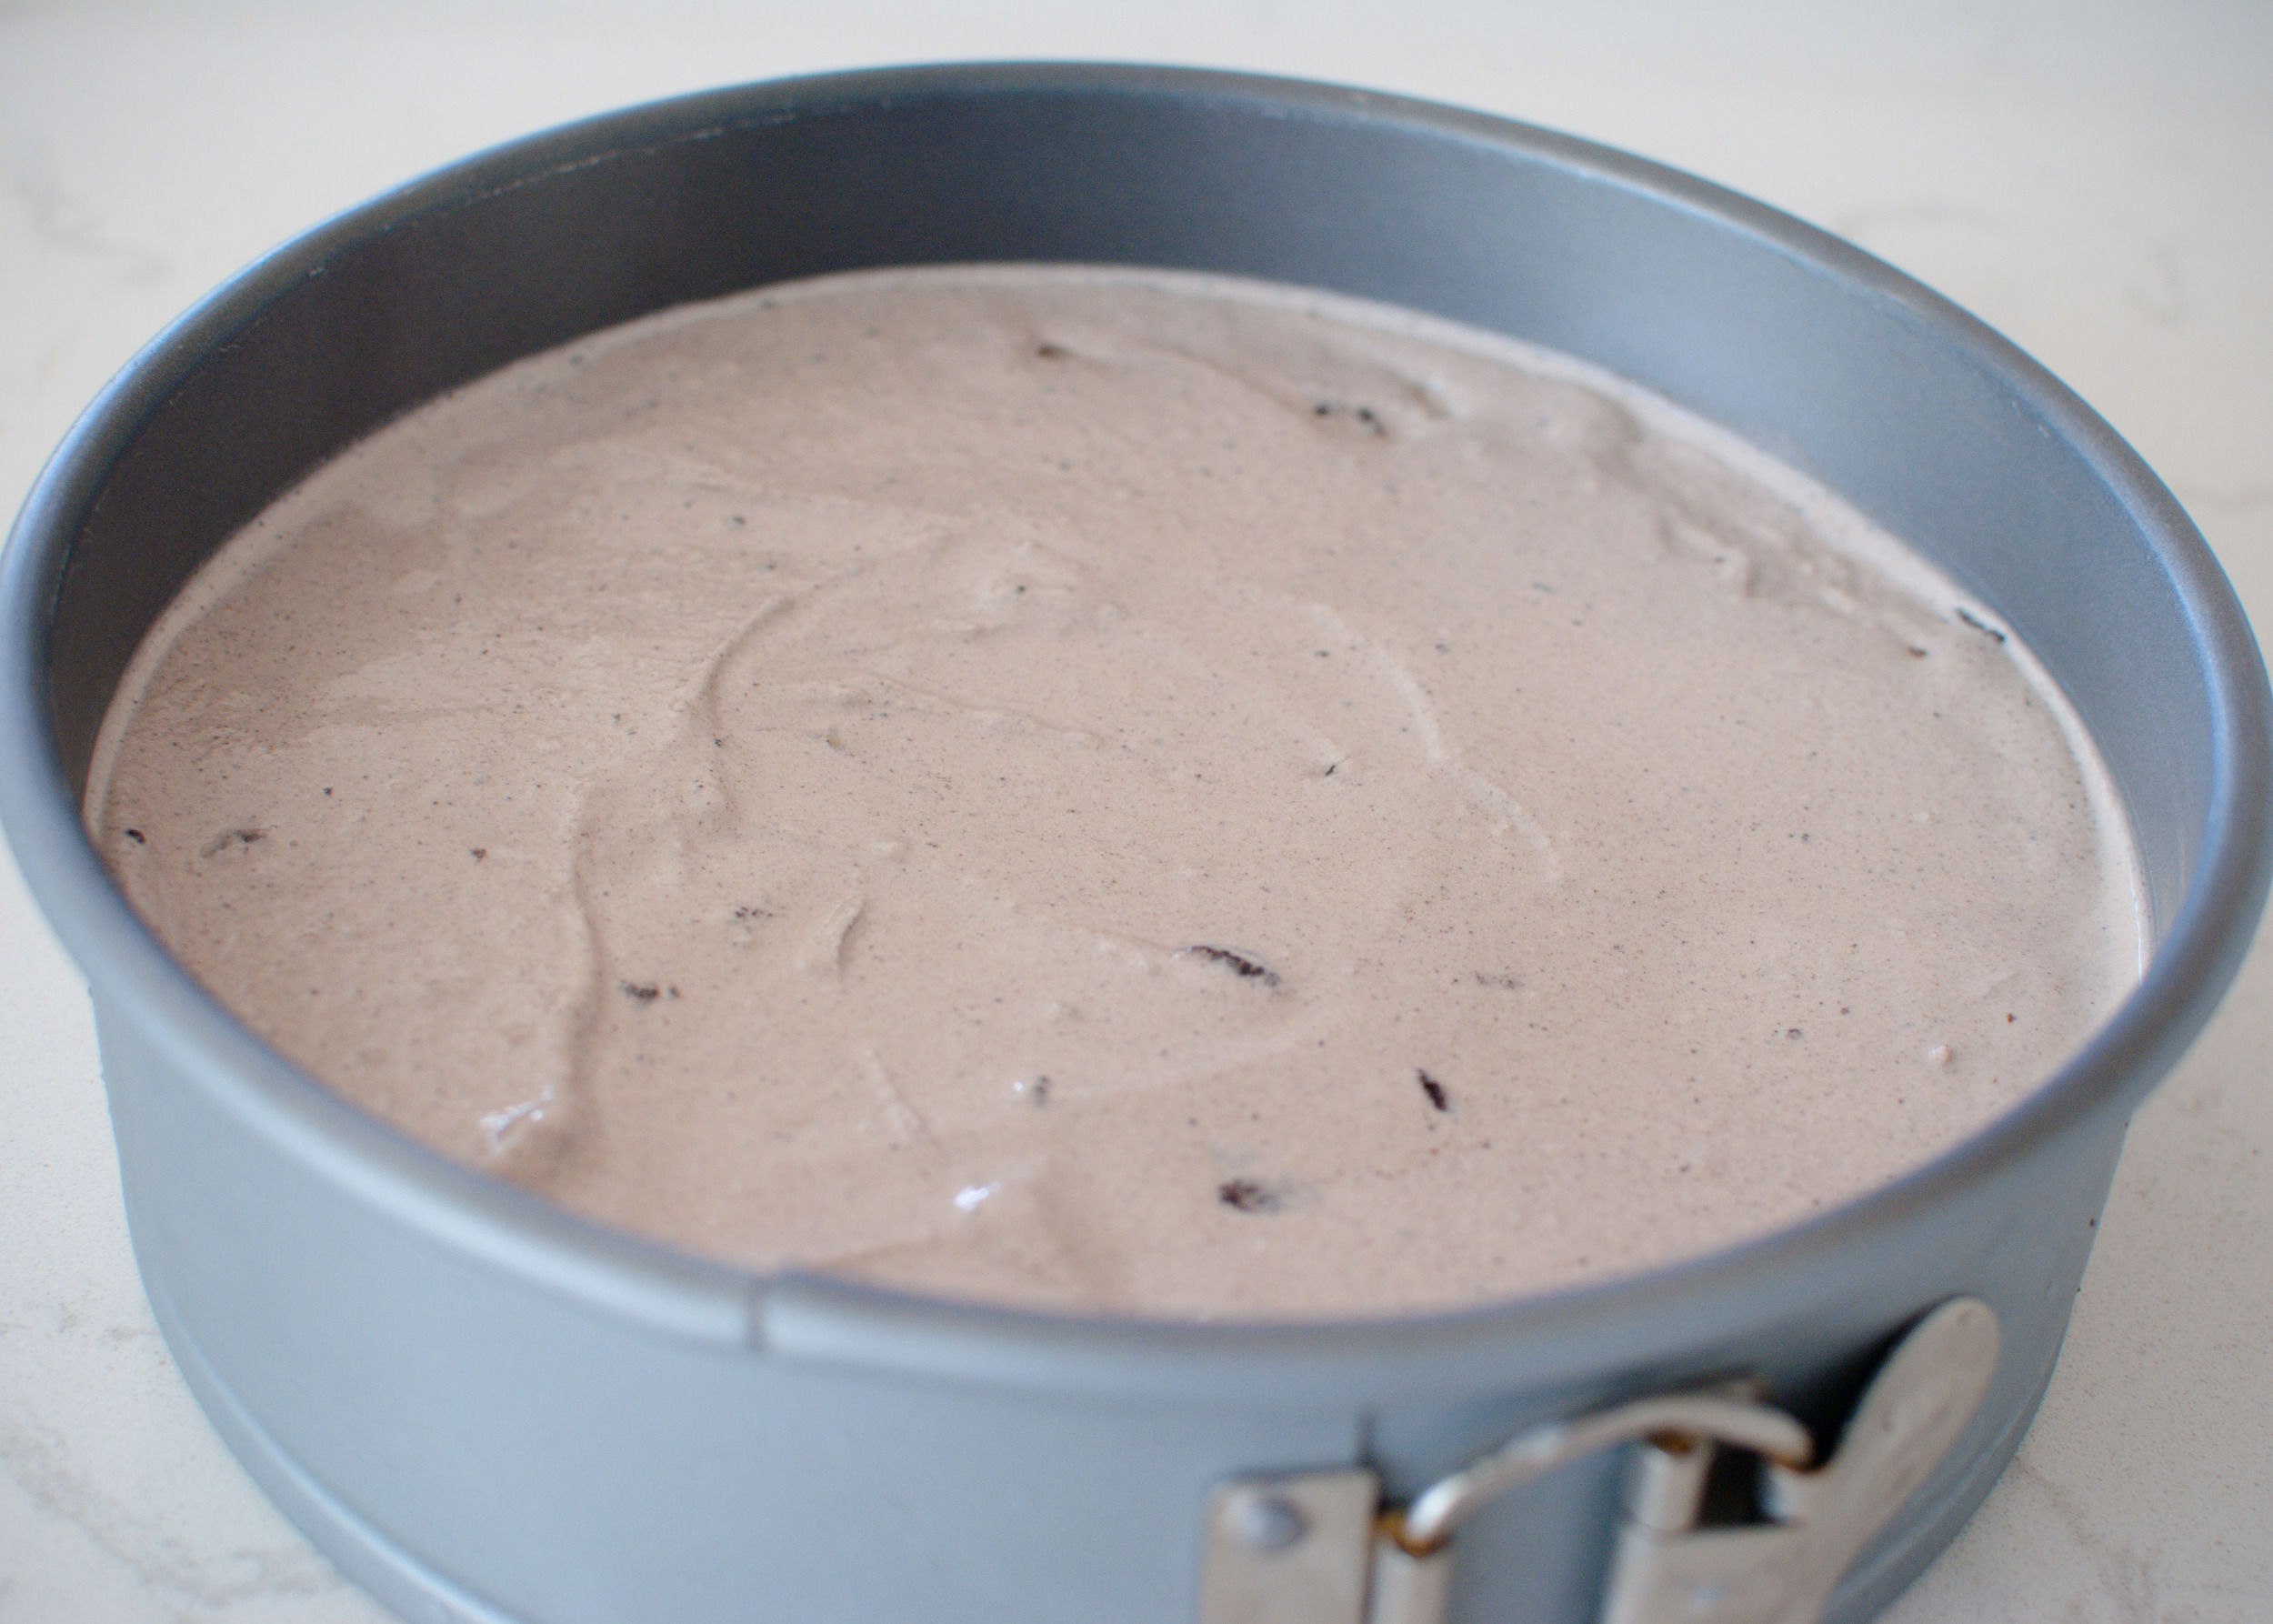
In a large bowl (or stand-mixer bowl fitted with a flat beater), stir together sugar, flour, cocoa, baking soda, baking powder, and salt. Beat in eggs, buttermilk, oil, and vanilla at medium speed for 2 minutes, until well-combined. Stir in very hot coffee - batter will be runny. Pour batter into prepared pans, filling them 2/3 full.

Bake until a wooden toothpick poked into the middle of the cake comes out clean. (Cupcakes: 22 to 25 minutes, 6x3-inch round: 30-35 minutes, 9x13-inch cake: 35-40 minutes, three 8-inch round cake pans: 30-35 minutes.) Cool 10 minutes, then remove from pans to wire racks. Cool completely. 

Cupcakes: Frost with Chocolate Buttercream Frosting and decorate judiciously with sprinkles!

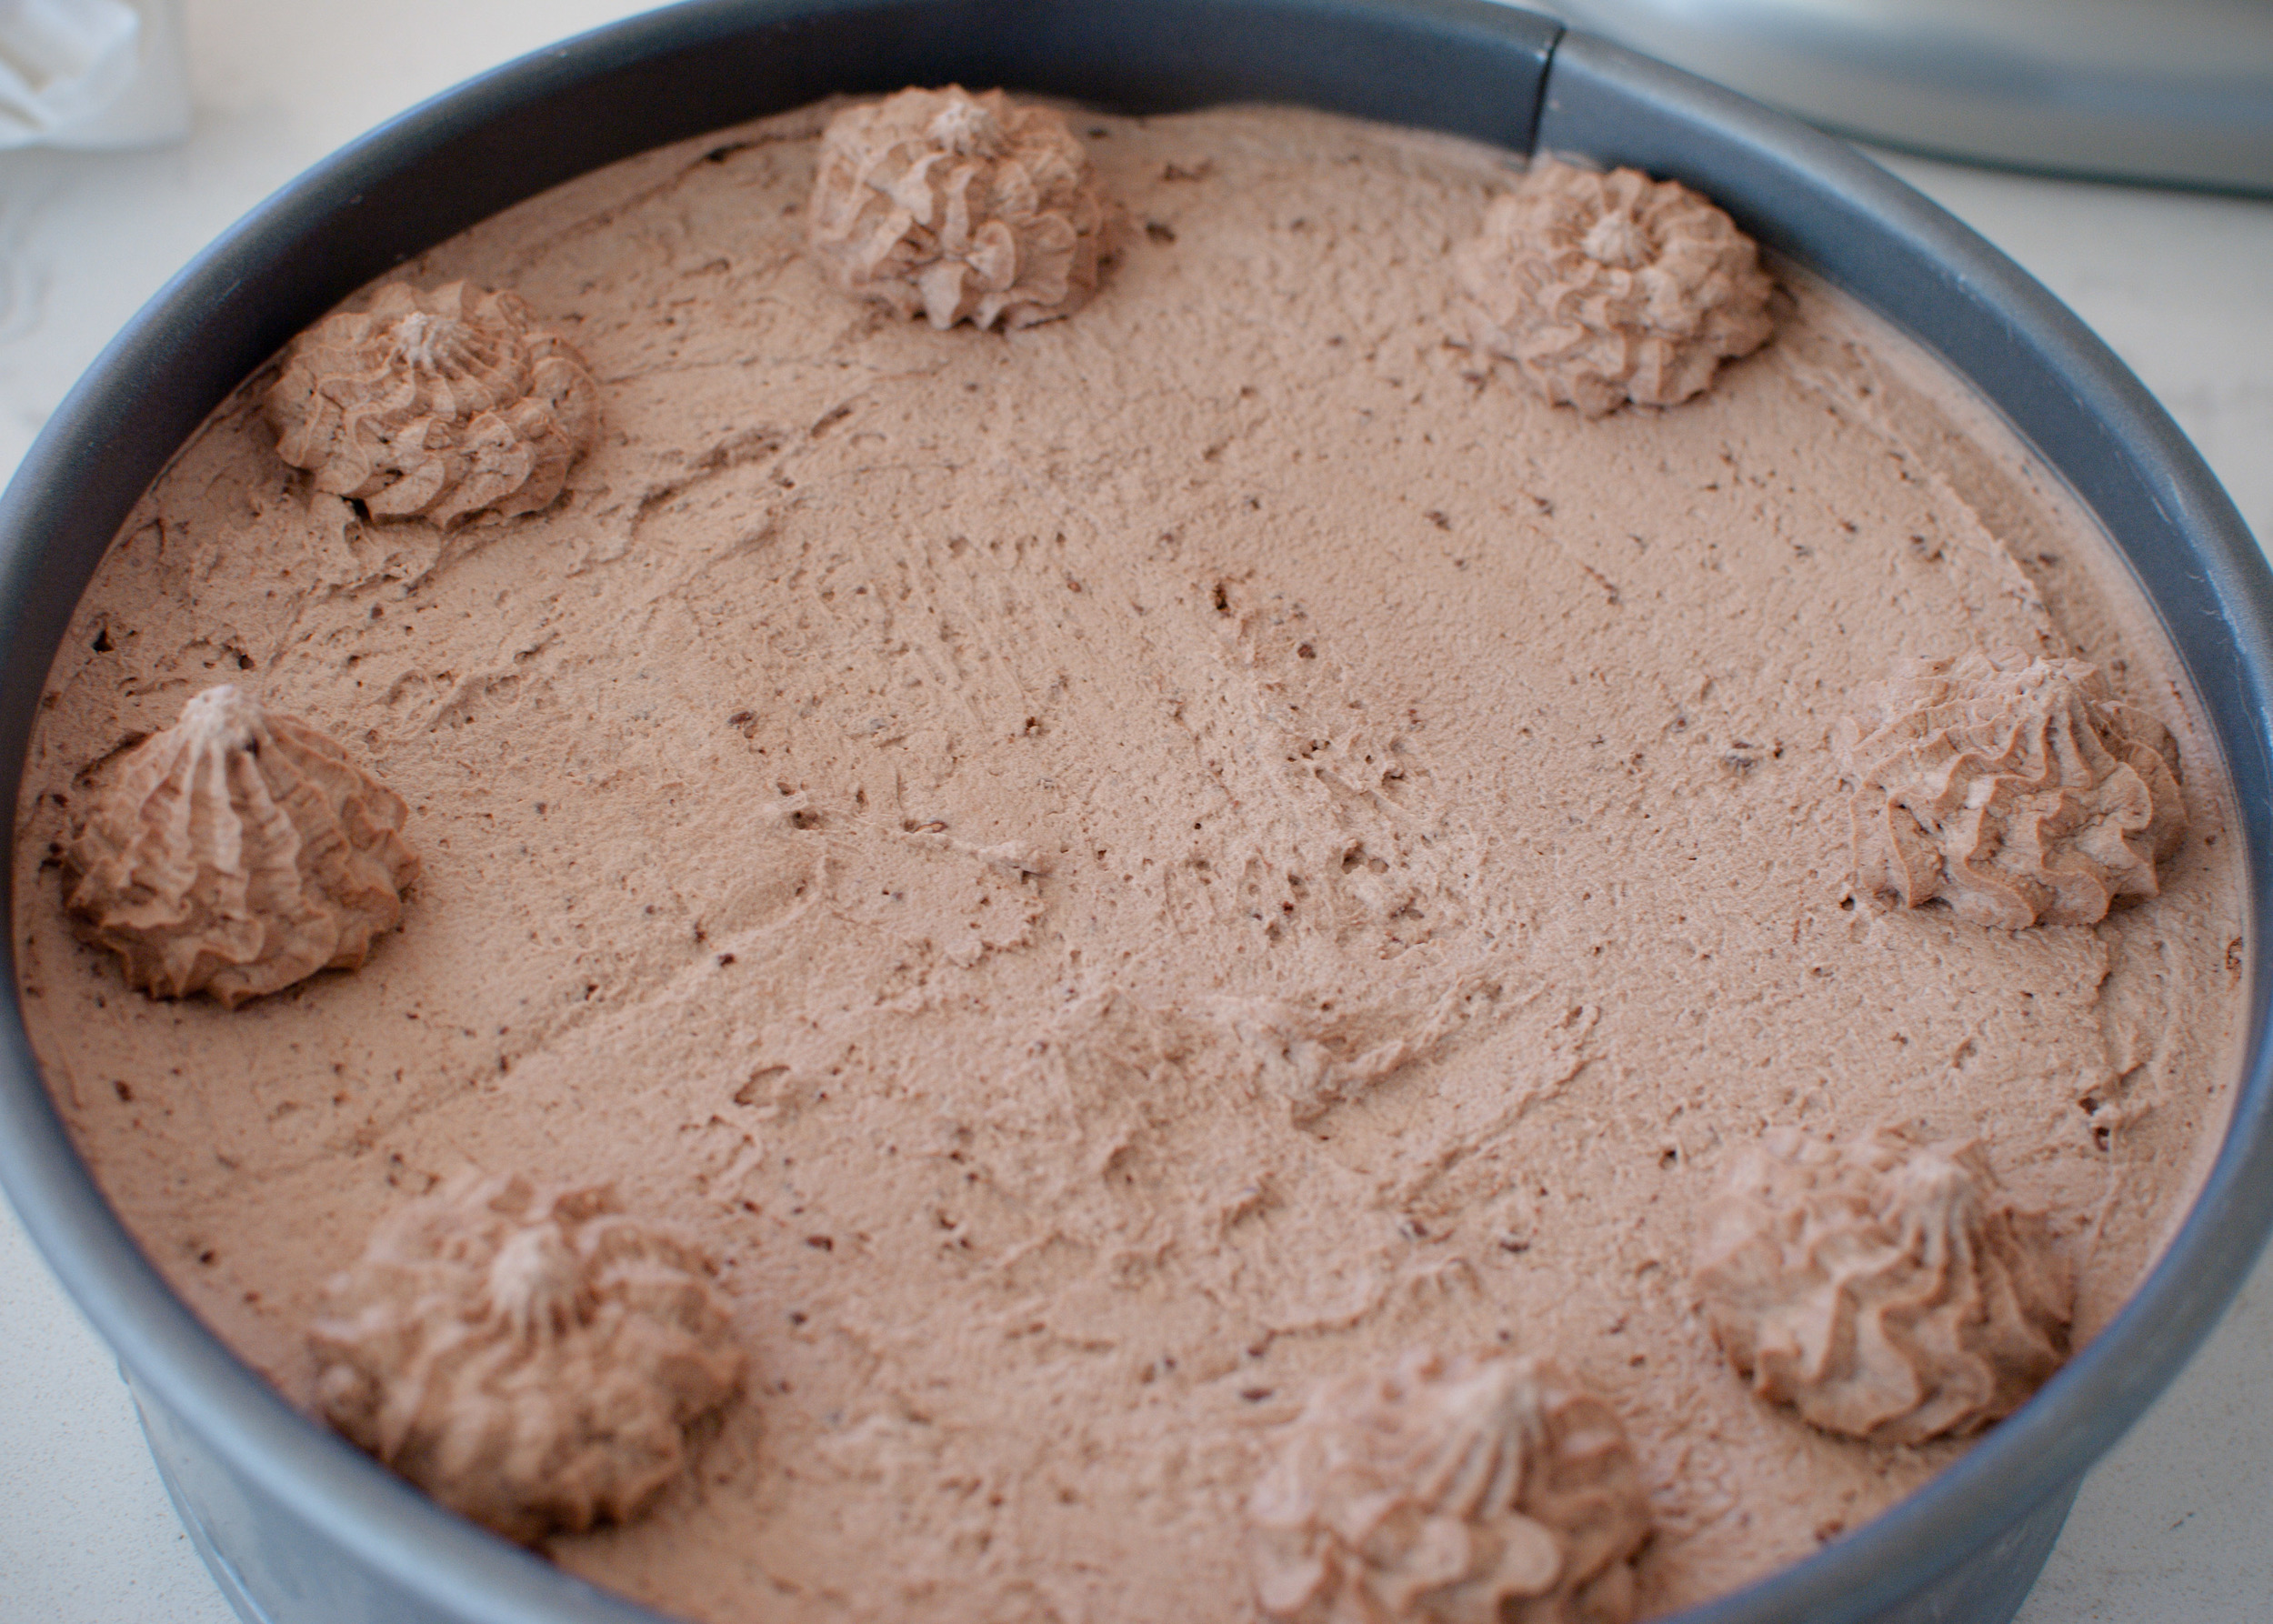
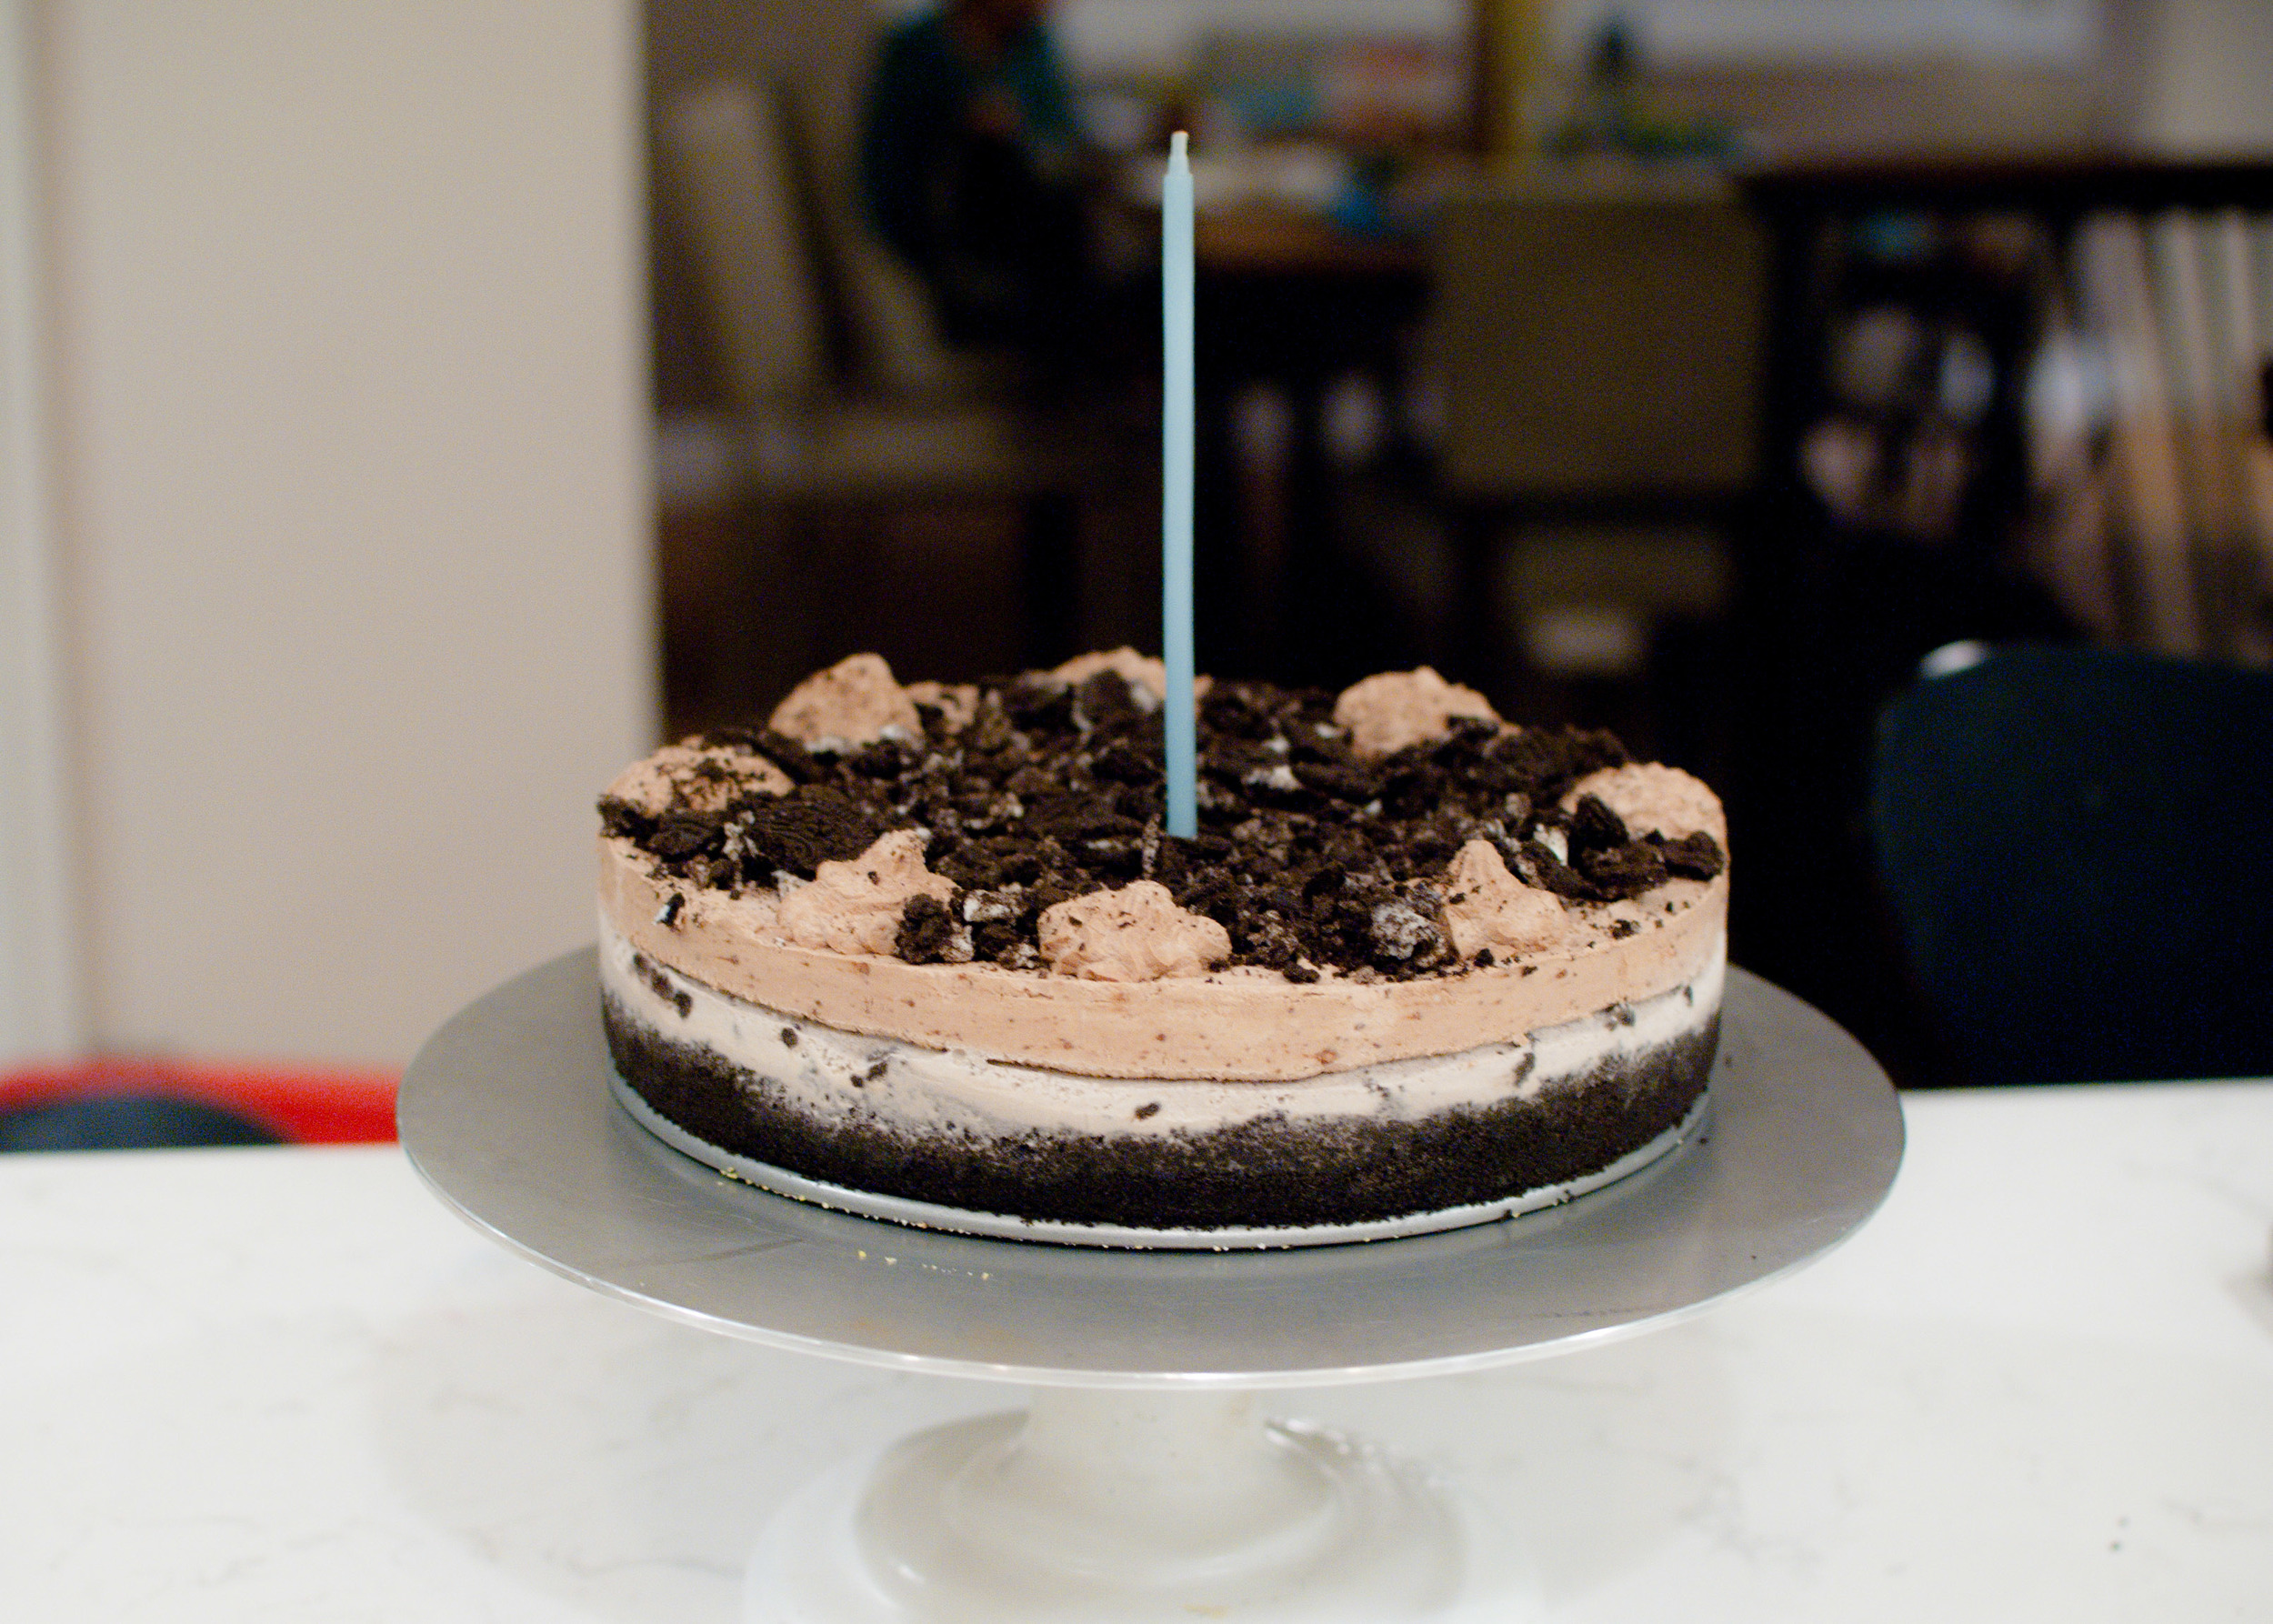
6-inch Double Layer Cake: If necessary, lightly trim the top of the cake to create a flat top. Using a serrated bread knife, slice the cake horizontally to create two round layers of equal thickness. Place one layer on a flat plate or cake stand. Using a knife or offset spatula, spread the top with frosting. Top with the second layer, and spread frosting all over the top and sides, creating pretty swirls as you go, if you like. Decorate with plenty of sprinkles!

13x9 Single-Layer Cake: Spread Chocolate Buttercream Frosting over the top and sides. (There will be extra frosting.) Then sprinkle, sprinkle, sprinkle with sprinkles!

3-Layer Cake: Lightly trim the top of each 8" round cake to create a flat top. Place one layer on a plate or cake stand. Using a knife or offset spatula, spread the top with frosting leaving a 1/4" border. Top with the second layer, and spread the top with frosting leaving a 1/4" border. Place the final layer on top, and spread frosting evenly over the top and sides, creating pretty swirls as you go, if you like. Then, go crazy with those sprinkles!

Chocolate Buttercream Frosting

Recipe adapted from The Cake Bible by Rose Levy Bernanbaum

10 ounces bittersweet or semisweet chocolate, roughly chopped or chips
2 cups unsalted butter, room temperature (softened)
4 large egg whites, room temperature*
1 cup granulated sugar

Using a double-boiler to melt chocolate: Improvise a double-boiler, (if you don't have one,) by filling a saucepan 1/4 full with water and placing a heat-safe bowl over the pot. (The bowl should not touch the water.) Bring the water to a boil, then reduce the heat to low to keep a steady simmer. Place the chocolate into the bowl and stir frequently, until the chocolate begins to melt. Remove from heat when half the chocolate is melted, and continue to stir, using residual heat to complete the melting. The chocolate should be completely smooth. (If the chocolate is not completely melted, return the chocolate to the double-boiler for 30 seconds and continue stirring.)

Using a microwave to melt chocolate: Microwave chocolate in a microwave-safe bowl on high for 15 seconds. Stir well. Repeat until chocolate is half-melted and stir, using residual heat to complete the melting. If chocolate cools before chocolate is completely smooth, return to the microwave for another 15 seconds and continue to stir until chocolate is fully melted.

In a mixing bowl beat the butter on medium speed until smooth and creamy.

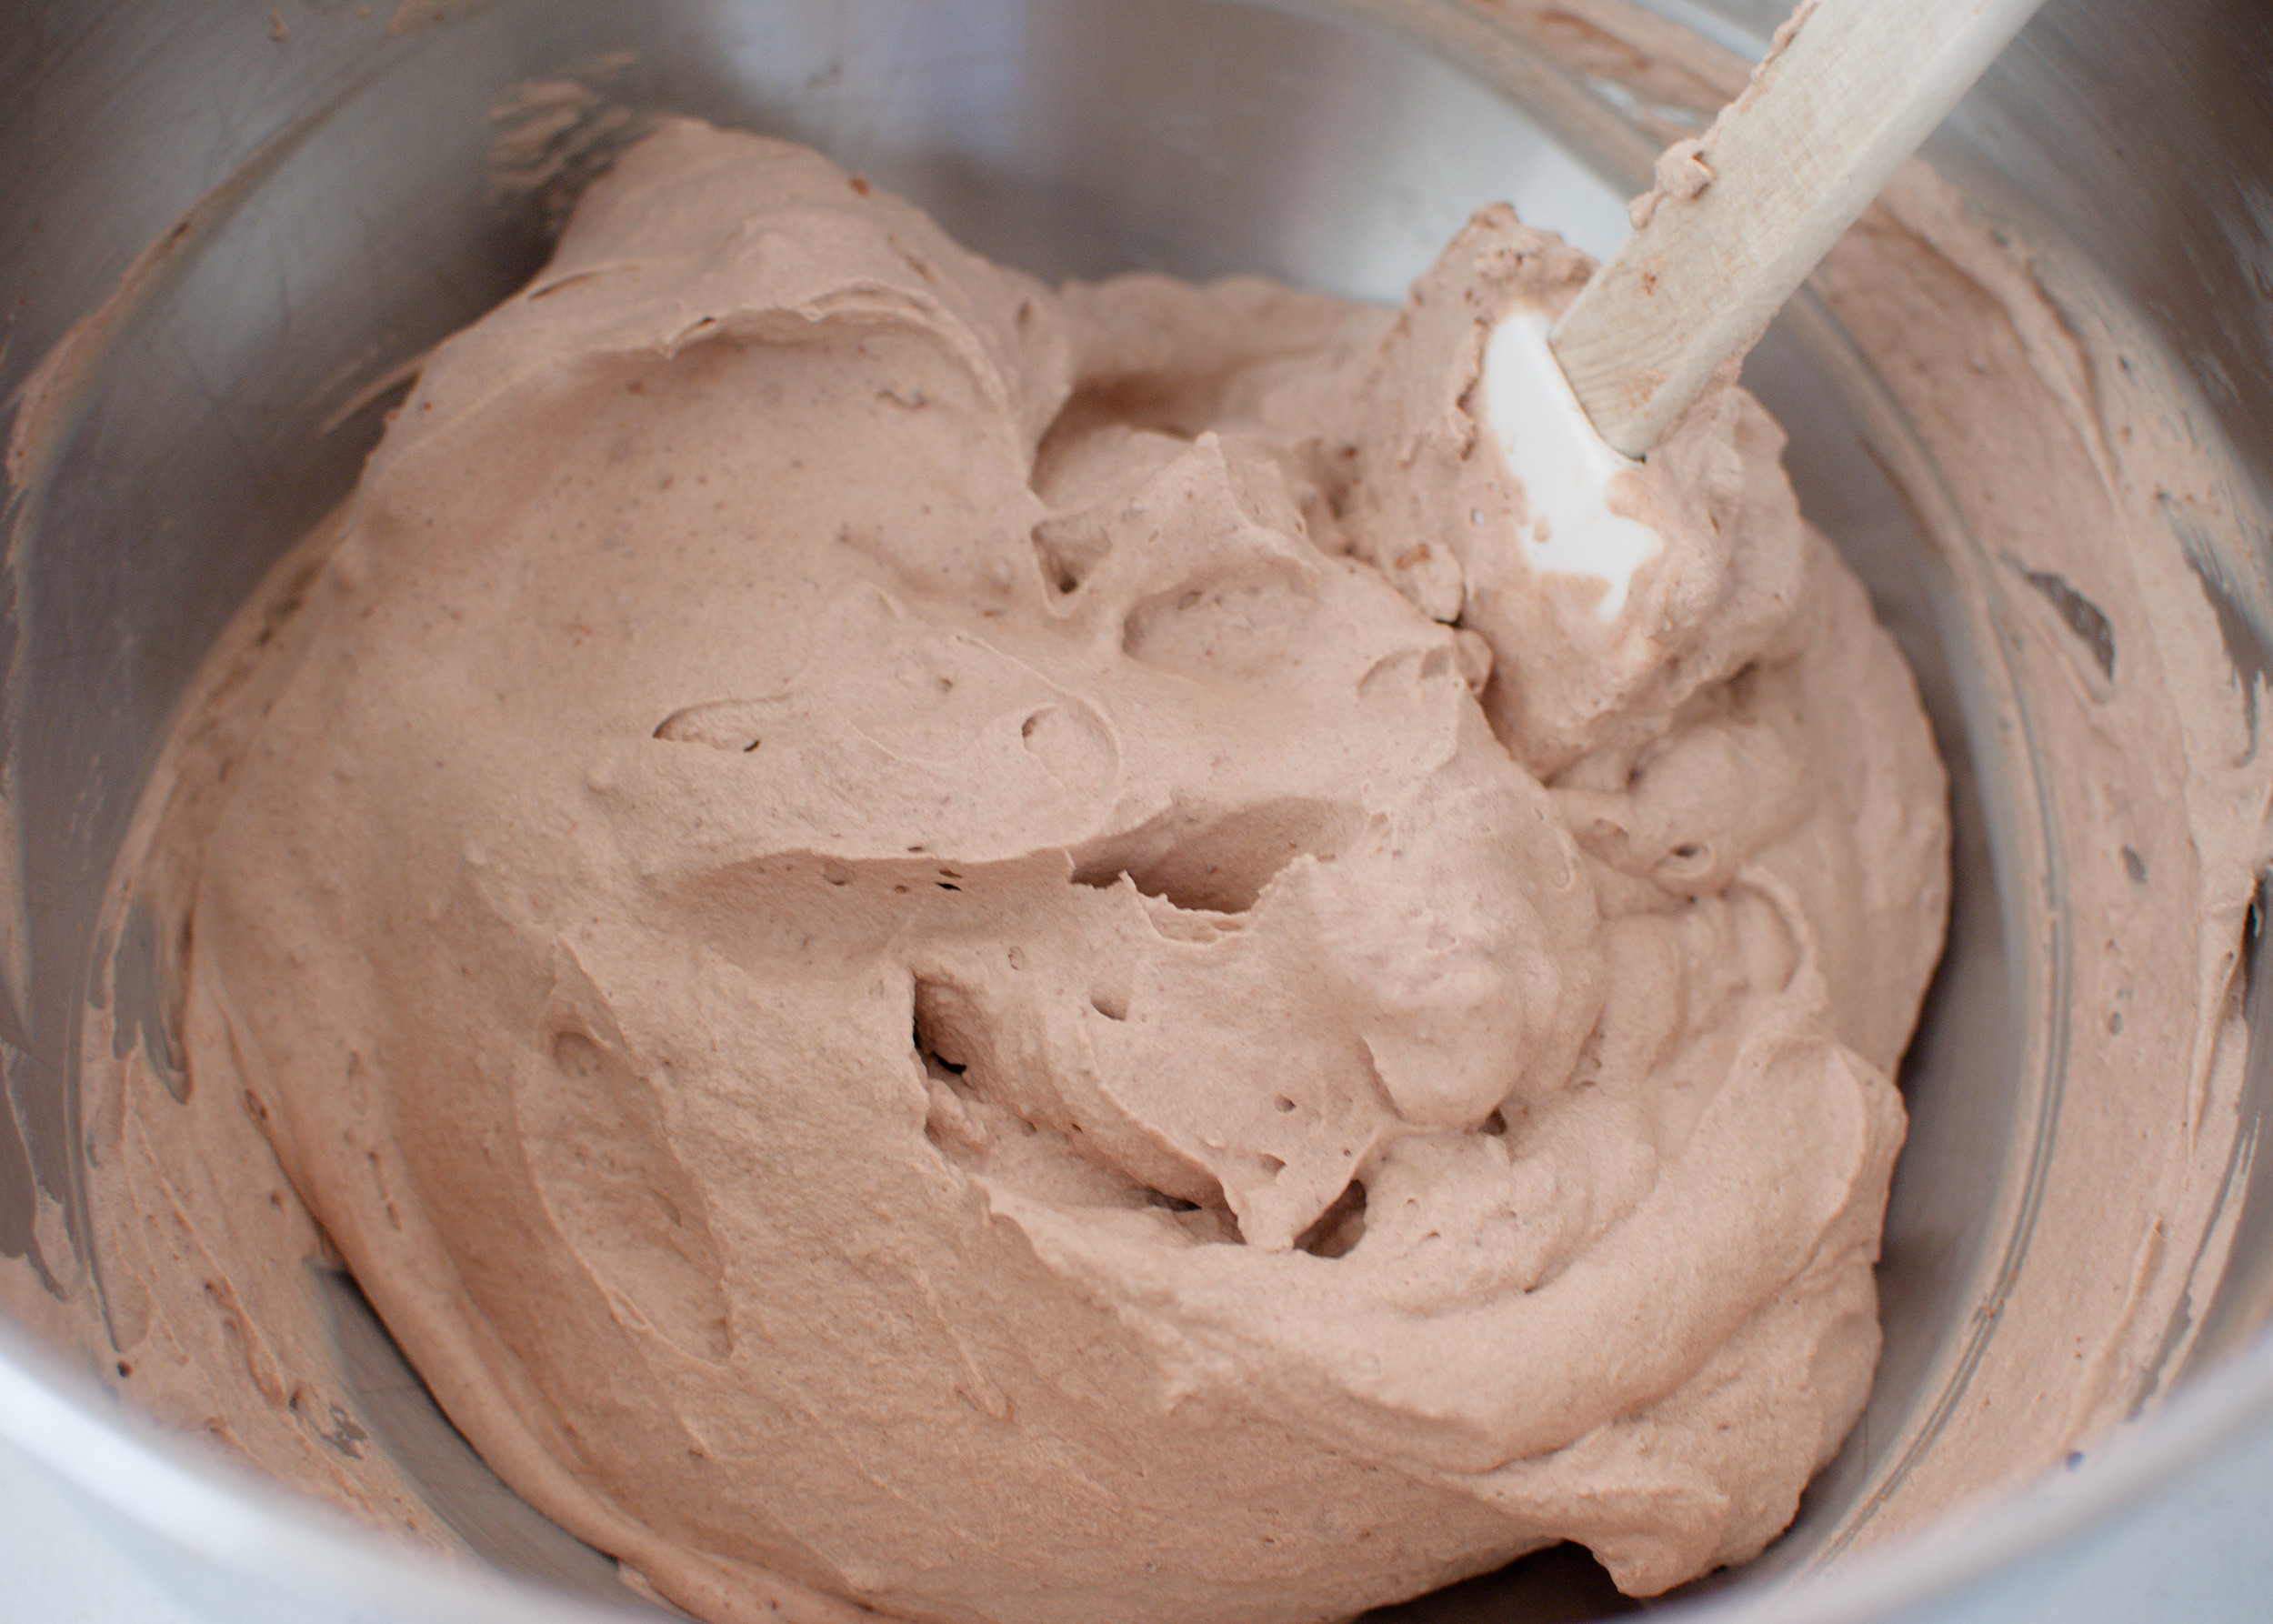
In the bowl of an electric mixer, beat the egg whites using the whisk attachment, (if you have one,) using a high speed setting, until soft peaks form when the beater is raised. Gradually beat in the sugar until stiff peaks form when the beater is raised slowly. Beat in the butter by the tablespoon. If the mixture looks slightly curdled, increase the speed a little and beat until smooth before continuing to add more butter. Add the melted and cooled chocolate all at once and beat until smooth and uniform in color. Use immediately or place in an airtight bowl. Re-beat frosting at room temperature to restore texture.

*Contains raw egg: Please be aware that consuming raw and lightly cooked eggs exposes a slight risk of salmonella or other food-borne illness. To reduce this risk, use fresh, properly refrigerated, clean grade A or AA eggs with intact shells, and avoid contact between the yolks or whites and the shell.

Polenta Cake with Olive Oil and Lemon by Amy Cantu

Print Friendly and PDF

I had this lemony, moist, squidgy, lightly gritty polenta cake stuck in my head. I knew just how I wanted it to look, taste, and feel in my mouth, but I was having trouble actually baking it. This one took three tries, but the results were totally worth it. I tried it as a loaf cake first, but the middle kept sinking, and the top was unattractively mottled dark brown. The Polenta Cake might seem plain Jane and suspiciously like cornbread, but I promise that its humble looks are deceiving. The olive oil and yogurt keep this Polenta Cake moist and just a bit dense, the lemon lends a bright citrusy flavor, and the polenta adds texture and earthiness. I love it on its own as a snack cake, (I'm determined to make "snack cake" a cake genre,) drizzled with a lemon glaze, in a trifle, or as it is here - topped with billows of lightly sweetened whipped cream and ripe summer fruit. The genius of Polenta Cake with Olive Oil and Lemon is in its simplicity.

Notes: Polenta Cake with Olive Oil and Lemon is perfect for making a Berry Trifle because it's sturdy and textured enough to hold together under the many layers, but also moist and delicious all on its own. If you're not feeding a crowd, the cake can just as easily be sliced into squares and topped with whipped cream (or ice cream!) and any in-season fruit. In the winter, it would be lovely with poached pears or an apple-cinnamon compote - YUM!


Active time: 5 minutes, Inactive time: 35 minutes
Yield: One 9 x 9" cake

1 cup flour
1/2 cup polenta
2 teaspoons baking powder
1/2 teaspoon kosher salt
1 cup plain whole-milk yogurt
1 cup granulated sugar
3 eggs
2 teaspoons grated lemon zest
1/2 teaspoon vanilla extract
1/2 cup olive oil, plus extra to grease the cake pa

Preheat oven to 350 degrees F. Grease a 9 x 9" metal cake pan with cooking spray or olive oil. Line the bottom and two sides with parchment paper, and grease the parchment paper again. Set aside.

Whisk together flour, polenta, baking powder, and salt in a medium bowl.

In a separate large bowl, whisk together yogurt, sugar, eggs, lemon zest, vanilla, and olive oil. Slowly whisk the dry ingredients into the wet ingredients, until just mixed together with no dry spots.

Pour cake batter into the prepared pan and bake for 30-35 minutes, or until a toothpick poked into the center of the cake comes out clean. Let cool completely before slicing. Cut into squares and serve with whipped cream and berries or use to make Berry Trifle.

Recipe inspired by Ina Garten's Lemon Yogurt Cake.

Berry Trifle by Amy Cantu

Print Friendly and PDF

It's summer! Finally! I'm basking in the warmth of the sun. I'm in love with all the brightly colored produce at the farmer's market. The berries are local, sweet-as-candy, and a deep, ripe red. The blueberries pop in my mouth, surrendering their sweet juices. The raspberries are vibrantly tart and sweet. It's the perfect time to have a barbecue (or at least a supper out on the patio,) to celebrate the season! I need a simple dessert that tastes like the height of summer, and this red, white, and blue-hued Berry Trifle is just that. Fresh vibrant berries, clouds of whipped mascarpone cream, and squidgy pieces of cake come together in 15 minutes to create this dreamy Berry Trifle: An impressive, layered masterpiece that tastes as good as it looks. 

Notes: The only special equipment needed is a trifle dish (or a large glass bowl), so that the beautiful layers can be seen. Purchased pound cake or angel food cake make this a no-bake dessert, but Polenta Cake with Olive Oil and Lemon is perfect for this berry trifle and makes it extra-special. It's easy to make - just stir together the ingredients and bake. The Polenta Cake is extra moist from the olive oil and holds up well in the trifle layers thanks to it's sturdy texture from the polenta.


Time: 15 minutes
Servings: 8-10

3/4 pound raspberries
3/4 pound strawberries, tops removed and sliced
3/4 pound blueberries
1/4 cup granulated sugar, divided use
1/4 cup fresh orange juice, divided use
One recipe Polenta Cake with Olive Oil and Lemon or 9" loaf purchased pound cake, cut into 1-inch cubes
1/2 cup confectioners' sugar (powdered sugar)
1 teaspoon vanilla extract
1 pound (16 ounces) mascarpone cheese, at room temperature
Grated zest of 1 lemon
2 cups heavy cream
2 tablespoons seedless raspberry jam or currant jelly

Combine strawberries, 2 tablespoons sugar, and 2 tablespoons orange juice in a bowl. In a separate bowl, combine raspberries with remaining 2 tablespoons sugar and 2 tablespoons orange juice. Set bowls aside.

Using an electric mixer, whip together confectioners' sugar, vanilla extract, mascarpone cheese, and lemon zest at medium speed until well combined. Add heavy cream and continue to mix at high speed until the mixture is fluffy like whipped cream.

To assemble the trifle: Arrange 1/3 of the cake cubes into a 13-cup trifle dish (or a large glass bowl). Next, pour in the strawberries and spread to make an even layer. Spread 1/2 of the whipped mascarpone cream over the strawberries in an even layer. Arrange half of the remaining cake cubes evenly over the cream layer. Top the cake with all the raspberries to create another even layer. Spread the remaining whipped mascarpone cream over the raspberries. Add the remaining cake cubes evenly over the cream. For the final layer, distribute the blueberries evenly over the top.

Melt the jam in a small dish in the microwave or in a small saucepan over low heat. Using a pastry brush, anoint the blueberries with the melted jam to give them a sweet, glossy glaze. 

Cover and refrigerate for at least 1 hour before serving.

Coconut Tres Leches Cake by Amy Cantu

Print Friendly and PDF

I have a long affair going with coconut, and I doubt it will ever end. I love the sweet, earthy, tropical flavor, and I especially love it in the form of cake. This Coconut Tres Leches Cake is not fussy - it's homey and comforting, swathed in whipped cream and swimming in a pool of sweetened milk. The addition of coconut milk as one of the "tres leches" (three milks) and toasted coconut adorning the top make me swoon. My confession is this: I love this cake straight out of the fridge the next morning for breakfast. Preferably still in my PJs and in bed. The cake stays moist from all the milk, but the chilled cake is a little more dense. It's magical. 

Notes: This is a wet, dense cake. Do not be frightened when you pour the milks over the cake, and the cake looks like it's drowning. As the cake sits, it will absorb most of the milk. There will be a small amount of milk left that has not soaked into the cake, and that is exactly what you want. As I've mentioned, I love this cake cold, but it is also delicious (and proper) to eat it at room temperature. I made zero changes to the original recipe, because in my mind, it's perfect. The bit of lime zest brightens the cake up a bit, and really, it's just the perfect Coconut Tres Leches Cake.


Recipe from Food52.

Time: 1 hour, plus time for cake to cool
Yield: 1 9-inch by 13-inch cake

1 1/4 cups all-purpose flour
1/4 cup coconut flour
1 teaspoon baking powder
1/2 teaspoon salt
1/2 cup unsalted butter (1 stick), plus more for the pan
1 tablespoon honey
5 large eggs
3/4 cup sugar, plus 2 tablespoons
1 teaspoon vanilla
1 13.5-ounce can coconut milk
1 14-ounce can sweetened condensed milk
1 1/2 cups whole milk
1 pint heavy whipping cream
Zest from 1 lime, finely grated
1 cup sweetened shredded coconut

Heat the oven to 350. Butter a 9x13 baking dish. Melt the butter and honey together and set aside.

Whisk the flours, salt, and baking powder together in a medium bowl.
Beat the eggs, sugar, and vanilla in a larger bowl until everything lightens in color and is nice and smooth. Now on lower speed or with a gentler arm, beat in the flour in 2 additions until the batter is just smooth. Fold in the butter and mix until it is just fully incorporated. 

Pour the batter into the pan and bake 25-30 minutes, rotating cake once halfway through, until it is golden and a toothpick comes out clean. This is going to look like a sort of shallow cake. Don't worry.

While the cake bakes, mix the three milks (tres leches) together and also spread the coconut out on a baking sheet. When the cake comes out, pop the coconut into the oven to toast. Check and stir every 3-4 minutes. It should only take 8-9 minutes to get golden brown.
Use a toothpick to poke little holes all over the warm cake. Now pour the milk over it -- slowly. It is going to look like a LOT of milk and you are going to want to panic. Don't. My cake actually floated up like a raft briefly! But pour it all on and wait -- 95% of that milk is going to adsorb into the cake and the rest is that lake you are looking for. Allow the cake to cool completely, and the toasted coconut as well.

Now whip the cream, 2 tablespoons of sugar, and lime zest together until stiff peaks form. Spread the cream over the cake, then sprinkle the coconut over top. You can dig in right now, our keep it in the fridge for 3-4 days, though I doubt it'll last that long.

Cookies and Cream Ice Cream Cake by Amy Cantu

Print Friendly and PDF
Cookies and Cream Ice Cream Cake

Ice cream cake is sooo much easier to make than a tiered cake baked in the oven. It looks impressive and tastes divine, because much like cheese, who doesn’t like ice cream? My family declared this “the best birthday cake ever”, which is almost an insult because of how little effort it took. The hardest part about this “cake” is starting at least a day in advance, so that the layers have ample time to freeze. I love the layered look of the cake, once it’s sliced. Depending on the flavor of ice cream you choose, this ice cream cake is just as comfortable at an elegant dinner party, as it is at a kid’s (or husband’s) birthday party!

Developed from Bon Appetit.

Notes: Variations of this ice cream cake are endless. You can change the ice cream flavor to just about anything that would go with chocolate. (Peanut butter ice cream topped with peanut butter cups?! A berry flavored ice cream and then top with fresh berries?! Or how about Dulce de Leche ice cream and then drizzle with caramel sauce? YUM!). You could also change the chocolate cookies to shortbread or vanilla wafer cookies and do a citrus flavored ice cream. Modify the whipped cream topping by substituting a teaspoon of lemon or orange zest for the cocoa powder. Now you have a summery dessert!


Time: 30 minutes (not including freezing time)
Servings: 12

52 chocolate wafer cookies, such as Famous Chocolate Wafers (about 12 ounces), broken into pieces, or chocolate cookie crumbs
6 tablespoons unsalted butter, melted
2 quarts Cookies and Cream ice cream, slightly softened
2 cups chilled whipping cream
1/2 teaspoon vanilla extract
3/4 cup powdered sugar
1/3 cup unsweetened cocoa powder
Chocolate sandwich cookies, crushed, for garnish

Blend cookies in food processor until finely ground. Add melted butter; process until crumbs are moistened. (Or if using chocolate cookie crumbs - use a fork to combine crumbs with butter until moistened.) Press crumb mixture onto bottom of 9-inch-diameter springform pan with 2 3/4-inch-high sides. Freeze until firm, about 10 minutes.

Spoon the softened ice cream into the crust-lined pan. Smooth top. Cover with plastic wrap. Freeze overnight.

Combine whipping cream and vanilla in another large bowl. Sift powdered sugar and cocoa over. Using electric mixer, beat until soft peaks form. Spread mixture over top of cake. Freeze until cream is set, at least 1 hour. (Can be made 2 days ahead. Cover; keep frozen.) Sprinkle crushed chocolate sandwich cookies over top of cake. Run knife between pan sides and cake to loosen. Remove pan sides. Using small metal spatula or knife, smooth cake sides. Let cake stand at cool room temperature 10 minutes before serving.