cream cheese

Roasted Jalapeno Grilled Cheese Sandwich by Cynthia Raub

Print Friendly and PDF
jalapeno grilled cheese sandwich

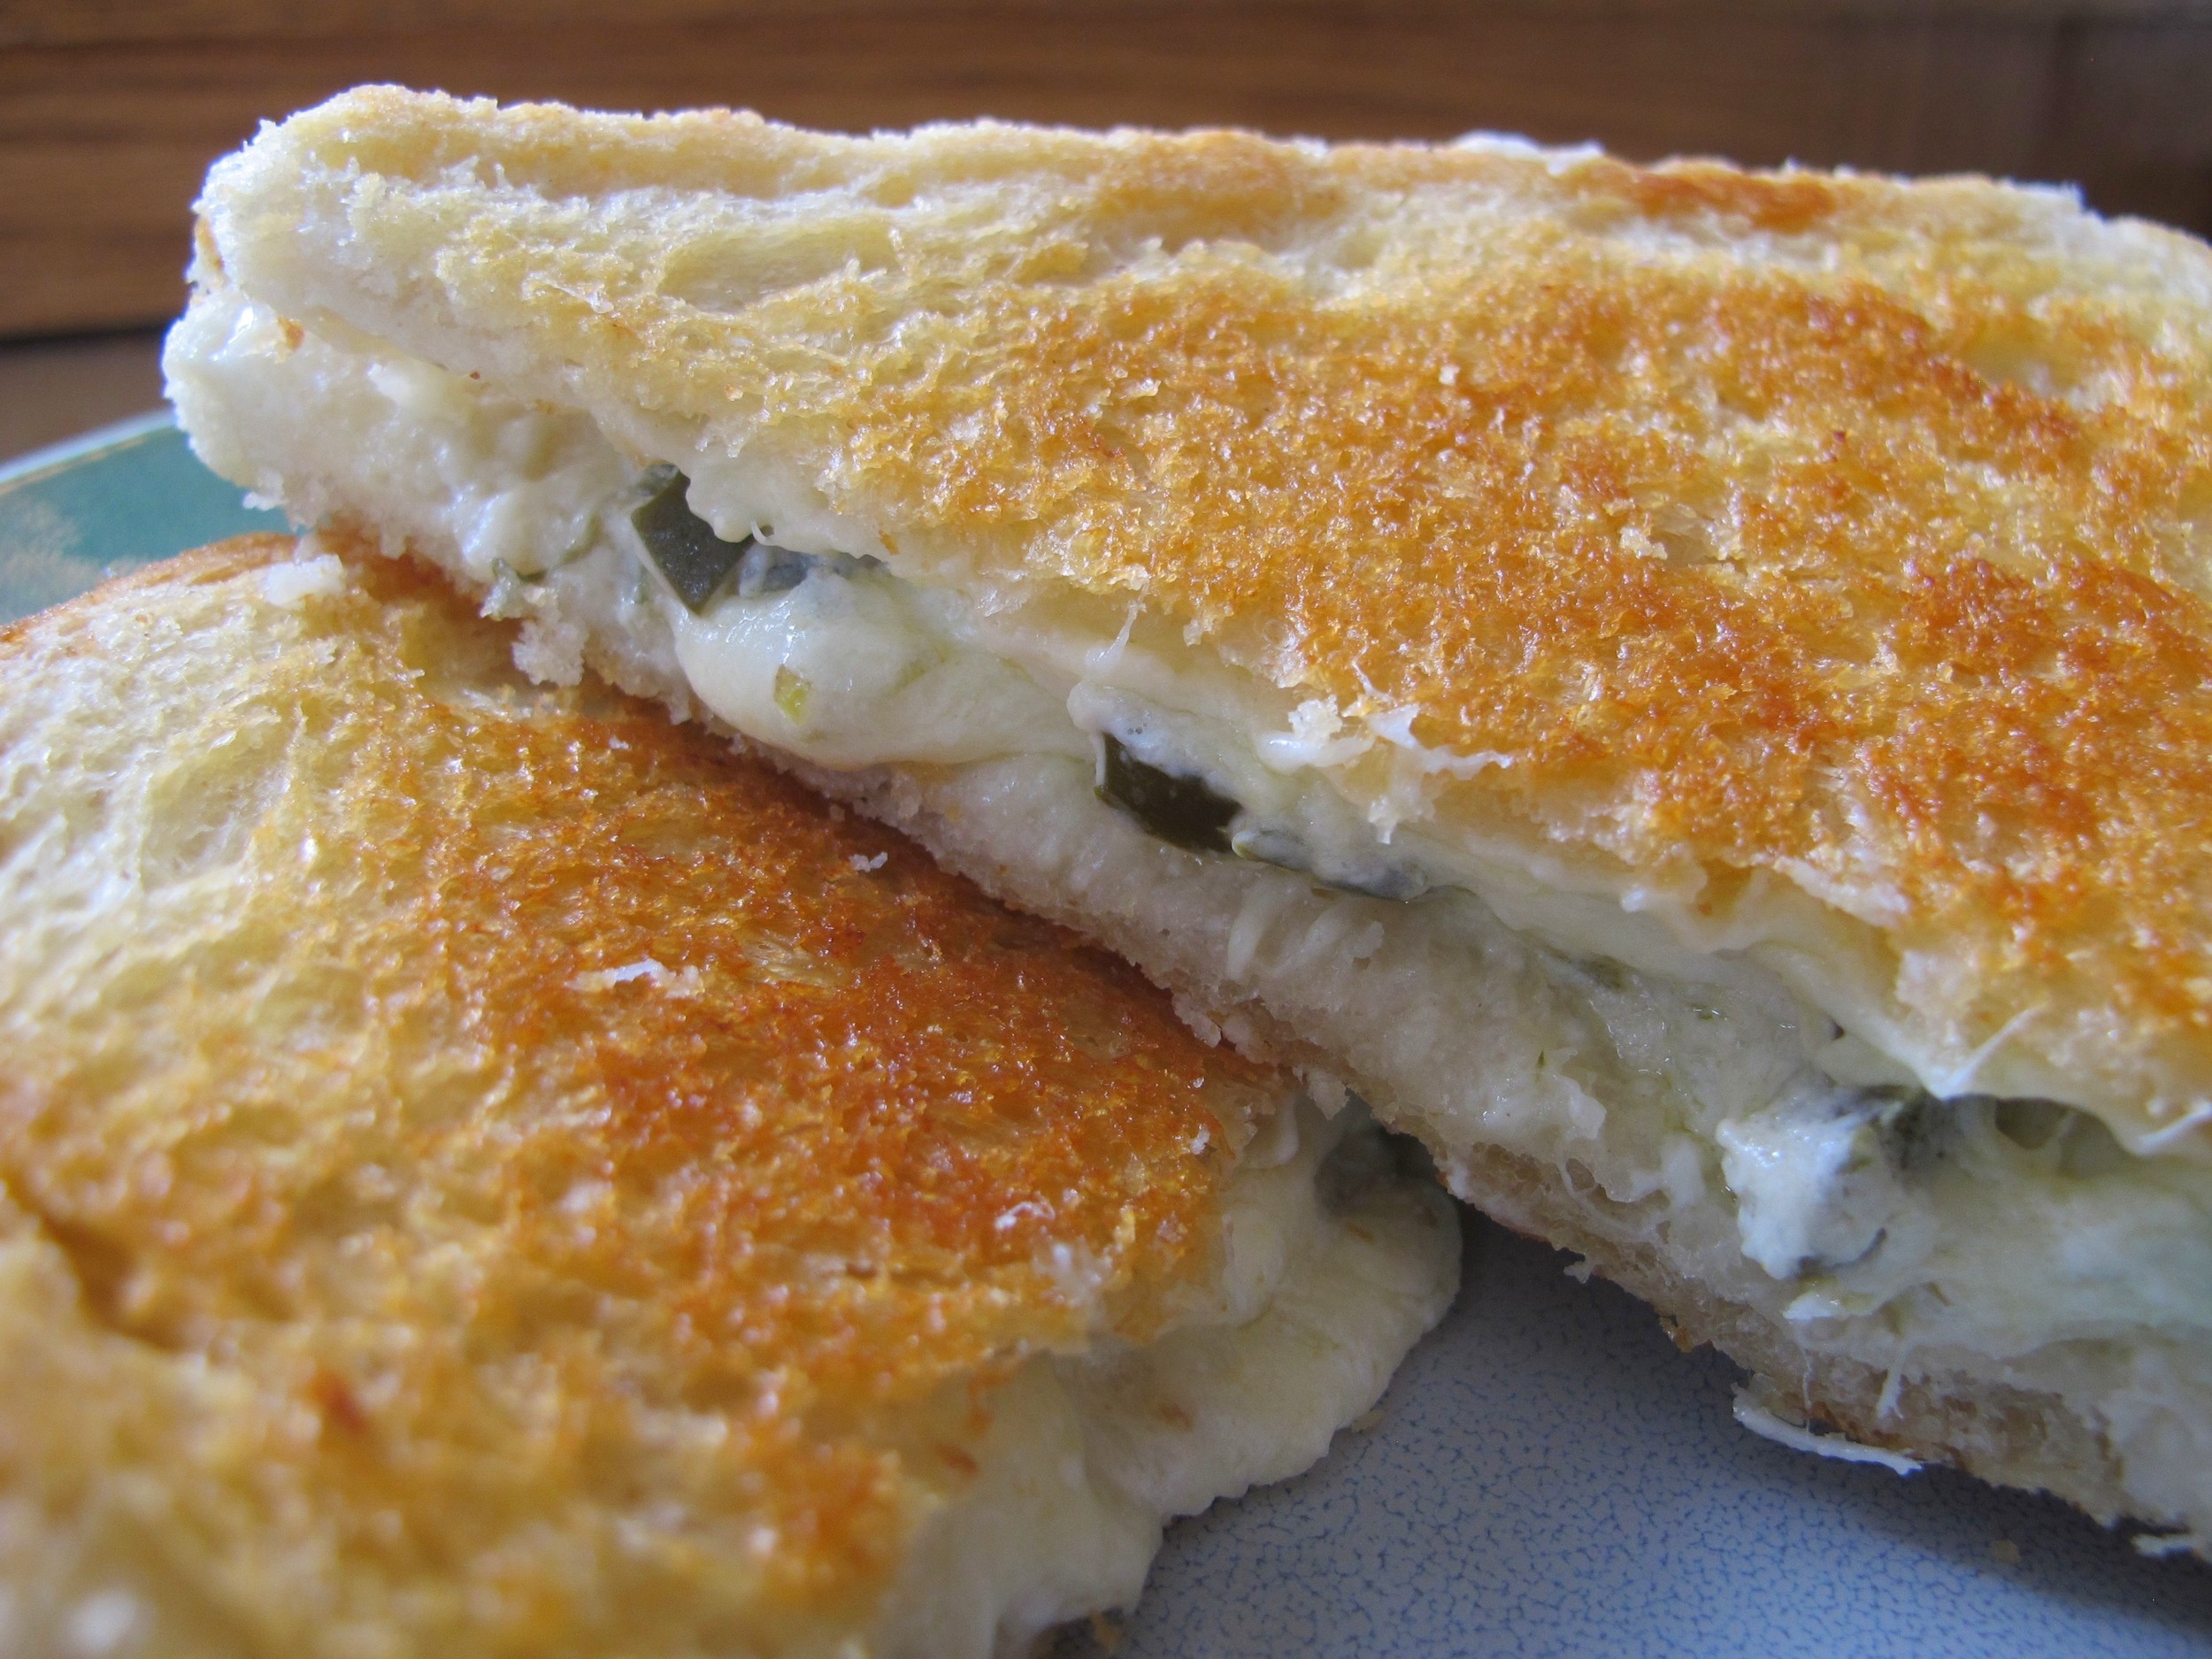
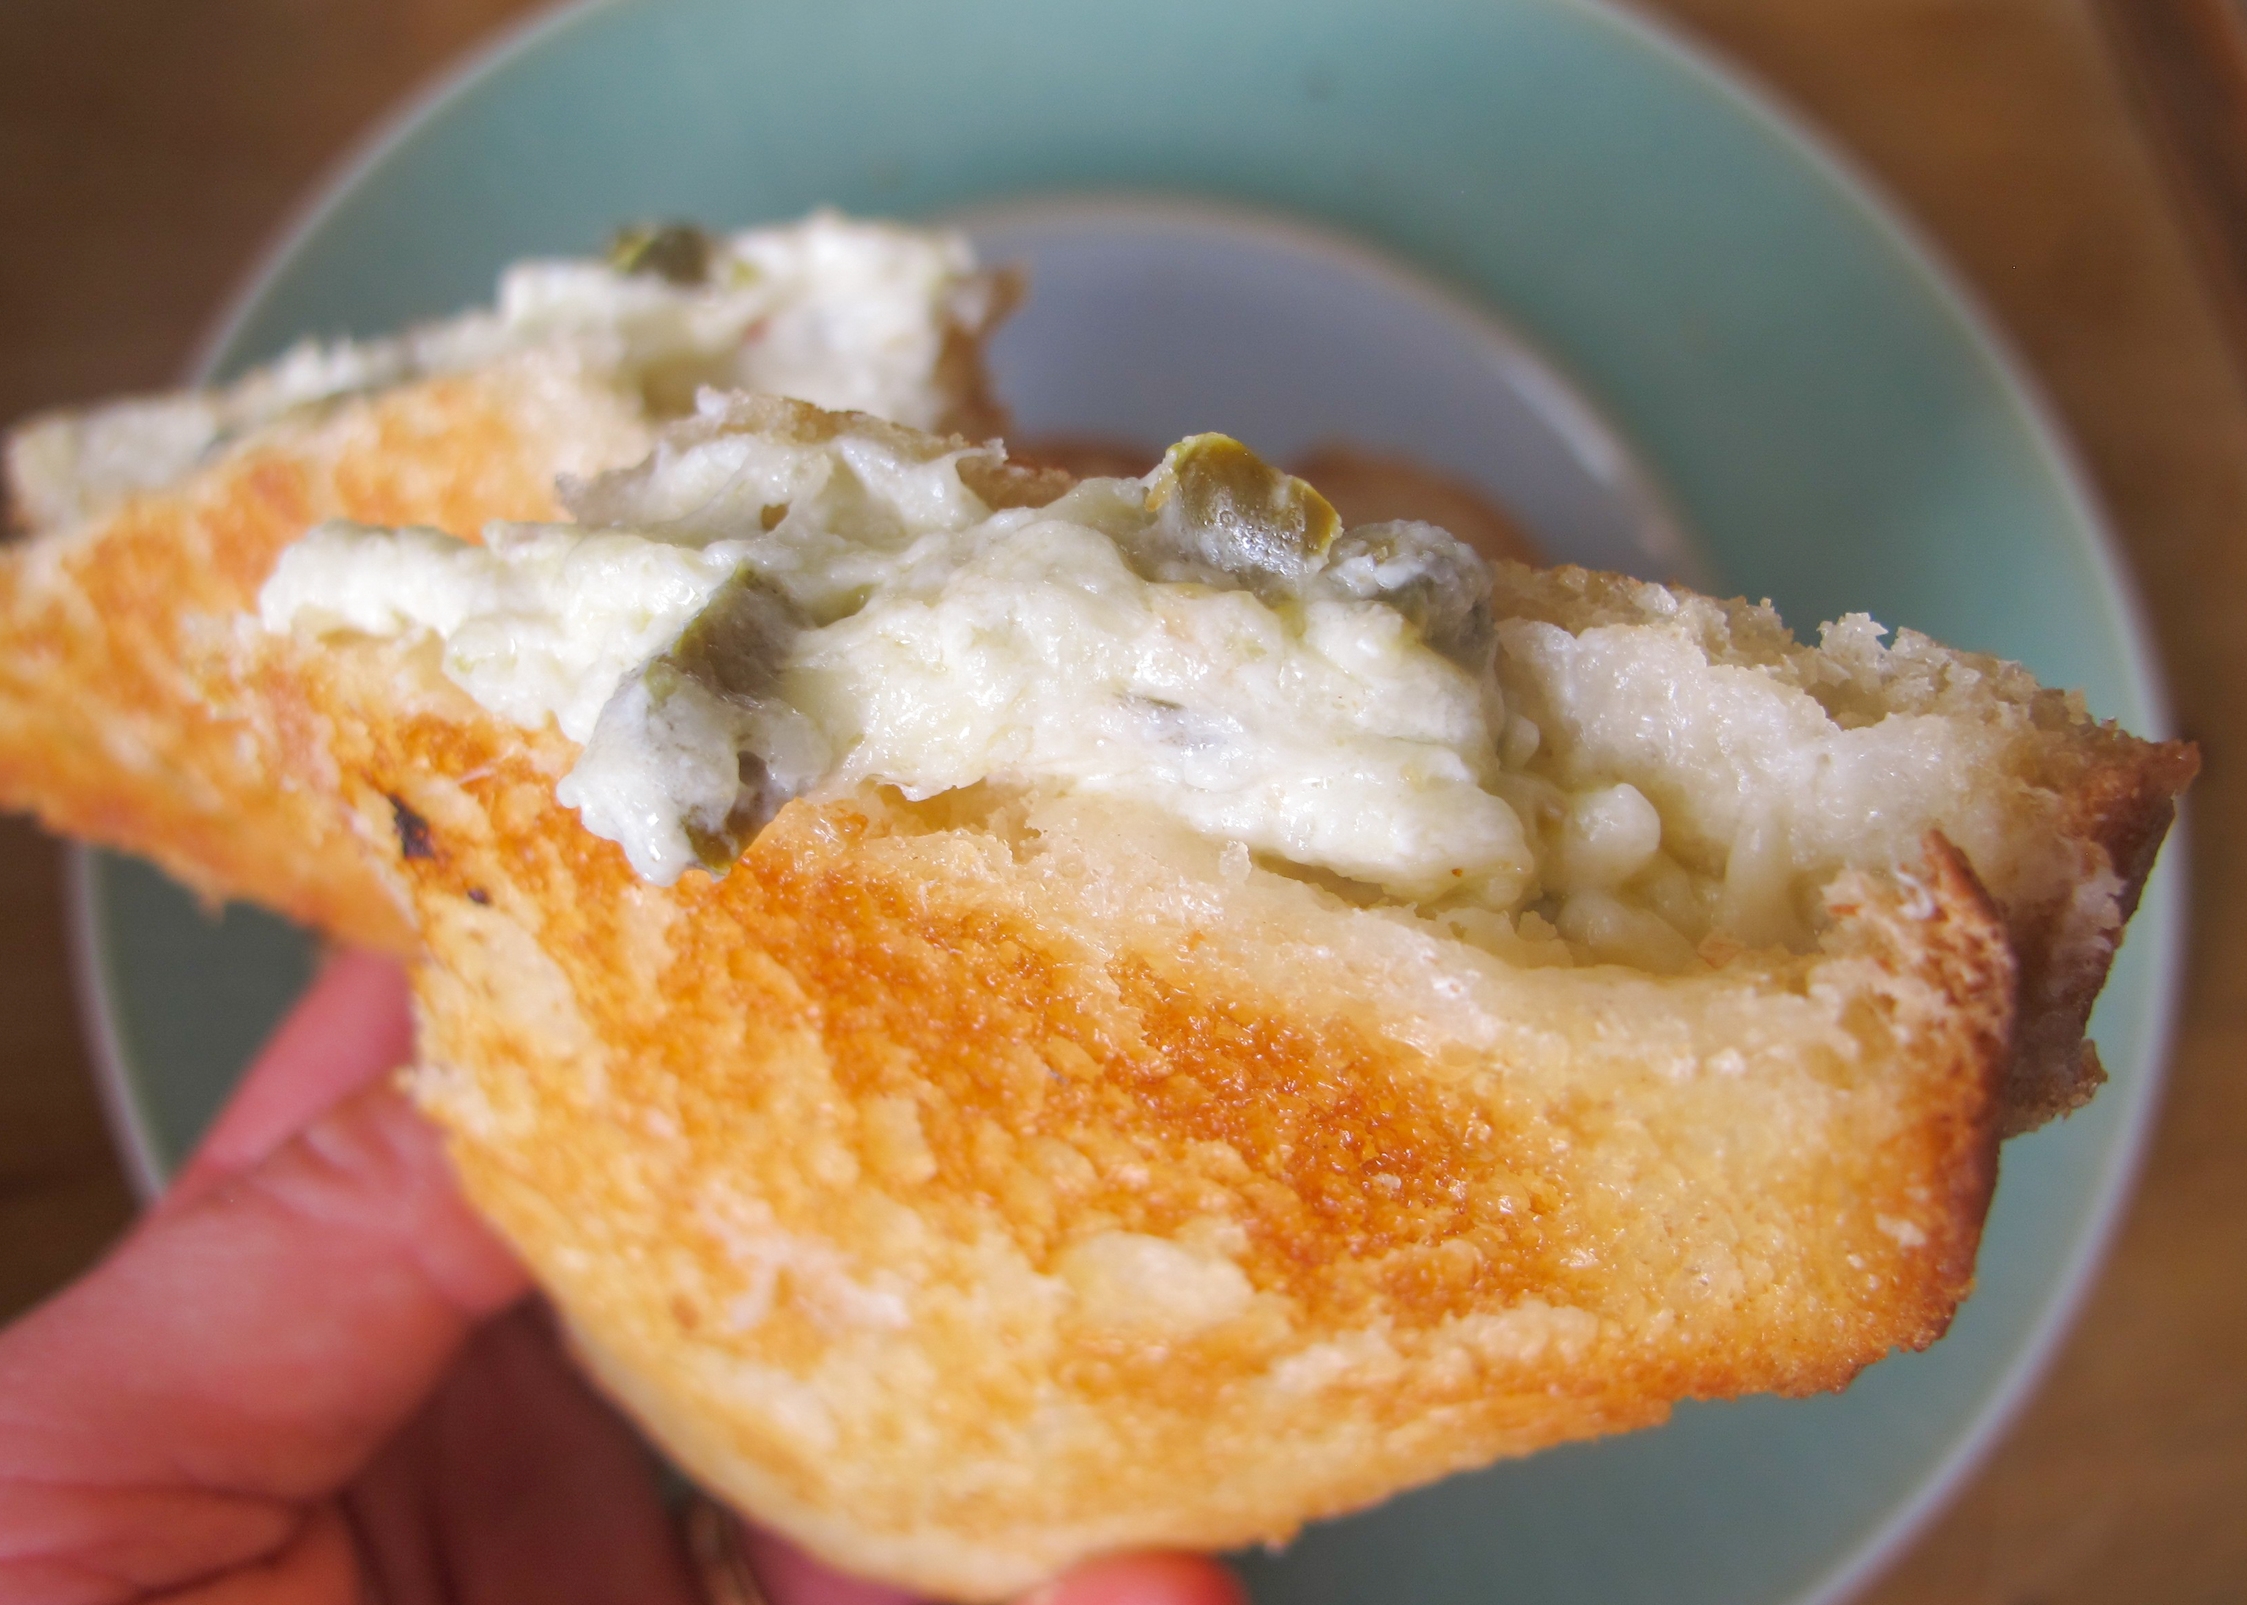
The magic of grilled cheese is found between the two slices of golden and toasted buttered bread - when the cheese oozes from the sides from each bite. Because I was serving these sandwiches an hour after they were cooked on the griddle, I wanted them to have a gooey texture, even when they were room temperature. Thanks to the combination of cream cheese and Monterey Jack cheese these maintained a melty and creamy texture when they were no longer hot. Served alongside the Bacon Jam and Cheddar Grilled Cheese Sandwiches and a refreshing Beet and Cucumber Salad, this slightly spicy, gooey sandwich was richly satisfying for a group of dedicated preschool parents. 

Notes: My jalapeños were extraordinarily spicy, so I deseeded them after roasting. When cooking for a group of people, I like to offer something a dish with a little bit of heat, but nothing too overwhelming. Be sure to taste your spicy peppers to gauge how much to add and what would be appropriate for your crowd.


Time: 1 hour
Servings: 4

1 8-oz package cream cheese
1 cup shredded Monterey Jack cheese
2 jalapeños
1 bunch green onions
1 tablespoon olive oil
1 teaspoon black pepper
Salt to taste
8 slices of white bread
Butter, room temperature

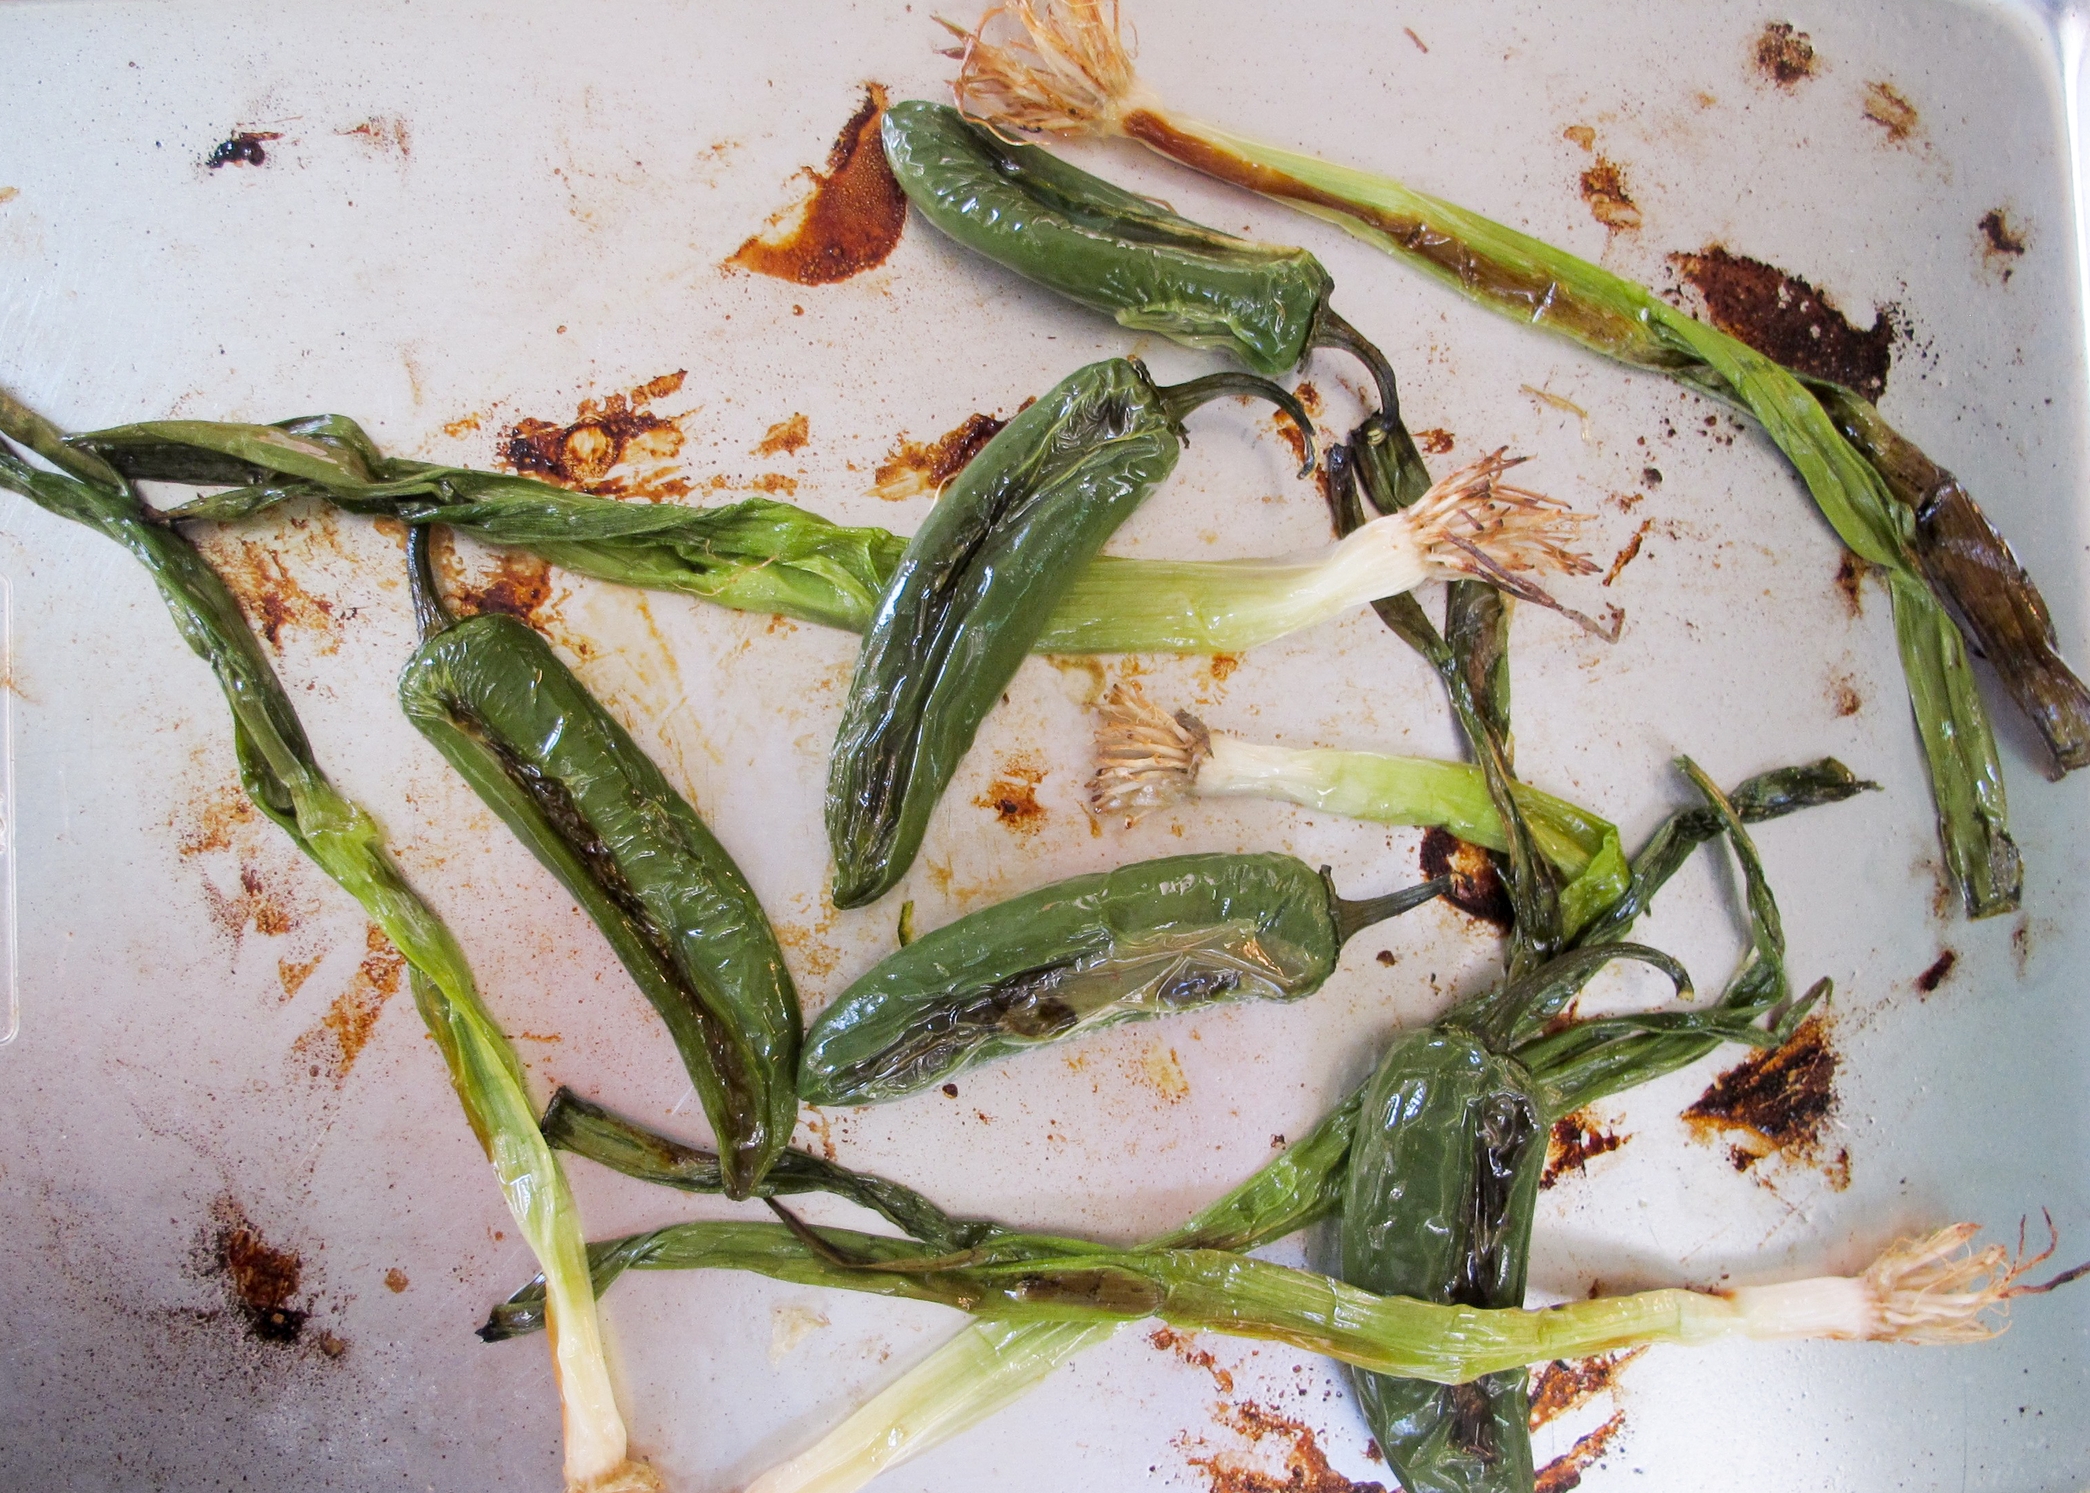
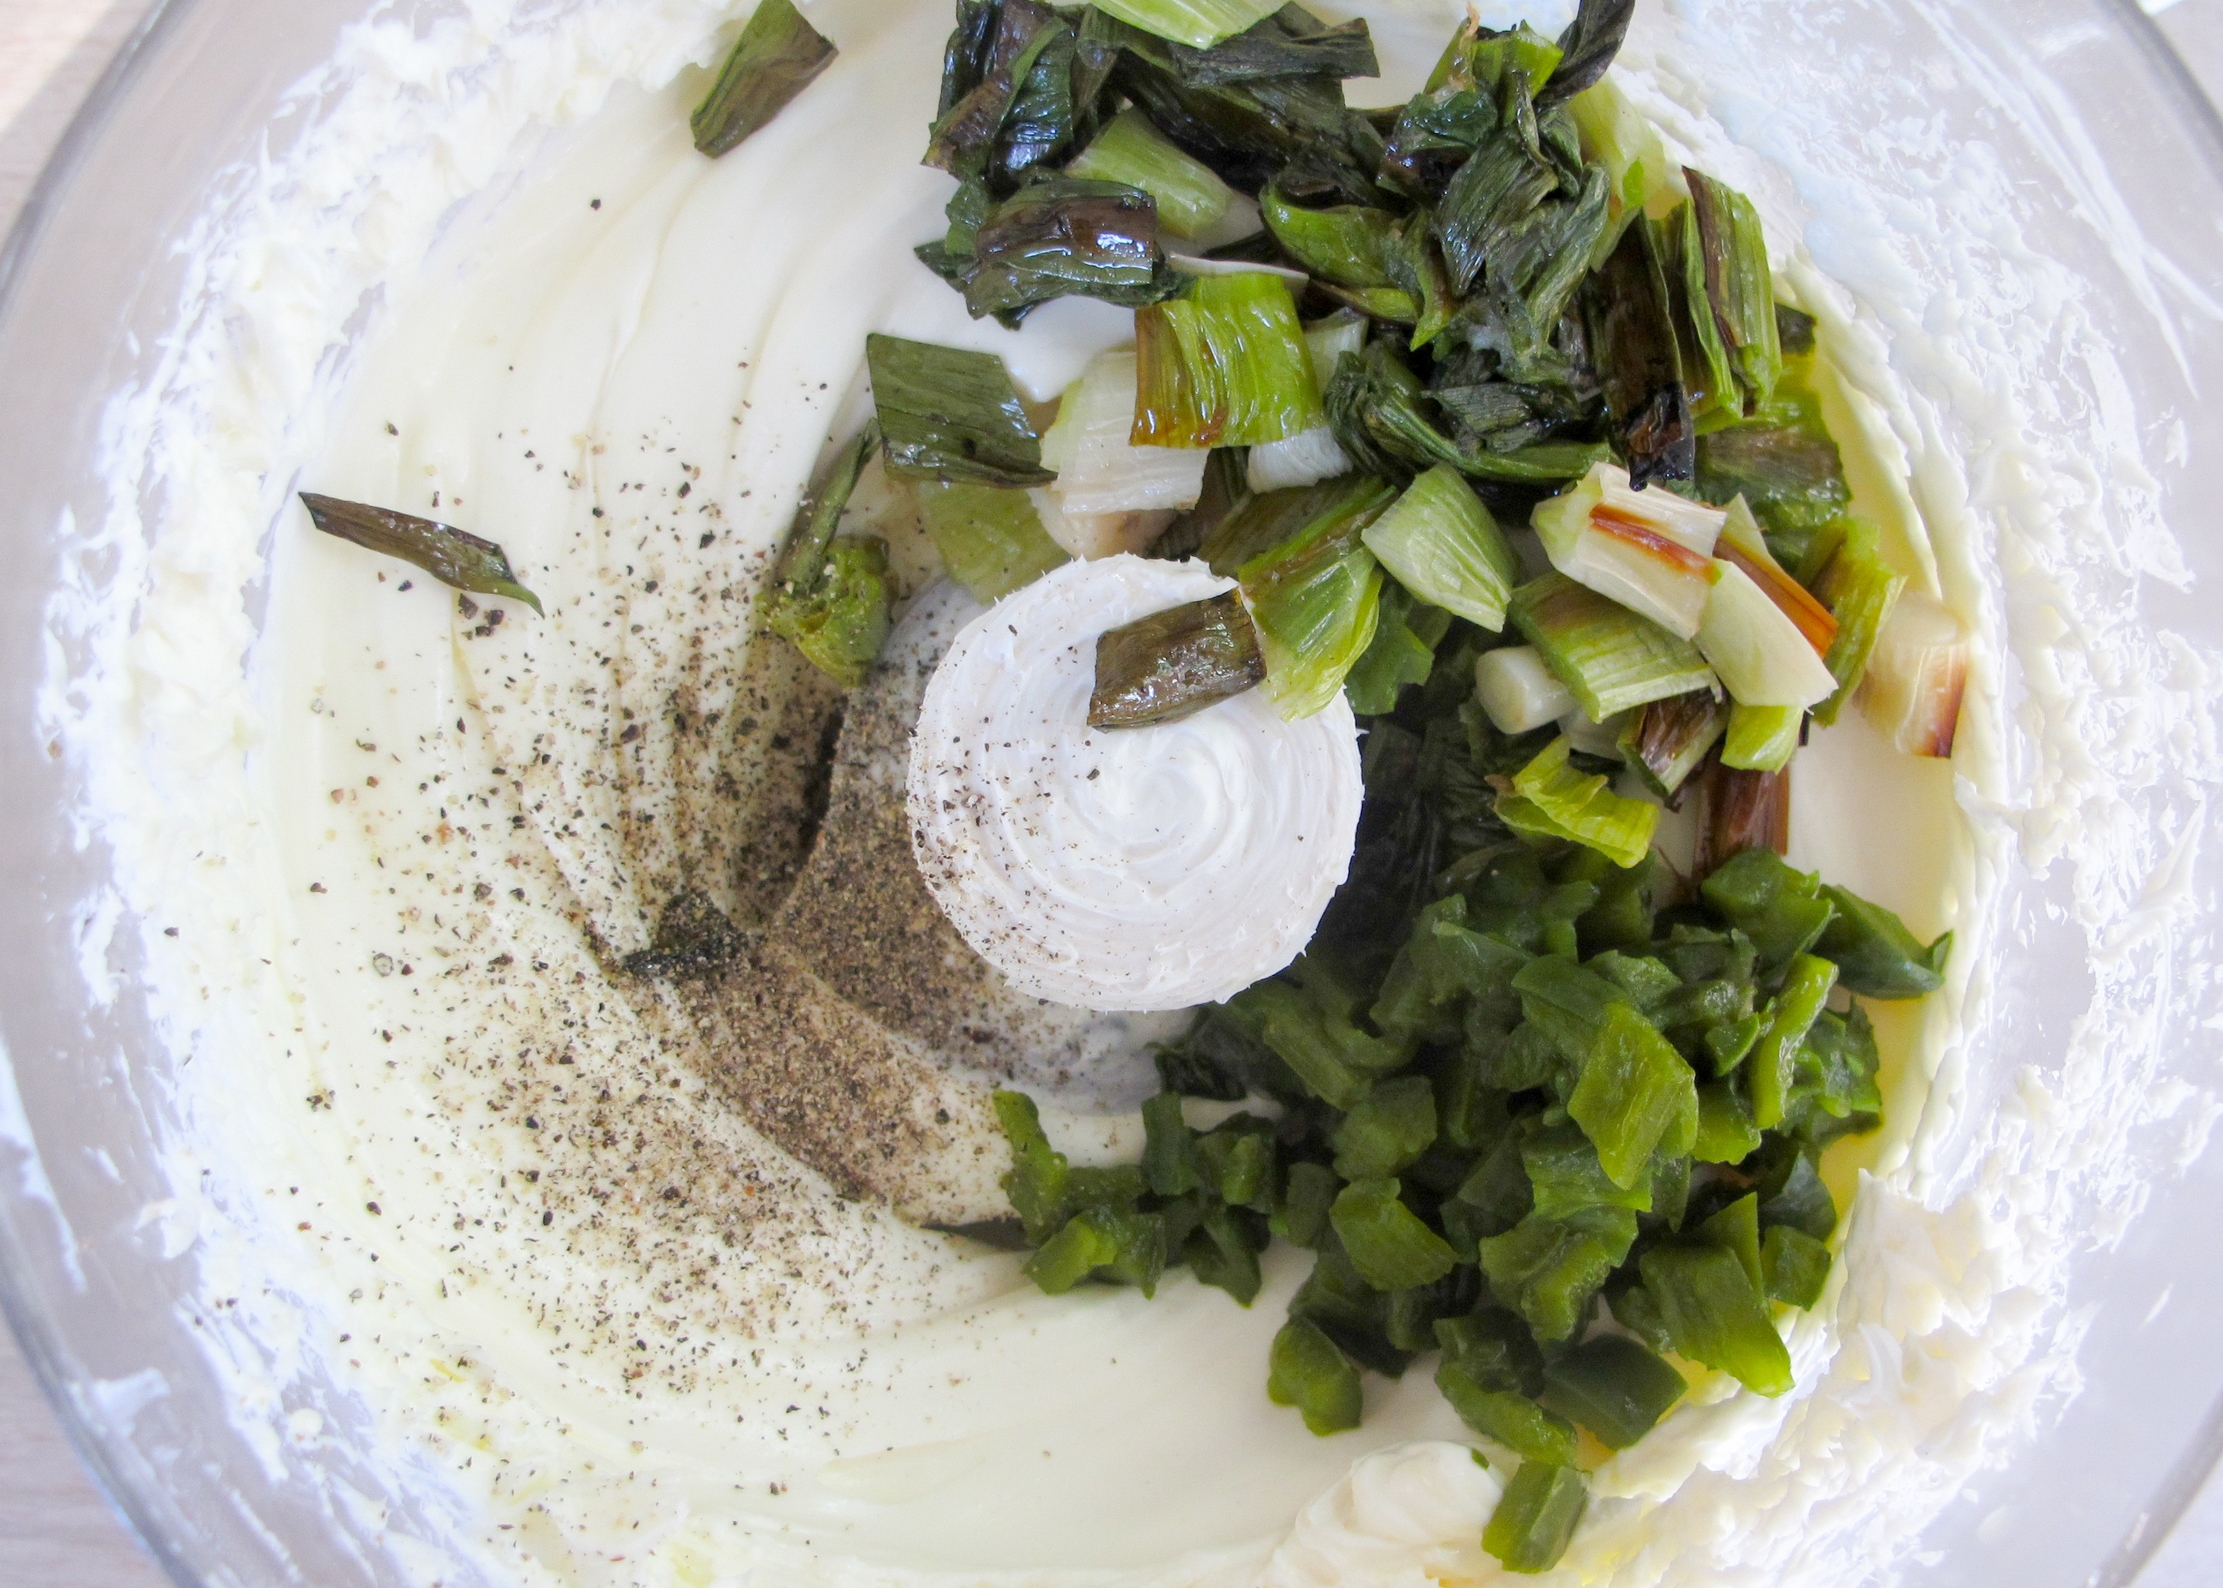
Preheat oven to 350 degrees. Coat jalapeños and green onions in olive oil and a sprinkling of salt and place on a baking pan. Roast jalapeños and green onions for 15-20 minutes until charred and softened. Set aside and allow to cool.

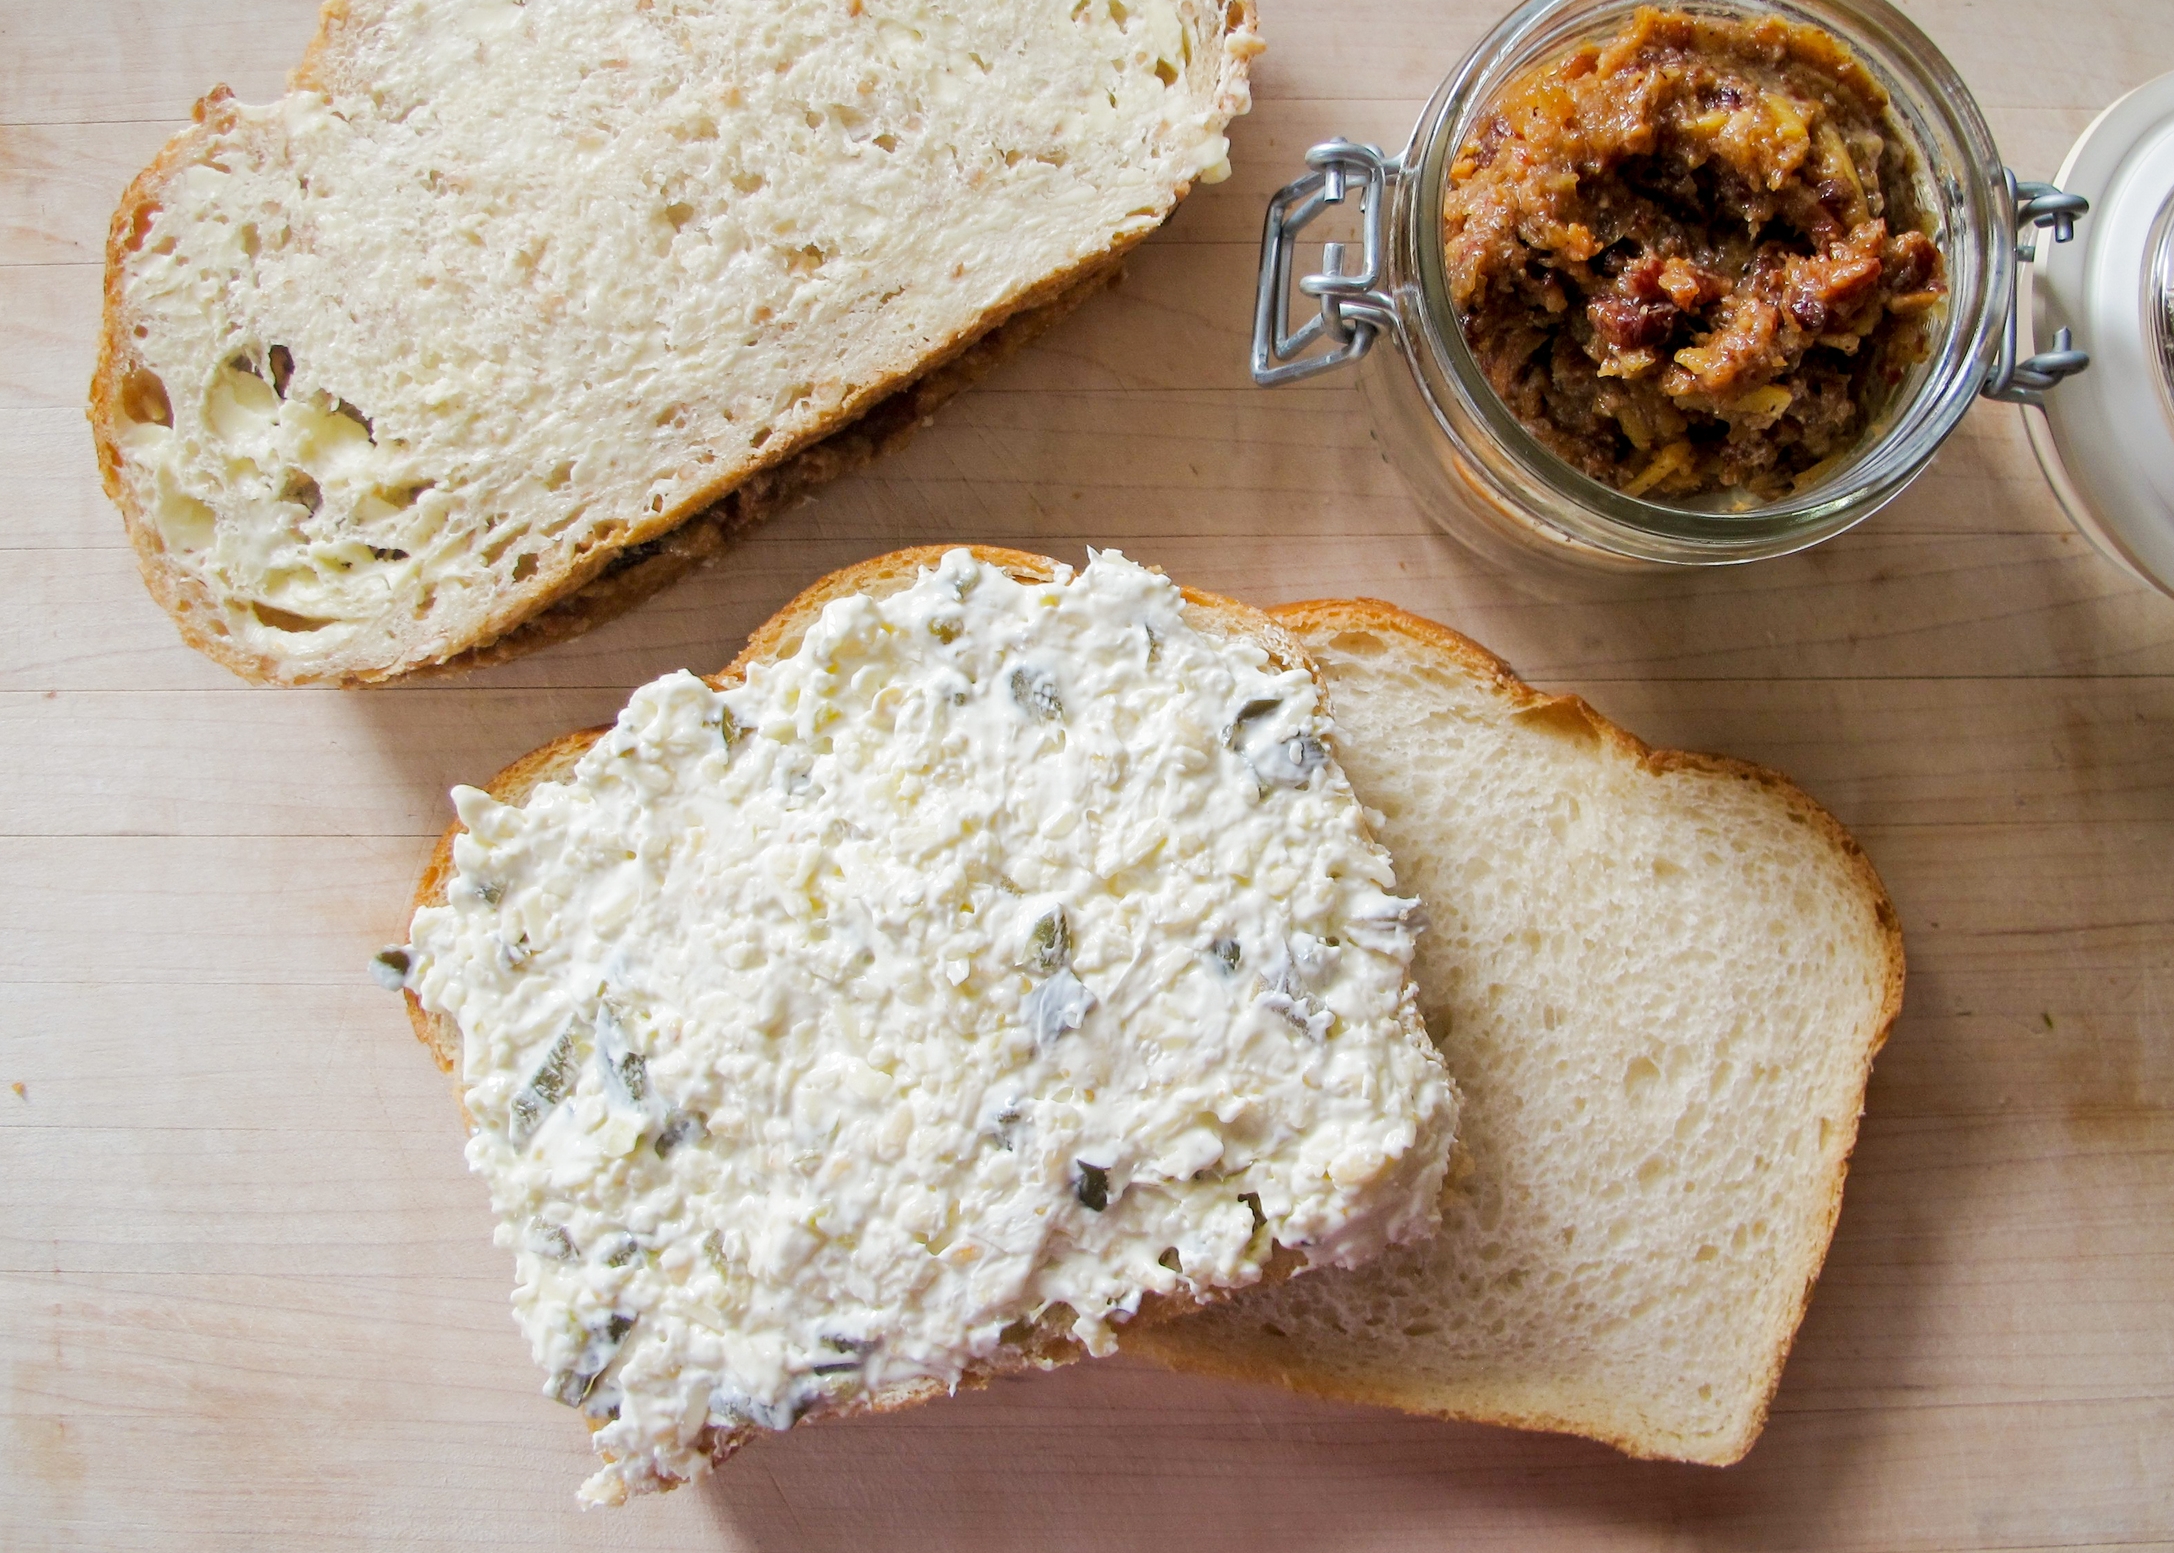
Meanwhile, shred cheese and set aside. Place cream cheese in a food processor with cooled and roughly chopped jalapeños and green onions, and black pepper. Pulse 10 times to combine and until jalapeños and green onions are finely minced. Add shredded cheese and pulse 5 times until combined but not paste-like.

Heat a non-stick griddle to medium-high heat. Spread cheese mixture on a slice of bread, close with another piece of bread. Spread room temperature butter on both sides of the sandwich. Slap the sandwich down onto the griddle and wait for the heavens to sing, cooking about 4-6 minutes per side.

Red Velvet Cheesecake Brownies by Amy Cantu

Print Friendly and PDF
red velvet cheesecake brownies

Cynthia and I knew we wanted to make something “red velvet” for Valentine’s Day, but we weren’t sure what exactly. We brainstormed a long list of “red velvet” baked goods - cakes, cupcakes, mini bundt cakes, cookies, and moon pies - to name a few. The thought of these Red Velvet Cheesecake Brownies made us both simultaneously release a deep sigh and a moan. We knew immediately we had to eat these. I think there is already a cult-following for these Red Velvet Cheesecake Brownies, and I can certainly see why. They are moist, decadent, and ridiculously good. Seriously. They are addictive. You can halve this recipe, but honestly, you will end up making another batch anyway. Just make a full batch and share the love with your friends, family, co-workers, neighbors, or school staff. They will love you forever. And also help yourself to a second serving because you deserve it.

Adapted from Sally’s Baking Addiction.

Notes: What makes “red velvet” red is food coloring. The original recipe called for twice as much food coloring, but I found that 1 tablespoon of red gel food coloring was more than enough for a large batch. If you don’t like the idea of using food coloring, you can leave it out, and you will still have amazing cheesecake brownies instead. I use almond extract in this recipe, because I love the nutty, sweet flavor. You could use all vanilla extract instead, and you would have a more classic red velvet flavor.


Time: 1 hour (includes bake time)
Servings: 16

1 cup (2 sticks) unsalted butter, melted, plus extra to grease pan
2 cups granulated sugar
2 teaspoons vanilla extract
2 teaspoons almond extract
½ cup unsweetened cocoa powder
¼ teaspoon kosher salt
1 tablespoon gel or liquid red food coloring
1 ½ teaspoons white vinegar
4 large eggs, lightly beaten
1 ½ cups all-purpose flour
16 ounces cream cheese, softened
½ cup granulated sugar
2 egg yolks
1 teaspoon almond extract


Preheat the oven to 350 degrees F. Grease a 9x13 baking pan with butter or nonstick spray.

To make the brownie layer, whisk together melted butter, 2 cups sugar, 2 teaspoons vanilla extract, and 2 teaspoons almond extract in a medium mixing bowl, until well combined. Next add cocoa powder, salt, food coloring, and vinegar, mixing well after each addition. Whisk in the eggs, then fold in the flour until just mixed, with no dry spots - do not over beat. Pour the brownie batter into prepared baking pan, reserving ½ cup for the top.

To make the cheesecake swirl, combine softened cream cheese, ½ cup sugar, egg yolks, and 1 teaspoon almond extract in a medium bowl. Use a hand-held mixer on medium speed to beat mixture until completely smooth - about 1 minute. Dollop large spoonfuls of the cream cheese mixture on top of the prepared brownie batter. Cover the cream cheese mixture with the remaining ½ cup brownie batter. Drag a knife through the layers, creating a swirl pattern.

Bake the brownies for about 40 minutes or until a toothpick inserted in the middle comes out clean. Allow the brownies to cool completely before cutting into squares. Cover brownies and store at room temperature for 3 days or in the refrigerator for up to 6 days. Brownies will freeze well, up to 2 months. Thaw overnight in the refrigerator.